
Installation Guide


Chapter IV — Installation Systems 874.
open several cartons and mix them as they are installed to help blend any
slight shade differences from one carton to the next.
Tile products with directional arrows on the back should be installed with the
arrows all pointing in the same direction.
• Tile Installed Using S-515, S-525, S-700 or S-750:
1. Line off entire area to be installed.
2. Apply the adhesive over the area not covering the chalk lines and using
the fine notching of the S-891 Trowel. You may prefer to spread and install
one quarter of the room at a time.
3. Allow the adhesive to set until dry-to-touch (except S-240) following the
recommended open time. To test, press your thumb lightly on the surface
of the adhesive in several places. If the surface feels slightly tacky as your
thumb is drawn away and does not stick to your thumb, the adhesive is
ready for the installation.
4. Install the tile along the chalk lines, laying the field area first and then
fitting in the border tile.
5. Roll all residential tile and SAFETY ZONE in both directions within the
adhesive working time using a 100-lb. roller.
6. Clean adhesive from the surface of the tile using a clean white cloth
dampened with a neutral detergent and water.
7. Tile should not be exposed to rolling load traffic for at least 72 hours after
installation to allow setting and drying of the adhesive.
• SAFETY ZONE in Specialty Areas:
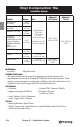
1. Line off entire area to be installed (Fig. 4).
2. Move chalk lines to one corner or end of the area farthest from the
doorway. These lines should be 2' or 3' from the wall depending on your
reach (Fig. 5).
3. Mix the entire contents of Part A and Part B together with a stirring
motion while at the same time lifting from the bottom. Mix thoroughly
for 3 to 5 minutes to a uniform color. Do not over mix. Never mix S-240
Epoxy Adhesive on the subfloor surface.
4. Immediately pour the entire unit of mixed adhesive onto the subfloor.
Do not leave mixed adhesive in cans because it shortens pot life and
S-240 Adhesive
Fig. 4 Fig. 5