
Installation Guide


3
Step 2. At the midpoint of the center line, create a perpendicular line using a carpenter’s square.
Step 3. Leave release paper on back of tile, and position tiles in one quadrant of the room to determine border tile
size. Shift the starting line(s) 1/2 the dimension of the tile; i.e.. shift 6" for a 12" tile to maximize border tile size, if
necessary.
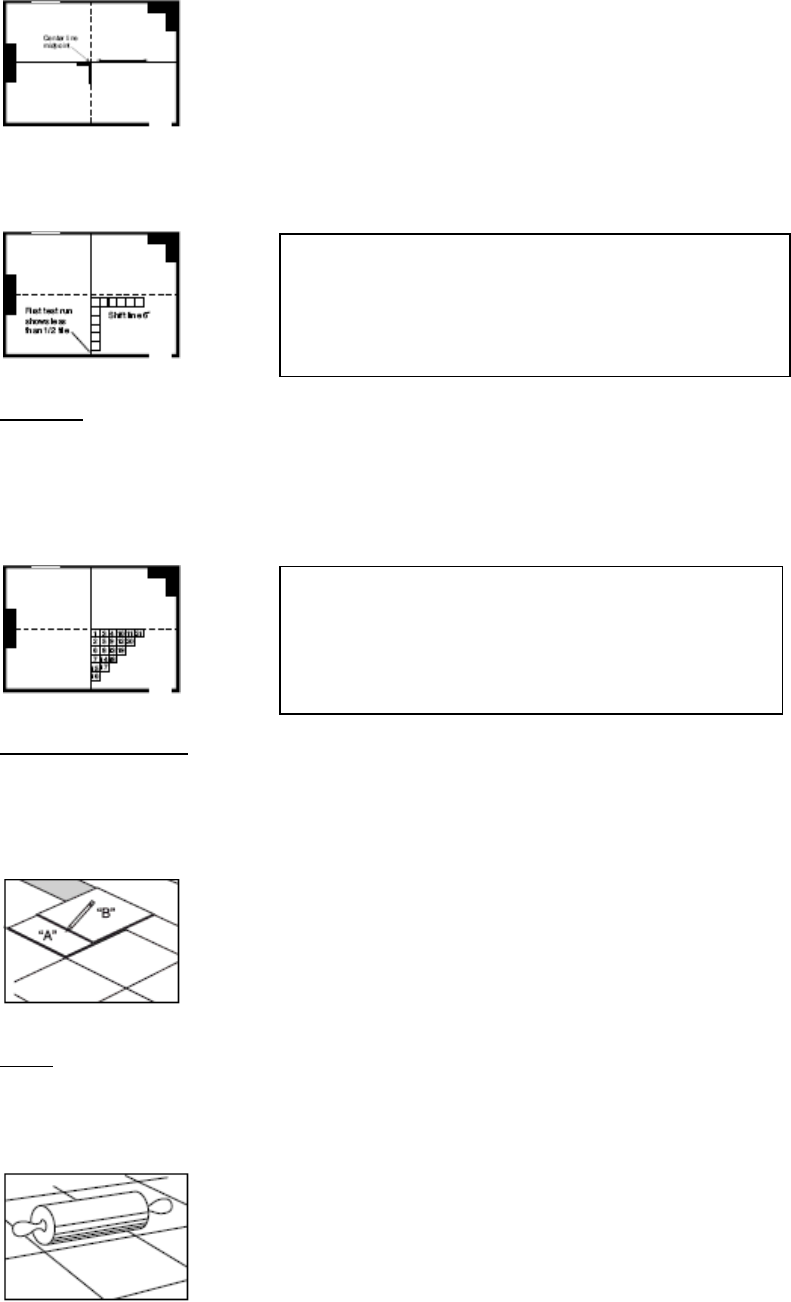
Install tile
Step 4. Peel release paper from tile and install at intersection. If grouting tiles, lay tiles with a 1/16” to 1/4” space at
the joints utilizing tile spacers designed for this purpose. For non-grouted tiles, make sure tiles are butted tightly at all
edges to prevent separation. For overall stone visuals, make sure arrows on back of tiles point in random direction.
Install all other visuals with arrows on back of tile in the same direction. Install one quadrant of tile at a time. Lay tiles
in pattern shown below, using chalk lines as a guide
Cutting the border tile
Step 5. For straight cuts place a loose tile (A) face up exactly on top of the last full tile, making sure the arrows are
pointed in the proper direction. Place another full tile (B) on top of tile (A) with its edge against the wall. Using tile (B)
as a guide, mark the face of tile (A) with a pencil. Cut border tiles with utility knife. For irregular cuts, make a pattern
and transfer it to a tile.
Finish
Step 6. For non-grouted tiles roll installed tiles to bond to floor. DO NOT wet wash tile for at least five days after
installation. This will allow the adhesive under the tile to dry and prevent excess moisture and cleaning agents from
interfering with the adhesive bond. Replace wall base and mouldings.
Precautions:
When installing over an existing resilient floor, lay out
the installation so the new seams are a minimum of 6”
away from the original seams.
When installing over tile floors, seams should fall in the
center of the tile.
Precaution:
When using tile from two or more cartons, check to be
sure all pattern and lot numbers are the same for
proper color match.