GET STARTED! SPEKTRUM DX3 Transmitter ARRMA 4x4 3S BLX Vehicle REQUIRED: 4x AA Batteries LiPo Battery (1x2S or 1x3S) LiPo Charger www.arrma-rc.
Warnings NOTICE All instructions, warranties and other collateral documents are subject to change at the sole discretion of Horizon Hobby, LLC. For up-to-date product literature, visit www.horizonhobby.com or www.towerhobbies.com and click on the support or resources tab for this product.
WARNING AGAINST COUNTERFEIT PRODUCTS: Always purchase from a Horizon Hobby, LLC authorized dealer to ensure authentic high-quality Spektrum product. Horizon Hobby, LLC disclaims all support and warranty with regards, but not limited to, compatibility and performance of counterfeit products or products claiming compatibility with DSM or Spektrum technology.
Warnung HINWEIS Alle Anweisungen, Garantien und dazugehörigen Dokumente können ohne Ankündigung von Horizon Hobby, LLC geändert werden. Eine aktuelle Version ersehen Sie bitte im Support Feld unter: http://www.horizonhobby.com / http://www.towerhobbies.
WARNUNG GEGEN GEFÄLSCHTE PRODUKTE: Sollten Sie jemals eine Spektrum Komponente ersetzen wollen, kaufen Sie die benötigen Ersatzteile immer bei Horizon Hobby oder einem von Horizon hobby autorisiertem Händler um die hohe Qualität des Produktes zu gewährleisten. Horizon Hobby LLC lehnt jedwede Haftung, Garantie oder Unterstützung sowie Kompatibilitäts- oder Leistungsansprüche zu DSM oder Spektrum in Zusammenhang mit gefälschten Produkten ab.
Avertissements REMARQUE Toutes les instructions, garanties et autres documents de garantie sont sujets à modification à la seule discrétion de Horizon Hobby, LLC. Veuillez, pour une documentation produit bien à jour, visiter le site internet http://www.horizonhobby.com / http://www.towerhobbies.com.
ATTENTION aux contrefaçons. Nous vous remercions d’avoir acheté un véritable produit Spektrum. Toujours acheter chez un revendeur officiel Horizon hobby pour être sur d’avoir des produits authentiques. Horizon Hobby décline toute garantie et responsabilité concernant les produits de contrefaçon ou les produits se disant compatibles DSM ou Spektrum.
Support At ARRMA we want you to love running your kit and make owning a high performance RC car as simple as possible. If you have any questions about running, maintaining, tuning or repairing your ARRMA product there are three options for you to use to get help and advice. Visit ARRMA-RC.com for support, parts and upgrades for your kit. If you can’t find what you’re looking for then you can always email us at support USA@ARRMA-RC (USA) or support@ARRMA-RC.
Contents Quick Start Guide 12 How to Drive 14 Electronic Speed Controller (ESC) 17 Radio Gear 20 Troubleshooting 24 Warranty Information 54 Inhalt Schnellstartanleitung 26 Wie man fährt 28 Fahrtregler 31 Fernsteuer 34 Fehlerbehebung 38 Garantieinformationen 56 Contenu Guide de Démarrage Rapide 40 Comment conduire 42 Variateur électronique 45 Ensemble radio 48 Dépannage 52 Informations de garantie 58 9 WWW.ARRMA-RC.
Kit Overview Supplied Überblick Aperçu du Kit Mitgeliefert Fournis • ARRMA VORTEKSTM 3S (ARA4305V3T1/T2/T3) • • • • • SpektrumTM 2.4GHz Transmitter (SPM2340) SpektrumTM 2.
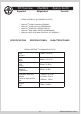
Required Benötigt Requis 1 x 2S or 1 x 3S Hardcase LiPo Battery 1 x 2S or 1 x 3S Hardcase LiPo Akku 1 x 2S or 1 x 3S Batterie LiPo Hardcase EC5™ / IC5® Battery Tray MAX dims Batteriefach MAX wird gedimmt Plateau de batterie MAX dims Voltage Eingangsspannung Voltage d’entrée Charger Ladegerät Chargeur L:156mm / 6.14 in x W:51mm / 2.01 in x H:48mm / 1.89 in 1x 2S or 1 x 3S LiPo 50C 5000mAh Minimum Req.
Quick Start Guide Remove Body Install AA Batteries In Controller 4 x AA Batteries (NOT INCLUDED) NOTE: Polarity CAUTION: Only charge rechargeable batteries. Charging non-rechargeable batteries may cause the batteries to burst, resulting in injury to persons and/or damage to property. CAUTION: Risk of explosion if battery is replaced by an incorrect type. Dispose of used batteries according to national regulations. 12 WWW.ARRMA-RC.
Install Charged Batteries In Car Steering Neutral 13 WWW.ARRMA-RC.
How to Drive ACCELERATE LEFT RIGHT LEFT RIGHT BRAKE/ REVERSE ACCELERATE BRAKE/REVERSE 14 WWW.ARRMA-RC.
Connect ESC and Power On CONTROLLER ON FIRST CAR ON SECOND Install Car Body NOW GET SHREDDING! 15 WWW.ARRMA-RC.
Power Off CONTROLLER OFF SECOND CAR OFF FIRST Storage ALL SAFE... UNTIL NEXT TIME! 16 WWW.ARRMA-RC.
Electronic Speed Controller (ESC) Only use fully charged LiPo batteries (4.2V per cell) to prevent battery/ESC damage. Battery Plug WARNING: Heat sink may be hot after use. Motor wires x 3 Receiver Plug (CH2) Power Switch & Set button ESC Specifications Input Voltage Throttle Setup 2S-3S LiPo (7.4-11.1v) 50C 5000mAh Minimum Req. 6-8 Cell NiMh (7.2v-9.6v) BEC Output 6.0v/4A Max Connect batteries, turn on TX and press/hold the set button ‘A’.
Battery Modes If using LiPo batteries you must set the correct battery mode on the ESC (electronic speed controller) to prevent battery damage. Temperature Protection If the ESC temperature exceeds 125 degrees Celsius/257 degrees Fahrenheit, the ESC will enter temperature protection mode and the green status LED will blink. Once the ESC has cooled down it will resume normal operation after it has been turned off and back on again.
ESC LED INDICATOR LED Indicator LED Code ESC turned On, LED indicator is Off Throttle trigger is in the neutral zone ESC is operating in Red LED illuminated forward throttle Red and Green LED ESC is at full throttle, illuminated full brake or full reverse LED flashes red with LVC protection short single pulses activated LED flashes green with The ESC is in thermal short single pulses shutoff mode LED flashes green with three The ESC has exceeded the short pulses repeating continuous current limit LED fla
Radio Gear SPEKTRUM DX3 SMART RADIO SYSTEM 2.4GHZ DIGITAL RADIO SYSTEM 9 8 10 7 5 13 1. Steering Wheel Controls direction (left/right) of the model 2. Throttle Trigger Controls speed and direction (forward/brake/reverse) of the model 3. BIND Button Puts the transmitter into Bind Mode 4. On/Off Switch Turns the power ON/OFF for the transmitter 5. TH REV Reverses function of the speed control when pulled back or pushed forward 12 6.
Steering Trim AVC / ST Rate Throttle Trim Battery Status Throttle Trim: factory default neutral, adjustment is not necessary. If battery status LED is flashing, the batteries need to be replaced. Factory Defaults ADJUSTING Lowering AVC Rate does the following: Raising AVC Rate does the following: Less steering assistance to control slides and maintain heading hold. More steering assistance to control slides and maintain heading hold. Lower AVC Rate will make the car harder to drive.
Binding - Enabling AVC IMPORTANT: keep the vehicle stationary when binding ACCELERATE Connect a fully charged battery pack to the ESC. Press and hold bind button on the receiver then press the power button on the ESC. Orange light on receiver will flash rapidly. Whilst holding the bind button on the transmitter press the ON button. Wait until the orange light on the receiver goes solid. Go to full throttle on the transmitter and back to neutral.
FCC ID: Contains BRWKATY1T and FCC ID: BRWSPMSR6200A This equipment complies with FCC and IC radiation exposure limits set forth for an uncontrolled environment. This equipment should be installed and operated with minimum distance 20cm between the radiator and/or antenna and your body (excluding fingers, hands, wrists, ankles and feet). This transmitter must not be co-located or operating in conjunction with any other antenna or transmitter.
Troubleshooting Problem Vehicle does not move Vehicle does not reverse Vehicle drives without input Short runtime Sluggish performance Possible Cause Solution Batteries are incorrectly installed in transmitter Check Indicator Light on transmitter, see page 20 Weak, damaged or no drive battery in model Install fresh, charged batteries Frayed or broken motor or ESC wires Check condition, reconnect and insulate ESC has shut down due to overheating Stop driving and allow ESC or motor to cool down
No control of vehicle or short range Steering/Throttle operation intermittent Vehicle wanders left/right without steering input Steering/Throttle operation Reversed Limited steering angle Transmitter batteries are weak or fitted incorrectly Check Indicator Light on transmitter, see page 20 Servo wires to receiver loose or connected incorrectly Reinstall servo wires to receiver Transmitter and receiver unit are not 'bound' correctly Transmitter and receiver need to be bound - see page 22 ESC has s
Schnellstartanleitung Entfernen Sie die Karosserie Legen Sie die AA Batterien in das Steuergerät ein 4x AA Batterien (Nicht im Lieferumfang enthalten) Wichtig: beachten Sie die Polung Vorsicht: Wenn Sie Akkus verwenden, laden Sie nur Akkus auf. Das Aufladen von Akkus, die nicht wiederaufladbar sind, kann dazu führen, dass die Batterien platzen, was zu Verletzungen von Personen und Personen oder Sachschäden führt. Vorsicht: Explosionsgefahr, wenn die Batterie durch einen falschen Typ ersetzt wird.
Setzen Sie den geladenen Akku in das Fahrzeug ein Lenkung Neutralposition 27 WWW.ARRMA-RC.
Wie man fährt Beschleunigung Links Rechts Links Rechts Bremsen/ Rückwärts Beschleunigung Bremsen/ Rückwärts 28 WWW.ARRMA-RC.
ESC Verbindung und Strom anschalten Fahrzeug als zweites einschalten Fernsteuerung als erstes einschalten Karosserie befestigen Nun kann es losgehen! 29 WWW.ARRMA-RC.
Ausschalten Fernsteuerung als zweites ausschalten Fahrzeug als erstes ausschalten Lagern Alles sicher verstaut... bis zum nächsten Mal! 30 WWW.ARRMA-RC.
Fahrtregler Benutzen Sie nur vollständig geladene LiPo-Akkus (4,2V pro Zelle), um Schäden am Akku/Regler zu vermeiden. Akkustecker WARNUNG: Der kühlkörper kann nach der fahrt heiss sein Motorkabel x 3 Empfängerkabel (CH2) Ein/Aus-Schalter & SetKnopf Reglerspezifikationen Eingangsspannung 2S-3S LiPo (7.4-11.1v) 50C 5000mAh Minimum Req. 6-8 Cell NiMh (7.2v-9.6v) 6.0v/4A Max BEC Ausgang Gaseinstellung Verbinden Sie den Akku, schalten Sie den Sender ein und drücken/halten Sie den SetKnopf “A”.
Batteriemodus Wenn Sie LiPo-Akkus verwenden, muss der entsprechende Batteriemodus am Fahrtregler angewählt sein, um Schäden an der Batterie durch Tiefentladung zu verhindern. Temperatursicherung Wenn die Temperatur des Reglers 125 Grad Celsius übersteigt, geht der Regler in den Übertemperatur-Schutzmodus und die Grün LED wird blinken. Nachdem die Temperatur des Reglers auf ein normales Maß gesunken ist, wird er wieder normal funktionieren.
ESC LED-ANZEIGE LED-Anzeige LED-Code ESC eingeschaltet, LEDAnzeige ist aus Rote und grüne LED leuchten Der Gashebel befindet sich in der neutralen Zone Rote LED leuchtet ESC ist bei Vollgas, Vollbremsung oder Vollumkehrung LED blinkt rot mit kurzen Einzelimpulsen LVC-Schutz aktiviert LED blinkt grün mit kurzen Einzelimpulsen LED blinkt grün mit drei sich wiederholenden kurzen Impulsen LED blinkt grün mit vier sich wiederholenden kurzen Impulsen Der Regler befindet sich im thermischen Abschaltmodus D
Fernsteuer SPEKTRUM DX3 SMART RADIO SYSTEM 2.4GHZ DIGITAL RADIO SYSTEM 9 8 10 7 5 13 12 1. Steuerrad Steuert die Richtung (links/rechts) des Modells 2. Gasauslöser Steuert die Geschwindigkeit und Richtung (vo r wä r t s / b r e m s e n /r ü c k wä r t s) des Modells 3. BIND-Taste Bringt den Sender in den Bindungsmodus 4. E I N/AU S - Schalter Schaltet die Stromzufuhr des Senders EIN/ AUS 5.
Lenkungstrimmung AVC / ST Rate Gastrimmung Batterie-Status Drosselklappenverkleidung: Werkseinstellung Neutral, Einstellung ist nicht erforderlich. Wenn die Batteriestatus-LED blinkt, müssen die Batterien ausgetauscht werden. Werkseinstellungen Das Verringern der AVCRate bewirkt Folgendes: EINSTELLEN Das Erhöhen der AVCRate bewirkt Folgendes: Weniger Lenkunterstützung zur Steuerung der Schlitten und zur Aufrechterhaltung des Kurshaltes.
WICHTIG: Halten Sie das Fahrzeug beim Binden stehen Bindung - AVC aktivieren Beschleunigung Schließen Sie einen voll aufgeladenen Akku an den Regler an. Halten Sie die Bindetaste am Empfänger gedrückt und drücken Sie die Ein- / Aus-Taste am Regler. Das orangefarbene Licht am Empfänger blinkt schnell. Halten Sie die Bindetaste am Sender gedrückt und drücken Sie die EIN-Taste. Warten Sie, bis das orangefarbene Licht am Empfänger dauerhaft leuchtet.
EU Konformitätserklärung: Horizon LLC erklärt hiermit, dass dieses Produkt konform zu den essentiellen Anforderungen der RED und EMC Direktive ist. Eine Kopie der Konformitätserklärung ist online unter folgender Adresse verfügbar : http://www.horizonhobby.com/content/supportrender-compliance. ENTSORGUNG IN DER EUROPÄISCHENUNION: Dieses Produkt darf nicht über den Hausmüll entsorgt werden.
Fehlerbehebung Problem Fahrzeug bewegt sich nicht Fahrzeug fährt nicht rückwärts Fahrzeug fährt selbstständig Short runtime Mögliche Ursache Lösung Batterien wurden in der Funkfernsteuerung nicht korrekt eingelegt Kontrollleuchte am Sender prüfen, siehe Seite 34 Schwacher oder beschädigter Akku im Fahrzeug Installieren Sie ein neuen, voll aufgeladenen Akku Zerschlissene oder beschädigte Motor- oder ESC Kabel Überprüfen Sie den Zustand, verbinden Sie Kabel erneut und isolieren Sie sie entspreche
Schleppende Leistung Keine Kontrolle über das Fahrzeug bzw.
Guide de Démarrage Rapide Supprimer la carrosserie Installer les piles AA dans la radiocommande 4 x Piles AA (Non inclus) Note: Polarité ATTENTION: Si vous utilisez des piles rechargeables, chargez uniquement les accus. Le chargement de piles non rechargeables peut provoquer l'éclatement des piles, entraînant des blessures corporelles et/ou des dommages matériels. ATTENTION: risque d'explosion si la batterie est remplacée par un type incorrect.
Installer les batteries chargées dans la voiture Neutre de direction 41 WWW.ARRMA-RC.
Comment conduire Accélérer Gauche Droite Gauche Droite Freiner/ Sens inverse Accélérer Freiner/Sens inverse 42 WWW.ARRMA-RC.
Connecter à l’ESC et allumer Radiocommande en premier Voiture en second Installer la carrosserie de la voiture Maintenant, commencez à vous amuser ! 43 WWW.ARRMA-RC.
Éteindre Voiture en premier Radiocommande en second Stockage Tout en sécurité ... Jusqu’à la prochaine fois 44 WWW.ARRMA-RC.
Variateur électronique Utilisez uniquement des batteries LiPo chargée complètement (4.2V par cellule) pour éviter des dommages à la batterie et à l’ESC (Contrôleur Electronique de Vitesse). Connecteur de batterie AVERTISSEMENTS: Le radiateur peut être chaud après une utilisation Câbles moteur x3 Câble de récepteur (CH2) Bouton de réglage et interrupteur Spécifications du variateur électronique Voltage d’entrée 2S-3S LiPo (7.4-11.1v) 50C 5000mAh Minimum Req. 6-8 Cell NiMh (7.2v-9.6v) Sortie BEC 6.
Mode de Batterie Pour l’utilisation de batteries LiPo, vous devez définir le mode batterie correcte sur le ESC (contrôleur de vitesse électronique) pour prévenir les dommages de la batterie. Protection de température Si la température de l’ESC dépasse 125 degrés C, l’ESC entre en mode de protection de température et le LED vert clignote. Une fois que l’ESC a refroidi, il reprendra son fonctionnement normal.
INDICATEUR LED ESC Indicateur LED Code LED La gâchette ESC activé, le voyant est d’accélérateur est dans éteint la zone neutre L’ESC fonctionne en LED rouge allumée accélération L'ESC est à plein LED rouge et verte régime, frein complet allumée ou marche arrière La LED clignote en rouge avec de courtes Protection LVC activée impulsions La LED clignote en L’ESC est en mode vert avec de courtes d’arrêt thermique impulsions LED flashes green with three The ESC has exceeded the short pulses repeating continuo
Ensemble radio ÉMETTEUR SPEKTRUM DX3 SMART 2.4GHZ DIGITAL RADIO SYSTEM 9 8 10 7 5 13 1. Volant de direction Commande la direction (gauche/droite) du modèle 2. Gâchette des gaz Contrôle la vitesse et la direction (marche avant/frein/arrière) du modèle 3. Bouton affectation Place l´émetteur en mode affectation 4. Interrupteur ON/OFF Commande l´alimentation de l´émetteur 5.
Garniture de direction AVC / ST Rate Garniture d’accélérateur État de la batterie Garniture d’accélérateur: neutre par défaut, aucun réglage n’est nécessaire. Si le voyant d'état de la batterie clignote, vous devez remplacer les piles. Réglages d’usine La réduction du taux AVC fait ce qui suit: RÉGLAGE L’augmentation du taux AVC fait ce qui suit: Moins d’assistance à la direction pour contrôler les glissades et maintenir le cap.
Liaison - Activation d’AVC IMPORTANT: gardez le véhicule à l’arrêt lors de l’attachement Accélérer Connectez une batterie complètement chargée au contrôleur. Appuyez sur le bouton d’affectation du récepteur et maintenez-le enfoncé, puis appuyez sur le bouton d’alimentation du contrôleur. Le voyant orange du récepteur clignotera rapidement. Tout en maintenant le bouton d’affectation de l’émetteur enfoncé, appuyez sur le bouton ON. Attendez que le voyant orange du récepteur s’éteigne.
Déclaration de conformité de l´Union européenne : Horizon Hobby, LLC déclare par la présente que ce produit est en conformité avec les exigences essentielles et les autres dispositions des directives RED et CEM. Une copie de la déclaration de conformité européenne est disponible à :http://www.horizonhobby.com/content/support-rendercompliance.
Dépannage Problème Le véhicule ne se déplace pas Le véhicule ne fonctionne pas en marche arrière Le moteur du véhicule ne fonctionne pas Utilisation de courte durée Cause possible Solution Les piles ne sont pas correctement installées dans l’émetteur Vérifiez le voyant lumineux sur l’émetteur, voir page 48 Batterie faible, endommagée ou sans disque dans le modèle Installer des batteries fraîches et chargées Câbles moteurs ou ESC défectueux Vérifier l’état, reconnecter et isoler ESC s’éteint en
Mauvaises performances Plus de contrôle du véhicule ou à faible distance Direction / accélération opération intermittente Le véhicule erre à gauche / à droite sans contrôle de direction Direction / accélération opération inversé Angle de braquage limité Performances Batterie endommagée ou non chargée Vérifier l’état, remplacer ou recharger Les réglages de l'accélérateur de l'émetteur sont incorrectement réglés Le trim des gaz doit être réglé sur zéro / neutre - voir page 49 pour les paramètres d’us
Warranty Information LIMITED WARRANTY What this Warranty Covers Horizon Hobby, LLC, (Horizon) warrants to the original purchaser that the product purchased (the “Product”) will be free from defects in materials and workmanship for a period of 2 years from the date of purchase.
Inspection or Services If this Product needs to be inspected or serviced and is compliant in the country you live and use the Product in, please use the Horizon Online Service Request submission process found on our website or call Horizon to obtain a Return Merchandise Authorization (RMA) number. Pack the Product securely using a shipping carton. Please note that original boxes may be included, but are not designed to withstand the rigors of shipping without additional protection.
Garantieinformationen Warnung Ein ferngesteuertes Modell ist kein Spielzeug. Es kann, wenn es falsch eingesetzt wird, zu erheblichen Verletzungen bei Lebewesen und Beschädigungen an Sachgütern führen. Betreiben Sie Ihr RC-Modell nur auf freien Plätzen und beachten Sie alle Hinweise der Bedienungsanleitung des Modells wie auch der Fernsteuerung. Garantiezeitraum Exklusive Garantie Horizon Hobby LLC (Horizon) garantiert, dass dasgekaufte Produkt frei von Material- und Montagefehlern ist.
Sicherheitshinweise Dieses ist ein hochwertiges Hobby Produkt und kein Spielzeug. Es muss mit Vorsicht und Umsicht eingesetzt werden und erfordert einige mechanische wie auch mentale Fähigkeiten. Ein Versagen, das Produkt sicher und umsichtig zu betreiben kann zu Verletzungen von Lebewesen und Sachbeschädigungen erheblichen Ausmaßes führen. Dieses Produkt ist nicht für den Gebrauch durch Kinder ohne die Aufsicht eines Erziehungsberechtigten vorgesehen.
Informations de garantie Durée de la garantie Garantie exclusive - Horizon Hobby, LLC (Horizon) garantit que le Produit acheté (le « Produit ») sera exempt de défauts matériels et de fabrication à sa date d’achat par l’Acheteur. La durée de garantie correspond aux dispositions légales du pays dans lequel le produit a été acquis. La durée de garantie est de 6 mois et la durée d’obligation de garantie de 18 mois à l’expiration de la période de garantie.
Questions, assistance et réparations Votre revendeur spécialisé local et le point de vente ne peuvent effectuer une estimation d’éligibilité à l’application de la garantie sans avoir consulté Horizon. Cela vaut également pour les réparations sous garantie. Vous voudrez bien, dans un tel cas, contacter le revendeur qui conviendra avec Horizon d’une décision appropriée, destinée à vous aider le plus rapidement possible.
JOIN OUR GLOBAL ARRMA COMMUNITY ARB100031333. ARRMA-RC.COM 63251 ©2021 Horizon Hobby, LLC. ARRMA RC is a trade name of Horizon Hobby Ltd. Horizon Hobby Ltd is a subsidiary of Horizon Hobby, LLC. ARRMA, the ARRMA logo, VORTEKS, DSMR, DMS2, EC5, IC5, AVC, Active Vehicle Control, dBoots and the Horizon Hobby logo are trademarks or registered trademarks of Horizon Hobby, LLC. The Spektrum trademark is used with permission of Bachmann Industries, Inc. Twitter® logos are trademarks of Twitter, Inc.