
Specifications


Introduction
Quest Installation Procedure
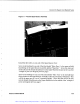
Connect the Umbilicus to the Quest Controller unit.
Press the round male electrical connector labeled P2 on the umbilicus (this connection
has large pins,) into the round female connector on the Controller Unit labeled
"Heaters." Twist the housing of the connector to lock the cable into place.
Likewise, connect the male electrical connector labeled P3 into the receptacle labeled
"Signal."
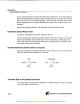
There will be
6
loose Teflon tubes with fittings protruding from the "Controller" side
of the umbilicus. These tubes will be labeled 1,2,3,4,5 and "membrane."
Remove the tape from the female ports labeled 1,2,3,4, and 5.
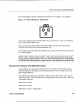
NOTE Note
-
Ensure that the bushing is loose on the Teflon tube prior to screwing in
the fittings. The bushing should not be "bound" to the yellow ferrule, as this can cause
twisting of the Teflon tube during installation.
To release a bound bushing from a
ferrule, grasp the ferrule between the thumb and index finger and gently rock the
bushing back to free it.
Connect the tubes labeled 1,2,3,4, and
5
to the matching female threaded ports on the
front of the Controller unit. To make the connection, simply screw in the tan PEEK
bushing into the appropriate female port. Make the connections finger tight.
The tube and fitting labeled "Membrane" is not to be connected, but left loose as it is.
This tubing will be used in conjunction with the optional "Automated Solvent Wash"
upgrade.
NOTE Note
-
Be careful to not cross-thread the fittings.
NOTE
Note
-
Ensure that the flat surface of the ferrule (perpendicular to the end of
the Teflon tube) is free of dust or fibers. This is the surface that creates the seal for the
tubing connection.
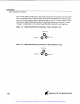
Connect the Solvent Bottle Cap
There will be two tubes protruding from the middle of the umbilicus. These tubes are
labeled "Btl. Press." and "Solvent." These connect to the Solvent Bottle Cap.
Artisan Technology Group - Quality Instrumentation ... Guaranteed | (888) 88-SOURCE | www.artisantg.com