
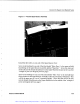
Specifications


Connect Power to the Unit
Connect the male "Quick Connect" fitting to a long Tygon tube (found in the ship kit)
which will lead to the laboratory gas supply.
Fit the Tygon tube all the way onto the
barb of the male Quick Connect fitting and tighten the
locking ring.
Connect the other end of the Tygon line to the laboratory gas supply. It is recommended
that the Quest use a "House Nitrogen System" as a gas supply.
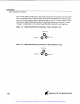
Press the male "Quick Connect" fitting into the female "Quick Connect" fitting
mounted on the back of the Quest Controller unit. The fitting should "click" into place.
Connect Power to the Unit
Plug the power cord into the female receptacle on the left rear of the unit. The cord can
then plug into a
120
VAC wall outlet. One can use a UPS or power strip if desired
(
10A
minimum rating).
Turn on the power to the Quest using the switch on the left rear of the unit.
Install a 4L Solvent Bottle
Place a
4L
bottle, in a safety carrier, on the lab bench.
Install a polyethylene end line filter on the end of the long "pickup" tube, which
protrudes from the bottom of the bottle cap.
Place a Teflon bottle seal on the top of the
4L
solvent bottle.
Place the "pickup" tube in the solvent bottle and screw down the outside of the cap.
Turn the dial on the top of the bottle cap towards the tube marked "Pressure." Wait a
minute or so for the bottle to pressurize
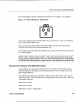
WARNING Always vent the bottle prior to unscrewing the cap.
WARNING
Always place the
4
L
solvent bottle in the plastic Safety Carrier when
working with the Quest.
WARNING
Always wear eye protection and appropriate clothing when operating the
Quest.
QUEST
210
User
Manual
Artisan Technology Group - Quality Instrumentation ... Guaranteed | (888) 88-SOURCE | www.artisantg.com