
Specifications


h. Install the bottle cap assembly onto the 4L bottle
of
NMP. Ensure the Teflon
bottle seal is placed in the bottleneck and tighten the bottle cap. Turn the black
dial on top of the Solvent Bottle Cap towards the tubing marked "Bottle
Pressure". Wait a -1 minute for the bottle to pressurize.
2.
Fill the
RVs
with NMP by turning the Manifold Control Valves to "SOLVENT" and
"VENT". Once the RVs are
314
full,
-4
mL, purge the Upper Manifold by
slowly
turning the
left
Manifold Control Valve from "Solvent" to
"DRAIN
GAS".
3.
Close the Upper Manifold by turning both of the Manifold Control Valves to
"CLOSED".
4.
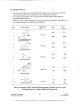
Adjust the Agitation Bar by doing the following:
a. Raise the Agitation Bar up by pushing the Agitation UP soft key located to the
right of the Quest Controller Unit display.
b. Use the
7/64"
hex wrench supplied with the Quest to loosen the Agitation Stops.
Adjust the Agitation Stops on the Reactor Unit so the maximum magnet bar
height is -1 -2 cm below the solvent level in the RVs. Tighten the Agitation Stops
so both stops are at the same height.
c.
On the Quest Controller Unit press the MODE soft key located below the LCD
display until the Agitation menu is displayed. Set the agitation parameters as
follows: Mix Every
4.Osec
and %Upward=
60%.
5.
Turn
the agitation on by pushing the Agitation ON soft key located to the right of the
Quest Controller Unit display. If solvent is splashing onto the Upper Manifold,
readjust the height of the agitation. The Mix Speed needle valve located on the front
of the Quest Controller Unit may also be used to soften or slow the agitation by
turning the valve clockwise.
6.
Agitate the resin for
5-1
0 minutes.
7.
Move the agitator up by pushing the Agitation UP soft key located to the right of the
Quest Controller Unit display.
8.
Drain all 10 RVs in parallel to the Waste
Tank
by turning the Manifold Control
Valves to "DRAIN GAS" and "CLOSED" and opening the Lower Manifold Drain
Valves. Allow nitrogen to purge the resin for -30 seconds.
9. Vent the Upper Manifold by turning the control valves to "Closed" and "Vent" and
wait
-5
sec
10. Close the Lower Manifold Drain Valves by flipping the Drain Levers upward.
11. Repeat steps 2-9 above (except step
#4)
and perform a total of 2
x
NMP,
4
x
DCM,
and 2
x
THF
resin washes. Change the
4
L
solvent bottle as necessary following step
1 above.
NOTE:
This is a convenient place to stop the synthesis. Cleavage of the resin may be performed
the
following day. The resin can be left
under
nitrogen after washing out all the reagents. To
store the resin under nitrogen turn the Manifold Control Valves to "METERED GAS" and
"CLOSED". Make sure the METERED GAS Needle Valve is open. You may qualitatively
analyze the resin by
IR
for ether formation (disappearance of the Si-H stretch at 21 00
CM-'
is
a diagnostic wavelength). Alternatively you may continue to cleave the resin and analyze
compounds by quantitative
GC
analysis.
Argonaut
Technologies
Part Number 102298
04/02/98
Quest Tutorial
Artisan Technology Group - Quality Instrumentation ... Guaranteed | (888) 88-SOURCE | www.artisantg.com