
User`s manual


14 ARTURIA – MiniLab – USER’S MANUAL
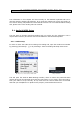
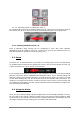
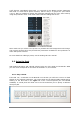
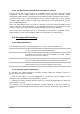
Audio and MIDI Settings window
3.1.2 MIDI setup
Connecting a USB MIDI keyboard controller with Analog Lab is very simple. As shown
above, navigate to the Audio & MIDI Settings window by pressing [Command] + [,] or
by selecting it from the Analog Lab drop-down menu as shown in section 3.1.1. This will
open the Audio & MIDI Settings window, which is where the preferred MIDI controller
will be selected.
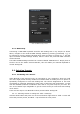
The Audio & MIDI Settings window has a section labeled “MIDI Devices”. Simply click on
the box next to the words “Arturia MiniLab”; this will enable your MiniLab keyboard to
control Analog Lab.
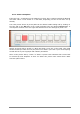
3.2 Selecting Presets
3.2.1 The Analog Lab “Preset”
When MiniLab is first powered-on by its connection to your computer it does not recall
one of the eight preset memory locations. Its default state is actually sort of a “preset 9”
specifically configured to work with Analog Lab. The control assignments in this case
correspond to particular parameters within each of Arturia’s soft-synthesizers, so that
with this hardware/software combination there will be very little setup for you to do. It’s
one of the fastest ways imaginable to get the exact sound you want and start making
music with it.
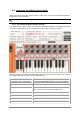
There are two ways to use MiniLab to select presets within Analog Lab:
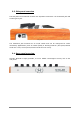
3.2.1.1 Selecting Presets in Analog Lab: Shift + Down/Up
Hold the Shift button and press one of the two buttons right below it: Shift + Down will
select the previous preset, and Shift + Up will select the next preset.