USER MANUAL ARTURIA – VOX Continental V – USER MANUAL 1
Direction Frédéric Brun Kevin Molcard Development Pierre-Lin Laneyrie (project manager) Theo Niessink (lead) Stefano D'Angelo Baptiste Aubry Corentin Comte, Adrien Courdavault Baptiste Le Goff Valentin Lepetit Samuel Limier Germain Marzin Mathieu Nocenti Pierre Pfister Benjamin Renard Design Glen Darcey Shaun Ellwood Morgan Perrier Sebastien Rochard Greg Vezon Sound Design Glen Darcey Stéphane Schott Luca Torre Theo Niessink Manual Randy Lee Tomoya Fukuchi Jason Valax Special Thanks Chuck Capsis L
Table of Contents 1 INTRODUCTION ................................................................................................................. 5 1.1 History of the original instrument ......................................................................................................... 5 1.1.1 1.1.1.1 Introduction .............................................................................................................................................................. 5 1.1.1.
3.3 3.2.11.3 MIDI preferences: the PREF button...................................................................................................................... 27 3.2.11.4 Output mode.......................................................................................................................................................... 29 3.2.11.5 Panic button and CPU meter ............................................................................................................................
1 INTRODUCTION Thank you for purchasing our virtual organ, VOX Continental V! We are certain it will give you many hours of inspiration and enjoyment. VOX Continental V is one of the pillars of our extensive family of instruments that recreate hard-to-find classic keyboards and synths. In addition to bringing the authentic sound of this essential instrument to your music, we have added some 21st century features that were never available in the original! 1.1 History of the original instrument 1.1.
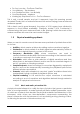
A Telharmonium console by Thaddeus Cahill, circa 1897 The Telharmonium (a.k.a. the “Dynamophone”) was originally heard by most people through means of electrical wires attached to “paper cones”, the forerunners of today’s loudspeakers. The music was transmitted to various locations in New York City over the burgeoning telephone system! Crosstalk from the Telharmonium sometimes interfered with telephone conversations, so that idea didn’t last long.
circuits. The rest of the pitches and their overtones were derived through the combined use of frequency dividers and phase-locked loop (PLL) frequency synthesizers. You tune one, you tune them all (times 12). And from these discoveries sprang the VOX Continental and its descendants, arguably the most popular and influential “combo” organ series ever produced. 1.1.2 The VOX Continental 1.1.2.
different drawbars. In roughly 1967 Tom Jennings was fired from his own company after a buyout. He then started up the Jennings Electronic Instruments (JEI) company and began making his own organs again. These organs were based on the Continental 300 but further expanded with more drawbars on the upper manual, an expanded percussion section, the addition of tremolo and spring reverb, as well as some tone presets.
The chrome legs would store within the detachable lid, making the unit much easier to transport than its behemoth rival, the Hammond. The sturdy, flat, and red/orange top was a perfect place for a second keyboard, such as the Fender Rhodes Piano Bass often used by Ray Manzarek of The Doors. The inverse coloring of the keys, previously only seen on harpsichords, was the final stroke of aesthetic genius. It was an irresistible combination (or “combo”, if you will). 1.1.2.
Do You Love Me – The Dave Clark Five I’m a Believer – The Monkees In-A-Gadda-Da-Vida – Iron Butterfly One Step Beyond – Madness Working My Way Back To You – The Four Seasons This is only a small sample, and yet it represents huge hits spanning several decades! Clearly this is a musical instrument with serious staying power and broad audience appeal. Still a classic and in great demand, the prices of VOX organs have climbed in response to their limited availability.
This idea has been around for a long time, but development has been hindered until recently because processors that were powerful enough to handle the computational complexity of the physical models either didn’t exist or were too expensive. But if you’ve been watching the technological trajectories, you know those days are in the past. And we’re just as happy about that as you are. 1.2.2 A computational conundrum Here’s an example of what must be taken into account while developing a physical model.
Not to rub it in, but we really should mention the ability of physical modeling algorithms to combine parameters into instruments that have never existed. There is no limit to the types of sounds physical modeling synthesis can produce! And when you gather a bunch of music fanatics who also possess a knowledge of the pertinent laws of physics and an in-depth understanding of the characteristics of electronic circuits, you wind up with Arturia.
2 ACTIVATION AND FIRST START 2.1 Register and Activate VOX Continental V works on computers equipped with Windows 7 or later and Mac OS X 10.8 or later. You can use the stand-alone version or use VOX Continental V as an Audio Units, AAX, VST2 or VST3 instrument. Once VOX Continental V has been installed, the next step is to register the software. The registration process will require you to enter the serial number and the unlock code you received with the product.
VOX Continental V main menu You will then see the Audio MIDI settings window. This works in the same way on both Windows and Mac OS X, although the names of the devices available to you will depend on the hardware you are using.
Audio and MIDI settings window Starting from the top you have the following options: Device lets you choose which audio driver you want to use to route sound out of the instrument. This might be your computer’s own driver like Windows Audio, or an ASIO driver. The name of your hardware interface may appear in this field. Output Channels lets you select which of the available outputs will be used to route audio out. If you only have two outputs, only two will appear as options.
go up to 96kHz, then 44.1k or 48k is usually fine. The Show Control Panel button will jump to the system control panel for whatever audio device is selected. Play Test Tone helps you to troubleshoot audio issues by confirming whether sound can be heard through the correct device. Your connected MIDI devices will appear in the MIDI Devices area. Click the check box to accept MIDI from the device you want to use to trigger the instrument.
2.2.3 Using VOX Continental V in plug-in mode VOX Continental V comes in VST, AU and AAX plug-in formats for use in all major DAW software such as Cubase, Logic, Pro Tools and so on. You can load it as a plug-in instrument and its interface and settings work the same way as in standalone mode, with a couple of differences. You can automate numerous parameters using your DAW’s automation system. You can use more than one instance of VOX Continental V in a DAW project.
3 USER INTERFACE VOX Continental V is packed with great features, and in this chapter we’ll make sure you know what each one does. We think you’ll be amazed by the huge range of sounds that can be made with this instrument. And while VOX Continental V is very flexible, there’s nothing complicated about it. That will always be the main focus of every Arturia product: to unleash your creativity while remaining easy to use. 3.
Continental V section at the very top left hand corner of the instrument window. 3.2.1 Save Preset The first option lets you save a preset. If you select this you are presented with a window where you can enter information about the preset. In addition to naming it you can enter the author name, select a bank and type and select some tags that describe the sound. This information can be read by the preset browser and is useful for searching the preset banks later.
3.2.3 Import preset This command lets you import a preset file, which can be either a single preset or an entire bank of presets. Both types are stored in the .vox format. After selecting this option, the default path to these files will appear in the window, but you can navigate to whichever folder you are using. 3.2.4 Export preset You can export and share a single preset using this command.
The Resize Window menu 3.2.6 Audio settings Here you manage the way the instrument transmits sound and receives MIDI. See section 2.2 of the manual for full details on this. 3.2.7 Preset browser overview The Preset browser is invoked by clicking the toolbar button that has four vertical lines. See section 3.3 of the manual for full details on this. The Filter, name field and left / right arrows in the toolbar all assist with preset selection.
The Preset Browser 3.2.8 Open and Close Advanced section The Advanced section can be revealed by clicking on the button with the two downward arrows at the right of the toolbar. This lets you access the more advanced features of the instrument like. Click this button once to reveal the advanced section of the instrument and again to hide it. You can also click on the frame of the instrument to open and close it. 3.2.
MIDI Learn mode 3.2.9.1 Assigning / unassigning controls If you click on a purple area you’ll put that control into learning mode. Move a physical knob or fader and the target goes red, indicating that a link has been made between the hardware control and the software parameter. There’s a popup window that displays which two things are being linked and a button to unassign the two from each other.
3.2.9.2 Min / Max value sliders There are also minimum and maximum value sliders that you can use to restrict the parameter change range to something other than 0%-100%. For example, you might want the filter cut-off be controllable via hardware from 30% to 90%. If you made this setting (Min set to 0.30 and Max set to 0.90) your physical knob would be unable to alter the volume lower than 30% or higher than 90%, no matter how far you turned it.
3.2.10 MIDI controller configuration There’s a small arrow at the far right hand side of the toolbar that deals with MIDI controller configurations. This allows you to manage the different sets of MIDI maps you may have set up for controlling the instrument’s parameters from MIDI hardware. You can copy the current MIDI assignment setup or delete it, import a configuration file or export the currently active one.
Displaying the current control’s value 3.2.11.2 MIDI Channel setting At the right hand side of the lower toolbar are three small windows. The first one on the left indicates the current MIDI Channel setting. Click on it and it will expand to show the full range of values you can select (All, 1-16).
3.2.11.3 MIDI preferences: the PREF button With a fully decked-out VOX Continental organ the organist could play three parts at the same time: the upper manual, the lower manual, and the pedal board. So naturally, the VOX Continental V software can respond to three separate MIDI channels simultaneously. But Arturia didn’t stop there. We allowed for other possibilities, such as those times when you just want to plug a keyboard controller into your computer and jam.
The MIDI Preferences window To change any of the parameters you see in this window, click in the value field next to its name and make a selection from the drop-down menu that appears. Here’s a description of what these parameters do: MIDI Channels: Multi mode only. Set the Upper, Lower and Bass to independent channels, or set one or more to “All” for an interesting form of Omni mode response (see section 3.4 for an explanation).
When Upper is set to All it receives data on all 16 MIDI channels. This crowds out the Lower and Bass instruments; they cannot be accessed on any MIDI channel. When the Upper is set to 1 and Lower is set to All, the Lower instrument allows Upper to be on channel 1 but intercepts any data it finds on MIDI channels 2-16. This crowds out the Bass instrument; it cannot be accessed on any MIDI channel.
To access the search view, click on the browser button (the icon looks a bit like books on a library shelf). The Preset Browser button 3.3.1 Searching presets The Search screen has a number of sections. By clicking on the Search field at the top left you can quickly enter any search term to filter the preset list by patch name. The Results column is updated to show the results of your search. Press the X button in the search field to clear the search. 3.3.
the small down arrow buttons in their title fields. Results columns can be sorted by clicking the same arrow button in their own section. You can use multiple search fields to perform narrower searches. So by entering a text search and also specifying type, bank and characteristics options you could see only the presets that match those exact criteria. Deselect any tag in any area to remove that criteria and widen the search without having to go back and start again.
3.3.3 The Preset Info section The Info column on the right of the search field shows you information about any preset. The information for User presets may be changed here: Name, Type, Favorite, etc. However, if you want to alter the information for a Factory preset you must first use the Save As command to re-save it as a User preset. After this the Info section will gain Edit and Delete buttons at the bottom of the window.
3.3.4 Preset selection: other methods The pull-down menu to the right of the Search menu provides a different way to select presets. The first option in this menu is called Filter, and it will display the presets that fit the search terms you used in the Search field. So if you searched for “Love” in the main search area, the results of that search will appear here. Similarly, if you previously selected a Type in the Search field you would see the results of that search in this area instead.
made in the Search field. So if you have pre-selected a Characteristic such as “Funky” this shortcut menu will only show you presets that match that tag. The left and right arrows in the toolbar cycle up and down through the preset list: either the full list, or the filtered list that resulted from the use of one or more search terms. 3.3.5 Playlists In the lower left corner of the Preset Browser window is a feature titled Playlists.
Click and drag from the Search Results list onto one of the playlists To view the contents of a playlist, click on the playlist name. 3.3.5.3 Re-order the presets Presets may be reorganized within a playlist. For example, to move a preset from slot 2 to slot 4, drag and drop the preset to the desired location. This will move the preset into the new location. 3.3.5.4 Remove a preset To delete a preset from a playlist, click the x at the end of the preset row. Click the X to remove a preset from a playlist 3.
The MIDI Mode tabs Note: For the following examples we will assume the Global MIDI channel is set to All. Simply select the MIDI Mode tab that corresponds to the configuration you need: Multi: This places the Upper and Lower manuals and pedals on independent MIDI channels. If the pedals have been retracted they share a MIDI channel with the Lower manual. The MIDI channel values are set inside the MIDI Preferences menu.
3.5 Extended mode When you click the EXT button you will notice immediately that Extended mode adds extra drawbars for each of the VOX Continental V organ manuals, and one more drawbar for the pedals. But it does more than that: it also adds an extra effect switch on the left side of the upper manual (TREM, for tremolo) and changes the “percussion” switches to the right of the lower manual, adding one more button overall but also altering which percussion stops are available for the preset.
III = a mix of 2-2/3', 2' and 1' IV = a mix of 2-2/3', 2', 1-3/5', & 1' ~ = sine wave output per drawbar, also known as the “Flute” stop M = filtered square wave output per drawbar; this is labeled the “Reed” stop S = sawtooth wave output per drawbar; only in Extended mode, and called the “String” stop. 3.5.
engine type (VOX or Jennings), the reverb type, set the vibrato/tremolo rates and depths, add or remove background noise, fine-tune the octave dividers, and turn the instrument into an “antique” with the Key Contact Age control. Here’s a list of the Open mode features, from left to right and top to bottom: Vibrato Depth: This allows you to control how deep the vibrato will be for the preset. You’ll only hear vibrato if the Vib button is toggled to On, though.
Tuning controls: The VOX Continental utilizes “octave divider” circuits to generate the pitches in each octave. These controls allow you to fine-tune the notes in the chromatic scale. So if you’d like to create a preset using altered intonation, for example, these are the controls to use. The range of each “potentiometer” is +/- 50 cents in 0.4 cent increments. But if you need finer resolution, right-click on your mouse and then click and drag the tuning potentiometer (a.k.a “pot”).
Key Contact Age: The design of the organ keyboards gives them a fair amount of character. Each key has a separate contact for each drawbar stop, and as these connections age the contacts age as well…and often at different rates. This knob allows you to dial in as much of this unpredictability as you would like, from none (0.00%) to “desperately in need of service” (100.0%).
3.8 The Swell pedal Whether you’re using the pedal board, an amplifier or an FX pedal, the Swell pedal is always there in the middle of the floor under the organ. You can click and drag the top of the pedal to set the overall level, or you can assign the Swell pedal to the MIDI controller of your choice. 3.9 The effects To add one of the effects to the VOX Continental V output, click the arrow to the right of the words “FX SLOT” at the bottom of the main window.
We’ll take each of the FX Slot menu choices one at a time, starting from the top. The first one is labeled Empty. Selecting this option will close the FX pedal and the FX Slot menu, removing the FX device from the signal path. But Empty isn’t the only option if you just want to hear the sound without the FX unit temporarily. You’ll notice that almost every FX device also has a bypass button, which when clicked will cause the FX mix to become 100% dry.
A flanging effect is created by combining two identical signals, delaying one of the signals by a small amount, and then modulating the delay time. The recombined output produces a sound that sweeps up through the harmonics of the original signal and back down. Flanging can create both subtle and extreme effects, depending on the Rate and Depth of the modulation. With higher Depth settings you will begin to hear changes to the pitch of the sound.
3.9.3 Chorus Type: Select one of three chorus types Rate: Adjusts the speed of the chorus Delay: Sets the amount of delay applied to the input signal Amount: Controls the depth of the chorus Mix: Changes the balance between the input signal and processed signal Stereo Rate: Sets the speed of the stereo effect Stereo Width: Controls the width of the stereo effect A chorus module recreates the sound of multiple takes of an instrument being combined in a mix.
3.9.4 3.6.4 Delay Delay: Sets the delay time. (The delay is mono for authenticity.) LFO rate: Controls the modulation rate Feedback: Adjusts Feedback FB Tone: Changes feedback filtering Mix: Alters wet/dry mix LFO Depth: Sets the amount of delay time modulation (which follows a sine wave) A delay repeats a sound, like an echo, giving it more space and depth. This analog delay reproduces the sound of the old solid state units that used analog bucket brigade circuits.
3.9.5 Overdrive Drive: Controls the amount of distortion Output: Sets the output trim level Tone: Sweeps the low-pass filter An overdrive effect “saturates” and distorts a sound by increasing the volume of a signal then clipping the excess. The Drive knob sets the amount of the saturated sound. The Tone knob controls the distortion filtering. You can adjust the output level by setting the Output knob. 3.9.6 Wah This FX device emulates a standard “wah-wah” pedal.
3.1 Output mode There are three output options, which are placed in the signal path after the FX unit. Click on the “Direct” button and you will see the following options: 3.1.1 Direct output Direct: The VOX Continental V and the FX unit are connected directly to the output, bypassing the Guitar and Leslie cabinet models. You can still use the built-in convolution reverb that resides in the VOX Continental V if you like. 3.1.
The High Shape and High Width set the parameters of the high rotor (amplitude and pan of the treble sounds). The Low Shape and Low Width set the parameters of the low rotor (amplitude and pan of the lower-frequency sounds). Speed and Rate adjust the rotor speed or stop it altogether. High Depth controls the famous Doppler effect of the Leslie speaker Level sets the output audio gain. 3.1.
To select a different speaker output model, click the label in the upper portion of the amplifier’s face: To select a different microphone model, click on the label in the lower-left corner of the amplifier’s face: Volume: Controls the output level Drive: Adjusts the amount of “crunch” Reverb: Increases or decreases the amount of spring reverb Low: Boost or cut of low-frequency EQ Mid: Boost or cut of midrange EQ High: Boost or cut of high-frequency EQ Amp Type: Select one of four amplifier models Mic Typ
4 END USER LICENSE AGREEMENT 1. General 1.1 In consideration of payment of the Licensee fee, which is a portion of the price you paid, Arturia, as Licensor, grants to you (hereinafter termed “Licensee”) a nonexclusive right for the use of software including related media, documentation (for example program descriptions, manuals) and other documents and materials manufactured by Arturia SA ("Product(s)"). All intellectual property rights in the software belong to Arturia SA (hereinafter: “Arturia”). 1.
not be resold or transferred. The Licensee can activate the Product on up to five computers, as long as only one installation is used at any given time. The Licensee must register the Product to Arturia to get access to client support, and to activate his Product. (An internet connection is required to register and activate the Product, either on the computer on which the Product is installed, either on another device able to exchange files with the computer on which the Product is installed).
the third party agrees in writing with this EULA and Licensee ceases all use of the software, completely removes all installed copies of the software from his computers and – if the software was not purchased via download – deletes or transfers the original media delivered with the software to the third party. In addition, Licensee is required to de-register the purchased software with Arturia (more information available on www.arturia.com). 5.
previously advised of the possibility of such damages. Some states do not allow limitations on the length of an implied warranty or the exclusion or limitation of incidental or consequential damages, so the above limitation or exclusions may not apply to the Licensee in this case. This warranty gives the Licensee specific legal rights, and the Licensee may also have other rights which vary from state to state.