APPLI A NC E S FOR L I V I NG AOS652X OPERATION MANUAL
Congratulations, you are now the proud owner of an ARTUSI cooking appliance. Thank you for purchasing ARTUSI and welcome to the ARTUSI Family. This instruction manual has been specially created to inform you of the full range of features your ARTUSI appliance has to offer and serves as an introduction to getting the very best out of your ARTUSI appliance. We present detailed information on each of the features your ARTUSI appliance consists of.
IT GB CONTENTS INDICE Primo utilizzo pag. 6 Pannelli autopulenti 8 Rispetto dell’ambiente Frontale comandi First use INDEX pag. 6 Self-cleaning panel 8 10 Respect for the environment 12-14 Control panel 10 12-14 Première utilisation pag.
DE ES NL PT INDEX INDICE INHOUD Erstmalige Benutzung S. 7 Primera utilización pag. 7 Eerste gebruik Selbstreinigende Platten 9 Paneles autolimpiantes Zelfreinigende panelen Umweltverträglichkeit 11 Respeto por el medio ambiente Bedienblende Panel de control 13-15 Betriebsanleitung: 9 11 13-15 Instrucciones de funcionamiento: INDICE pag. 7 Primeira utilização pág.
IT GB PRIMO UTILIZZO IT 6 FR THE FIRST GB TIME YOU USE THE PRIMO UTILIZZO THE FIRST TIME OVEN USE THE Il forno va pulito a fondo YOU Clean the oven thoroughly con acqua e sapone e ri- OVEN with soapy water and rinse PREMIERE FR UTILISATION PREMIERE UTILISATION Le four doit être nettoyé à Il forno va pulito a fondo accuratamente. sciacquato con togliere acqua e i sapone e riPer telai laterali sciacquato accuratamente.
DE ERSTMALIGE DE BENUTZUNG ERSTMALIGE BENUTZUNG Der Backofen muss gründ- ES NL PT PRIMERA EERSTENL GEBRUIK PRIMEIRA ES PT UTILIZACIÓN UTILIZAÇÃO PRIMERA EERSTE GEBRUIK PRIMEIRA UTILIZACIÓN El horno se limpia a fondo De oven moet grondig wor- UTILIZAÇÃO O forno deve ser limpo a lich mit Seifenwasser geDer Backofen muss gründsäubert werden. Wie auf lich Abbildung mit Seifenwasser geder dargestellt säubert werden.
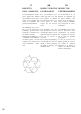
IT 8 GB FR PANNELLI AUTOPULENTI CATALICI SELF-CLEANING CATALYTIC PANELS PANNEAUX AUTONETTOYANTS CATALYTIQUES I nostri forni con pareti lisce hanno la possibilità di montare all’interno della muffola dei pannelli autopulenti che ricoprono le pareti. Questi speciali pannelli, da agganciare alle pareti prima dei telai laterali, sono ricoperti di uno speciale smalto catalitico microporoso che ossida e vaporizza gradualmente gli schizzi di olio e grasso eliminandoli durante le cotture sopra i 200° C.
DE ES NL PT SELBSTREINIGENDE KATALYTISCHE PLATTEN PANELES KATALYSERENDE PAINÉIS DE CATALÍTICOS ZELFREINIGENDE AUTOLIMPEZA AUTOLIMPIANTES PANELEN CATALÍTICOS Unsere Backöfen mit glatten Wänden bieten die Möglichkeit, in der Muffel selbstreinigende Platten zu montieren, mit denen die Wände verkleidet werden.
IT FR RISPETTO DELL’AMBIENTE RESPECT FOR THE RESPECT DE ENVIRONMENT L’ENVIRONNEMENT La documentazione del presente apparecchio utilizza carta sbiancata, senza cloro, oppure carta riciclata allo scopo di contribuire alla protezione dell’ambiente The documentation provided with this oven has been printed on chlorine free bleached paper or recycled paper to show respect for the environment.
DE ES NL PT UMWELTVERTRÄGLICHKEIT RESPETO POR EL RESPECT VOOR MEDIO AMBIENTE HET MILIEU RESPEITO PELO AMBIENTE Als Beitrag zum Umweltschutz wurde die Dokumentation dieses Geräts auf chlorfrei gebleichtes oder Recycling-Papier gedruckt.
IT FUNZIONI PANNELLO COMANDI GB FR CONTROL PANEL FONCTIONS DU FUNCTIONS PANNEAU DE COMMANDE SIMBOLI FUNZIONI SUL FUNCTION SYMBOLS SYMBOLES DES COMMUTATORE ON THE SELECTOR FONCTIONS SUR LE COMMUTATEUR Lampada forno (rimane Oven light (stays on while sempre accesa durante il oven is in use). funzionamento). Lampe du four (reste allumée pendant la marche). Resistenza inferiore. Rego- Bottom heating element. Résistance inférieure.
DE BEDIENTAFELFUNKTIONEN ES FUNCIONES PANEL DE MANDOS NL PT FUNCTIES FUNÇÕES PAINEL BEDIENINGSPANEEL DE COMANDOS FUNKTIONSSYMBOLE SÍMBOLOS DEL PANEL FUNCTIE-SYMBOLEN SÍMBOLOS FUNÇÕES AM SCHALTER DE CONTROL OP DE SCHAKELAAR NO COMUTADOR Ofenbeleuchtung (bleibt Bombilla horno (queda Ovenverlichting (blijft altijd Lâmpada do forno (permawährend des Betriebs siempre encendida durante branden tijdens de nece sempre acesa durante immer eingeschaltet). el funcionamiento). werking). o funcionamento).
14 IT GB FR Resistenza superiore (grill superficie e potenza ridotta). Regolazione del termostato da 50° a 200° C. Top heating element (small, low power grill). Thermostat setting from 50°C to 200°C. Résistance supérieure (grill à grande surface et puissance réduite). Réglage du thermostat de 50° à 200°C. Resistenza inferiore + Resistenza circolare con ventilatore. Regolazione del termostato da 50° C a MAX. ATTENZIONE: Le parti accessibili possono diventare molto calde durante l’uso.
DE ES NL PT Oberhitze (Grill mit reduzierter Fläche und Leistung). Einstellung des Thermostats von 50° auf 200°C. Resistencia superior (grill superficie y potencia reducida). Regulación del termostato entre 50° C y 200° C. Bovenste verwarmingselement (grill met beperkt oppervlak en vermogen). Instelling van de thermostaat van 50°C tot 200°C. Resistência superior (grill superfície potência reduzida). Regulação do termóstato desde 50° até 200° C. Unterhitze + Heißluft mit Ventilator.
IT 16 GB FR COTTURA VENTILATO FAN COOKING CUISSON VENTILEE Con questo tipo di cottura, un ventilatore posto nella parte posteriore fa circolare l’aria calda all’interno del forno, distribuendola in modo uniforme. La cottura avviene più rapidamente rispetto alla cottura convenzionale. Il sistema risulta idoneo per la cottura su più ripiani ed anche per cibi di natura diversa (pesce, carne ecc. ).
DE ES NL PT UMLUFT BACKEN COCCIÓN VENTILADA: BEREIDING MET VENTILATIE MODO VENTILADO Bei dieser Garart bringt der Ventilator, der sich im hinteren Ofenteil befindet, heiße Umluft in den Ofen und verteilt diese gleichmäßig, wobei die Garzeit geringer als beim konventionellen Backen ist. Diese Methode eignet sich zum Garen auf mehreren Einschubhöhen, auch von Speisen unterschiedlicher Art (Fisch, Fleisch usw.).
COTTURA AL GRILL GRILL COOKING CUISSON AU GRIL Tipo di cottura per la grigliatura o doratura dei cibi. Alcuni forni possono essere completi di motorino asta e spiedo per cottura al girarrosto. La griglia con il cibo da cuocere va inserito nella 1 o 2 posizione da sopra. Preriscaldare per 5Ê. Ruotare la manopola del termostato con temperature da 50 a 200 . Use the grill to grill or brown foods. Some ovens may be equipped with an electric motor, spit and skewers for turning on the spit.
GRILLEN COCCIÓN AL GRILL BEREIDING MET GRILL MODO GRIL Zum Grillen oder Bräunen der Speisen. Einige Backöfen sind komplett mit Stabmotor und Drehspieß für Spießbraten ausgestattet. Der Rost mit dem Gargut wird in der 1. oder 2. Schiene von oben eingeschoben. Den Backofen 5 Minuten vorheizen. Den ThermostatDrehgriff auf Temperaturen von 50 bis 200 drehen. Tipo de cocción para asar al grill o para dorar los alimentos.
IT FR TERMOSTATO THERMOSTAT THERMOSTAT REGOLATORE ENERGIA 0-11 0-11 HEAT REGULATOR REGULATEUR D’ENERGIE 0-11 COMMUTATORE 0-6 0-6 SELECTOR COMMUTATEUR 0-6 CONTAMINUTI ALARM TIMER MINUTEUR TEMPORIZZATORE COOKING TIMER TEMPORISATEUR Dispositivo che permette di regolare la temperatura di cottura più idonea ai cibi cuocere e può essere regolato da 50° a 250° C. Dispositivi per la regolazione della potenza delle piastre elettriche in ghisa o vetro ceramica.
DE ES NL PT THERMOSTAT TERMOSTATO: THERMOSTAAT TERMÓSTATO ENERGIEREGLER 0-11 REGULADOR DE ENERGÍA 0-11 ENERGIEREGELAAR 0-11 REGULADOR ENERGIA 011 UMSCHALTER 0-6 SELECTOR 0-6 SCHAKELAAR 0-6 COMUTADOR 0-6 KURZZEITMESSER MINUTERO MINUTENTELLER CONTADOR DE MINUTOS ZEITSCHALTER TEMPORIZADOR: TIMER TEMPORIZADOR Temperaturregler, mit dem die je nach Gargut geeignete Gartemperatur eingestellt wird, und der auf Temperaturen zwischen 50° und 250° C eingestellt werden kann.
IT GB FR Premere la manopolina e Push the knob out and turn it Appuyer le petit bouton et le ruotare in senso antiorario. anticlockwise to set the clock. tourner dans le sens inverse des aiguilles d’une montre. ture a tempo definito ruotare la manopola in senso antiorario fino al tempo desiderato. Un segnale 22 cuissons à temps défini, tourner le bouton dans le sens inverse des aiguilles d’une montre jusqu’au temps désiré.
DE ES NL Den kleinen Drehgriff Apretar el mando y girarlo Drukken de knop draai hem Drücken und im en el sentido antihorario met de klok mee linksom Gegenseitigersinn drehen. de las agujas del reloj. am de tijd in te stellen. Zet de knop van de schakelaar en van de thermostaat in de gewenste stand en op de gewenste temperatuur.
IT TIMER ELETTRONICO 6 TASTI GB FR 6 KEY ELECTRONIC TIMER TEMPORISATEUR ELECTRONIQUE A 6 TOUCHES Regolazione dell’orologio Setting the clock Réglage de l’horloge Premere contemporaneaAppuyer en même temps Press the duration key sur les touches de durée mente i tasti di durata and the end of cooking et de fin de cuisson e fine cottura ed agire key simultaneously, then et agir sur les touches sui tasti +/- fino all’im- press the +/- keys to set the postazione dell’ora deside- time. rata.
DE ES NL ELEKTRONISCHE TEMPORIZADOR ZEITSCHALTUHR ELECTRÓNICO MIT 6 TASTEN DE 6 TECLAS: PT ELEKTRONISCHE TIMER TIMER 6 ELECTRÓNICO 6 TOETSEN TECLAS Einstellung der Uhr Regulación del reloj Stellen van de klok Regulação do relógio Gleichzeitig die Tasten für Apretar simultáneamente las Druk tegelijkertijd op de Carregar simultaneamente Gardauer und Garende teclas de duración und drücken die de cocción y fin toetsen voor de duur , y pulsar las en einde bereiding nas teclas de duração en fim cozedu
IT FUNZIONAMENTO AUTOMATICO GB FULLY AUTOMATIC OPERATION FR FONCTIONNEMENT AUTOMATIQUE Per cotture a tempo definito To set the end of cooking Pour les cuissons à temps premere il tasto di durata time, press the duration key défini, appuyer sur la touche de durée cuisson cottura e impostare and press the +/- keys et, à l’aide des touches con i tasti +/- il tempo to set the duration of necessario per la cottura. cooking.
DE AUTOMATIKBETRIEB ES FUNCIONAMIENTO AUTOMÁTICO: NL AUTOMATISCHE WERKING Für bestimmte Garzeiten. Para cocciones con tiempo Voor bereidingen met een Die Taste für Gardauer definido apretar la tecla de vaste bereidingstijd, druk op de toets van de bedrücken und mit den duración de cocción y en stel Tasten +/- die erforderliche programar con las teclas +/ reidingsduur Garzeit einstellen. Die - el tiempo necesario para met de toetsen +/- de tijd in Taste für Garende drücken la cocción.
IT 28 GB FR SOSTITUZIONE REPLACING THE DELLA LAMPADA OVEN LIGHT DEL FORNO REMPLACEMENT DE LA LAMPE DU FOUR IMPORTANTE: La lampada del forno deve avere precise caratteristiche: a) struttura adatta alle alte temperature (fino a 300 gradi) b) alimentazione: vedere valore V/Hz indicato sulla targa matricola c) potenza 25 W. d) attacco di tipo E 14 Prima di procedere, staccare l’apparecchio dalla linea di alimentazione, per evitare la possibilità di scosse elettriche.
DE ES NL PT AUSWECHSLUNG DER OFENBELEUCHTUNG CAMBIO DE LA BOMBILLA DEL HORNO HET VERVANGEN SUBSTITUIÇÃO VAN HET LAMPJE DA LÂMPADA DO VAN DE OVEN FORNO WICHTIG: Die Ofenbeleuchtung muss folgende Merkmale aufweisen: a) h o c h t e m p e r a t u r beständig (bis zu 300 Grad) b) Stromversorgung: siehe Anschlusswerte V/Hz auf dem Typenschild. c) Leistung 25 W d) Sockel E 14 Vor der Arbeit das Gerät von der Stromzufuhr abtrennen, um Stromschläge zu vermeiden.
IT SMONTAGGIO DELLA PORTA FORNO REMOVING THE OVEN DOOR Lo smontaggio della porta forno può essere facilmente effettuato operando come segue: - aprire totalmente la porta; - sollevare le due levette indicate in fig.; - richiudere la porta sul primo scatto di arresto determinato dalle due levette sollevate in precedenza; - sollevare la porta verso l’alto e verso l’esterno del forno per estrarla dalle sedi; The oven door can be removed quickly and easily. To do so, proceed as follows: - Open the door fully.
DE ES NL PT AUSBAUEN DER OFENTÜR DESMONTAJE DE DEMONTAGE VAN DESMONTAGEM LA PUERTA DEL DE OVENDEUR DA PORTA FORNO HORNO Die Backofentür kann mühelos ausgebaut werden. Dazu folgendermaßen vorgehen: - die Tür ganz öffnen; - die zwei auf Abb.
IT GB FR IT GB PER INSTALLATION POURFR L’INSTALLATORE INSTRUCTIONS L’INSTALLATEUR PER INSTALLATION POUR L’INSTALLATORE INSTRUCTIONS L’INSTALLATEUR Incasso del forno Encastrement du four Incasso del forno Il forno può essere installato sotto unpuò piano di installacottura Il forno essere to sotto piano di Le cottura oppure in un colonna. dioppure dell’incasso in colonna. Le dimensioni devodell’incasso devono mensioni essere come riportato in no essere come riportato in figura. figura.
DE ES NL PT FÜR DEN INSTALLATEUR PARA EL INSTALADOR: VOOR DE INSTALLATEUR PARA O INSTALADOR Einbau des Backofens Encastre del horno Inbouw van de oven Encastre do forno Der Ofen kann unter einem Kochfeld oder in einen Schrank eingebaut werden. Die Einbaumaße müssen den auf der Abbildung dargestellten entsprechen. Das Möbelmaterial muss hitzebeständig sein. Der Backofen muss zu den Möbelwänden zentriert, und mit den mitgelieferten Schrauben und Buchsen befestigt werden.
Backofens mit den Gasoder Gas/Elektrokombikochfeldern siehe beiliegende Anleitungen. horno con las placas de de oven met gas- of cocción polivalentes gas o gemengde kookplaten, zie combi eléctricos ver las de bijgaande instructies. instrucciones anexas. com os planos de cozedura polivalentes gás ou combinados eléctricos ver as instruções em anexo. ALLACCIAMENTI GAS OD ELETTRICI GAS OR ELECTRICAL CONNECTIONS RACCORDEMENTS GAZ OU ÉLECTRIQUES GAS- BZW.
IT GB FR ALLACCIAMENTO ELECTRICAL ELETTRICO CONNECTIONS BRANCHEMENT ELECTRIQUE Prima di effettuare l’allacciamento elettrico accertarsi che: - le caratteristiche dell’impianto siano tali da soddisfare quanto indicato sulla targa matricola applicata sul fronte del forno; - l’impianto sia munito di un efficace collegamento di terra secondo le norme e le disposizioni di legge in vigore. La messa a terra è obbligatoria a termini di legge.
DE ES NL PT STROMANSCHLUSS CONEXIÓN ELÉCTRICA ELEKTRISCHE AANSLUITING LIGAÇÃO ELÉCTRICA Vor der Durchführung des Stromanschluss muss sichergestellt werden, dass: - die Eigenschaften der Stromnetzes mit den Werten auf dem vorne am Ofen angebrachten Typenschild übereinstimmen; - das Stromnetz gemäß den geltenden Bestimmungen und Rechtsvorschriften geerdet ist. Die Erdung ist gesetzlich vorgeschrieben. Das Kabel darf an keiner Stelle eine Temperatur von über 50° C erreichen.
IT GB completa nelle condizioni della categoria di sovratensione III, tali dispositivi di disconnessione devono essere previsti nella rete di alimentazione conformemente alle regole di installazione. La spina o l’interruttore onnipolare devono essere facilmente raggiungibili con l’apparecchiatura installata. guarantee class III overvoltage protection, then such a device must be fitted to the power supply in compliance with the regulations governing electrical installations.
DE ES Trenneinrichtungen gemäß den Installationsvorschriften im Versorgungsnetz vorgesehen sein. Der Stecker oder allpoliger Schalter müssen bei installiertem Gerät leicht zugänglich sein. de apertura de los contactos que asegure la desconexión completa en las condiciones estipuladas para la categoría de sobretensión III. Es necesario que sea fácil llegar a la toma o al interruptor omnipolar con el equipo instalado. Bei Gebrauch wird das Gerät sehr warm.
Il contenuto del presente manuale è generico e non tutte le funzionalità descritte potrebbero essere incluse nel vostro prodotto. La Casa costruttrice declina ogni responsabilità per le possibili inesattezze contenute nel presente opuscolo, imputabili ad errori di stampa o di trascrizione. Si riserva il diritto di apportare ai propri prodotti quelle modifiche che ritiene necessarie o utili, senza pregiudicare le caratteristiche essenziali.
TIMER TOUCH CONTROL PT TIMER TOUCH CONTROL TIMER TOUCH CONTROL MINUTEUR À TOUCHES SENSITIVES NL FR Italiano ES English TOUCH CONTROL TIMER Français Deutsch DE Deutsch Español TIMER TOUCH CONTROL Português Español GB Nederlands TIMER TOUCH CONTROL Português Français IT
Regolazione dell’orologio Figura 1 Alla prima accensione appariranno i simboli “Auto” e “0:00” lampeggianti. Per la prima regolazione dell’orologio, premere il tasto centrale per 3 secondi circa. Quando appare il simbolo premere il pulsante “+” o “-“ per regolare l’ora desiderata. Attendere, e un segnale acustico segnalerà che l’ora e’ stata impostata (figura 1).
Fine della cottura Figura 4 Può essere impostata l’ora nella quale terminerà la cottura Premere il tasto centrale per 3 secondi. Premere nuovamente il tasto centrale due volte consecutive ed apparirà la scritta “End” (figura 4). Con i pulsanti “+” e “-“ impostare il l’ora della fine cottura desiderata. Il forno funzionerà con la temperatura e la funzione pre-impostate, fino all’ora stabilita. Programmazione della cottura automatica Figura 5 Funzione di cottura con programmazione a tempo definito.
TIMER TOUCH CONTROL Setting the clock “Auto” and “0:00” will start flashing when the unit is switched on for the first time. To set the clock, press the central button for about 3 seconds. When appears, press “+” or “-“ to set the correct time. Wait until a beep tells you that the clock has been set (figure 1). To set the time at a later stage, press “+” and “-” together for 3 seconds and then adjust the clock as described above.
End of cooking time Figure 4 The end of cooking time can also be set. Press the central button for 3 seconds. Press the central button twice consecutively and wait for “End” to appear (figure 4). Press “+” and “-” to set the required end of cooking time. The oven will work in the set mode and at the set temperature until the end of cooking time. Programming automatic cooking Figure 5 Cooking function with set times. Press the central button for 3 seconds. Then press it again until “dur” appears.
TOUCH CONTROL TIMER Uhr einstellen Wird die Uhr zum ersten Mal eingeschaltet, blinken die Symbole „Auto“ und „0:00“. Zur ersten Zeiteinstellung drücken Sie ungefähr drei Sekunden die mittlere Taste. So wie das Symbol erscheint, drücken Sie auf die „+“ oder „-“ Taste, um die gewünschte Uhrzeit einzustellen. Warten Sie, bis ein akustisches Signal die eingestellte Zeit bestätigt (Abbildung 1).
Ende der Backzeit Abbildung 4 Man kann auch das Ende der Backzeit einstellen. Drücken Sie drei Sekunden lang die mittlere Taste. Drücken Sie erneut zwei Male hintereinander die mittlere Taste, bis die Schrift „End“ (Abbildung 4) erscheint. Durch Betätigen der Tasten „+“ oder „-“ können Sie nun das gewünschte Ende der Backzeit einstellen. Der Ofen bleibt somit bis zur gewünschten Zeit mit den eingestellten Funktionen und Temperatur eingeschaltet.
TIMER TOUCH CONTROL ES Regulación del reloj Figura 1 Al encender el reloj por primera vez aparecerán los símbolos “Auto” y “0:00” intermitentes. Para efectuar la primera regulación del reloj, pulsar la tecla central por unos 3 segundos. Cuando aparezca el símbolo pulsar el pulsador “+” o “-“ para regular la hora deseada. Esperar hasta que una señal acústica indique que la hora está programada (figura 1).
Fin de la cocción Figura 4 Se puede programar la hora a la cual finalizará la cocción. Pulsar la tecla central por 3 segundos. Volver a pulsar la tecla central dos veces consecutivas y aparecerá la inscripción “End” (figura 4). Con los pulsadores “+” y “-” programar la hora de fin de cocción deseada. El horno funcionará con la temperatura y la función predefinidas, hasta la hora establecida. Programación de la cocción automática Figura 5 Función de cocción con programación por tiempo definido.
TIMER TOUCH CONTROL PT Regulação do relógio Figura 1 Quando se acende o forno pela primeira vez aparecem os símbolos “Auto” e “0:00” a piscar. Para o primeiro acerto do relógio, pressionar a tecla central por aproximadamente 3 segundos. Quando aparece o símbolo pressionar o botão “+” o “-“ para acertar a hora pretendida. Aguardar, e um sinal acústico indicará que a hora foi acertada (figura 1).
Fim da cozedura Figura 4 Pode ser programada a hora em que terminará a cozedura Pressionar a tecla central por 3 segundos. Pressionar novamente a tecla central duas vezes consecutivas e aparecerá a escrita “End” (figura 4). Com os botões “+” e “-“ programar a hora pretendida de fim da cozedura. O forno funcionará com a temperatura e a função predefinidas, até a hora estabelecida. Programação da cozedura automática Figura 5 Função de cozedura com programação a tempo definido.
TIMER TOUCH CONTROL Instelling van de klok Figuur 1 Bij de eerste keer aanzetten knipperen de symbolen “Auto” en “0:00”. Om de klok de eerste keer in te stellen moet u de middelste toets ongeveer 3 seconden lang ingedrukt houden. Als het symbool verschijnt moet u de toets “+” of “-“ indrukken om de juiste tijd in te stellen. Daarna moet u wachten totdat een geluidssignaal signaleert dat de tijd ingesteld is (figuur 1).
Einde van de baktijd Figuur 4 De tijd waarop het bakken eindigt kan ingesteld worden. Houd de middelste toets 3 seconden lang ingedrukt. Druk nogmaals twee keer achter elkaar op de middelste toets waarna de aanduiding “End” (figuur 4) verschijnt. Stel met de toetsen “+” en “-“ het gewenste einde van de baktijd in. De oven zal tot de ingestelde tijd op de vooringestelde temperatuur en functie functioneren. Programmering van het automatische bakproces Figuur 5 Bakfunctie met programmering voor bepaalde tijd.
MINUTEUR À TOUCHES SENSITIVES Réglage de la pendule Figure 1 Lors de la première utilisation de l’appareil, l’affichage fera apparaître le symbole « Auto » et la valeur « 0:00 » en mode clignotant. Pour effectuer le réglage initial de la pendule, exercez une pression de plus de 3 secondes sur la touche centrale. Lorsque le symbole apparaît, réglez l’heure en utilisant les touches “+” ou “-“. Attendre qu’un signal acoustique indique que le réglage de l’heure a été pris en compte (figure 1).
Fin de cuisson Figure 4 Cette fonction permet de régler l’heure de fin de cuisson. Exercez une pression de plus de 3 secondes sur la touche centrale puis appuyez à nouveau par deux fois sur cette même touche pour faire apparaître la mention “End” (figure 4). Utilisez les touches “+” et “-“ pour régler l’heure de fin de cuisson désirée. Le four fonctionnera à la température et dans le mode sélectionnés jusqu’à l’heure indiquée.
Potete scegliere l’apertura della porta verso destra o verso sinistra prima di collocare il prodotto nell’incasso. 1 Decide whether you want the door to open to the left or right before positioning the appliance in the oven recess Possibilité de choisir l’ouverture de la porte vers la droite ou vers la gauche avant de placer la pièce dans le logement. Vor dem Einbau des Gerätes kann gewählt wählen, ob die Türöffnung nach rechts oder links erfolgt.
...quindi rimuovere i quattro tappi di plastica nel lato opposto. Remove the four plastic caps from the opposite side. 4 ...enlever les quatre bouchons en plastique de l’autre côté. ...danach auf der Gegenseite die vier Kunststoffstöpsel entfernen ...quite los cuatro embellecedores de plástico del lado opuesto. ...verwijder daarna de vier plastic doppen aan de andere kant. ...de seguida, retire os quatro tampões de plástico no lado oposto. Capovolgere la porta di 180°. 5 Turn the door 180°.
NOTA: Controllare che la porta del forno sia parallela al frontalino (altrimenti agire sulle viti appena fissate per regolarla). NOTE: Make sure that the oven door is perfectly parallel with the front panel. If it is not, adjust it by means of the screws you have just inserted. REMARQUE : Contrôler que la porte du four est parallèle à la façade (sinon intervenir sur les vis venant dʼêtre fixées pour la régler).
Warranty Card Worldwide Appliances Pty Limited A.B.N. 45868077422 Office: 48-50 Moore Street, Leichhardt N.S.W 2040 Post: Locked Bag 3000, Annandale, N.S.W 2038 P: 1300 694 583 WARRANTY REGISTRATION Your ongoing satisfaction with your artusi product is important to us. We ask that you complete the enclosed Warranty Registration Card and return it to us so that we have a record of the artusi product purchased by you.
Warranty Card continued 4. Time for Claim under the Warranty You must make any claim under this Warranty within twenty eight (28) days after the occurrence of an event which gives rise to a claim pursuant to the Warranty, by booking a service call on the telephone number below. 5. Proof of Purchase Customers must retain proof of purchase in order to be eligible to make a warranty claim in respect of an artusi product. 6.
DISCLAIMER Worldwide Appliances PTY LTD, trading as ARTUSI, is continually seeking ways to improve the design specifications, aesthetics and production techniques of its products. As a result alterations to our products and designs take place continually. Whilst every effort is made to produce information and literature that is up to date, this brochure should not be regarded as an infallible guide to the current specifications, nor does it constitute an offer for the sale of any particular product.