
User's Manual
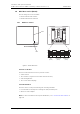
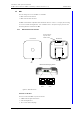
Table Of Contents
- 1 Introduction
- 2 Description
- 3 Safety Instructions
- 4 IP Security
- 5 Installation of the Base Station
- 5.1 Base Station Cabling
- 5.2 Install the Base Station
- 5.2.1 Fix the Mounting Bracket to a Wall
- 5.2.2 Fix the Mounting Bracket to a Ceiling
- 5.2.3 Fix the Mounting Bracket to a Pole or Beam
- 5.2.4 Use the Cable Ducts for IPBS1
- 5.2.5 Connect External Antennas (only IPBS2 and DB1)
- 5.2.6 Secure the Cable
- 5.2.7 Pinning
- 5.2.8 Connect the Base Station Cables
- 5.2.9 Mount the Base Station
- 5.3 Power the Base Station
- 6 Installation of the IPBL
- 7 Configuration
- 7.1 Requirements
- 7.2 Access the GUI
- 7.3 GUI Web Access
- 7.4 Configure the Mobility Master
- 7.5 Configure the Standby Mobility Master
- 7.6 Configure the Pari Master
- 7.7 Configure the Standby Pari Master
- 7.8 Configure the Master
- 7.9 Configure the Standby Master
- 7.10 Plug and Play Configuration
- 7.11 Configure the Radio
- 7.12 Configure Deployment
- 7.13 Add Users
- 8 Operation
- 8.1 General
- 8.1.1 Name the IPBS/IPBL
- 8.1.2 Change User Name and Password
- 8.1.3 Centralized Management of Administrator/Auditor Accounts Using Kerberos
- 8.1.4 Configure Automatic Firmware Update
- 8.1.5 Configure the NTP Settings
- 8.1.6 Configure Logging
- 8.1.7 Configure the HTTP settings
- 8.1.8 Configure the HTTP Client settings
- 8.1.9 SNMP
- 8.1.10 Certificates
- 8.1.11 License
- 8.2 LAN
- 8.3 IP
- 8.4 LDAP
- 8.5 DECT
- 8.5.1 Change System Name and Password
- 8.5.2 Set Subscription Method
- 8.5.3 Configure Authentication Code
- 8.5.4 Select Tones
- 8.5.5 Set Default Language
- 8.5.6 Set Frequency Band
- 8.5.7 Enable Carriers
- 8.5.8 Local R-Key Handling
- 8.5.9 No Transfer on Hangup
- 8.5.10 Configure Coder
- 8.5.11 Secure RTP
- 8.5.12 Configure Supplementary Services
- 8.5.13 Select Mode
- 8.5.14 Set Master Id
- 8.5.15 Enable PARI Function
- 8.5.16 Configure Gatekeeper
- 8.5.17 Registration for Anonymous Devices
- 8.5.18 Select Mobility Master Mode
- 8.5.19 Connect Mobilty Master to other Mobility Master(s)
- 8.5.20 Disconnect Mobilty Master from other Mobility Master(s)
- 8.5.21 Connect Master to a Mobility Master
- 8.5.22 Enable the Radio
- 8.5.23 Enter IP Address to the PARI Master and the Standby PARI Master
- 8.5.24 Multiple Radio Configuration
- 8.5.25 PARI
- 8.5.26 SARI
- 8.5.27 Configure Air Synchronization
- 8.6 VoIP
- 8.7 UNITE
- 8.8 Import and Export a Central Phonebook
- 8.9 Users
- 8.10 Device Overview
- 8.11 DECT Sync
- 8.12 Traffic
- 8.13 Gateway
- 8.14 Backup
- 8.15 Software Upgrade
- 8.15.1 Before Upgrading
- 8.15.2 Upgrading Sequence
- 8.15.3 IPBS/IPBL Upgrade
- 8.15.4 Configuration After Updating the Firmware From Software Version 2.x.x to Later
- 8.15.5 Configuration After Updating the Firmware From Software Version 3.x.x to Later
- 8.15.6 System Upgrade from Software Version 4.x.x to 5.0.x
- 8.16 System Downgrade from software version 5.0.x to 2.x.x, from 4.x.x to 2.x.x and from 3.x.x to 2.x.x
- 8.17 System Downgrade from software version 5.0.x to 3.x.x and 4.x.x to 3.x.x
- 8.18 Update
- 8.19 System Upgrade in System with Mobility Masters
- 8.20 Replacing Master Hardware in Multiple Master System
- 8.21 Diagnostics
- 8.22 Reset
- 8.23 Reset Using the Reset Button
- 8.1 General
- 9 Commissioning
- 10 Troubleshooting
- 11 Related Documents
- Document History
- Appendix A: How to Use the Update Server
- Appendix B: RFP Power Consumption
- Appendix C: Local R-Key Handling
- Appendix D: Database Maintenance
- Appendix E: Load Balancing
- Appendix F: Update Script for Configuration of Kerberos Clients
- Appendix G: Install Certificate in the Web Browser

TD 92579EN
15 February 2012 / Ver. H
Installation and Operation Manual
IP-DECT Base Station & IP-DECT Gateway (software version 5.0.x)
19
3 Safety Instructions
For safe and efficient operation, observe the guidelines given in this manual and all
necessary safety precautions. Follow the operating instructions and adhere to all warnings
and safety precautions located on the product and this manual.
• Installation and service is to be performed by service persons only.
• IPBL must be connected to a mains socket outlet with a protective earthing connection.
• IPBL must be permanently connected to protective earth when powered by 48 VDC.
• IPBL must be mounted in a Restricted Area Location (RAL) in Sweden, Finland and
Norway.
• Ensure that the voltage and frequency of the mains power socket matches the voltage
and frequency inscribed on the equipment’s electrical rating label.
• Never install telephone wiring during a thunderstorm.
Note: Avoid touching or punching down the IPBS/RFP signal and power pairs as there is
48Vdc or 24Vdc present on these wires at all times.
• Always install the base station conforming to relevant national installation rules.
• Disconnect all power sources before servicing the equipment.
• Use only approved spare parts and accessories. The operation of non-approved parts
cannot be guaranteed and may cause damage or danger.
• Only approved power supplies according to valid editions of EN/IEC/CSA/UL/AU/NZS
60950 are to be used when the IPBS/RFPs are powered by local power supplies.
3.1 Protection Against Electrostatic Discharge (ESD)
Integrated circuits are sensitive to ESD.To avoid damage caused by ESD, service engineers
and other people must handle equipment and boards carefully.
Electronic equipment has become more resistive to ESD, but we see an increase of
situations where static electricity can build up. This is caused by an increasing application
of man–made fibres like nylon, acrylic, etc. which are capable of generating ESD of 10,000
Volts and more.
Walking across a nylon carpet, even for a few feet, could cause a person to be charged–up
to more than 10,000 Volts.
Under these conditions, if a system board or a (C)MOS device is touched it could easily be
damaged. Although the device may not be totally defective, it is often degraded, causing
it to fail at a later date without apparent reason.
To make sure that equipment and parts are well protected during shipment, special
packaging materials are utilized. System boards will be shipped in anti–static bags and
(C)MOS devices and other sensitive parts in small shielded boxes.
3.1.1 ESD Handling
In the interest of quality and reliability, it is advisable to observe the following rules when
handling system parts:
• Keep parts in their protective packaging until they are needed.
• When returning system parts like EEPROMS to the factory, use the protective
packaging as described.
• Never underestimate the damaging power ESD can have and be especially careful
when temperatures are below freezing point and during very warm weather in