
User Guide

AShop V User Guide146
AShop Software © Copyright 2002 - 2010
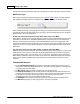
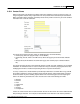
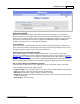
Add New Vendor
Click on the New Vendor button. Add the vendor contact information and click Save.
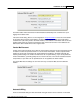
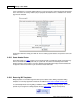
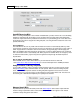
Assign Each Product to a Vendor
Assign each product to a vendor through the AShop admin panel Edit Catalog menu. Click on the edit
button for each product. When at least one vendor has been added, there will be a drop-down selector in
each product page. Select a vendor and save the product.
Note that products are not required to be assigned to a vendor. All active products will appear in the
shopping cart regardless of their vendor relationship. The vendor assignment simply enables automation
within the Sales Office. For example, when an order is received and it includes products that are
assigned to a vendor, the order will appear in Vendors > Open Orders with an option to automatically
generate a purchase order, filled in with the vendor, customer, and product information. Example 2:
When manually creating purchase orders the vendor products are selectively displayed depending on
which vendor the purchase order will be sent to.
See also: Sales Office > Vendors