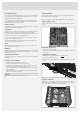
OPERATING INSTRUCTIONS Dishwasher DFI664
Contents Display panel Important safety instructions Before washing for the first time Loading the dishwasher Using the dishwasher Settings Care and maintenance instructions 2 3 4 5 8 12 14 Troubleshooting Technical information Installation instructions Service Notes Quick start guide 16 19 20 22 23 24 Dear Customer, Thank you for choosing this quality product from ASKO. We hope it will meet your expectations and fulfill your needs for many years to come.
Important safety instructions SAVE THESE INSTRUCTIONS FOR FUTURE REFERENCE WARNING! When using your dishwasher, follow basic precautions, including the following: • Read all instructions before using the dishwasher. • Use the dishwasher only for its intended function. • Use only detergents or wetting agents recommended for use in a dishwasher and keep them out of the reach of children.
Before washing for the first time 1. Checking water hardness 2. Basic settings Contact the local water utility to check the water hardness in your area. This is important to determine how much detergent and rinse aid to use. To switch on the dishwasher, press and hold the main power switch until the display lights up. In general, more rinse aid and detergent are needed for hard water. "Welcome to your new ASKO. This is a first time set up." is shown on the display.
Loading the dishwasher 3. Top up with rinse aid Energy-efficient dishwashing Use rinse aid to improve wash and dry times. Also use rinse aid to achieve clear and spotless results. Run programs only with a full load Wait until the dishwasher is fully loaded before running a program, this way you save energy. Use the Rinse and hold program to rinse the dishes if there are any unpleasant odors while you wait for the dishwasher to become fully loaded.
Fragile dishes The baskets Some cookware is not dishwasher safe. This can be for several reasons. Some materials cannot withstand high temperatures, others can be damaged by dishwasher detergent. The dishwasher includes a top cutlery tray, an upper basket, and a lower basket with a cutlery basket. Use caution with, for example, handmade items, fragile decoration, crystal/glassware, silver, copper, tin, aluminum, wood, and plastic. Look for the "Dishwasher safe" marking.
Raising the upper basket 1 Pull out the upper basket. 2 Grab the sides of the upper basket with both hands and lift it up. Washing large plates Move adjustable tines and their mounts to widen the distance between the tine rows to adapt the lower basket to plates with a diameter greater than 9 3/4" (25 cm). Lowering the upper basket 1 Pull out the upper basket. Cutlery basket 2 While holding the basket, pull out the two locking handles on either side to lower the upper basket.
Using the dishwasher Typical load for 10 place settings Add detergent Upper basket with 10 place settings AHAM DW-1 Press to open 1 Prewash detergent compartment 2 Main wash detergent compartment Detergent is added according to water hardness. Follow the instructions on the detergent packaging. Too much detergent can result in less effective dishwashing and also entails greater environmental impact. NOTE! Ensure the upper basket is set to its lowest position.
Press and hold the main power switch until the display lights up. Starting the dishwasher START Eco STOP 2:00 Speed mode Select the program Select a program mode The main power switch Press and hold the main power switch until the display turns on. Also check that the water supply valve is on. Select a program To select a program, press the Navigation button or until the desired program is shown on the display. Choose a program to suit the type of dishes and how dirty they are.
1 Press the button once to activate Delayed Start. Press the button several times – or hold it in – to set the desired number of hours. 2 Press Start/Stop and close the door. The timer counts down and the dishwasher starts after the selected delay. If you want to cancel the Delayed Start option, open the door and press and hold the main power switch until the display turns off. TIP! Activate the setting High temperature to improve the dishwashing results. Energy consumption is slightly increased.
25 25 25 25 Normal wash 4) ECO wash Sanitation wash Time program 2 2 60 °C 140 °F 60 °C 140 °F 60 °C 140 °F 60 °C 140 °F 50 °C 120 °F 2:20 2:20 1:50 1:30 1.0 1.0 0.8 1.4 1.1 1:50 1:50 1:20 1:00 2:25 0:07 0.6 0.6 0.5 0.9 0.6 0.01 0.4-1.2 0.6 3.2 3.2 2.4 2.6 3.2 0.8 2.9- 5.0 4.0 3.7 3.2 The energy label performance figures are based on this program.
Settings Open the dishwasher's Settings menu To open the dishwasher's Settings menu, press the Navigation button with the mode selector . or until Settings menu is shown on the display and confirm your selection To exit the dishwasher's Settings menu, select Exit and confirm your selection with the mode selector . Navigation buttons for choosing setting Mode selector to confirm current setting START 1� Language Settings English STOP Current setting Settings Options 1.
Settings Options 8. On/Off Super rinse Super rinse adds two extra rinses. Activated in the following programs: Normal wash ECO wash Sanitation wash Plastic wash Lower half Upper half 9. High temperature On/Off Activate the setting High temperature to improve the dishwashing results. Energy consumption is slightly increased.
Care and maintenance instructions Coarse filter The coarse filter traps larger food particles, which cannot get past the drain pump. Empty the coarse filter as necessary. Top spray arm • The upper basket must be removed before the top spray arm can be released. Extend the upper basket then rotate the basket catch on each runner outward (see illustration). Remove the basket. Coarse filter • Remove the top cutlery tray.
Unblocking the drain pump If the dishwasher still contains water after the program has finished, something may be blocking the drain pump. Such items are easily removed. • Shut off the water. • Unplug the unit from the power outlet. • Call the Customer Care Center. 1 Turn off the machine using the main power switch and unplug it from the power outlet. 2 Remove the coarse filter and the fine filter. 3 Scoop out the water from the dishwasher tub.
Troubleshooting Type of fault on the display Action F10 Overfilling water 1 Clear the drain pump. See the section Care and maintenance instructions. If the problem persists, call the Customer Care Center. F11 Water outlet fault See “Water remains in the dishwasher above the filters” in the table “Problem” below. If the problem persists, call the Customer Care Center. F12 Water inlet fault Check that the water supply valve is on. If the problem persists, call the Customer Care Center.
Problem Possible causes Action The dishes are not clean. The spray arms do not rotate. Check that the dishes are not blocking the spray arms. Spray arm holes or bearings blocked. Clean the spray arms. See the chapter Care and maintenance instructions. Unsuitable dishwashing program. Choose a longer program. Incorrect detergent dosage. Dose according to water hardness. Far too much or far too little detergent can result in poor dishwashing results. Detergent is too old.
Problem Possible causes Water remains in the dishwasher above the filters. The filters are blocked. Bad odor in dishwasher. Action Clean the coarse and fine filters. The filters are not fitted correctly. Check that the filter handle is locked in the stop position. The handle should point straight out from the dishwasher. Debris in the drain pump. Clean the drain pump. See the chapter Care and maintenance instructions. Kink in drain hose. Check that the hose is free from kinks and sharp bends.
Technical information Technical data Height: 32 1/4 - 34 3/8" Width: 24" Depth: 22" Weight: 100 lb (45 kg) 1) Water pressure: 4.2–140 psi Electrical connection: See serial number plate Rated power: 1) See serial number plate Weight can vary due to different specifications.
Installation instructions [''] 47 1/8 24* 5 1/8 - 7 3/8 27 1/2 26 3/4 - 30** 32 1/4 - 34 3/8 22 2 1 1/8 - 3 3/4 * If European widths of 23 5/8'' (600 mm) is required, remove the trim kit. **Door length. Nominal dimensions. Actual measurements may vary. Important safety instructions • Connections to electricity, water, and drainage must be performed by a qualified professional. • Always follow applicable regulations for water, drainage, and electricity.
Drain connection See the separate installation instructions for necessary information. This dishwasher is suitable for installing in a raised recess (to attain an ergonomic working height). This means that the dishwasher can be placed so that the drain hose runs to a lower level than the bottom of the dishwasher, such as by routing it directly to a floor drain. The dishwasher is fitted with an integrated anti-siphon device to prevent the machine from being emptied of water during the wash cycle.
Service Limited Warranty – Residential Appliances ASKO Distribution North America, LLC. (“ASKO”) warrants to the original purchaser (the “ASKO Customer”) of the ASKO product (the “ASKO Product”), who purchased the ASKO Product from a distributor, dealer, manufacturer’s representative or other seller who has been authorized by ASKO, that this ASKO Product is free of defects in materials and/or workmanship, subject to the terms and conditions set forth herein.
Notes 23
Quick start guide Load the baskets (See page 5.) 1. Do not rinse dishes under running water before loading them in the dishwasher. Simply scrape off large food particles before loading the dishwasher. Check that the spray arms can rotate freely Check also that the water supply valve is on. 2. Don't forget! Empty the coarse filter and clean the fine filter when necessary. (See page 14.