OPERATING INSTRUCTIONS Dishwasher DBI654IB
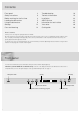
Contents Front panel Safety instructions Before washing for the first time Loading the dishwasher Using the dishwasher Settings Care and cleaning 2 3 4 5 8 12 14 Troubleshooting Technical information Installation ASKO Service Information for test institute Your notes Quick guide 16 19 20 24 25 26 28 Dear Customer, Thank you for choosing this quality product from ASKO. We hope it will meet your expectations and fulfil your needs for many years to come.
Safety instructions • Read the operating instructions and keep them in a safe place! • Number of place settings: 15 • Never use the dishwasher for any purpose other than that specified in these operating instructions. • Do not load the dishwasher door or dishwasher baskets with anything other than dishes. • Never leave the dishwasher door open as someone may trip on it.
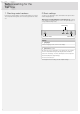
Before washing for the first time 1. Checking water hardness 2. Basic settings Contact the local water utility to check the water hardness in your area. This is important with regard to how much detergent and rinse aid to use. To switch on the dishwasher, press and hold the main power switch until the display lights up. "Welcome to your new ASKO. This is a first time set up." is shown on the display. It is important that you choose the right settings to ensure good dishwashing results.
Loading the dishwasher 3. Top up with rinse aid Energy-efficient dishwashing By using rinse aid you will improve your drying result. You will also achieve a better dishwashing result with glassware and dishes. Run programs only with a full load Wait to run a program until the dishwasher is full. This way you save energy. Use the Rinse and hold program to rinse the dishes if there are any unpleasant odours while you wait for the dishwasher to become fully loaded.
Fragile dishes The dishwasher's baskets Some cookware is not dishwasher safe. This can be for several reasons. Some materials cannot withstand strong heat, others can be damaged by dishwashing detergent. The dishwasher is equipped with a top cutlery tray, an upper basket and a lower basket with a cutlery basket. Exercise caution with, for example, handmade items, fragile decoration, crystal/glassware, silver, copper, tin, aluminium, wood and plastic. Look for the "Dishwasher safe" marking.
glasses are placed on the wine glass shelf and knives are placed in the knife stand on the right (if fitted). Foldable tines Lower the foldable tines (plate supports) when washing pots and pans. Release the foldable tines by pressing the catch inwards before adjusting their position. Raising the upper basket 1 Pull out the upper basket. 2 Grab the sides of the upper basket with both hands and lift it up. Lowering the upper basket 1 Pull out the upper basket.
Using the dishwasher Cutlery basket with lid Add detergent Press to open The cutlery basket lid can be removed and used, for example, as an extra cutlery basket in the upper basket (see below). 1 Prewash detergent compartment 2 Main wash detergent compartment Detergent is added according to water hardness. Follow the instructions on the detergent packaging. Too much detergent can result in less effective dishwashing and also entails greater environmental impact.
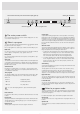
Press and hold the main power switch until the display lights up. Starting the dishwasher START Eco STOP 2:00 Speed mode Select the program Select a program mode The main power switch Press and hold the main power switch until the display turns on. Also check that the water tap is on. Select a program To select a program, press the Navigation button or until the desired program is shown on the display. Choose a programme to suit the type of dishes and how dirty they are.
Night mode Lower noise level during the dishwashing program. The program time is extended. Intensive mode Improves the dishwashing results, but the dishwasher uses more energy and water. The program time is extended. Select an Option To select an option, press the option button until the desired option is shown on the display. The available options vary between programs. Extra Dry A higher temperature in the final rinse and a longer drying cycle improve the drying results if you activate this option.
25 25 25 25 25 ECO wash 4) Heavy wash Auto wash Sanitation wash Time program 20 20 20 Quick Pro wash Upper half wash Lower half wash Connection to hot water, approx. 60 °C. The energy label performance figures are based on this program which is recommended for normally soiled load (no options). 4) 1.2 1.2 1.1 0.8 1.4 Connection to cold water, approx. 20 °C. 2:20 2:20 1:00 1:40 1:10 3) 60 °C 60 °C 55 °C 50 °C 70 °C 0.9 0.01 0.5-1.6 1.1 0.9-1.5 1.1 0.
Settings Open the dishwasher's Settings menu To open the dishwasher's Settings menu, press the Navigation button using the mode selector . or until Settings menu is shown on the display and confirm your selection To exit the dishwasher's Settings menu, select Exit and confirm your selection using the mode selector . Navigation buttons for choosing setting Mode selector to confirm current setting START 1� Language Settings English STOP Current setting Settings Options 1.
Settings Options 8. On/Off Super rinse Super rinse adds two extra rinses. Activated in the following programs: Heavy wash ECO wash Sanitation wash Plastic wash Lower half wash Upper half wash 9. High temperature On/Off Activate the setting High temperature to improve the dishwashing results. Energy consumption is slightly increased.
Care and cleaning Coarse filter The coarse filter traps larger food particles, which cannot get past the drainage pump. Empty the coarse filter as necessary. Top spray arm • The upper basket must be removed before the top spray arm can be released. Pull out the upper basket and turn the basket catch on each runner outwards (see illustration). The basket can now be removed. Coarse filter 1 Lift the coarse filter by the handle. 2 Empty the coarse filter.
Unblocking the drainage pump NOTE! If the dishwasher still contains water after the programme has finished, something may be blocking the drainage pump. Such items are easily removed. Do not forget to replace the drainage pump stop. 1 Turn off the machine using the main power switch and unplug it from the wall socket. 2 Remove the coarse filter and the fine filter. 3 Scoop out the water from the dishwasher tub.
Troubleshooting Type of fault on the display Action F10 Overfilling water Clear the drainage pump. See the chapter Care and cleaning. If the problem persists, call the service department. F11 Water outlet fault See “Water remains in the dishwasher” in the table “Problem” below. If the problem persists, call the service department.
Problem Possible causes Action The dishes are not clean. The spray arms do not rotate. Check that the dishes are not blocking the spray arms. Spray arm holes or bearings blocked. Clean the spray arms. See Chapter Care and cleaning. Unsuitable dishwashing program. Choose a longer programme. Incorrect detergent dosage. Dose according to water hardness. Far too much or far too little detergent results in poorer dishwashing results. Old detergent. Detergent is a perishable product.
Problem Possible causes Action Water remains in the dishwasher. The filters are blocked. Clean the coarse and fine filters. The filters are not fitted correctly. Check that the filter handle is locked in the stop position. The handle should point towards the back of the dishwasher. Debris in the drainage pump. Clean the drainage pump. See the chapter Care and cleaning. Kink in drainage hose. Check that the hose is free from kinks and sharp bends. Blocked drainage hose.
Technical information Information on energy labelling Energy labelling Australian standard: AS/NZS 2007 Number of place settings: 15 Dishwashing programs: ECO wash 1) , no options Program time: 2:50 hours:minutes Connection: Cold water 20 °C Test method for noise measurement: IEC 60704-2-3 1) This dishwashing program is the standard cleaning cycle used to compile the energy labelling information.
Installation [mm] 1198 596 559 519 131-186 670 700 819*- 872 714 9 50 30 30-94 *Remove locking nuts for an installed height of 820-821 mm. Nominal dimensions. Actual measurements may vary. Safety instructions Transport protection for the door • Connections to electricity, water and drainage must be performed by a qualified professional. • Always follow applicable regulations for water, drainage and electricity.
Placing the dishwasher Affix the protective film The dishwasher can be installed built-in, completely freestanding or partially built-in. Attach the protective film (packed in the document bag) to the underside of the worktop. The protective film is to protect the worktop from moisture. 820-875 A. Built-in The dishwasher is intended for installation under a worktop. The recess dimensions are illustrated. Holes for wires/cables need not be larger than 38 mm in diameter.
Adjust the height and slide the dishwasher into place Drainage connection 1 Start by measuring the height from the floor to the bottom edge of the worktop. 2 Measure the height from the floor to the top edge of the dishwasher. 3 Lean the dishwasher forwards a little and roughly adjust the rear foot by turning the adjustment screw at the front clockwise to raise and anticlockwise to lower the dishwasher (see illustration below). Use a broad screwdriver or a socket screwdriver.
Connection to hot water supply Connect the dishwasher to the hot water supply (max. 70 °C) if the building is heated using an energy-efficient means such as district heating, solar power or geothermal power. Choosing a hot water connection cuts dishwashing times and reduces the dishwasher's energy consumption. Screwing the dishwasher into place (Applicable only to built-in dishwashers.) NOTE! Do not exceed the permitted water supply temperature.
ASKO Service Dishwasher kick panel Information about your product The dishwasher is supplied with a kick panel. There is a QR code on the compliance plate. Scan the code to view information about your product. Contact the service department Read the chapter Troubleshooting before contacting the service department. If you have encountered a problem that you cannot resolve, please contact your nearest dealer, see www.asko.com. When making contact, provide the details on the serial number plate.
Information for test institute Request test institute information via e-mail dishwashers@appliancedevelopment.com. The request should include the details on the product’s serial number plate. Include the article number (1) and the serial number (2). 1 2 ART. NO.: SERIAL NO.
Your notes 26
Your notes 27
Quick guide Load the baskets (See page 5.) 1. Do not rinse dishes under running water before loading them in the dishwasher. Simply scrape off large food particles before loading the dishwasher. Check that the spray arms can rotate freely Check also that the water tap is on. 2. Don't forget! Empty the coarse filter and clean the fine filter when necessary. (See page 14.) Add detergent The detergent compartment has one smaller compartment for the prewash and one for the main wash. (See page 8.) 3.