INSTALLATION INSTRUCTIONS Dishwasher
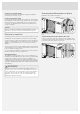
Installation instructions [''] 47 1/8 24* 5 1/8 - 7 3/8 28 32 3/4 - 34 7/8 28 1/8 22 2 4 1/4 * If European widths of 23 5/8'' (600 mm) is required, remove the trim kit. Nominal dimensions. Actual measurements may vary. Important safety instructions Transport protection for the door • Connections to electricity, water, and drainage must be performed by a qualified professional. • Always follow applicable regulations for water, drainage, and electricity.
Placing the dishwasher Fit the protective film The dishwasher is intended to be built in under a countertop. The built-in measurements are shown in the illustration. Make sure that the cord and hose hole's edges are even and will not damage the drain and inlet hoses or the power cord. Fit the protective film (packed in the document bag) to the underside of the countertop. The protective film is to protect the countertop from moisture.
Adjust the height and slide the dishwasher into place Drain connection 1 Start by measuring the height from the floor to the bottom edge of the countertop. 2 Measure the height from the floor to the top edge of the dishwasher. 3 Lean the dishwasher forward a little and roughly adjust the rear foot by turning the adjustment screw at the front clockwise to raise and counterclockwise to lower the dishwasher (see illustration below). Use a flat head screwdriver or a socket screwdriver.
Connection to cold water supply Connect the dishwasher to the cold water supply if the building is heated using oil, electricity, or gas. Screwing the dishwasher into place (Applicable only to built-in dishwashers.) Connection to hot water supply Connect the dishwasher to the hot water supply (max. 140 °F (60 °C)) if the building is heated using an energy-efficient means such as district heating, solar power, or geothermal power.
Dishwasher toe kick The dishwasher is supplied with a toe kick.
Notes 7
en (09-17) Item No.: 671470. Rev. 02. We reserve the right to make changes. www.askona.