ENGLISH ENGLISH ASKO USE AND CARE GUIDE SAVE THESE INSTRUCTIONS FOR FUTURE REFERENCE m fro g ! T e nc a t i n e AN a T r OR rform o p e or th P IM pe a l l it f t g s be e a d usin e r h e t t y e r, efor e g b r To r d ions u y o truct e.
IMPORTANT SAFETY INSTRUCTIONS WARNING! To reduce the risk of fire, electric shock, or injury to persons when using your appliance, follow basic precautions, including the following: ♦ Read all instructions before using the appliance. ♦ Do not wash or dry articles that have been previously cleaned in, washed in, soaked in, or spotted with gasoline, dry-cleaning solvents, cooking oils, other flammable or explosive substances as they give off vapors that could ignite or explode.
Your new energy-efficient ASKO dryer is designed to give you maximum drying performance using less energy. To make the most of the dryer’s functions and features, we recommend that you read this manual carefully before using your machine for the first time. For operating instructions, refer to the section in this guide for your specific model. Model T731 has timer-controlled drying in addition to the four automatic programs. Below is an illustration of the parts and features of your ASKO dryer.
INSTALLATION INSTRUCTIONS Read these instructions carefully and completely before you install the machine. The installation should be carried out by a qualified person who is familiar with all local codes and ordinances for electrical and plumbing connections. NOTE: Cosmetic damage must be reported to your dealer within five days from the date of purchase. After unpacking the dryer, thoroughly check the unit for cosmetic damage.
You will need a UL-CSA-approved, 4-inch ridged metal exhaust duct. To connect the exhaust duct to a ventilation outlet, follow the steps below: NOTE: The more bends and the longer the duct, the less air will circulate through the machine, which will impede drying performance. We recommend that you cut off any excess exhaust duct and run the duct with as few bends as possible. And make any necessary bends as gentle as possible. 1.
FREESTANDING INSTALLATION The dryer can be placed next to the washing machine. It is essential that the machine is leveled and the locknuts are tight to eliminate vibration noise. There should be at least 1/2” (12 mm) of space between the washer and dryer. BUILT-IN INSTALLATION ASKO dryers can be installed beneath a cabinet or worktop with a minimum height of 34” (864 mm).
WARNING! Before starting this procedure, be sure the power is turned off at the breaker/fuse box. Power Supply Cord You will need a 3-wire power supply cord with three No. 10 copper wires and a matching 3-wire receptacle of NEMA Type 10-30R, as illustrated below: To connect a 3-wire power cord to the dryer, follow the steps below. NOTE: 1. The numbers in the illustration below correlate to the step numbers. Turn the power off at the breaker/fuse box. 2. Remove terminal block cover. 3.
STACKED INSTALLATION ASKO dryers can be mounted on top of any matching ASKO washer. Mounts are supplied with the machine. The metal brackets are attached to the lower back of the unit. The plastic cups are packed inside the dryer. Two metal brackets for securing the dryer to the washer 5. Lift the dryer into position. Raising the front edge, push the dryer backwards until it engages with the brackets on the back of the washer. Two plastic cups to secure the dryer legs.
The door hinges on ASKO dryers are reversible. The dryers are shipped left-hinged. To reverse them, follow the steps below: 11. Tighten the screws on the sides of the doors to hold the magnetic catch and cover plate in place. WARNING! 12. Using a flathead screwdriver, carefully remove the plastic plugs in the upper and lower edge of the door and place them in the empty holes on the opposite side.
PREPARING THE LAUNDRY With proper attention to how you prepare your laundry items for washing and drying, your wardrobe and linens will look like new for years. SORTING THE LAUNDRY For best drying results, clothes should be sorted properly. Most importantly, you should follow the care label instructions (see next page). Below are some suggestions on how to sort your laundry for drying. ♦ ♦ ♦ ♦ ♦ Permanent press items should be dried together.
Page 11 ENGLISH ENGLISH
T701 OPERATING INSTRUCTIONS WARNING! To reduce the risk of electric shock or injury to persons, read the ”Important Safety Instructions” section on page 2 before operating this appliance. THE CONTROL PANEL Power Button Start Button Temperature/Air Fluff Control Turns power to the machine off and on. Press to start a program. Turn to select Normal or Low drying temperatures or the Air Fluff program.
WARNING! To reduce the risk of electric shock or injury to persons, read the ”Important Safety Instructions” section on page 2 before operating this appliance. THE CONTROL PANEL Power Button Start Button Temperature/Air Fluff Control Turns power to the machine off and on. Press to start a program. Turn to select Normal or Low drying temperatures or the Air Fluff program. Temperature Start Programs Timed dry 180 min Normal Power Indicator Light Air fluff Glows when the power is turned on.
T731 OPERATING INSTRUCTIONS WARNING! To reduce the risk of electric shock or injury to persons, read the ”Important Safety Instructions” section on page 2 before operating this appliance. THE CONTROL PANEL Start Button LED Window Displays program number, dry time selected, remaining program time, etc. Press to start a program. Power Button Turns power to the machine on and off. Programs Iron dry Timed dry Power Indicator Light Air fluff Extra dry Dry Normal dry Glows when the power is turned on.
Your ASKO dryer has our state-of-the-art Sensidry system. This means it has a humidity sensor that ensures different fabrics always dry thoroughly. This sensor turns off the heat when the laundry has reached the appropriate dryness. activate the humidity sensor. You should be careful when using this option not to overdry the fabrics. This program automatically uses the Low temperature setting, but you can change it to Normal by depressing the Temperature button.
BUZZER PROGRAM MEMORY Press this button to set a buzzer to sound for three seconds when a program is complete. The indicator light will stay lit when this option is on. The dryer is designed to retain the settings last selected with each program. For example, if you select Normal Dry, the Low temperature option, a 2-hour anti-crease, and Quick cool-down, next time you select Normal Dry these options will automatically be selected.
WARNING! To reduce the risk of electric shock or injury to persons, read the ”Important Safety Instructions” section on page 2 before operating this appliance. THE CONTROL PANEL Preset Programs LCD Window Press one of these buttons to select a program. Power Button Displays the program, temperature settings, and program run time. Press to turn power to the machine on and off. P1 Power Indicator Light P2 Start Glows when the power is turned on. Start Button Press to start a program.
THE PRESET PROGRAMS ASKO dryers are delivered with the four most commonly used programs. The table below lists the preset programs and the settings for each. To select a program, simply press one of the program buttons and press Start. For additional programming options, refer to “Customizing the Preset Program Buttons” below. With ASKO’s Sensidry™ system, you need never worry about over-drying your laundry. Just select the proper program for the type of fabric you’re drying and Sensidry does the rest.
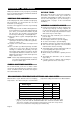
OPTIONS AVAILABLE WITH EACH PROGRAM Program Dry Temp Cooling Time (1) Anti-Crease Buzzer Delay Start Extra dry Normal or Low Normal or Quick 1, 2, or 3 hours On or Off 1 to 24 hours Dry Normal or Low Normal or Quick 1, 2, or 3 hours On or Off 1 to 24 hours Normal Dry Normal or Low Normal or Quick 1, 2, or 3 hours On or Off 1 to 24 hours Iron Dry Normal or Low Normal or Quick 1, 2, or 3 hours On or Off 1 to 24 hours n/a n/a 1, 2, or 3 hours On or Off 1 to 24 hours Normal o
Timed Dry and Air Fluff The Delayed Start Program When you select Timed Dry or Air Fluff on the program menu, the word “Time” and a number (of minutes) will flash in the upper right corner of the LCD window. This indicates you must select a program time (5 to 90 minutes in 5-minute increments). This program lets you delay starting the dryer for up to 24 hours. This feature is useful in areas where utility companies offer discount rates during off-peak hours. 1. Press MENU until “Select time” displays.
There are eleven languages available for the LCD window: ♦ ♦ ♦ ♦ ♦ ♦ English French Spanish Portuguese Italian German ♦ ♦ ♦ ♦ ♦ Swedish Danish Norwegian Netherlands Finnish CHILD-SAFE START As a safety measure, you can program the T761 and T781 not to start unless the Start button is held down for three seconds. To do this, follow the steps below: 1. Turn the machine off then on. 2. Press ENTER five times, then press P3 five times. (This must be done within 15 seconds.) 3.
CARE AND MAINTENANCE INSTRUCTIONS CLEANING THE LINT FILTER The wear on fabrics in a tumble dryer is insignificant. The lint caught in the lint filter is dust and fiber residue that has been formed when the garments have been worn. The lint filter must be cleaned after each load. If this is not done, drying performance will suffer, as insufficient air will pass through the drum. The machine may also overheat after a while, which will cause it to stop automatically.
1. Turn off the main power to the machine. 2. Remove the two 20-torx screws on the bottom of the front panel then grasp the bottom of the panel and pull it forward and down. 3. Unscrew the two 10-torx safety screws (A) on the bottom of the fan cover and fold out the four tabs (B). 4. Remove the fan cover. The condenser should be cleaned on a regular basis, preferably monthly. If you have pets, you should probably clean it more often. To clean the condenser, follow the steps below: 1.
TROUBLESHOOTING If you experience a problem with your dryer, you should review the following list of frequently encountered situations or go to our website at www.askousa.com. It could save you the cost and inconvenience of a service call. Model Name (e.g., T701, T761, etc.) Type plate (see below) Even though the product is under warranty, if the problem is not caused by defective product workmanship or materials, you will be charged for a service call.
MODELS T701, T721, T731, T761, T781 Be sure to complete the Warranty Registration Card you received with your appliance and mail it to AM Appliance Group to validate your appliance warranty. Cosmetic damage must be reported to your dealer within five days from the date of purchase. After unpacking the dryer, thoroughly check the unit for cosmetic damage.
INDEX A Air Fluff program T701 T721 T731 T761 & T781 Anti-crease option T701 T721 T731 T761-T781 Automatic door switch H Hinges, reversing 12 13 15 19 I 12 13 15 18 2 Languages, changing the LED (T761/T781) Laundry tips LCD window (T761/T781) LED window (T731) Lint filter Load sizes, recommended B Built-in installation Buzzer option T701 T721 T731 T761/T781 6 12 13 16 18 C Care and cleaning Care label symbols Changing the LED readouts (T761/T781) Child-safe start T731 T761/T781 Condensation container