Operating Instructions Washing Machine Save these instructions for future reference Dear Asko Customer, Thank you for choosing this quality product from Scandinavia, which was made in Sweden. We want you to feel assured that the inside of your new machine is just as good as the outside and that the ethics and standards that went into the production of this machine are just as high as the quality and performance that you will receive from it. We hope that this product will give you many years of pleasure.
Contents Before using your machine for the first time Transport protection Packing material Washer door Checking water hardness Important safety instructions Grounding instructions Installation Overflow guard function Transport/Winter storage Disposal Child safety Keep an eye on children! Child-safe Start Parts of the washing machine Detergent compartment Front panel 2 Downloaded From WashingMachine-Manual.
Contents Selecting Options Temperature Spin Rinse High Water Level Delayed Start Settings You can change the following settings: How to choose the settings: Pre-soak Anti Wrinkle function Clock Buzzer Volume Child-safe Start Automatic Door Opening Language Temperature Back Care and maintenance instructions Checking the filter and drain pump Cleaning the detergent compartment Cleaning the outside of the machine Cleaning the inside of the machine to avoid unpleasant smells Rinse holes under the paddle If you
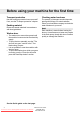
Before using your machine for the first time Transport protection Checking water hardness Has the transport protection been removed? If not, see the "Transport protection" chapter. The quantity of detergent needed depends, among other things, on water hardness. Phone your local water company to check the water hardness in your area. Packing material Please sort waste materials in accordance with local guidelines.
Important safety instructions To reduce the risk of fire, electric shock, or injury to persons when using your appliance, follow basic precautions, including the following: • Read all instructions before using the appliance. • Do not run appliance while you are out of the home.
Important safety instructions B) Grounding instructions for a permanently connected appliance: This appliance must be connected to a grounded metal, permanent wiring system, or an equipment-grounding terminal or lead on the appliance. Note This manual does not cover every possible condition and situation that may occur. Use common sense and caution when installing, operating, and maintaining any appliance.
Child safety Keep an eye on children! Child-safe Start Watch out for children! • Laundry detergents are corrosive, so always keep them out of reach of children. • Should a child swallow detergent, give plenty to drink immediately, i.e., one or two glasses of milk or water. Do not try to induce vomiting. Seek medical advice immediately: The National Poison center phone number is 1-800-222-1222. • Always close the door and start the appliance as soon as you put in the detergent.
Parts of the washing machine 1. Outer door 1 2 3 4 2. Main power switch 3. Detergent compartment 4. Program panel 5. Type plate (on the inside of the glass door) 5 6. Hatch for drain pump 7. Drain pump (behind hatch) 6, 7 8 Downloaded From WashingMachine-Manual.com Manuals Customer Care Center 1-800-898-1879 www.askousa.
Detergent compartment 1. 2. 3. 4. Pre Wash Main Wash Main wash liquid detergent. Fabric softener 4 1 3 2 The detergent drawer automatically dispenses the detergent and fabric softener at the appropriate times. Simply pour the measured amounts of detergent and softener into the proper compartments (as illustrated) and close the drawer. Note To avoid oversudsing, do not put detergent in the prewash compartment unless you are using one of the Heavy wash programs which has a prewash cycle.
Front panel 1 2 1 Main power switch 2 Program selector 3 Display window 10 Downloaded From WashingMachine-Manual.com Manuals 4 5 3 4 Start/Stop 5 Door opening Customer Care Center 1-800-898-1879 www.askousa.
Advice and tips before washing Here are some tips that may help you before washing. Sorting your laundry Sort items according to: • how soiled they are • color • material Clothing • Close zippers so that they don’t harm fabrics. • New colored items may contain excess dye and should therefore be washed separately the first few times. • Turn delicate items inside out. This reduces the risk of burling and fading.
Advice and tips before washing Wash cycle Tumble dry cycle Tumble dry heat setting Wash water temperature Special drying instructions Bleach instructions Ironing instructions Dry clean symbol 12 Downloaded From WashingMachine-Manual.com Manuals Customer Care Center 1-800-898-1879 www.askousa.
Advice and tips before washing Colored cotton Reducing allergic reactions Colored cotton items labeled 140°F (60°C) should be washed at 140°F (60°C) the first time in order to remove any excess dye. If you do not do so, there is a risk that the color will run. Use detergent without bleach in order to preserve the color of the fabric. The washing machine has a Super Rinse option. Use this for people with sensitive skin, such as those with allergies and small children.
Advice and tips before washing Dyeing fabrics Detergents If you want to dye fabrics in the machine, select the Normal program with the Super Rinse option On. Select temperature according to the dye manufacturer’s recommendations. Choose a low spin speed if the fabric to be dyed is a blended material such as polyester/cotton. Laundry detergents are available in low-, normal- and high-sudsing formulas. A detergent´s ability to clean is not relative to the amount of suds it produces.
Advice and tips before washing Recommended powder detergents ASKO washers use 50% to 75% less detergent than most other washers. This is because of their low water consumption and the fact that all the wash water is repeatedly circulated through the laundry, ensuring that all the detergent is fully utilized. We recommend that you use powder detergents made specifically for front-loading washers. These are sometimes called HE (High-Efficiency) detergents.
Advice and tips before washing Recommended detergent amounts based on water hardness Water hardness Soft (0-3 grains per gal.) Medium (4-8 grains per gal.) Hard (9+ grains per gal.) Detergent amounts Pre Wash 1 teaspoon 1 teaspoon 1 teaspoon 16 Downloaded From WashingMachine-Manual.com Manuals Customer Care Center 1-800-898-1879 www.askousa.
Operating instructions 1 Sort your laundry. See the "Advice and Tips" section before washing. Note! Place underwired bras in a laundry net. Note! Empty pockets. Coins, nails, and the like can cause damage to the machine and fabrics. See the "Advice and Tips" section before washing. 2 3 Turn on the main power switch. Liquid detergent When using liquid detergent, follow the chart on page 15 for recommended detergent amounts. We recommend always using a wash ball with very thick liquid detergent.
Operating instructions Fabric softener Pour the fabric softener into the compartment with the symbol. Follow the recommendations on the fabric softener packaging. Note! Do not fill above the compartment’s maximum fill level. Otherwise fabric softener will be dispensed too early, which impairs the washing effect. Detergent compartment Push here to open. Pre Wash Fabric softener Main wash liquid detergent. Main Wash 18 Downloaded From WashingMachine-Manual.
Operating instructions 5 Select the program You select the program by pressing the up or down arrow button. The name of the selected program is highlighted and the program end time appears on the display. Start the program by pressing the Start/Stop button, or press the button in the middle of the arrow buttons to select Options. 1. Auto This program automatically adjusts the length of the main wash and the number of rinses to the amount and type of laundry loaded in the machine. 2.
Operating instructions 9. Wool A gentle laundry program for wool, silk, and garments that should be washed by hand. The highest temperature is 86°F (30°C). The program has a short spin. The maximum spin speed is 800 rpm. 10. Delicate / Hand A gentle laundry program for wool, silk, and garments that should be washed by hand. The highest temperature is 86°F (30°C). The program has a short spin. The maximum spin speed is 800 rpm. 20 Downloaded From WashingMachine-Manual.com Manuals 11.
Operating instructions Menu overview Super Rinse Normal Rinse Economy Rinse 1. Auto 2. Time Choice 205°F 3. 175°F Sani 160°F 4. Stain 5. 140°F White Delayed Start 2000* 1900* Door opening * End 1800 10.20 09.20 * 6. Color 120°F 7. Quick 105°F 1600 * 8. PermaPress 85°F 1400 * 9. Wool Cold 1200 1700 Clock High Water Level Normal Water Level Start/Stop End time 1000 10. Delicate / Hand 11. Rinse 800 12. Spin 400 13. Drain 14.
Operating instructions 6 Close the door and press the Start/Stop button Time remaining The time remaining is shown in hours and minutes. Once a program has been selected, an estimated running time for the complete program is displayed. This may differ from time to time depending on the temperature of the water entering the machine and the size of the load. During the actual program the time counts down in minutes.
Selecting Options You can select options to adjust the washing program to suit your own specific requirements. The machine remembers which options you chose for a program (with the exception of Delayed Start) the next time you select the same program. Of course, you can change this if you want. Temperature 1. Choose the temperature by pressing the program selector (the big arrow) until a temperature is highlighted. 2. Press the up or down arrow button until the desired temperature is displayed.
Selecting Options High Water Level 1. High Water Level means additional water is used during the main wash and rinse cycles. Select High Water Level by pressing the program selector (the big arrow) until the High Water Level symbol is highlighted. Note! The machine takes in the additional water for High Water Level about 15 minutes after the main wash has started. 2. You cannot choose this option with the Auto, Time, Wool, Delicate/Hand, Rinse, Drain, or Spin programs. 3.
Settings You can change the following settings: • • • • • • • • Pre-soak Anti Wrinkle function Clock Buzzer Volume Child-safe Start Automatic Door Opening Language Temperature °C/°F How to choose the settings: 1. Press the program selector (the big arrow) until the program selection menu in the display on the left is highlighted. 2. Then press the up or down arrow button until Settings is highlighted. 3. Press the program selector (the big arrow).
Settings Clock Set the clock to 12 hour, 24 hour, or remaining program time display. 1. Press the up or down arrow button until Clock appears in the middle of the display. 2. Press the program selector again (the big arrow) to access the options menu on the right of the display. 3. Press the up or down arrow button to choose 12 hour clock, 24 hour clock, or remaining program time display. 4. Press the program selector (the big arrow) to save your setting. 5.
Settings Automatic Door Opening The standard setting is for the washer door to open automatically when the program has finished. If for any reason you do not want the door to open automatically, you can program the machine so that the door only opens when you press the Door Opening button (key symbol). 1. Press the up or down arrow button until Automatic Door Opening appears in the middle of the display. 2.
Care and maintenance instructions Checking the filter and drain pump The washing machine has a filter, where coins, hairpins, and the like can get caught. To clean the filter and drain pump: 1. Make sure the machine is empty of water and that it is switched off at the main power switch. Cleaning the detergent compartment Open the detergent compartment and lift out the insert. Rinse it and scrub it clean with a dish brush. Replace the compartment. 2.
Care and maintenance instructions Rinse holes under the paddle If you have hard water If you think that an object, such as a nail or a paper clip, may have fallen through the wash drum, you should check the container under the paddle. Objects of this kind can rust and cause spots on clothing. Nails and other sharp objects can make holes in fabric. If you live in an area with hard water (limescale), the washer drum may develop a grayish-white coating. To remove this, empty a sachet of citric acid, approx.
Troubleshooting The washer door will not open The machine will not start 1. Check that the main power switch is on. 2. Has the power supply been cut off? Check the house fuses (circuit breakers). The washer door cannot be opened using the button with the key symbol if the power supply has been cut off. 1. Is the washer door properly closed? Push it firmly. 2. Is there power? Check the house fuses. 3. Check that you have not selected Delayed Start. Stop the program if you want.
Troubleshooting Error messages The display indicates whether an error has occurred during the program. After taking the measures described below, turn off the machine to exit error message mode. The error messages that may be shown are: The door is not closed If the display shows Close the door, you tried to start a program with the washer door open. Close the door and the program will start. Over filling If the display indicates Over filling: 1. Shut off the water tap. 2.
Technical information Technical data Height: Width: Depth: Weight: Cylinder volume: Max. laundry capacity: Spin speed (rpm) Rated power: Heater output: Water pressure: Wash drum and liquid compartment material: Outer casing material: Water connection: Drain: 32 Downloaded From WashingMachine-Manual.com Manuals 33 1/2'' (850mm) 23 7/16'' (595mm) 23.0" (585mm) 161 (172)lb (with outer door) 13.2gal (50l) 13lb (6kg) 400 - 2000 See serial number tag and rating plate. See serial number tag and rating plate.
Transport protection Before the machine is used, the three transport protection devices should be removed as shown below. Each transport protection device consists of a screw, a washer, and a rubber spacer. After the protection device has been removed, the rubber spacer acts as a plug for the holes for the device and also as a damper. • First remove the screws and the washers. • Then remove the rubber spacers.
Installation instructions Read these instructions carefully and completely before you install the machine. The installation should be carried out by a qualified person who is familiar with all local codes and ordinances for electrical and plumbing connections. Cosmetic damage must be reported to your dealer within five days from the date of purchase. After unpacking the washer, thoroughly check the unit for cosmetic damage.
Installation instructions Drain outlet connection The machine is supplied with the outlet hose already attached. The hose should be extended over a suitable sink edge or drain pipe at a height of 24" to 36" (610 mm to 914 mm) above the bottom of the unit. (The lower height is preferable.) Make sure the hose is not kinked. 24" to 36" Warning! Connection to a permanently wired supply point must be made only by a qualified electrician Grounding instructions This appliance must be grounded.
Installation instructions Built-in installation ASKO washers can be installed beneath a cabinet or worktop with a height of 34½" (876 mm). There must be a gap of about ½" (12 mm) all around the machine, including between the rear edge of the machine's top panel and the back wall. The opening width must be at least 24½" (622 mm). Space must also be available for the inlet and drain hoses. See the illustration below for measurements and positions.
Reversing the door 1. Hinge pins (top and bottom) 2. Cover washer 3. Plastic plugs (on the upper and lower edges) Downloaded From WashingMachine-Manual.com Manuals 4. 5. 6. Customer Care Center 1-800-898-1879 www.askousa.
Reversing the door You can choose whether the door is hung on the right or the left. Follow these instructions: 1. Remove the Toe kick. 2. Unscrew the 2 screws on the hinges. 6. Move the plastic plugs on the upper and lower edges of the door. Use a flat screwdriver to remove the plugs. 3. Lift the door up and remove it. Support the door while doing this. 4. Remove both door pins (top and bottom). Fit them on the opposite side of the door. Refit the hinges. 7.
Reversing the door Built-in machine with cover door fitted 4. Remove the cover washers from the hinges. You can choose whether the door is hung on the right or the left. Follow these instructions: 1. Remove the Toe kick. 2. Remove the cover door by undoing the four screws. Support the door while doing this. Undo the screw holding the door magnet in place. Steel door 3. Remove the two cover washer screws on the front of the steel door. Remove the cover washers. 5.
Fitting the wooden door Fitting the wooden door 30.2" (766mm) Width 23 7/16'' (595mm) Front of the wooden door Front of the steel door B 30 5/32” (766mm) 15 5/16” (389mm) A Height 21 27/32” (555mm) 23 7/16” (595mm) C D Back of the steel door Front of the wooden door 2 40 Downloaded From WashingMachine-Manual.com Manuals Customer Care Center 1-800-898-1879 www.askousa.
Service and guarantee It is important to register your product warranty by logging onto www.askousa.com/customercare/registration and filling out all required fields within 90 days from the date of purchase. After doing so, you will be e-mailed a certificate that will extend the original warranty for one additional year. If you do not have access to the internet, complete the warranty card included with the product and mail it to the address on the warranty card within 90 days of the date of purchase.
Service and guarantee Warranty AM Appliance Group will not pay for: Service calls to: 1. Correct the installation of the appliance. 2. Repair damage due to shipment, delivery, installation, misuse or abuse. 3. Instruct how to use the appliance. 4. Replace house fuses or correct house wiring. 5. Correct house plumbing, including drainage problems related to improper installation. 6. Clean or service air device in drain line.
Notes Downloaded From WashingMachine-Manual.com Manuals Customer Care Center 1-800-898-1879 www.askousa.
Quick guide 1 3 Washing • Empty pockets and close zippers. • Read the item’s laundry label. • Sorting laundry. Detergent compartment • Pour detergent into the main wash compartment, and pre-wash compartment as well if required. Pour fabric softener into the compartment on the right with the • Note! If you use liquid detergent, follow the detergent manufacturer’s recommendations. Place underwired bras in a laundry net. • 2 symbol.