
User's Manual


33 of 38
IMPORTANT: If the power light is not blinking green, repeat Step “a” until the power light is
blinking green.
In about 15 seconds the POWER light will change from flashing green to solid green and the PLC
ACT (Power line Communication Activity) light will turn solid green (flashing green when there
is data traffic) indicating they are synchronized with the same NEK.
Congratulations, you are done!
ADDING A THIRD OR MORE PLUGLINK HD AV DEVICES
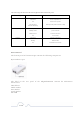
Plug your new PlugLink-ETH-500 (Device C) into an AC outlet. The POWER light indicator should
be lit solid green.
Press the SECURITY button BRIEFLY (1 second) and release. The POWER light should now be
blinking green.
IMPORTANT: If the POWER light is not blinking green, repeat Step “a” until the power light is
blinking green.
This unit is now ready to join the existing HD AV network. This unit will remain in this “adder”
mode for about 2 minutes.
From your existing devices (either device A or device B) press the SECURITY button BRIEFLY (1
second) then release. The POWER light should now be blinking green.
IMPORTANT: If the power light is not blinking green, repeat Step “2” until the power light is
blinking green.
In about 15 seconds the POWER light will change from flashing green to solid green and the PLC
ACT (Power line Communication Activity) light will turn solid green (flashing green when there
is data traffic) indicating they are synchronized with the same NEK.
To add more PlugLink devices; simple repeat this process per device.
Congratulations, you are done!
Notes:
The other devices already in the Power line network with the proper NEK are not
affected and do not need to be reconfigured.
If you disconnect power from any device, its NEK value will remain and will not
default back to “HomePlugAV” NEK.
An adapter can only generate a private key once. To replace a private key, first
reset the unit back to its factory defaults by pressing the Firmware Default Reset
(FW RST) button for 1 second, then follow the procedure above
The use of the SECURITY (Network ID) button is optional. You may also use the
application software described in the manual to set NEK's as well.
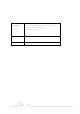
DeviceA DeviceB DeviceC
PLCACTlight
Powerlight
Ethernetlight
Ethernetlight