LS1M User’s Guide PDA OBD2 Scanner Version 1.
Introduction Thank you for your purchase of the LS1M Scanner. The LS1M Scanner is a scan tool that can retrieve engine parameters and trouble codes from GM vehicle using the VPW OBD-2 protocol. That includes most GM cars & trucks from 1996 to 2006. To verify compatibility of your vehicle to the LS1M scanner, look for the diagnostic connector under the dash, on the driver’s side. It’s a 16-pin connector with pins 1-8 across the top & pins 9-16 across the bottom.
Also available is a custom PDA for use with the LS1M scanner. It comes with a PDA, USB hotsync cable, serial hotsync cable, home charger, car charger, Getting Started guide and a PDA software CD. Serial Cable Car Charger Getting Started PDA Home Charger USB Cable PDA Software CD The PDA software CD has some extra programs on it and some more online documentation, but everything you need is contained on the LS1M CD. When the term “CD” is used in this User’s Guide, it’s referring to the LS1M CD.
Both switches ON Turn on the PDA with the power button, located on the top of the PDA. Find the LS1M icon: and tap it with the stylus. The stylus is tucked away near the back of the PDA. To return to the application screen later, click the blue button on the keyboard, and then the Home button (picture of a blue house on it, lower right of the PDA keyboard). Before your first scan, be sure to check the engine type on the Config screen.
Power Mute LS1M Icon Stylus Battery Indicator Shift Home/ Menu Page up/down Hotsync connector (on bottom) Charging the PDA Your PDA has been fully charged before shipping, so it shouldn’t require any charging before first use. To recharge it, plug the USB cable into the bottom connection on the PDA, and plug the other end into any USB port or to the PDA home charger. The light on the top, next to the power button, will turn orange indicating charge mode.
Using the Stylus For clicking buttons on a PDA, you use a stylus, which is just a plastic pointer. The stylus should be in its holder on the back of the PDA. To use it, pull it out & tap the display where you want to “click”. If you don’t have the sounds silenced, you should hear a little ticking noise when you click, and whatever icon you click on will cause its associated program to run. When you first start your PDA, you should see a screen full of program icons.
Create a new user named “LS1M” Select “USB” Click Next, and the Install. It may be necessary to reboot your computer after the installation is complete.
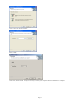
Installing LS1M Synchronizer To enable you to save logs to text files on the PC, you must install LS1M Synchronizer. First install Palm Desktop as described above. If you already have Palm Desktop installed, verify it’s version 4.1 or better (select to Help>About Palm Desktop). Be sure you are logged into the computer with administrator rights to avoid errors. Insert the LS1M CD and find the file “Setup.exe” in the “LS1M Synchronizer” folder. Double-click on this file to start the installation routine.
and another dialog box “LS1M Sycnchronizer” will pop up, which is what you use to save logged data from the PDA to the computer. See “Exporting Logs to the PC” on page 18. Resetting the PDA PDA’s are little computers, and like computers hang up sometimes, every once in a while the PDA can get “stuck”. There’s usually an error message on the screen, or the screen simply freezes. If this happens, you need to do a reset. Unscrew the tip of the stylus to reveal a thin little pointer.
Using LS1M Starting LS1M To start LS1M, click the “home” button until you see the LS1M icon. Tap the LS1M icon to bring up the LS1M Main Menu. From this main menu, tap any of the buttons to bring up the screen you want to use: • Scan: The basic scanning screen. Use this to view and log engine parameters. • Saved Logs: Use this screen to recall data that was logged in the Scan screen. • Auto-Log: Set up the scanner to automatically log data based on any set of conditions, such as SPD > 30 or TPS >= 90.
Select which vehicle you intend to scan by clicking on the appropriate box on the screen, as shown above. (Note that support for the L67 is only available with a combo LS1/L67 cable. Cables purchased before July 2003 may not have the new chip installed.) You can also click the Units button to change from default English units to Metric units. Click the “Cable Test” button while the cable is connected to the car and the car’s key is in the “run” position.
Scan To start the Scan screen, click the “Scan” button on the main menu. This will bring up Page 1 of the Scan screen. Page Number Mode Info Button Scan Button Parameter Value Units Status To start scanning, click the “Scan” button on the screen, or press the Page-Up button. The mode at the top of the screen should change from “Stopped” to “Scanning”, and you should see some values display on the screen. If you see “T.O.” instead, that means there’s been a timeout error (no response from vehicle).
The first page is filled with some of the most common, basic engine parameters, from temperatures & ignition advance, to fuel trims & O2 sensor values. The second page is configured for just ignition voltage. This can be useful to determine the state of health of your battery. Turn the key on, start scanning this page, then start the car. Then click the “Info” button to see the minimum voltage that occurred while cranking the engine over. If it’s less than 9.5V, your battery may be on its way out.
Page 5 has some of the diagnostic parameters. MAF and MAFF show mass air flow sensor output. MISP and MISR are used for misfire diagnosis. MAP shows the manifold air pressure, while IAC shows the idle air controller position in counts, and TPSV shows the throttle position switch output in volts. The final sample page is an example of how you might diagnose engine knock (pinging).
Pick a parameter from the drop-down list, pick a condition, then enter a value. In the example on the left, all scans will be shown that contain ignition timing advance greater than 25 degrees. In the example on the right, scans will be filtered starting when the throttle is over 90% open and stopping when the SPD reaches 70 mph. When a Filter or Range is active, the button will be highlighted as shown below. Fwd/Rev Buttons Scroll Bar To remove the filter, just press the Filter button again.
Playing Back a Log On the main menu, click the Saved Logs button. All of your internally saved logs will appear in the list at the top. Click an entry to view the description. Click View to load the saved data into the Scan screen. Delete will delete the currently selected entry. Delete All will delete all entries. Dump will send the log out the serial hotsync cable. This feature is for mainly Mac and Linux users. The LS1M Synchronizer is designed to work with Palm Desktop for Windows only.
There are three lists that you can cycle between by clicking the List 1, List 2 or List 3 check boxes. To modify the list, click on an item, and then click Change to select a new one. (These lists are kept separate from the Scan screen, so any changes you make here only affect the Auto-Log screen.) Click Save or Cancel to get back to the main screen. Now, to select what conditions will trigger the automatic logging, click the Setup button from the main Auto-Log screen.
In this example, the engine coolant temperature reached a maximum of 209.9 degrees F, the average intake air temperature was 89.9 degrees F, and the maximum vehicle speed was 39.3 MPH. Click on a parameter name or the word “Max” to change the display. Note that only the parameters that were selected to log will be included here. For instance, if KR (knock retard) was not included in parameter list 1, then you can’t view the Min, Max or Avg value of KR during this run.
Exporting Logs to the PC Once logs have been saved on the PDA, you can export them to files on your PC during a hot-synch operation. This requires that Palm Desktop 4.1 and the LS1M Synchronizer are both installed on your computer. See the section below on Palm Desktop for installation instructions. If both Palm Desktop 4.1 and LS1M Synchronizer are installed, you will see this window appear when you hotsynch: The saved logs will appear in the list.
EFILive format is for compatibility with the EFILive scan tool program. Note that if you selected metric units on the LS1M Config screen, then metric units will be saved to the log file by the synchronizer. Clicking the other tabs across the top of the synchronizer window – Ltrims, Accel Tests, Trouble Codes – will show the saved data from the other scan screens.
Click the saved entry at the top. Detailed information will be displayed in the bottom part of the screen. Use the scroll bar to the right of this data to page down & see all the collected cell values. The Clear Log button will erase all saved LTrim collections. Accel Test Start/Stop Speeds Elapsed Time Speed Estimated horsepower Status Vehicle weight This screen will perform an acceleration test of your vehicle.
Trouble Codes To go to the Trouble Codes screen, click the Trouble Codes button on the Main Menu. Current Trouble Codes Tab Control Code Description From this screen you can scan for current and pending trouble codes and reset the SES light. Click the Scan button to scan for trouble codes. The list of current trouble codes is shown by default. Click the Tab control to switch to Pending codes.
Gauge To go to the Gauge screen, click the Gauge button on the Main Menu. The Gauge screen is useful for a quick check in the car. The font is much bigger than the Scan screen. Parameter Min Max Start/Reset/ Clear Buttons Averag Selector Parameter Select a parameter (the little down arrow) to change it. Click the Clear button to clear all selected parameters. Click the Start button to begin scanning. The parameters you picked will be updated on the screen.
Software Upgrades Updates to the LS1M software are free for the life of the scanner. Information on revisions will be available on the LS1M web site: http://www.LS1M.com The LS1M program, like most all PDA programs, consists of one file (LS1M.PRC). This program can be installed just any other 3rd-party software, with the Palm Desktop, or the downloaded setup file can be used instead. See Installing LS1M below.
Click the “Add…” button & navigate to the directory where the new LS1M.PRC is. Select the file LS1M.PRC and click “Done”. Now, the next time a hot-synch is performed, the new version of LS1M will be installed. To verify that the new version actually got installed, start LS1M on the PDA and note the version number at the bottom of the screen. (Go to the main menu & click “About LS1M” to view the startup screen again.
Appendix Scan Parameters Please note that not every vehicle will support every parameter. For example, most V6-equipped vehicles do not have a passenger-side O2 sensor; therefore, codes such as LFT2 & O2R will return “T.O.” (timeout). The engine type selected on the Config screen will also determine which parameters are available on the screen when you’re configuring the scanner.
Enhanced parameters are additional data that can be scanned from most late-model GM vehicles. The LS1 and L67/L36 support all of these listed below.
Licensing Agreement As a purchaser of the LS1M scanner, you MAY: • Use the scanner on as many different vehicles as you want. • Loan the scanner to a friend to use. • Sell the scanner. (The new owner will also be bound by the terms of this licensing agreement.) • Make a backup copy of the program. You may NOT: • Give a copy of the program to anyone else. If someone wants a copy, direct him/her to the web site where he/she can download the demo version.