
Troubleshooting guide


SECTION 4
MAINTENANCE
20
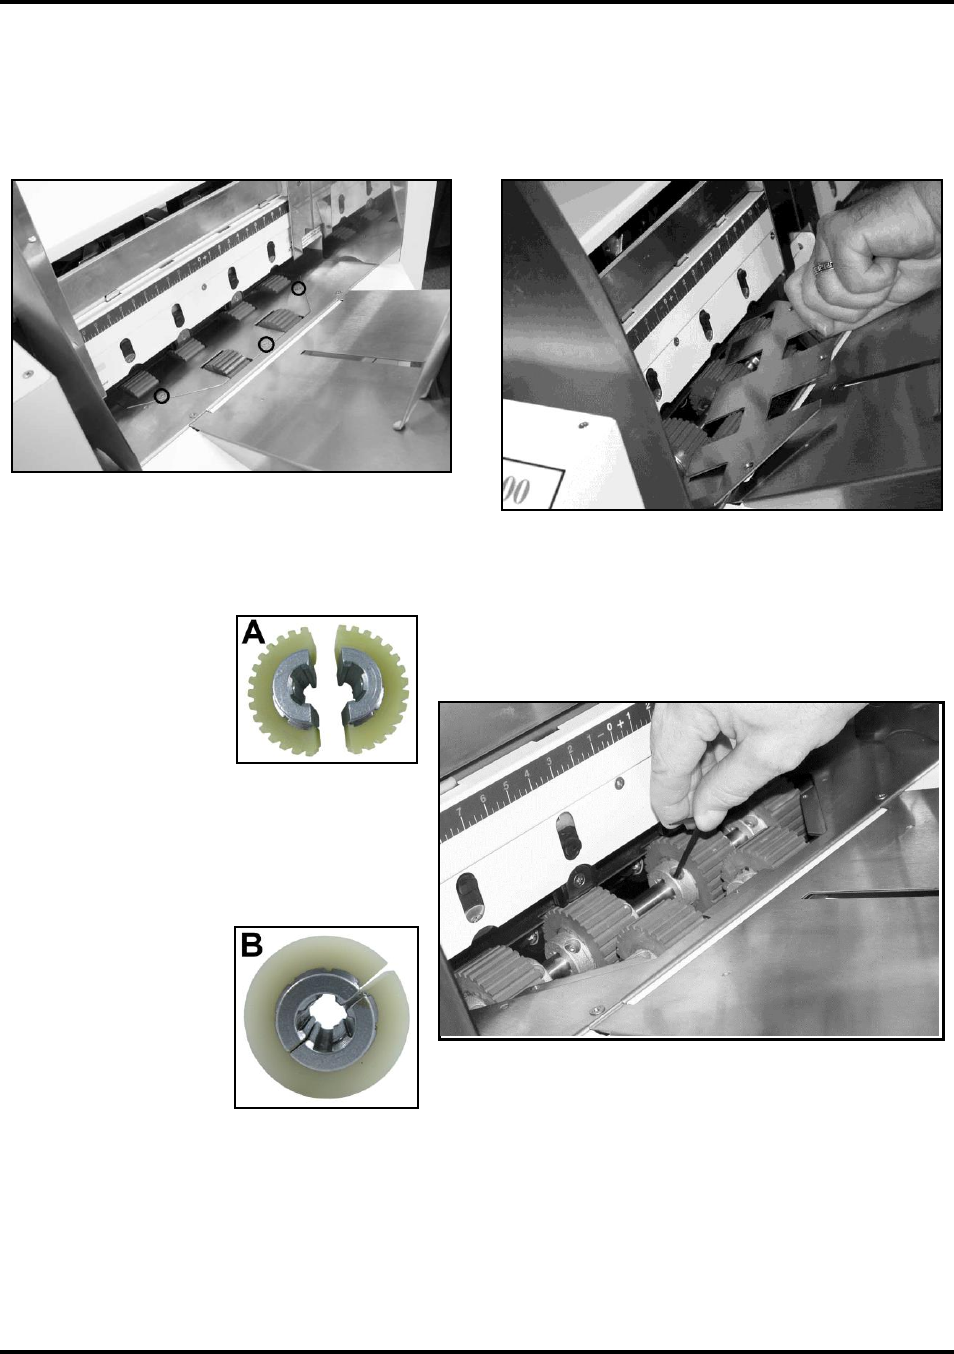
Replacing Feed Rollers
1. Before removing Feed Roller Access Plate, unplug power to Printer.
2. Use a Phillips screwdriver to remove three screws from Feed Roller Access Plate. Then remove Access Plate.
3. Determine which type of Roller (A or B) is installed on Printer.
(Type B replaced Type A which was installed Printers manufactured before May 2012.)
NOTE: All replacement Feed Roller Assemblies are type B. Type A is no longer available.
[A] Ridged tread,
2-pc. Feed Roller.
To Remove:
Rotate Feed Roller
Shaft so Feed
Roller mounting
screws are face up.
Use a 3/32" Allen wrench to remove two
button head cap screws. Remove one half of
Feed Roller. Rotate shaft until two screws
holding second half of Feed Roller are
accessible. Remove those screws, then
remove second half of Feed Roller.
[B] Smooth tread,
1-pc. Feed Roller.
To Remove:
Rotate Feed Roller
Shaft so Feed
Roller mounting
screws are face up.
Use a 3/32" Allen
wrench to remove
two button head cap screws. Rotate shaft until remaining two screws holding Feed Roller are accessible.
Remove those screws, then open and remove Feed Roller.
4. Fit new Feed Roller around Shaft, align holes and replace two screws.
Rotate Shaft and reinstall remaining two screws.
5. Replace Feed Roller Access Plate and fasten with three Phillips screws.