2-WAY REMOTE CONTROL ENGINE STARTER ® USER MANUAL MODEL 2305A For all gas- and diesel-powered vehicles • • • • • AM/FM communication May control vehicle’s OEM safety system or added optional system Protection mode for turbocharged engines Headlight status warning Pager mode (FRANÇAIS AU VERSO) CONSULT SAFETY PRECAUTION SECTION BEFORE USING THIS PRODUCT. SOME FEATURES MAY REQUIRE ADDITIONAL MATERIAL (NOT INCLUDED). PATENT NOS CAN 2.105.426 USA 5.614.883 - 5.617.819 - 5.673.017 - 6.087.
GOVERNMENT REGULATIONS This device complies with the requirements of Industry Canada (IC) - Management of Radio Frequencies, as specified in document CNR-210. Its use is authorized only on a no-interference, no-protection basis; in other words, this device must not be used if it is determined that it causes harmful interference to services authorized by IC.
THANK YOU FOR CHOOSING AN ASTROSTART REMOTE CAR STARTER! Like you, Astroflex is concerned with the environment. This is why we suggest using the two-minute runtime when you remote start your vehicle to warm up engine fluids. We take this opportunity to remind you to properly defrost your windows and remove all the snow from your vehicle before driving on public roads.
SAFETY PRECAUTIONS Before using this product, carefully read the following safety precautions. GENERAL RULES • Never perform a remote start when a person or animal is inside the vehicle. • Do not allow any person or animal to remain inside the vehicle when the engine is running under remote starter control (continuous mode). • Immediately report any malfunction to the AstroStart dealer that performed the installation. • Under no circumstance can this product or its use be modified.
SAFETY SEQUENCE FOR MANUAL TRANSMISSION VEHICLES Your remote starter was designed to force you to perform a series of actions that will ensure that the gearshift lever is in neutral position when you exit the vehicle. This series of actions is called a "Safety sequence" and is aimed at preventing any remote start in situations where remote starting the engine would not be safe.
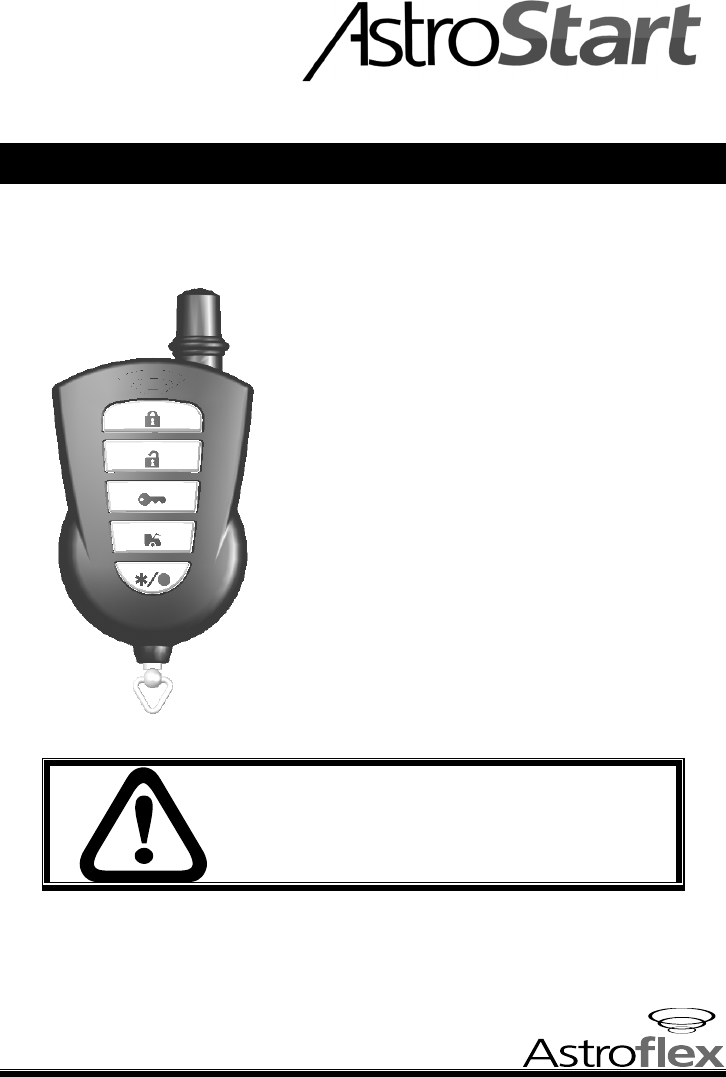
THE REMOTE CONTROL A maximum of four remote controls can be assigned to your vehicle. See your dealer for additional remote controls. NOTE: The range of your remote control can be affected by weak batteries, interference from nearby metal structures, hydro poles, or crowded parking lots. USING YOUR REMOTE CONTROL To send a command, press for two seconds on the appropriate button. Command may not be sent if the button is not pressed long enough.
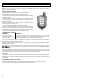
REPLACING THE BATTERY When the sound becomes low-piched on a audio confirmation this means that the batteries need to be replaced. The remote control requires two 3-volt lithium batteries (CR-2430 or equivalent). We strongly recommend keeping a set of replacement batteries in your glove compartment. To replace the battery, remove the screw on the back cover of the remote control, remove old batteries and replace them with new ones.
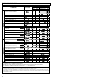
TABLE OF COMMANDS CONFIRMATION COMMANDS BUTTONS VEHICLE LIGHTS GROUP 1 START / CONTINUOUS MODE 1 STOP ACCESS TO COMMAND GROUP #2 LOCK / ARMING * UNLOCK / DISARMING * TRUNK > 4 sec. 1 - > 2 sec. - - 2 / 4* > 4 sec. UTILITY 1 UTILITY 2 C D BEEP 1 2 1-20 (10 sec.) - 1X 1 2X 2 1X /2X 1 /2 - - 1X 1 3 - 1X 2X 1 2 1-4 - 4 2 - 1 - 1 - - - > 4 sec. 1 - 1X > 2 sec.
By default, the commands executed by the remote are those of Group 1. To perform a command from Group 2, you must first press the button (2 sec.), and then press the button(s) corresponding to the desired command. The remote control remains in Group 2 for 10 secondes (to execute the command). If the button is pressed (2 sec.) when the remote is in Group 2, it switches to Group 1. A : The system is ready for a start. B : Start will not be possible. C : Start was successful. D : Start was not successful.
START COMMANDS STARTING THE ENGINE To start engine, press the button (2 sec.). The system automatically adjusts ignition duration for your type of vehicle; parking lights flash once (duration: four seconds) then stay on all the time the engine is running.
CONTINUOUS MODE Continuous Mode function lets you remove the key from the ignition while leaving the engine running. This convenient feature allows you to leave your vehicle for short periods while climate controls remain on. AUTOMATIC TRANSMISSION VEHICLES MANUAL TRANSMISSION VEHICLES To access Continuous Mode, press on the button while engine is idling (see STARTING THE button of the ENGINE on page 8).
LOW TEMPERATURE MODE In Low Temperature (Sentinel) mode, system starts your engine automatically when the temperature falls below a preset level. Engine will run for programmed runtime, after which the system will wait 2½ hours and then start the engine again if temperature is still below preset level. To activate/cancel Low Temperature mode, press and buttons simultaneously (2 sec.). When mode is activated Parking lights will flash 4 times, then, if temperature is below preset level, engine will start.
SECURITY SYSTEM This section applies to an AstroStart safety system (optional) and should not be mistaken for the vehicle’s original system. On such a system, the remote can only warn of an alarm status (optional connections). The bi-directional remote control is in constant communication with your vehicle. Even if you do not ask for status, it will inform you by means of icons on your remote that a door has been opened for longer than 5-minutes, that the engine has stopped, etc.
OPERATION Your alarm system has three different operating modes: active, semi-passive rearming and passive rearming depending on initial programming. See the relevant paragraph for the mode your system was configured in during installation. Following a rearming, the last remote that transmitted a command to the system will receive confirmation of the rearming. ACTIVE In active mode, the alarm must be armed using the remote (see Table of Commands on page 6).
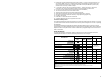
The following table shows the effect that each zone has on the rearming cycle. Protection zone Hood Doors Additional sensor (trunk) Shock sensor Effect on rearming cycle These four zones prolong rearming cycle as long as they remain in violation. Activated by ignition key: Cancels rearming Activated by remote starter: No effect Warning No effect Applying brakes or ignition key in RUN position cancels rearming (until a door is opened, which causes rearming cycle to restart from the beginning).
The following table shows the meaning of zone codes (number of flashes). ZONE CODES FLASHES 1 2 3 4 5 6 7 8 ZONE INDICATED System is armed. A door is/was open. Hood is/was open. Alarm condition is/was detected on shock sensor input. Key is/was in ignition position (RUN). Alarm condition is/was detected on additional sensor input. Additional sensor monitors status of ____________________________________________________ Loss of power (+12V battery supply was removed).
LOCK/UNLOCK COMMANDS AND ALARM SYSTEM ARMING/DISARMING If your vehicle is equipped with electric door locks, several functions can be operated by remote control. These features are optional and may require purchasing additional equipment. Consult your dealer for advice. Arming and disarming the security system also controls Lock/Unlock functions. The arming/disarming functions only apply to models equipped with a security system.
. System equipped with an additional sensor If your system is equipped with a sensor designed to monitor status of trunk (added at time of installation), parking lights will flash three times to confirm command was received. When trunk is released, 3 chirps are emitted to warn that alarm will not take into account the status of this zone or the shock sensor's zone for the next 5 minutes. If you do not release trunk within 10 seconds, the system will rearm trunk automatically.
INDICATOR LIGHT An optional indicator light (LED) can be added to the system to show the status of the safety sequence (on vehicles equipped with a manual transmission), and the status of the safety system, the antitheft system or the Valet Mode. See ‘Indicator Light’ in the ‘Safety System’ Section. The following table shows the codes displayed by the indicator light when performing the safety sequence.
PANIC To activate the panic mode, press either or button and hold for more than 4 seconds. This command activates all deterrents that are connected to the system, parking lights, horn, siren and dome light for 30 sec. or 60 sec. depending on programming made during installation. Panic mode is used to attract attention if you are experiencing difficulties.
ALARM CONDITION CODES Use this command to identify which zone is in violation during arming or which generated alarm condition. Press (2 sec.) on the button, then press the and buttons simultaneously (2 sec.). Parking lights will flash a number of times corresponding to code for protection zone in violation. If more than one zone is in violation, code for the zone with highest priority is shown. See table of codes below. Code 1 2 3 4 5 6 7 8 Protection Zone Priority System is armed. 8 A door is/was open.
CODE LEARNING OF ADDITIONAL TRANSMITTER(S) Four different remote controls can be programmed for a given vehicle. If a fifth remote is added, the first remote is deleted. Note: When the first code learning command is sent, all the old codes are cleared out. therefore if you want to add a new remote, all the old ones must be reprogrammed as well. One or more remote transmitters can be added. To do this, the programming is accessed as follows: Open hood. (Hood switch must be present and operational.
SAFETY CHECKS In order to maintain a high safety standard, proceed with the following checks every month. HOOD SWITCH • Remote start your vehicle. • Open hood. Engine should stop as soon as hood is opened. If engine does not stop immediately, turn main switch to OFF position and leave it off until situation is rectified. Contact your service center.
GEARSHIFT CHECK APPLICABLE TO MANUAL TRANSMISSION VEHICLES Make sure the parking brake is operational, i.e. it has the capability of immobilizing the vehicle. If the parking brake cannot stop the wheels from turning, which is not safe, place the main switch in OFF position until the situation is rectified. DETECTION OF PARKING BRAKE STATUS 1. Carry out the safety sequence, then remote start the engine to confirm the safety sequence is valid. Make sure not to apply the brakes. 2. Release the parking brake.