® 2-WAY REMOTE CONTROL ENGINE STARTER USER MANUAL MODEL RSS-5225 For all hybrid, gas- and diesel-powered vehicles. 2-WAY SST 5-button REMOTE STARTER with LCD display. CONSULT SAFETY PRECAUTION SECTION BEFORE USING THIS PRODUCT. SOME FEATURES MAY REQUIRE ADDITIONAL MATERIAL (NOT INCLUDED). (FRANÇAIS AU VERSO) PATENT NOS CAN 1.130.426 USA 4.345.554 - 5.614.883 - 5.617.819 - 5.673.017 AND OTHER PATENTS PENDING All rights reserved © Directed Electronics Canada Inc.
5225 GOVERNMENT REGULATIONS This device complies with the Industry Canada Radio Standards Specification RSS 210. Its use is authorized only on a no-interference, no-protection basis; in other words, this device must not be used if it is determined that it causes harmful interference to services authorized by IC. In addition, the user of this device must accept any radio interference that may be received, even if this interference could affect the operation of the device.
THANK YOU FOR CHOOSING AN ASTROSTART REMOTE CAR STARTER! Like you, Directed Electronics Canada Inc. is concerned with the environment. This is why we suggest using the two-minute runtime when you remote-start your vehicle to warm up engine fluids. We take this opportunity to remind you to properly defrost your windows and remove all the snow from your vehicle before driving on public roads.
SAFETY PRECAUTIONS Before using this product, please carefully read the following safety precautions. GENERAL RULES • • • • • • • • • • • • • • • • Never perform a remote start when a person or animal is inside the vehicle. Do not allow any person or animal to remain inside the vehicle when the engine is running under remote starter control (continuous mode). Immediately report any malfunction to the AstroStart dealer that performed the installation.
SAFETY SEQUENCE FOR MANUAL TRANSMISSION VEHICLES Your remote starter was designed to force you to perform a series of actions that will ensure that the gearshift lever is in the neutral position when you exit the vehicle. This series of actions is called a "Safety sequence" and is aimed at preventing remote starting in unsafe situations. Should the rear hatch, liftgate or any door be opened at any time, the intrusion will be detected and the engine will not start.
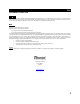
THE 2-WAY REMOTE CONTROL The remote control can control three separate vehicles. A maximum of four remote controls can be assigned to a vehicle. See your dealer for additional remote controls. Front view Side view Antenna LCD screen Side buttons Mini-USB Port Programming Lock button Remote Start Status / Trunk Unlock button FIG 1 USING YOUR REMOTE CONTROL To send a command, press for one second on the appropriate button. The remote control beeps when a button is pressed (if this option is on).
CHARGING THE REMOTE CONTROL 1. Plug the AC adapter into a 110V AC outlet. Insert the mini-USB connector into the mini-USB port located on the side of the remote control (see figure 1, page 5). The text field will display “CHARGE” to indicate that the remote control is charging (The remote remains operational while charging. It can command the system). 2. Once fully charged, the text field will display “FULL”. 3. The remote control is then ready for use.
CONFIRMATIONS EMITTED BY THE REMOTE AN AUDIBLE AND A VISUAL CONFIRMATION ARE EMITTED EACH TIME A COMMAND IS TRANSMITTED. The LCD displays the vehicule status at all time. It is refreshed on every transmission or when the status of the vehicle changes, unless the “Status confirmation” function is disabled. The display shows the last confirmation received. The following diagram shows the usefulness of each icon of the display.
Two types of confirmations are displayed on the remote: Command confirmation: These confirmations are command acknowledgements. The icon corresponding to the command is displayed to confirm the reception of the command. Status confirmations: These confirmations are displayed when the status of a monitored zone changes: door opening, alarm state, etc.
SYSTEM EQUIPPED WITH AN ADDITIONAL SENSOR . If your system is equipped with a sensor designed to monitor the status of the trunk (added at time of installation), the parking lights will flash three times to confirm that the command was received. When the trunk is released, 3 chirps are emitted to warn that the alarm will not take into account the status of this zone or the shock sensor's zone for the next 5 minutes.
UPON ENTERING YOUR VEHICLE... DO NOT TURN IGNITION KEY TO START POSITION. Automatic transmission vehicles To avoid turning the engine off when taking place behind the steering wheel, do not apply the brakes until you have placed the key in the ignition and turned it to the RUN position. Drive as usual.
REMOTE TRANSMITTER PROGRAMMING TABLE SETUP SETTINGS COMMENT ON (Locked) OFF (Unlocked) ON OFF Upon "Status" command Upon any command Never ON OFF Hour Minute 1 to 7 Keypad Page Light Button Clock Colour Keypad Lock/Unlock To receive vehicle page information.
CONTINUOUS MODE Continuous Mode function lets you remove the key from the ignition while leaving the engine running. This convenient feature allows you to leave your vehicle for short periods while the climate controls remain on. AUTOMATIC TRANSMISSION VEHICLES MANUAL TRANSMISSION VEHICLES To access Continuous Mode, send the Start command while the engine is idling (see STARTING THE ENGINE on page 9).
TABLE OF COMMANDS COMMANDS BUTTON 5 START / CONTINUOUS MODE 5 STOP + 5 LOCK / ARMING * 5 PANIC (BUTTON HELD FOR > 4 SEC.) CONFIRMATIONS SENT BY VEHICLE HORN PARKING LIGHTS SIREN * 1 1 - - 1 - 1 1/3 1/3/X 30 / 60 SEC. OR REMOTE SMALL STOP LOCKED PANIC 5 UNLOCK / DISARMING * - 2/4 2/4/X 5 TRUNK (BUTTON HELD FOR > 4 SEC.
SECURITY SYSTEM This section applies to an AstroStart safety system (optional) and should not be mistaken for the vehicle’s original system. On such a system, the remote can only warn of an alarm status (Alarm Link) (optional connections). This half-duplex remote control is in constant communication with your vehicle. Even if you do not ask for status, it will inform you by means of icons on your remote that; a door has been opened for more than 5 minutes; that the engine has stopped; etc.
SEMI-PASSIVE REARMING In semi-passive mode, the alarm must be armed and disarmed using the remote (see Table of Commands on page 13). In this mode, the alarm rearms automatically 25 seconds after disarming (rearming cycle) if doors all remain closed. The indicator light flashes rapidly to indicate that the system is in a rearming cycle.
CONFIRMATION When the alarm is armed, one chirp of the siren and/or flash of the parking lights means that all protection zones are in normal condition and that the system is ready. The remote control sends the following confirmation with one soft chirp. Three siren chirps or parking flashes means that one or more zones are in violation (i.e. at least one door is opened). At that time, the remote sends the same confirmations but with a high chirp, reminding you to correct the violated zone.
SECONDARY FUNCTIONS ANTI-LOCK When connected, this function prevents the system from locking the doors during the automatic rearming if the key is in the ignition. It can also be connected to a switch to select automatic locking as ACTIVE or INACTIVE. TEMPORARY VALET MODE (ALARM) This mode is used to cancel the automatic rearming until next rearming. I.e. the system will not rearm automatically after 30 seconds. However, the system goes back to normal next time it is rearmed (with delay).
INDICATOR LIGHT An optional indicator light (LED) can be added to show the status of the safety sequence (on vehicles equipped with a manual transmission), of the safety system, the antitheft system or of the Valet Mode. See ‘Indicator Light’ in the ‘Safety System’ Section. The following table shows the codes displayed by the indicator light when performing the safety sequence. Repeated flashes 3 double flashes 2 double flashes 1 double flash 1 single flash Fast (10 sec.) Phase or Status Start of sequence.
START FAIL CODES When a remote start attempt fails, it is possible to determine what caused the failure to start. When this occurs, the remote emits a long error beep and vibrates twice. The table below lists the various start fail codes. Note that this code is only displayed once. Code 1 2 3 4 5 6 7 8 9 10 11 12 13 14 15 16 19 20 Failure to start details Module has received a Stop command (remote, safety sequence or timer). Brakes were applied during or after start sequence or module overload occurred.
The engine should stop as soon as the hood is opened. If the engine does not stop immediately, turn the main switch to the OFF position and leave it off until the situation is rectified. Contact your service center. GEARSHIFT CHECK APPLICABLE TO AUTOMATIC TRANSMISSION VEHICLES If the key must be in the ignition for the gearshift to be moved out of “P” (Park), your vehicle is safe as long as keys are kept away from children.
GLOSSARY SIREN The Siren has six different sounds, i.e., the chirps and the six different melodies (only supplied with optional alarm kits). It chirps intermittently (short repeated chirps) during a pre-alarm and continuously during an alarm condition. It can confirm ARM and DISARM commands with short chirps; see table in CONFIRMATION section. This function is programmable as ACTIVE or INACTIVE during installation. HORN The Horn beeps intermittently (short repeated beeps) during an alarm condition.