ZE550ML/ ZE551ML Manuale utente
I10509 Giugno 2015 Edizione riveduta e corretta V2 Cura e sicurezza Linee guida La sicurezza alla guida prima di tutto. Raccomandiamo vivamente di non usare il vostro dispositivo durante la guida di un qualsiasi veicolo. Questo dispositivo deve essere utilizzato solamente in ambienti con temperature comprese fra 5 °C (41 °F) e 35 °C (95 °F). Spegnete il dispositivo nelle aree in cui è vietato l'utilizzo dei dispositivi mobili.
Corretto smaltimento Rischio di esplosione se la batteria è sostituita con una di un altro tipo non compatibile. Smaltite le batterie usate attenendovi alle istruzioni fornite dal produttore. NON BUTTATE la batteria nei bidoni dei rifiuti municipali. Il simbolo X sul bidone dei rifiuti indica che la batteria non deve essere buttata nei bidoni dei rifiuti municipali. NON BUTTATE questo prodotto nei bidoni dei rifiuti municipali.
Indice 1 Concetti di base Benvenuti!................................................................................................................................................. 8 Prepara il tuo ASUS Phone!................................................................................................................. 9 Procedura di inizializzazione............................................................................................................17 Utilizzare il touch screen...................
Accettare o rifiutare inviti ad eventi..............................................................................................43 Ottenere avvisi relativi agli eventi..................................................................................................44 Ottenere aggiornamenti meteo.....................................................................................................46 Do It Later.................................................................................................
5 Gioco e divertimento Utilizzo degli auricolari...............................................................................................93 Collegamento del jack audio...........................................................................................................93 Musica...........................................................................................................................94 Avviare Musica..................................................................................
Timer...................................................................................................................................................... 125 9 ZenLink Conoscere ZenLink....................................................................................................126 Party Link.............................................................................................................................................. 126 Share Link....................................................
1 Concetti di base Concetti di base 1 Benvenuti! Esplorate la semplicità intuitiva di ASUS ZenUI 2.0! ASUS ZenUI 2.0 è un'interfaccia intuitiva e affascinante esclusiva per l'ASUS Phone. ASUS ZenUI fornisce app speciali, integrate con altre app, per soddisfare le necessità individuali di ciascun utente, e rendere la vostra vita più facile, mentre usate il vostro smartphone ASUS. Aiuto ASUS Trovate risposte alle vostre domande più frequenti (FAQ) o inviateci i vostri feedback nel forum per gli utenti.
Prepara il tuo ASUS Phone! Parti e funzioni Date un'occhiata al vostro dispositivo e rendetelo operativo in un batter d'occhio. Jack audio Pulsante di accensione/ spegnimento Microfono Fotocamera posteriore Pulsante volume Flash Fotocamera anteriore Ricevitore Display touch screen Incavo Tasti a sfioramento Altoparlante Microfono Porta micro-USB NOTE: • Rimuovete la cover posteriore per accedere agli slot per la Micro-SIM e per la scheda di memoria microSD.
Installazione della scheda Micro-SIM La scheda Micro-SIM (micro-subscriber identity module) memorizza diverse informazioni come il vostro numero di telefono, i contatti, i messaggi e altre informazioni necessarie per l'accesso alla rete mobile. Il vostro ASUS Phone è dotato di due slot per schede Micro-SIM, in questo modo potete configurare e usare due reti mobili senza aver bisogno di portare con voi due telefoni diversi.
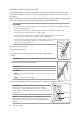
Rimozione della scheda Micro-SIM ATTENZIONE: Usate la massima cura quando maneggiate una Micro-SIM. ASUS non può essere ritenuta responsabile per eventuali danni o perdite di dati di una Micro-SIM. Per rimuovere una Micro-SIM: 1. Spegnete il dispositivo. 2. Localizzate l'incavo presente in corrispondenza dell'angolo inferiore destro. ATTENZIONE! Prestate attenzione quando fate leva sulla cover per sollevarla. 3. Sollevate la cover posteriore e estraetela.
Installazione di una scheda di memoria Il vostro ASUS Phone è compatibile con le schede di memoria dei formati microSD™, microSDHC™ e microSDXC™ con una dimensione massima di 64 GB. NOTA: Alcune schede di memoria potrebbero non essere compatibili con il vostro ASUS Phone. Per prevenire perdite di dati, danni al dispositivo o alla scheda di memoria usate solamente schede di memoria compatibili. ATTENZIONE! • Usate la massima cura quando maneggiate una scheda di memoria.
Rimozione di una scheda di memoria ATTENZIONE! • Usate la massima cura quando maneggiate una scheda di memoria. ASUS non può essere ritenuta responsabile per eventuali danni o perdite di dati di una scheda di memoria. • Per rimuovere una scheda di memoria in sicurezza dovete espellerla correttamente. Per espellere la scheda di memoria andate su Home > App > Impostazioni > Memoria > Smonta dispositivo esterno d'archiviazione. Per rimuovere una scheda di memoria: 1. Spegnete il dispositivo. 2.
Caricare la batteria dell'ASUS Phone La batteria del vostro ASUS Phone è parzialmente carica ma dovete caricarla completamente prima del primo utilizzo. Prima di caricare la batteria del vostro dispositivo leggete le seguenti note e precauzioni importanti. IMPORTANTE! • Usate solamente l'adattatore di alimentazione AC e il cavo micro USB in dotazione per caricare la batteria del vostro ASUS Phone. Usare un adattatore di alimentazione AC diverso potrebbe danneggiare il vostro dispositivo.
IMPORTANTE! • Quando utilizzate il vostro ASUS Phone, collegato ad una presa di corrente, fate in modo che questa sia vicina all'ASUS Phone e facilmente accessibile. • Quando ricaricate la batteria dell'ASUS Phone tramite un computer assicuratevi di collegare il cavo micro-USB ad una porta USB 2.0 o USB 3.0. • Evitate di caricare la batteria dell'ASUS Phone in ambienti la cui temperatura è superiore ai 35°C (95°F).
Accendere o spegnere il vostro ASUS Phone. Accensione del dispositivo Per accendere il dispositivo premete e tenete premuto il pulsante di accensione/spegnimento/ blocco fino a quando il dispositivo vibra e si accende. Spegnimento del dispositivo Per spegnere il dispositivo: 1. Se lo schermo è spento premete il pulsante di accensione/spegnimento/blocco per accenderlo. Se lo schermo è bloccato sbloccatelo. 2.
Procedura di inizializzazione Quando accendete l'ASUS Phone per la prima volta la procedura guidata vi aiuterà nel processo di configurazione del dispositivo. Seguite le istruzioni sullo schermo per selezionare la lingua, la modalità di input, configurare le reti mobile e Wi-Fi, sincronizzare gli account e impostare i vostri servizi di geolocalizzazione.
Consigli per il risparmio della batteria La carica della batteria è la linfa vitale del vostro ASUS Phone. Qui di seguito alcuni consigli che vi aiuteranno a risparmiare il più possibile la carica residua del vostro ASUS Phone. 18 – Chiudete tutte le app che non state usando al momento. – Quando non lo usate mettete il dispositivo in sospensione. – Attivate l'opzione Salvataggio intelligente nell'app Risparmio energia. – Impostate l'audio su modalità intelligente.
Utilizzare il touch screen Usate questi gesti interattivi dello schermo touch per avviare app, accedere alle impostazioni o navigare sul vostro ASUS Phone. Avviare app o selezionare oggetti Opzioni disponibili: • Toccate un'app per avviarla. • Per selezionare un oggetto, ad esempio all'interno di Gestione File, toccatelo. Spostare o eliminare oggetti Opzioni disponibili: • Per spostare un'app o un widget toccate l'oggetto e tenete premuto spostandolo quindi nella posizione desiderata.
Navigazione tra pagine e schermi Opzioni disponibili: • Fate scivolare il vostro dito verso destra, o verso sinistra, per navigare tra le schermate o per scorrere tra le immagini. • Fate scivolare il vostro dito verso l'alto, o verso il basso, per scorrere in una pagina web o in un elenco di oggetti. Zoom avanti Allontanate due dita tra di loro sullo schermo per effettuare uno zoom avanti in Galleria, Maps o su una pagina web.
Zoom indietro Avvicinate due dita tra di loro sullo schermo per effettuare uno zoom indietro in Galleria, Maps o su una pagina web. NOTA: Potreste non essere in grado di ingrandire/rimpicciolire su alcune pagine web in quanto queste potrebbero essere state progettate appositamente per il vostro schermo.
2 Casa dolce casa 2 Casa dolce casa Caratteristiche della pagina iniziale Zen (Home) Schermata Home Sulla schermata Home potrete visualizzare promemoria di eventi importanti, app e aggiornamenti di sistema, previsioni meteo e messaggi di testo di persone importanti per voi.
Introduzione alle icone di notifica Queste icone sono presenti sulla barra di stato e forniscono informazioni sullo stato corrente del vostro ASUS Phone. Rete mobile Mostra la potenza del segnale della vostra rete mobile. 1 Micro-SIM 1 Indica che una scheda Micro-SIM è stata inserita nello slot Micro-SIM 1. 2 Micro-SIM 2 Indica che una scheda Micro-SIM è stata inserita nello slot Micro-SIM 2. NOTA: L'icona di una Micro-SIM si colora di verde quando è impostata come rete preferita.
Impostazioni rapide Il pannello Impostazioni rapide permette l'accesso con un tocco ad alcune funzioni senza fili e impostazioni del vostro ASUS Phone. Ciascuna di queste funzioni è rappresentata da un pulsante. Per accedere al pannello Impostazioni rapide trascinate verso il basso la schermata dall'angolo superiore destro del vostro ASUS Phone. NOTA: Un pulsante blu indica che la funzione è attualmente abilitata, un pulsante grigio indica che la funzione è al momento disabilitata.
Aggiungere o rimuovere pulsanti Per aggiungere o rimuovere pulsanti dal pannello di notifica di Impostazioni rapide: 1. Avviate Impostazioni rapide quindi toccate . 2. Selezionate la casella a fianco di una funzione per aggiungere quella funzione al pannello di notifica di Impostazioni rapide. NOTA: Una casella selezionata indica che d'ora in poi quella funzione è accessibile dal pannello di notifica di Impostazioni rapide ASUS. Una casella non selezionata indica l'opposto. 3.
Personalizzare la schermata Home Trasmettete la vostra personalità alla schermata Home. Selezionate un design attraente per lo sfondo, create collegamenti per un accesso veloce alle app preferite e aggiungete widget per una rapida rassegna delle informazioni importanti. Se volete potete aggiungere altre pagine per avere più spazio disponibile per widget e app sulla vostra schermata Home.
Raggruppare collegamenti alle app in una cartella Potete creare cartelle per organizzare i collegamenti della vostra schermata Home. 1. Nella schermata Home toccate e spostate un'app su un'altra app fino a quando non compare una cartella. 2. Toccate la cartella e toccate Cartella senza nome per rinominare la cartella. I widget Potete inserire widget, ovvero piccole app dinamiche, nella vostra schermata Home.
Sfondi Permettete alle vostre app, icone e altri elementi Zen di accomodarsi su uno sfondo attraente. Potete selezionare uno sfondo con tinta traslucida per ottimizzare la leggibilità e la chiarezza. Oppure potete selezionare uno sfondo animato per rendere vivo il vostro schermo.
Sfondi animati Per applicare uno sfondo animato: 1. Toccate e tenete premuto su un'area disponibile della schermata Home e selezionate Sfondi. 2. Selezionate quale schermata volete modificare: Schermata Home o Schermata Home e Blocco. 3. Selezionate uno sfondo animato e toccate Applica. NOTA: Se volete potete modificare le impostazioni per lo sfondo su > Impostazioni > Display.
Aggiungere collegamenti Nella modalità semplificata potete aggiungere fino a dodici (12) collegamenti alle app nella schermata Home. 1. Trascinate la schermata Home verso sinistra quindi toccate . 2. Dalla schermata App selezionate l'applicazione che volete aggiungere all'elenco. Rimuovere collegamenti Eseguite le seguenti operazioni: 1. Trascinate la schermata Home verso sinistra quindi toccate . 2. Toccate Modifica coll. 3.
Configurazione di data e ora Come impostazione standard l'ora visualizzata sulla vostra schermata Home viene sincronizzata automaticamente con le impostazioni del vostro operatore. Per modificare le impostazioni di data e ora: 1. Avviate la schermata Impostazioni in uno dei seguenti modi: •• Avviate Impostazioni rapide quindi toccate •• Toccate . > Impostazioni. 2. Navigate nella schermata Impostazioni e selezionate la voce Data e ora. 3. Deselezionate Data e ora automatiche e Fuso orario automatico. 4.
Schermata di blocco Come impostazione standard la schermata Blocco appare quando accendete il dispositivo o quando lo riattivate dalla sospensione. Dalla schermata Blocco potete procedere al sistema operativo Android semplicemente trascinando il dito sullo schermo touch. La schermata Blocco può essere personalizzata per limitare l'accesso ai vostri dati e applicazioni.
Personalizzare i pulsanti di accesso rapido Come impostazione standard la schermata Blocco include i seguenti pulsanti di accesso rapido: Telefono, Messaggi e Fotocamera. A seconda delle vostre esigenze potete personalizzare questi pulsanti in questo modo: 1. Avviate Impostazioni rapide quindi toccate . 2. Navigate nella schermata Impostazioni e selezionate la voce Schermata Blocco. 3. In Display spostate il cursore di Accesso rapido su ON. 4. Toccate Accesso rapido. 5.
3 Work hard, play harder Work hard, play harder 3 Browser Il vostro browser ultra-moderno basato sul motore Chromium vi permette di navigare in Internet ad una velocità incredibile. La sua interfaccia Zen semplice e intuitiva, dotata della tecnologia textreflow ottimizza i contenuti web per adattarli meglio allo schermo del vostro ASUS Phone.
Condividere pagine Condividete pagine web interessanti dal vostro tablet ASUS tramite un account e-mail, un servizio di archiviazione cloud, il Bluetooth o altre app presenti sull'ASUS Phone. 1. Avviate il browser. 2. Da una pagina web toccate > Condividi link. 2. Toccate l'account o l'app che volete usare per condividere la pagina. Leggere una pagina più tardi Se trovate alcune informazioni importanti ma non avete tempo per leggerle al momento potete scegliere di leggerle in seguito.
Aggiungere pagine ai segnalibri Aggiungete le vostre pagine web preferite ai segnalibri in modo da poter tornare a visitarle facilmente in un secondo momento. Per aggiungere una pagina web ai segnalibri: Nella pagina toccate > Salva nei segnalibri. La prossima volta che avviate il browser potete raggiungere facilmente la pagina salvata nei segnalibri.
Svuotare la cache del browser Svuotate la cache del browser per eliminare i file Internet temporanei, i siti web e i cookie che sono al momento memorizzati nel vostro ASUS Phone. Questo aiuterà a migliorare le prestazioni del vostro browser. 1. Avviate il browser. 2. Toccate > Impostazioni > Privacy e sicurezza > Cancella cache. 3. Toccate OK al messaggio di conferma. Email Aggiungete un account POP3/IMAP di Exchange, Gmail, Yahoo! Mail, Outlook.
Aggiungere un account e-mail Se non avete un account e-mail potete crearne uno in modo da poter ricevere, leggere e inviare e-mail dal vostro ASUS Phone. 1. Dalla schermata Home toccate Email per avviare l'app Email. 2. Toccate > Impostazioni, quindi aggiungete l'account e-mail. 3. Selezionate il provider dell'indirizzo e-mail che volete aggiungere. 4. Seguite le istruzioni sullo schermo per completare la configurazione del nuovo account e-mail.
Inviare inviti ad eventi per email Potete inviare inviti per email, così come impostare avvisi di allarme per un evento, direttamente dal vostro ASUS Phone. 1. Nella schermata Home toccate Email. 2. Toccate > Invito a riunione. 3. Nel campo Nome evento inserite il nome dell'evento. 4. Nel campo Posizione inserite la via, città, paese e CAP del luogo dell'evento. 5. Spostate il cursore di Conto alla rovescia su ON.
Calendario L'app Calendario vi permette di tenere sotto controllo gli eventi importanti tramite l'ASUS Phone. Oltre alla creazione di eventi potete aggiungere promemoria o un conto alla rovescia per essere sicuri di non perdervi ogni singola occasione. Inoltre potrete memorizzare gli eventi importanti come i compleanni e gli anniversari che avete impostato per i vostri contatti VIP. Creare un evento Per creare un evento: 1. Toccate ASUS > Calendario. 2. Toccate per creare un nuovo evento. 3.
Creare un evento per un account Dopo aver aggiunto un account online da sincronizzare con Calendario potete ora usare il vostro ASUS Phone per creare notifiche specifiche per un particolare account: 1. Toccate ASUS > Calendario. 2. Toccate Nuovo evento per creare un nuovo evento. 3. Nella schermata Nuovo evento toccate Calendario per visualizzare tutti gli account sincronizzati con Calendario. 4. Selezionate l'account per il quale volete creare il nuovo evento. 5.
What’s Next Non perdete eventi importanti mentre vi godete il tempo libero o quando state ricevendo messaggi, e-mail o chiamate dai vostri contatti VIP. Create il vostro calendario di eventi, gruppi VIP o aggiornamenti meteo per ottenere avvisi e promemoria di What's Next. Potete visualizzare gli avvisi di What's Next dalla schermata Blocco, nel pannello delle notifiche di sistema o grazie al widget e all'app What's Next.
Accettare o rifiutare inviti ad eventi Impostate il vostro account nell'app Email per inviare o ricevere e-mail contenenti inviti a eventi. Se accettate inviti e-mail gli eventi verranno sincronizzati con l'app Calendario. NOTA: Per maggiori dettagli consultate la sezione Email e Calendario. IMPORTANTE! Il vostro ASUS Phone deve essere connesso ad una rete Wi-Fi o mobile per permettervi di ricevere inviti per e-mail o avvisi relativi ad un evento.
Ottenere avvisi relativi agli eventi Se accettate un invito ad un evento otterrete promemoria relativi a ciascun cambiamento dell'evento come la cancellazione, il rinvio, il cambiamento del luogo dell'evento o un cambiamento del calendario. Questi avvisi relativi all'evento verranno visualizzati sulla schermata Blocco, sul pannello delle notifiche di sistema, sul widget e sull'app di What's Next.
Avviso evento cancellato Otterrete un avviso di evento cancellato quando l'organizzatore cancella l'evento. Avviso evento riprogrammato Otterrete un avviso nel caso in cui l'evento venisse posticipato, riprogrammato o spostato in un altro luogo.
Ottenere aggiornamenti meteo Ottenete aggiornamenti AccuWeather® in tempo reale, ogni ora fino a 12 ore, per la vostra posizione corrente o per altre parti del mondo. Potete fare programmi fino a sette (7) giorni con le previsioni meteo settimanali o vestirvi in modo appropriato grazie all'indice di temperatura realmente percepita AccuWeather RealFeel®.
Do It Later Organizzate scrupolosamente anche le cose più banali della vostra vita frenetica. Quando siete troppo impegnati potrete usare questa app per leggere notizie, rispondere a e-mail, chiamate, SMS o portare a termine altre attività importanti quando vi è più comodo farlo. Contrassegnate i vostri messaggi non letti, le e-mail o le pagine web interessanti come Rispondi in seguito, Leggi in seguito o Chiama in seguito.
Richiama ora Se avete impostato una chiamata come Chiama in seguito potete recuperare la chiamata, e richiamare, tramite l'app Do It Later, quando lo ritenete opportuno. 1. Nella schermata Home toccate ASUS > Do It Later. 2. Selezionate la chiamata che volete richiamare e toccate Chiama adesso. 3. Quando avete finito toccate per completare l'attività.
Rispondere ai messaggi Se avete contrassegnato uno o più SMS come Rispondi in seguito potete recuperarli e rispondere, tramite l'app Do It Later, quando lo ritenete opportuno. 1. Nella schermata Home toccate ASUS > Do It Later. 2. Selezionate il messaggio SMS al quale volete rispondere quindi toccate Rispondi adesso. 3. Quando avete finito toccate per completare l'attività.
SuperNote Prendete appunti divertendovi e sincronizzando le vostre note usando SuperNote. Questa app intuitiva vi permette di creare note in blocchi note organizzati semplicemente scrivendo o disegnando sullo schermo touch. Mentre create una nota potete aggiungere file multimediali da altre applicazioni e condividerli con un social network o con un account di archiviazione Cloud.
Creare un blocco note Per creare un file tramite SuperNote fate riferimento ai seguenti passaggi: 1. Toccate ASUS > SuperNote quindi toccate . 2. Scegliete un nome per il file e selezionate Per il tablet o Per il telefono per decidere il formato della pagina. 3. Selezionate un modello e cominciate a scrivere le vostre note. Condividere un blocco note su cloud Potete condividere un blocco note su cloud nel seguente modo: 1.
Gestione File Tramite Gestione File potete localizzare e gestire facilmente i vostri dati presenti sull'ASUS Phone o su un dispositivo di archiviazione esterno ad esso collegato. Accedere alla memoria interna Per accedere alla memoria interna: 1. Toccate ASUS > Gestione File. 2. Toccate > Memoria interna per visualizzare i contenuti del vostro ASUS Phone. Toccate quindi un oggetto per selezionarlo. Accedere alla memory card Per accedere alla memory card: 1. Inserite una microSD nel vostro ASUS Phone. 2.
Il Cloud Eseguite un backup dei vostri dati, sincronizzate file tra diversi dispositivi, condividete file privatamente e in sicurezza tramite un servizio cloud come ASUS WebStorage, Drive, OneDrive o Dropbox. ASUS WebStorage Registratevi o eseguite l'accesso ad ASUS WebStorage per ottenere spazio di archiviazione gratuito. Caricate automaticamente le foto appena scattate per una condivisione istantanea, sincronizzate file tra dispositivi diversi o condividete file tramite il vostro account ASUS WebStorage.
Trasferimento dati Trasferite dati come contatti, eventi di calendario o messaggi SMS dal vostro vecchio dispositivo mobile all'ASUS Phone tramite la tecnologia Bluetooth. Per usare Trasferimento dati: 1. Accoppiate il vostro vecchio dispositivo mobile all'ASUS Phone tramite Bluetooth. NOTA: Per maggiori informazioni in merito all'associazione di dispositivi consultate la sezione Accoppiare il vostro ASUS Phone ad un dispositivo Bluetooth®. 2.
Aiuto ZenUI Trovate le risposte che cercate nelle FAQs (Frequently Asked Questions) o interagite direttamente con altri utenti ZenUI per trovare e condividere suggerimenti per le app ZenUI 2.0. Per accedere all'aiuto di ZenUI: 1. Toccate > Aiuto ASUS. 2. Toccate ASUS ZenUI Apps quindi selezionate l'app per la quale state cercando delle risposte.
4 Restare in contatto Restare in contatto 4 Chiama con stile Funzione dual SIM La funzione dual SIM del vostro ASUS Phone vi permette di gestire le impostazioni delle schede Micro-SIM installate. Grazie a questa funzione potete abilitare/disabilitare una scheda Micro-SIM, assegnarle un nome o impostare una specifica Micro-SIM come rete preferita. Rinominare una scheda Micro-SIM Assegnate un nome alle schede Micro-SIM installate sul vostro ASUS Phone, in questo modo potrete identificarle più facilmente.
Impostare la Micro-SIM preferita Impostate una Micro-SIM come preferita per chiamate vocali o per servizio dati. Scheda SIM per chiamate vocali Quando effettuate una chiamata il vostro ASUS Phone usa automaticamente la Micro-SIM preferita. Per impostare una Micro-SIM come predefinita per le chiamate vocali toccate Chiamata vocale quindi selezionate la SIM che volete usare. IMPORTANTE! Potete usare questa funzione solamente se effettuate una chiamata ad uno dei vostri contatti.
Fare chiamate Il vostro ASUS Phone dispone di diversi modi per fare una chiamata. Chiamate i vostri amici dall’elenco dei contatti, usate la composizione veloce o inserite un numero rapido per chiamare velocemente i vostri contatti preferiti. NOTA: Organizzate i vostri contatti tramite l'app Persone. Per maggiori dettagli consultate la sezione Gestione dei contatti. Avviare l’app Telefono Dalla schermata Home potete avviare l’app Telefono in uno dei seguenti modi: • Toccate . • Toccate > Telefono.
Chiamata automatica di un numero interno Potete inserire una pausa, breve o lunga, dopo aver composto il numero principale, il numero interno verrà composto automaticamente. 1. Nell'app Telefono inserite il numero principale. 2. Toccate e tenete premuto * per inserire una pausa la quale verrà indicata con una virgola (,). NOTA: Se volete una pausa più lunga toccate e tenete premuto nuovamente *. 3. Inserite il numero interno. 4. Toccate SIM1 o SIM2 per comporre il numero. 5.
Creare una voce di composizione veloce Create voci di composizione veloce usando i tasti da 2 a 9 per i vostri contatti preferiti. 1. Dall'app Telefono potete seguire una di queste due procedure: •• Toccate e tenete premuto su un numero, da 2 a 9, quindi toccate OK nella schermata di conferma. •• Toccate > Composizione veloce per avviare la schermata di Composizione veloce. 2. Selezionate un contatto dall'elenco dei contatti. L'associazione verrà salvata nella schermata di Composizione veloce.
Chiamate internazionali Abilitando Chiamate internazionali, quando vi trovate all'estero, sarà più semplice per voi chiamare casa rapidamente. NOTA: Utilizzando il servizio roaming si andrà incontro a costi aggiuntivi. Prima di utilizzare il servizio roaming chiedete informazioni al vostro operatore. 1. Avviate la schermata Impostazioni in uno dei seguenti modi: •• Avviate Impostazioni rapide quindi toccate •• Toccate . > Impostazioni. 2. Toccate Impostazioni chiamate > Chiamate internazionali. 3.
Ricevere chiamate Lo schermo touch del vostro ASUS Phone si accende quando c'è una chiamata in arrivo. La visualizzazione di una chiamata in arrivo varia a seconda dello stato del vostro ASUS Phone. Rispondere alle chiamate Ci sono due modi per rispondere a una chiamata, a seconda dello stato del vostro ASUS Phone: • Se il vostro dispositivo è attivo toccate Rispondi per ricevere la chiamata o Rifiuta in caso contrario.
Bloccare le chiamate Potete aggiungere un numero, o una chiamata dal registro chiamate, all'elenco degli utenti bloccati. 1. Nell'app Telefono toccate per visualizzare il registro chiamate. 2. Selezionate il numero che volete bloccare, toccate > Aggiungi a elenco blocco, quindi toccate OK. Salvare una chiamata su Persone Potete aggiungere ai contatti una chiamata, o un numero, dal registro chiamate. 1. Nell'app Telefono toccate per visualizzare il registro chiamate. 2.
Altre opzioni per le chiamate Durante una chiamata toccate chiamata in corso. e selezionate una delle possibili opzioni disponibili per una Microfono Attiva/disattiva il microfono per la chiamata in corso. Quando il microfono non è attivo potete ascoltare il vostro interlocutore ma questi non potrà sentirvi. Vivavoce Attiva/disattiva il vivavoce. Chiamata in attesa Mette in attesa una chiamata attiva.
Gestione di chiamate multiple Il vostro ASUS Phone fornisce la comodità di fare o ricevere due chiamate. Potete anche ospitare un'audioconferenza e condurre riunioni d'affari o chiamate di gruppo con amici o conoscenti. Rispondere ad una seconda chiamata Durante una chiamata con l'ASUS Phone potreste udire un bip, questo indica che c'è una seconda chiamata in arrivo. Toccate Rispondi sullo schermo touch per ricevere una chiamata durante un'altra chiamata.
Ospitare un'audioconferenza Il vostro ASUS Phone, grazie al servizio GSM, può ospitare un'audioconferenza con un numero massimo di cinque (5) partecipanti. Durante una chiamata potete aggiungere altri contatti e unirli in un'audioconferenza. 1. Chiamate un contatto o componete un numero. Aspettate che la persona risponda. quindi toccate un contatto o componete un numero 2. Quando la chiamata è stabilita toccate di una persona che volete includere nell'audioconferenza. 3.
Gestione di un'audioconferenza Durante un'audioconferenza potete separare i contatti dal gruppo per una conversazione privata o disconnettere un contatto dall'audioconferenza. 1. Nella schermata dell'audioconferenza toccate GESTISCI CONFERENZA per accedere all'elenco dei partecipanti all'audioconferenza. 2. Per rimuovere un contatto dall'audioconferenza toccate dall'audioconferenza toccate 3. Toccate 67 . per tornare alla schermata dell'audioconferenza. Capitolo 4: Restare in contatto .
Registrare una chiamata Il vostro ASUS Phone vi permette di registrare una chiamata per un utilizzo futuro. 1. Chiamate un contatto o componete un numero. 2. Toccate per registrare la chiamata. IMPORTANTE! Prima di registrare la chiamata assicuratevi di aver chiesto il permesso alla persona con la quale state parlando. 3. Per fermare la registrazione toccate . L’icona appare nella barra di notifiche di sistema. 4.
Gestione dei contatti Organizzate i vostri contatti e restate in contatto con loro tramite chiamate, messaggi SMS, email o social network. Raggruppate i contatti come Preferiti per trovarli più velocemente o come VIP per ricevere notifiche in merito a eventi futuri, chiamate perse o messaggi non letti. Potete sincronizzare i vostri contatti con i vostri account e-mail o social network, collegare le informazioni tra di loro per un accesso rapido o filtrare i contatti che preferite.
Aggiungere contatti Aggiungete contatti al vostro dispositivo e inserite informazioni importanti come un numero di telefono, un indirizzo e-mail, eventi speciali per i VIP e molto altro. 1. Avviate l'app Persone quindi toccate . 2. Selezionate Dispositivo. NOTE: • Potete anche salvare i contatti sulla scheda SIM o su un account e-mail. • Se non avete ancora un account e-mail toccate Aggiungi nuovo account e createne uno. 3.
Personalizzare il profilo dei contatti Modificate le informazioni dei contatti, aggiungete una foto, impostate una suoneria o scattate una foto da usare per un profilo. 1. Avviate l'app Persone quindi selezionate il contatto che volete modificare o personalizzare. 2. Apportate le modifiche nella pagina del contatto. Toccate per modificare le informazioni del contatto Toccate per aggiungere una copertina al contatto da Galleria o scattandola tramite la Fotocamera.
Aggiungere un contatto ai VIP dalla schermata VIP Per aggiungere un contatto ai VIP dalla schermata VIP: 1. Avviate l'app Persone. > VIP. 2. Toccate 3. Nella schermata VIP toccate . 4. Selezionate il contatto che volete aggiungere ai VIP quindi toccate Aggiungi. Il contatto, o i contatti, sono stati aggiunti al gruppo VIP. Aggiungere un evento ad un contatto VIP Potete aggiungere un evento ad un contatto VIP, ad esempio un anniversario, un compleanno o altri eventi importanti. 1.
Inserire un contatto nei Preferiti Inserite i contatti che chiamate più spesso tra i preferiti in modo da poterli chiamare rapidamente dall'app Telefono. 1. Nella schermata Home toccate ASUS > Persone. 2. Selezionate il contatto che volete aggiungere ai preferiti. 3. Toccate . Il contatto è stato aggiunto al gruppo Preferiti nell'app Telefono. NOTE: • Per visualizzare l'elenco dei preferiti toccate • Per maggiori dettagli consultate la sezione Chiamare i contatti preferiti.
Esportare i contatti Esportate i vostri contatti su uno qualsiasi degli account di archiviazione del vostro ASUS Phone. 1. Toccate ASUS > Persone quindi toccate > Gestisci cont. 2. Toccate Importa/esporta quindi selezionate una tra le opzioni di esportazione: a. Esporta su scheda SIM 1/Esporta su scheda SIM 2 b. Esporta in archivio 3. Selezionate la sorgente dalla quale volete esportare i vostri contatti: a. Tutti i contatti b. Account email c. Dispositivo d. SIM1/SIM2 4.
Sblocco di numeri o contatti Potreste aver bisogno di rimuovere un numero, o un contatto, dall'elenco in modo da poter ricevere nuovamente chiamate o messaggi da quel numero o contatto. 1. Toccate ASUS > Persone quindi toccate > Gestisci cont. > Lista nera 2. Toccate e tenete premuto sul contatto, o il numero, che volete sbloccare quindi toccate Rimuovi da elenco bloccati e poi OK.
Collegare le informazioni dei contatti Quando aggiungete un account social network o e-mail i dati di questo account verranno sincronizzati automaticamente con l'app Persone. In alcuni casi alcune informazioni dello stesso contatto potrebbero essere separate, nell'app Persone, a causa delle variazioni del nickname. Potete collegare manualmente e unificare tutte le informazioni per riunirle in un singolo profilo. 1. Nell'app Persone toccate il contatto al quale volete collegare le informazioni. 2.
Impostazioni chiamata Configurate le impostazioni per le vostre chiamate in ingresso e in uscita, per il blocco delle chiamate indesiderate, per le chiamate internazionali e altro. 1. Entrate nella schermata Impostazioni in uno dei seguenti modi: •• Avviate Impostazioni rapide quindi toccate •• Toccate . > Impostazioni. 2. Toccate Impostazioni chiamate quindi selezionate l'opzione che volete configurare. Blocco chiamate Impostazioni blocco Configurate le impostazioni per il blocco delle chiamate.
Altre impostazioni Nessuno sfondo durante le chiamate Impostazioni account telefono Apparecchi acustici Se la voce è abilitata verrà mostrato uno sfondo nero durante una chiamata. Configurate l'account SIP e altre impostazioni per il telefono. Abilitate questa opzione per attivare la compatibilità agli apparecchi acustici. Inviare messaggi e altro Messaggi L'app Messaggi consente di inviare messaggi e rispondere subito, o in un secondo momento, ai messaggi importanti dei vostri contatti.
Bloccare i messaggi Bloccate messaggi di spam, o messaggi che non volete ricevere da un mittente indesiderato. 1. Nella schermata Home toccate , e poi toccate . 2. Nell'elenco delle conversazioni selezionate il mittente dal quale non volete più ricevere messaggi. Inoltrare una conversazione Potete inoltrare una conversazione ad un'altra persona o impostare un allarme in modo da rispondere ad un messaggio importante quando lo ritenete opportuno. 1. Nella schermata Home toccate . 2.
Altre opzioni per i messaggi Quando vi trovate in una conversazione, o mentre state scrivendo un messaggio potete toccare per accedere ad una delle seguenti opzioni. Aggiungi oggetto Inserisci emoticon Inserisci modelli di testo Elimina messaggi Impostazioni Toccate per aggiungere il titolo al vostro messaggio. Toccate per inserire un'emoticon nel vostro messaggio. Toccate per inserire una risposta preimpostata nel corpo del messaggio.
6. Toccate Okay! Facciamolo! per aggiornare il vostro elenco di amici a partire dai contatti. Se volete aggiungere i vostri amici manualmente toccate No grazie... NOTA: I vostri contatti Omlet verranno integrati automaticamente all'elenco nell'app Persone. Per maggiori informazioni fate riferimento alla sezione Visualizzare i contatti Omlet nell'app Persone. Registrazione tramite account Google™ Per registrarvi usando il vostro account Google™: 1. Toccate quindi toccate Chat di Omlet. 2.
Registrazione tramite account Facebook Per registrarvi usando il vostro account Facebook: 1. Toccate quindi toccate Chat di Omlet. 2. Nella schermata di registrazione toccate Collegare un account diverso qui quindi toccate Facebook. L'app Chat di Omlet vi porterà alla schermata di Facebook per permettervi di accedere con il vostro account. 3. Eseguite l'accesso con il vostro account di Facebook quindi toccate OK. 4. Inserite il vostro nome e toccate Inizia. 5.
Usare Omlet Inviate messaggi di testo e multimediali per una conversazione divertente, creativa e interattiva. Per avviare una conversazione: 1. Dalla schermata di Chat di Omlet toccate per visualizzare il menu quindi toccate Contatti. 2. Toccate il contatto con il quale volete chattare e poi toccate . Inviare un messaggio di chat Per inviare un messaggio digitatelo nella casella Che succede? e toccate .
Usare le funzioni aggiuntive Chat di Omlet è caratterizzata da queste funzioni aggiuntive che vi permettono di creare messaggi multimediali per una conversazione più divertente e personalizzata. Per usare queste funzioni toccate che desiderate. durante la conversazione e selezionate la funzione specifica Toccate per inviare un'immagine dal vostro dispositivo. Toccate per cercare file GIF su Internet e inviare GIF tramite la conversazione.
Usare Social Hotspot Social Hotspot è un modo facile e veloce per chattare con i vostri amici in una chat room. Grazie a questa funzione potete iniziare una chat di gruppo, o partecipare ad una chat di gruppo esistente, senza dover inserire le vostre informazioni di contatto. NOTE: • Per usare Social Hotspot è necessario attivare il GPS del vostro dispositivo. • La funzione Social Hotspot è in grado di rilevare utenti Omlet nel raggio di due (2) chilometri ed è attivo per quattro (4) ore.
Partecipare ad un Social Hotspot Per partecipare ad un Social Hotspot: 1. Dalla schermata di Chat di Omlet toccate per visualizzare il menu di Omlet quindi toccate Chat Vicine. Omlet avvia Google Maps e vi mostra i Social Hotspot attivi nelle vicinanze. NOTA: I Social Hotspot sono indicati con l'icona . 2.
Nella schermata di Social Hotspot potete chattare con i vostri amici, inviare sticker o condividere foto con il gruppo. NOTA: Per visualizzare le foto condivise fate riferimento alla sezione Visualizzare le foto condivise nell'app Galleria.
Visualizzare le foto condivise nell'app Galleria Le foto condivise da voi e dai vostri amici tramite Chat di Omlet vengono salvate all'istante sul vostro dispositivo. Potete visualizzare le foto condivise tramite l'app Galleria. Per visualizzare le foto condivise: 1. Avviate l'app Galleria. 2. Nella schermata principale di Galleria toccate a. Tutte le foto condivise b. Chat room c.
Visualizzare tutte le foto condivise Toccate Tutte le foto condivise per visualizzare tutte le foto condivise da voi e dai vostri contatti Omlet. Visualizzare le foto condivise nella chat room Toccate Chat room per visualizzare le foto condivise in una chat room o su un social.
Visualizzare le foto condivise dal condivisore Toccate Condivisore per visualizzare le foto condivise da un contatto Omlet. Visualizzare i contatti Omlet nell'app Persone Oltre a connettervi ai vostri contatti Omlet tramite Chat di Omlet potete visualizzare e chattare con i vostri contatti usando l'app Persone. L'integrazione dei vostri contatti Omlet all'app Persone vi permette di visualizzare e chattare più facilmente con i vostri contatti Omlet anche senza bisogno di avviare Chat di Omlet.
2. Toccate Contatti da visualizzare per accedere all'elenco dei gruppi di contatti. 3. Togliete la spunta da tutti i contatti tranne Omlet Chat, quindi toccate su un qualunque punto dello schermo per visualizzare tutti i contatti Omlet. 4. Toccate un contatto Omlet per selezionare e visualizzare i dettagli di un contatto o chattare direttamente.
Sincronizzare Chat di Omlet con un servizio Cloud Se disponete di un servizio cloud come Dropbox potete configurare Chat di Omlet in modo che carichi sul cloud automaticamente, e in sicurezza, le conversazioni private e il registro della chat. Al fine di permettere a Chat di Omlet di caricare i dati sul could è necessario sincronizzare un account cloud con Chat di Omlet. Per fare questo: 1. Nel menu di Chat di Omlet toccate Impostazioni. 2.
5 Gioco e divertimento Gioco e divertimento 5 Utilizzo degli auricolari Utilizzando gli auricolari potete sperimentate la libertà di fare altre cose quando state chiamando o quando state ascoltando la vostra musica preferita. Collegamento del jack audio Inserite il jack da 3.5mm nella porta audio del vostro dispositivo. ATTENZIONE! • Non inserite altri oggetti nella porta jack. • Non inserite un cavo nel quale scorre corrente all'interno della porta jack.
Musica L'app Musica cerca automaticamente file musicali nell'archiviazione esterna e interna del vostro ASUS Phone. Potete organizzare questi file musicali in elenchi di riproduzione o aggiungerli in coda per riprodurli in sequenza. Potete anche riprodurre musica da un account cloud come ASUS WebStorage, Dropbox, OneDrive o Drive. IMPORTANTE! Prima di riprodurre musica da un account cloud assicuratevi che il vostro ASUS Phone sia connesso ad una rete mobile o Wi-Fi.
Altre opzioni di riproduzione Durante la riproduzione potete toccate per accedere ad una delle seguenti opzioni. Aggiungere a playlist Toccate per aggiungere la canzone ad un elenco di riproduzione esistente o per crearne uno nuovo e aggiungere la canzone ad esso. Play To Toccate per eseguire una scansione e riprodurre la canzone su altri dispositivi nelle vicinanze. NOTA: Per maggiori dettagli consultate la sezione Riprodurre su altri dispositivi.
Riprodurre musica da archiviazione cloud Per riprodurre musica da archiviazione cloud:. 1. Nella schermata principale di Musica toccate . 2. Nel menu Musica su cloud selezionate il servizio cloud contenente le vostre canzoni. 3. Selezionate la canzone quindi toccatela per riprodurla. Creare un elenco di riproduzione Ottenete le vostre canzoni preferite da sorgenti diverse come archiviazione interna, esterna o account cloud e organizzatele in elenchi di riproduzione. 1.
Riprodurre su altri dispositivi Usate la funzione PlayTo per riprodurre musica dal vostro ASUS Phone ad altri dispositivi nelle vicinanze compatibili Miracast o DLNA. Per usare PlayTo: 1. Da una canzone in riproduzione al momento toccate > PlayTo. 2. Toccate il dispositivo sul quale volete riprodurre la musica. La musica sul vostro ASUS Phone verrà riprodotta sull'altro dispositivo. 3. Per fermare PlayTo toccate > Disconnetti.
Ricerca di stazioni locali Per cercare stazioni nella vostra area toccate per cercare automaticamente le stazioni radio locali. Le stazioni locali disponibili vengono visualizzate nella schermata di Radio FM. Sintonizzazione su un'altra frequenza Se volete ascoltare una frequenza specifica: 1. Nell'app Radio FM toccate la stazione radio corrente. 2. Nella casella Sintonizza frequenza inserite la frequenza della stazione desiderata. 3.
6 I vostri momenti preziosi I vostri momenti preziosi 6 Catturare i momenti Avviare l'app Fotocamera Scattate foto e registrate video usando l'app Fotocamera del vostro ASUS Phone. Per avviare l'app Fotocamera potete fare in uno dei seguenti modi. Dalla schermata Blocco Trascinate verso il basso fino a quando Fotocamera non è in esecuzione. Usando il widget Fotocamera Dalla schermata Blocco trascinate il dito verso sinistra per avviare l'app Fotocamera. Dalla schermata Home Toccate .
Primo utilizzo di Fotocamera Dopo aver avviato Fotocamera per la prima volta appariranno due strumenti per aiutarvi ad iniziare: Guida e Geolocalizzazione. Guida Se usate per la prima volta l'app Fotocamera apparirà questa guida dopo aver avviato l'applicazione. Fate riferimento ai passaggi seguenti per procedere. 1. Nella schermata della guida toccate Ignora se volete saltare il tutorial o Start per visualizzare la guida. 2.
Schermata principale di Fotocamera La fotocamera del vostro ASUS Phone è dotata della funzione auto-scene detection e di uno stabilizzatore automatico dell'immagine. Inoltre dispone di una funzione di stabilizzazione del video che permette di evitare tremolii durante la registrazione di un video. Toccate le icone per iniziare ad usare la fotocamera ed esplorare le funzioni per foto e video del vostro ASUS Phone.
Impostazioni immagine Modificate l'aspetto delle immagini che acquisite configurando le impostazioni della fotocamera nel modo seguente. IMPORTANTE! Applicate le impostazioni prima di scattare la foto. 1. Nella schermata principale di Fotocamera toccate > . 2. Navigate e personalizzate le opzioni disponibili. Immagini Con questo menu potete configurare la qualità dell'immagine. Modalità di scatto Scegliete se attivare o meno l'Autoscatto e la Sequenza scatti.
Impostazioni video Modificate l'aspetto dei video che registrate configurando le impostazioni della fotocamera nel modo seguente. IMPORTANTE! Applicate le impostazioni prima di scattare la foto. 1. Nella schermata principale di Fotocamera toccate > 2. Navigate e personalizzate le opzioni disponibili. Immagini Con questo menu potete configurare la qualità dell'immagine. Esposizione Scegliete se abilitare l'Auto-esposizione via touch. 103 Capitolo 6: I vostri momenti preziosi .
Impostazioni avanzate Fotocamera Tramite le impostazioni avanzate potrete sperimentare nuovi modi per scattare foto o acquisire video usando le funzioni speciali della fotocamera del vostro ASUS Phone. IMPORTANTE! Applicate le impostazioni prima di scattare la foto. Le funzioni disponibili possono variare in base al modello. Luce bassa Usando PixelMaster la sensibilità alla luce della fotocamera aumenta del 400% in modo da migliorare la riduzione del rumore e aumentare il contrasto fino al 200%.
Visualizzatore di Indietro nel tempo 1. Dopo aver premuto il pulsante di scatto apparirà il visualizzatore di Indietro nel tempo sulla parte superiore della foto acquisita. Ruotate il cursore per scorrere tra le foto che avete appena scattato. NOTA: Toccate Best per visualizzare un consiglio sulla foto migliore. 2. Selezionate una foto e toccate Fine per salvarla in Galleria.
Notturna Acquisite foto ben illuminate anche di notte, o in situazioni in cui la luce è scarsa, usando la funzione Notturna del vostro ASUS Phone. NOTA: Tenete le vostre mani ferme mentre l'ASUS Phone sta acquisendo l'immagine per evitare un risultato sfocato. Scattare foto notturne > Notturna. 1. Nella schermata principale di Fotocamera toccate 2. Toccate per avviare la cattura di foto notturne.
Miniatura Simulate l'effetto tilt-shift delle lenti DSLR tramite la funzione Miniatura. Questa funzione consente di concentrarsi su aree specifiche del soggetto aggiungendo un effetto bokeh utilizzabile su foto e video che acquisite con il vostro ASUS Phone. Cattura di foto Miniatura 1. Nella schermata principale di Fotocamera toccate > Miniatura. o per selezionare l'area di messa a fuoco, quindi usate due dita per regolare la 2. Toccate dimensione dell'area di messa a fuoco e la posizione. 3.
Sorriso Catturate il sorriso perfetto o l'espressione facciale più bizzarra usando la funzione Sorriso su un insieme di foto. Questa funzione vi permette di scattare cinque foto consecutive dopo aver premuto il pulsante di scatto e rileva automaticamente le facce per permettervi di confrontarle. Utilizzo di Sorriso 1. Nella schermata principale di Fotocamera toccate 2. Toccate > Sorriso. per catturare foto modificabili con Sorriso. 3.
Rallentatore La funzione rallentatore del vostro ASUS Phone permette di catturare immagini fisse per una riproduzione automatica al rallentatore. A tutti gli effetti gli eventi sembreranno muoversi come in avanzamento veloce anche se effettivamente verificati e registrati tra lunghi intervalli. Registrazione di video al Rallentatore 1. Nella schermata principale di Fotocamera toccate 2. Toccate 3. Toccate 109 > Rallentatore. per selezionare l'intervallo di tempo.
Introduzione a Galleria Visualizzate le immagini e i video sul vostro ASUS Phone tramite l'app Galleria. Questa app vi permette, inoltre, di modificare, condividere o eliminare immagini e video salvati sul vostro ASUS Phone. Dalla Galleria potete visualizzare le immagini tramite presentazione o toccare un'immagine, o un video, per visualizzarne il contenuto. Per avviare Galleria toccate ASUS > Galleria.
Visualizzare la posizione delle foto Abilitate i servizi di geolocalizzazione del vostro ASUS Phone per allegare le informazioni alle vostre foto. La posizione comprende l'area nella quale le foto vengono scattate così come la posizione sulla mappa da usare con Google Maps o Baidu (solo per la Cina). Per visualizzare i dettagli di una foto: 1. Abilitate i servizi di geolocalizzazione da > Impostazioni > Geolocalizzazione. 2. Assicuratevi di aver condiviso la vostra posizione su Google Maps o Baidu. 3.
Condividere file da Galleria 1. Dalla schermata di Galleria toccate la cartella contenente i file che volete condividere. 2. Dopo aver aperto la cartella toccate per attivare la selezione dei file. 3. Toccate i file che volete condividere. Un segno di spunta appare sulle immagini che avete selezionato. 4. Toccate quindi selezionate dall'elenco il servizio con il quale volete condividere le immagini. Eliminare file da Galleria 1.
Postare foto sul vostro calendario Abilitando questa funzione in Galleria potete visualizzare foto direttamente dai vostri eventi di calendario. In questo modo potete raggruppare immediatamente le foto in base al nome del loro evento. 1. Dopo aver scattato foto con il vostro ASUS Phone avviate Galleria 2. Toccate 3. Toccate evento. > Bacheca eventi. sull'angolo superiore destro della cartella contenente le foto scattare durante un 4.
Usare MiniMovie Trasformate le foto in presentazioni creative usando la funzione MiniMovie dell'app Galleria. MiniMovie contiene diversi temi che potete applicare alle foto selezionate. Per creare un MiniMovie da una cartella di foto: 1. Avviate l'app Galleria quindi toccate per selezionare il percorso delle vostre foto. 2. Selezionate la cartella contenente le foto quindi toccate > MiniMovie automatico. 3. Selezionate il tema MiniMovie che volete usare per la vostra presentazione.
Per creare un MiniMovie da una selezione di foto: 1. Avviate l'app Galleria quindi toccate 2. Toccate per selezionare il percorso delle vostre foto. per attivare la selezione dei file. 3. Dopo aver selezionato le foto toccate MiniMovie. 4. Selezionate il tema MiniMovie che volete usare per la vostra presentazione. Toccate uno di questi temi per visualizzare la sua anteprima. 5. Dopo aver selezionato un tema toccate per salvare la presentazione.
7 Restate connessi 7 Restate connessi Rete mobile Quando non avete una rete Wi-Fi a disposizione potete connettervi ad una rete mobile per accedere a Internet. Abilitare la rete mobile 1. Entrate nella schermata Impostazioni in uno dei seguenti modi: •• Avviate Impostazioni rapide quindi toccate •• Toccate . > Impostazioni. 2. Toccate Altro... > Reti cellulari. 3. Mettete la spunta su Dati attivati e configurate le altre impostazioni della rete cellulare, se necessario.
Connessione ad una rete Wi-Fi 1. Nella schermata Impostazioni toccate Wi-Fi per visualizzare tutte le reti Wi-Fi rilevate. 2. Toccate una rete per connettervi ad essa. Nel caso di una rete protetta potrebbe essere necessario inserire una password, o ulteriori credenziali, prima di poter stabilire la connessione. NOTE: • Il vostro ASUS Phone si connette automaticamente alle reti alle quali si è già connesso in precedenza. • Quando non la usate spegnete l'interfaccia Wi-Fi per risparmiare la batteria.
Accoppiare il vostro ASUS Phone ad un dispositivo Bluetooth® Prima di poter usare la funzione Bluetooth del vostro ASUS Phone è necessario accoppiarlo ad un dispositivo Bluetooth. L'ASUS Phone ricorda automaticamente gli accoppiamenti con altri dispositivi Bluetooth. 1. Nella schermata Impostazioni toccate Bluetooth per visualizzare i dispositivi disponibili. IMPORTANTE! • Se il dispositivo al quale volete associarvi non è nell'elenco assicuratevi che questo abbia abilitato il Bluetooth e che sia visibile.
Tethering/hotspot portatile Quando il servizio Wi-Fi non è disponibile potete usare il vostro ASUS Phone come modem o come hotspot Wi-Fi portatile per condividere la connessione ad Internet con altri dispositivi mobili. IMPORTANTE! La maggior parte degli operatori richiede un piano dati per permettervi di utilizzare la funzione tethering. Contattate il vostro operatore per maggiori informazioni sulla disponibilità di questa funzione con il vostro piano telefonico.
4. Nella schermata di Tethering spostate il cursore di Hotspot Wi-Fi portatile su ON. 5. Connettete altri dispositivi all'hotspot del vostro ASUS Phone allo stesso modo con il quale vi connettete ad una rete Wi-Fi. Tethering Bluetooth Abilitate il Bluetooth del vostro ASUS Phone e usate il tablet come modem per fornire accesso a Internet ad altri dispositivi mobili compatibili Bluetooth come laptop o un tablet. 1. Abilitate il Bluetooth sul vostro ASUS Phone e sull'altro dispositivo. 2.
8 Viaggi e mappe Viaggi e mappe 8 Meteo Ottenete aggiornamenti in tempo reale direttamente sul vostro ASUS Phone grazie all'app Meteo. Usando l'app Meteo potrete anche ottenere informazioni meteorologiche di altre parti del mondo. Avviare l'app Meteo Dalla schermata Home potete avviare l'app Meteo in uno dei seguenti modi: •• Toccate > Meteo. •• Dalla schermata Home del vostro ASUS Phone toccate l'icona di Meteo.
Schermata principale di Meteo Impostate la vostra posizione corrente per ottenere aggiornamenti meteo per il luogo in cui vi trovate o per altre parti del mondo. Potete visualizzare gli aggiornamenti meteo, o le previsioni giornaliere, sul widget o sull'app di What's Next e sull'app calendario. NOTA: Per maggiori dettagli consultate la sezione Ottenere aggiornamenti meteo.
Orologio Personalizzate le impostazioni sul fuso orario per il vostro ASUS Phone, impostate una sveglia e usate il vostro ASUS Phone come cronometro grazie all'app Orologio. Avviare Orologio Avviate l'app Orologio in uno dei seguenti modi: > Orologio. •• Toccate •• Dalla schermata Home del vostro ASUS Phone toccate l'orologio digitale. Orologio mondiale Toccate per accedere all'orologio mondiale del vostro ASUS Phone. Toccate per accedere alle impostazioni dell'app Orologio.
Sveglia Toccate per accedere alla sveglia del vostro ASUS Phone. Toccate per eliminare tute le sveglie che avete impostato in precedenza. Toccate per accedere alle impostazioni della sveglia. Toccate per impostare una nuova sveglia. Cronometro Toccate per usare il vostro ASUS Phone come cronometro. Toccate questo pulsante per far partire il cronometro.
Timer Potete impostare diverse opzioni per il timer del vostro ASUS Phone. Per fare questo procedete come spiegato di seguito: Impostare il timer 1. Toccate per accedere alla funzione timer del vostro ASUS Phone. Tastierino numerico 2. Usate il tastierino numerico per inserire il tempo limite e toccate Inizia per far partire il timer.
9 ZenLink 9 ZenLink Conoscere ZenLink Restate connessi con ZenLink per la massima produttività. Con queste app ZenLink, esclusive ASUS, potete connettervi ad altri dispositivi per ricevere e condividere file. ZenLink dispone delle seguenti app: Party Link, Share Link, PC Link e Remote Link. NOTA: Alcune di queste app ZenLink potrebbero non essere disponibili per il vostro ASUS Phone. Party Link Create o partecipate ad un gruppo virtuale per condividere foto in tempo reale.
Ricevere foto Per ricevere foto da altri dispositivi compatibili con Party Link: 1. Avviate Fotocamera quindi toccate 2. Toccate . > OK. 3. Toccate Partecipa ad un gruppo > Cerca per avviare la ricerca dei dispositivi compatibili con Party Link. 4. Nell'elenco selezionate il gruppo al quale volete aggiungervi e toccate Partecipa. 5. (Opzionale) Se il gruppo è protetto da password chiedetela al creatore del gruppo prima di procedere.
Share Link Condividete e ricevete file, app o contenuti multimediali tra dispositivi Android grazie all'app Share Link (per dispositivi mobili ASUS) o Shareit (per altri dispositivi mobili) tramite una connessione WiFi. Grazie a quest'app potete inviare o ricevere file (singoli o multipli) con dimensione fino a 100 MB. L'app Share Link invia e riceve file più velocemente della tecnologia Bluetooth. Condividere file 1. Dalla schermata Home toccate ZenLink > Share Link. 2.
Ricevere file Per ricevere file: 1. Nella schermata Home toccate quindi toccate Share Link. 2. Toccate Ricevi file per ricevere file da un altro dispositivo. PC Link Usate il vostro computer per accedere e controllate il vostro ASUS Phone, e le sue app, tramite PC Link. Potrete controllare il vostro ASUS Phone tramite la tastiera e il mouse del computer. NOTA: Prima di usare PC Link assicuratevi di aver installato PC Link sul vostro computer. Visitate http:// pclink.asus.
Introduzione alle impostazioni di PC Link Cliccate su quest'icona per ruotare la schermata dell'ASUS Phone proiettata sullo schermo del vostro computer. Cliccate su quest'icona per regolare il volume. Cliccate su quest'icona per catturare uno screenshot. Cliccate su quest'icona per riattivare l'ASUS Phone o attivare la sospensione. Cliccate su quest'icona per verificare la presenza di aggiornamenti PC Link e assegnare un percorso per i vostri screenshot.
Remote Link Trasformate il vostro ASUS Phone in dispositivo di input senza fili o in un controllo remoto per le presentazioni. Tramite questa app potete usare il vostro ASUS Phone come touchpad, schermo touch, puntatore laser per presentazioni e pannello di controllo per Windows® Media Player. Perché questo sia possibile il tablet ASUS deve essere connesso al computer via Bluetooth. NOTE: • Prima di usare Remote Link assicuratevi di aver installato Remote Link sul vostro computer.
Controllo presentazioni tramite Remote Link Toccate per controllare le presentazioni sul vostro computer. Toccate e tenete premuto su questo pulsante per attivare il puntatore laser. Toccate per passare alla slide successiva. Toccate per tornare alla slide precedente. Telecomando Remote Link per Windows® Media Player Toccate per controllare Windows® Media Player. Toccate questo pulsante per tornare alla canzone precedente. Toccate questo pulsante per andare alla canzone successiva.
Tastiera Remote Link Toccate per simulare una tastiera. Potete anche usare l'icona del microfono per passare un input vocale. Toccate questo pulsante per inserire il vostro messaggio tramite un'istruzione vocale. Toccate questo pulsante per inviare il messaggio al vostro computer. Inserite il vostro messaggio in questo campo.
10 Zen ovunque 10 Zen ovunque Strumenti Zen speciali Torcia Potete trasformare il vostro ASUS Phone in una torcia avviando il pannello Impostazioni rapide accessibile da qualunque app in esecuzione. Nel pannello di Impostazioni rapide sarà sufficiente toccare l'icona della Torcia per attivare la funzione. Toccate qui per attivare la torcia.
Opzioni del menu di Torcia Toccate qui per abilitare/disabilitare la torcia. Toccate qui per abilitare/disabilitare la modalità SOS. Toccate una di queste icone per selezionare la velocità con cui la torcia lampeggia. Toccate qui per attivare/disattivare la luce.
Calcolatrice Potete avviare Calcolatrice facilmente. Quando aprite il pannello delle Impostazioni rapide trovate Calcolatrice all'inizio dell'elenco. Toccatela per procedere con i vostri calcoli.
Appunto rapido Appunto rapido è uno strumento che vi permette di scrivere note importanti che volete ricordare, potete usare la tastiera o scrivere a mano libera. Dopo aver creato un appunto potete condividerlo con Share Link, o con un social network, o trasformarlo in un'attività da eseguite con Do It Later. Creare una nota adesiva Potete trasformare il vostro appunto rapido in una nota adesiva visualizzabile ovunque sul vostro ASUS Phone.
Registratore suoni Registrate file audio tramite l'ASUS Phone usando l'app Registratore suoni. Avviare Registratore suoni Per avviare Registratore suoni toccate > Registratore suoni.
Mettere in pausa una registrazione Quando una registrazione è in pausa potete scegliere di riprenderla, eliminarla o salvarla. Toccate per eliminare la registrazione Toccate per riprendere la registrazione Toccate per salvare la registrazione Elenco registrazioni Nell'elenco delle registrazioni potete riprodurre, rinominare, condividere o eliminare una registrazione salvata. Per visualizzare il vostro elenco di registrazioni toccate Registratore suoni.
Audio Wizard AudioWizard vi consente di personalizzare la modalità sonora del vostro ASUS Phone permettendovi di ottenere un suono più limpido e più indicato alla vostra situazione di utilizzo. Usare AudioWizard Per usare AudioWizard: 1. Toccate ASUS > Audio Wizard. 2. Nella finestra di AudioWizard selezionate la modalità che volete attivare, toccate Fine per salvare ad uscire. Quando abilitato l'ASUS Phone passa automaticamente alla qualità audio migliore per le app ASUS in esecuzione.
Splendid ASUS Splendid vi permette di regolare facilmente le impostazioni del display. Inoltre può arricchire la quantità di colori del vostro schermo con i profili predefiniti. Usare Splendid Per usare Splendid: 1. Nella schermata Home toccate ASUS > Splendid. 2. Selezionate una delle modalità disponibili: Bilanciato, Lettura, Vivace o Personalizzato. Modalità bilanciata Questa modalità permette un bilanciamento dei colori sul vostro ASUS Phone.
Modalità lettura Questa modalità riduce l'affaticamento per gli occhi e fornisce una migliore esperienza di lettura sul vostro ASUS Phone. Toccate per regolare l'intensità del giallo Toccate per ripristinare le impostazioni predefinite Modalità vivace Questa modalità arricchisce i colori dello schermo del vostro ASUS Phone.
Personalizzato Questa modalità vi permette di regolare lo schermo in base alle vostre preferenze di temperatura, tonalità e saturazione. Spostate il cursore per regolare la temperatura del colore Spostate il cursore per regolare la tonalità Toccate per ripristinare le impostazioni predefinite Spostate il cursore per regolare la saturazione NOTA: Potete impostare la modalità di Splendid dal pannello Impostazioni rapide.
Risparmio Energia Massimizzate o prolungate l'energia del vostro ASUS Phone anche quando è inattivo o quando è connesso alla vostra rete. Personalizzate in modo intelligente le impostazioni di gestione dell'energia per le attività più frequenti come la lettura di e-mail o la visione di video. Configurazione di Risparmio energia Massimizzate, ottimizzate o personalizzate l'energia del vostro ASUS Phone con le modalità di gestione intelligente. 1.
Personalizzare la gestione dell'energia Impostate la luminosità dello schermo per le vostre attività frequenti come la lettura di e-mail o ebook, la visione di video, sfogliare siti web o ascoltare musica. Potete anche abilitare le funzioni di risparmio dell'energia per alcune app o abilitare la disconnessione automatica dalla rete quanto l'ASUS Phone è in sospensione. 1. In Risparmio energia selezionate Personalizzato e toccate l'icona delle impostazioni che trovate sulla destra . 2.
Configurazione delle impostazioni ASUS Cover. Per configurare le impostazioni di ASUS Cover: 1. Toccate > Impostazioni. 2. Toccate Impostazioni Personalizzate ASUS > Abilita custodia ASUS Cover.
11 Restate Zen Restate Zen 11 Mantenere il dispositivo aggiornato Mantenete il vostro ASUS Phone nel ciclo degli aggiornamenti per sistema Android, app e funzionalità. Aggiornare il sistema 1. Toccate quindi toccate Impostazioni. 2. Scorrete la schermata delle Impostazioni verso il basso e selezionate Informazioni su. 3. Toccate Aggiornamento del sistema quindi toccate Controlla aggiornamenti.
Mettere in sicurezza l'ASUS Phone Usate le funzioni di sicurezza dell'ASUS Phone per prevenire chiamate non desiderate o un accesso non autorizzato alle vostre informazioni. Sblocco dello schermo Potete scegliere di proteggere lo sblocco dello schermo dell'ASUS Phone in diversi modi. 1. Toccate quindi toccate Impostazioni > Schermata Blocco. 2. Toccate Blocco schermo quindi selezionate un'opzione per proteggere lo sblocco dello schermo del vostro ASUS Phone.
PIN Inserite almeno quattro numeri per impostare un PIN. IMPORTANTE! Assicuratevi di aver memorizzato perfettamente il PIN che avete creato per sbloccare il dispositivo. Sequenza Fate scorrere il vostro dito sui punti per creare una sequenza. IMPORTANTE! Il numero minimo di punti per creare una sequenza è quattro. Assicuratevi di aver memorizzato perfettamente la sequenza che avete creato per sbloccare il dispositivo.
Password Inserite almeno quattro caratteri per impostare una password. IMPORTANTE! Assicuratevi di aver memorizzato perfettamente la password che avete creato per sbloccare il dispositivo. Configurare le altre opzioni di sicurezza Oltre allo sblocco dello schermo è possibile configurare queste altre opzioni di sicurezza nella finestra di schermata Blocco. • Accesso rapido: Spostate il cursore di Accesso rapido su ON per poter avviare le app dalla schermata Blocco.
Conoscere l'identità del vostro ASUS Phone Conoscete l'identità del vostro ASUS Phone, come il numero di serie, l'IMEI (International Mobile Equipment Identity) o il numero del modello. Questo aspetto è molto importante in quanto, nel caso perdiate il vostro ASUS Phone, o questo vi venga rubato, potete contattare il vostro gestore di telefonia mobile e fornire queste informazioni in modo da bloccare un eventuale uso non autorizzato del dispositivo. Per visualizzare l'identità del vostro ASUS Phone: 1.
Appendice Appendice Comunicazioni Dichiarazione FCC (Federal Communications Commission) Questo dispositivo rispetta i requisiti indicati nel regolamento FCC - Parte 15. Il funzionamento è soggetto alle seguenti due condizioni: • Questo dispositivo non provoca interferenze dannose. • Questo dispositivo accetta qualsiasi interferenza comprese quelle che potrebbero causare un comportamento indesiderato.
Dichiarazione di avvertimento IC Il dispositivo potrebbe interrompere la trasmissione automaticamente in caso di mancanza di informazioni da trasmettere o nel caso in cui la trasmissione fallisse. Si noti che questo non è inteso a vietare la trasmissione delle informazioni di controllo, di segnalazione o l'uso di codici ripetitivi ove richiesto dalla tecnologia.
Avviso marchio CE Marchio CE per dispositivi provvisti di WLAN/Bluetooth Questo apparecchio è conforme ai requisiti previsti dalla direttiva 1999/5/EC della Commissione Europea del 9 Marzo 1999 che regolamenta le apparecchiature radio, i terminali di telecomunicazione e il reciproco riconoscimento della loro conformità. I valori massimi SAR CE per questo dispositivo sono pari a: •• 0.351 W/Kg (Testa) •• 0.
Requisiti per la sicurezza elettrica I prodotti con un consumo elettrico superiore a 6A e con peso superiore a 3Kg devono utilizzare cavi di alimentazione approvati con caratteristiche pari o superiori a: H05VV-F, 3G, 0.75mm2 o H05VV-F, 2G, 0.75mm2. Servizio di ritiro e riciclaggio ASUS Il programma di ritiro e riciclaggio dei prodotti ASUS deriva dal costante impegno aziendale a raggiungere i più elevati standard di protezione ambientale.