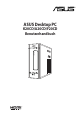
ASUS Desktop PC K20CD/A20CD/F20CD Benutzerhandbuch
G10808 Erste Ausgabe September 2015 Copyright © 2015 ASUSTeK Computer Inc. Alle Rechte vorbehalten. Kein Teil dieses Handbuchs, einschließlich der darin beschriebenen Produkte und Software, darf ohne ausdrückliche schriftliche Genehmigung von ASUSTeK COMPUTER INC. (“ASUS”) mit jeglichen Mitteln in jeglicher Form reproduziert, übertragen, transkribiert, in Wiederaufrufsystemen gespeichert oder in jegliche Sprache übersetzt werden, abgesehen von vom Käufer als Sicherungskopie angelegter Dokumentation.
Inhaltsverzeichnis Hinweise.......................................................................................................................................................4 Sicherheitsinformationen......................................................................................................................7 Anmerkungen zu diesem Handbuch...............................................................................................8 Wo finden Sie weitere Information............................
Hinweise Rücknahmeservices Das ASUS-Wiederverwertungs- und Rücknahmeprogramm basiert auf den Bestrebungen, die höchsten Standards zum Schutz der Umwelt anzuwenden. Wir glauben, dass die Bereitstellung einer Lösung für unsere Kunden die Möglichkeit schafft, unsere Produkte, Batterien, andere Komponenten und ebenfalls das Verpackungsmaterial verantwortungsbewußt der Wiederverwertung zuzuführen. Besuchen Sie bitte die Webseite http://csr.asus.com/english/Takeback.
IC: Kanadische Entsprechenserklärung Entspricht den kanadischen ICES-003 Class B-Spezifikationen. Dieses Gerät entspricht dem RSS210 von Industry Canada. Dieses Gerät der Klasse B erfüllt alle Anforderungen der kanadischen Bestimmung für Interferenz-Geräte. Dieses Gerät stimmt mit lizenzfreiem/lizenzfreien RSS-Standard(s) von Industry Canada überein.
RF Gerätehinweis CE: Europäische Gemeinschaft Entsprechenserklärung Das Gerät erfüllt die RF-Exposition Voraussetzung 1999/519/EG, die Empfehlung vom 12. Juli 1999 des Rates zur Begrenzung der Exposition der Bevölkerung gegenüber elektromagnetischen Feldern (0 bis 300 GHz). Das drahtlose Gerät entspricht der R+TTE-Richtlinie. W-LAN Radio verwenden Das Gerät ist für den Innenbereich beschrängt, wenn es im 5.15 bis 5.25 GHz Frequenzbereich benutzt wird.
Sicherheitsinformationen Bevor Sie das Gerät reinigen, trennen Sie es von der Stromversorgung. Wischen Sie den Desktop-PC mit einem weichen Tuch oder einem Fensterleder ab, das Sie mit einer Lösung aus einem nicht scheuernden Reinigungsmittel und einigen Tropfen warmem Wasser angefeuchtet haben. Wischen Sie verbleibende Feuchtigkeit mit einem trockenen Tuch ab. • NICHT auf ungerade oder instabile Oberflächen aufstellen. Wenden Sie sich an das Wartungspersonal, wenn das Gehäuse beschädigt wurde.
Anmerkungen zu diesem Handbuch Um sicherzustellen, dass Sie die Schritte richtig ausführen, beachten Sie die folgenden Symbole, die in dieser Anleitung benutzt werden. GEFAHR/WARNUNG:: Informationen zur Vermeidung von Verletzungen beim Versuch, eine Aufgabe abzuschließen. ACHTUNG: Informationen, um Schäden an den Komponenten zu vermeiden, beim Ausführen einer Aufgabe. WICHTIG: Anweisungen, denen Sie folgen MÜSSEN, um die Aufgabe zu vollenden.
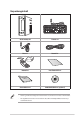
Verpackungsinhalt ASUS Desktop PC Tastatur x1 Maus x1 Netzteil x1 Installation Guide Netzteil x1 Installationshilfe x1 Garantiekarte x1 DVD/SDVD/RDVD x1 (optional) • Sollten o.g. Artikel beschädigt oder nicht vorhanden sein, wenden Sie sich bitte an Ihren Händler. • Die abgebildeten Teile dienen nur als Referenz. Tatsächliche Produktspezifikationen können je nach Modell variieren.
Kapitel 1 Erste Schritte Willkommen! Wir danken Ihnen für den Kauf dieses ASUS Desktop PCs! Der ASUS Desktop PC liefert topaktuelle Leistung, unvergleichliche Zuverlässigkeit und benutzerorientierte Anwendungen. All diese Eigenschaften wurden in diesem verblüffend futuristischen und eleganten Systemgehäuse vereint. Lesen Sie die ASUS Garantiekarte sorgfältig durch, bevor Sie Ihren ASUS Desktop-PC in Betrieb nehmen. Kennenlernen des Computers Abbildungen werden nur zu Ihrer Referenz bereitgestellt.
Frontseite GERMAN USB 3.0-Anschluss. Diese Universal Serial Bus 3.0 (USB 3.0)-Anschlüsse nehmen USB 2.0-Geräte wie Maus, Drucker, Scanner, Kamera, PDA und andere Geräte auf. • Bei der Installation eines Windows® -Betriebssystems verbinden Sie KEINE Tastatur /Maus mit den USB 3.0-Anschlüssen. • Der Beschränkungen des USB 3.0-Controllers wegen, können USB 3.0-Geräte nur unter Windows® und nur nach der Installation eines USB 3.0-Treibers verwendet werden. • USB 3.
GERMAN Rückseite Line-In-Anschluss (hellblau). Dieser Anschluss verbindet mit Tonband-, CDoder DVDPlayern und anderen Audiogeräten. Line-Out-Anschluss (Limette). Dieser Anschluss verbindet mit Kopfhörern oder Lautsprechern. In einer 4.1-, 5.1- oder 7.1-Kanal-Konfiguration wird die Funktion dieses Anschlusses zum Front-Lautsprecherausgang. Unterstützt vom ASUS Audio Wizard. Mikrofonanschluss (rosa). Dieser Anschluss verbindet ein Mikrofon.
GERMAN USB 3.0-Anschlüsse A. Dieser Universal Serial Bus 3.1- (USB 3.1-) Port ist für USB 3.1-Geräte vorgesehen. USB 3.0-Ports. Diese Universal Serial Bus 3.0 (USB 3.0)-Anschlüsse sind kompatibel mit USB 3.0-Geräten wie Mäusen, Druckern, Scannern, Kameras, PDAs und anderen. • Bei der Installation eines Windows® -Betriebssystems verbinden Sie KEINE Tastatur /Maus mit den USB 3.0-Anschlüssen. • Der Beschränkungen des USB 3.0-Controllers wegen, können USB 3.
Einrichten Ihres Computers Dieser Abschnitt hilft Ihnen beim Anschließen üblicher Hardware-Geräte an Ihren Computer, wie externer Monitore, Tastaturen, Mäuse und Netzteile. GERMAN Anschließen eines externen Monitors ASUS Grafikkarte verwenden (nur bei bestimmten Modellen) Verbinden Sie den Monitor mit dem Anzeigeausgang der aufgesetzten ASUS Grafikkarte. So verbinden Sie einen externen Monitor mit der ASUS Grafikkarte: 1. Verbinden Sie einen Monitor mit dem Anzeigeausgang der ASUS-Grafikkarte. 2.
Verwenden der Onboard Monitor-Ausgänge GERMAN Schließen Sie den Monitor an den integrierten Anzeigeanschluss an. So verbinden Sie einen externen Monitor mithilfe der integrierten Anzeigeanschlüsse: 1. Verbinden Sie ein VGA-Monitor mit dem VGA-Anschluss oder ein DVI-D-Monitor mit dem DVI-D-Anschluss oder ein HDMI-Monitor mit dem HDMI-Anschluss auf der Rückseite Ihres Computers. 2. Schließen Sie den Monitor an Ihren Desktop PC an.
Anschließen einer USB-Tastatur und USB-Maus GERMAN Verbinden Sie eine USB-Tastatur und USB-Maus mit den USB-Anschlüssen auf der Rücktafel (Rückseite) Ihres Computers. ` Verbinden Sie die USB-Tastatur und USB-Maus mit den USB-2.0-Anschlüssen. Anschließen des Netzkabels Verbinden Sie ein Ende des Neztkabels mit dem Stromanschluss auf der Rücktafel (Rückseite) Ihres Computers und das andere Ende mit der Steckdose.
Einschalten Ihres Computers Dieser Abschnitt beschreibt, wie Sie den Computer nach dem Einrichten einschalten. GERMAN Einschalten Ihres Computers So schalten Sie den Computer ein: 1. Schalten Sie den Monitor ein. 2. Drücken Sie die Einschalttaste Ihres Computers. 3. Warten Sie, bis das Betriebssystem automatisch startet.
Kapitel 2 GERMAN Anschließen von Geräten an Ihren Computer Anschließen eines USB-Datenträgers Dieser Desktop PC enthält USB 2.0, USB 3.0, and USB 3.1 Anschlüsse auf der Vorder- sowie Rückseite. Die USB-Anschlüsse ermöglichen Ihnen das Anschließen von USB-Geräten wie z.B. USB-Datenträger. So schließen Sie einen USB-Datenträger an: • Stecken Sie den USB-Datenträger in Ihren Computer ein. Rückseite Frontseite Entfernen eines USB-Datenträgers So entfernen Sie ein USB-Speichergerät: 1.
Anschließen von Mikrofon und Lautsprechern GERMAN Dieser Desktop-PC enthält Mikrofon- und Lautsprecheranschlüsse auf der Vorder- sowie Rückseite. Die auf der Rückseite gelegenen Audio E/A-Anschlüsse ermöglichen Ihnen den Anschluss von 2.1-Kanal, 4.1-Kanal und 5.1-Kanal Stereolautsprechern. Anschluss von Kopfhörer und Mikrofon Anschluss von 2.
GERMAN Anschluss von 4.1-Kanal Lautsprechern Anschluss von 5.
Anschluss von 7.
Anschließen von mehreren externen Anzeigegeräten GERMAN Ihr Desktop-PC enthält evtl. VGA-, HDMI- und DVI-Anschlüsse/Ausgänge und ermöglicht Ihnen das Verbinden von mehreren externen Anzeigegeräten. Ist eine Grafikkarte in Ihrem Computer installiert, verbinden Sie die Monitore mit den Monitoren der Grafikkarte. Einrichten mehrerer Anzeigegeräte Wenn Sie mehrere Monitore verwenden, können Sie die Anzeigemodi selbst bestimmen.
Anschließen eines HDTV Verbinden Sie ein High-Definition TV (HDTV) mit dem HDMI-Anschluss Ihres Computers. GERMAN • Sie benötigen ein HDMI-Kabel, um ein HDTV mit dem Computer zu verbinden. Das HDMI-Kabel muss separat erworben werden. • Um die beste Anzeigeleistung zu erhalten, sollte das HDMI-Kabel kürzer als 15 Meter sein.
Kapitel 3 GERMAN Computer verwenden Richtige Sitzhaltung beim Verwenden des Desktop-PCs Beim Verwenden des Desktop-PCs ist die Einhaltung der richtigen Sitzhaltung erforderlich, um Verspannungen Ihrer Handgelenke, Hände und anderer Gelenke oder Muskeln zu vermeiden. Dieser Abschnitt bietet Ihnen Tipps zum Vermeiden von physischen Beschwerden und möglichen Verletzungen beim Verwenden und Erfreuen Ihres Desktop-PCs.
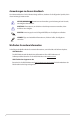
Speicherkartenleser verwenden GERMAN Digitale Kameras und andere digitale Aufnahmegeräte verwenden Speicherkarten, um digitale Bilder oder Medien zu speichern. Der auf der Frontseite Ihres Systems integrierte Speicherkartenleser ermöglicht das Lesen und Schreiben von und auf unterschiedlichen Speicherkarten. So verwenden Sie eine Speicherkarte: 1. Stecken Sie eine Speicherkarte in den Kartensteckplatz. • Eine Speicherkarte ist gekerbt und lässt sich nur in eine Richtung einpassen.
GERMAN Optisches Laufwerk verwenden Einlegen einer optischen Disk So legen Sie einen optischen Datenträger ein: 1. Drücken Sie beim eingeschalteten System die Auswurftaste, um das Laufwerk zu öffnen. 2. Legen Sie den Datenträger in das Laufwerk, mit der bedruckten Seite nach außen, wenn der Desktop PC vertikal aufgestellt worden ist oder mit der bedruckten Seite nach oben, wenn das Gerät horizontal aufgestellt worden ist. 3. Drücken Sie auf das Laufwerksfach, um es zu schließen. 4.
GERMAN 28 Kapitel 3: Ihren Computer verwenden
Kapitel 4 GERMAN Mit dem Internet verbinden Kabelverbindung Für eine Verbindung zwischen Ihrem Computer und DSL-/Kabelmodem oder Lokales Netzwerk (Local Area Network / LAN) verwenden Sie ein RJ-45-Kabel. Über DSL-/Kabelmodem verbinden So verbinden Sie via DSL-/Kabelmodem: 1. Richten Sie das DSL-/Kabelmodem ein. Beziehen Sie sich auf die Dokumentation, die mit Ihrem DSL-/Kabelmodem geliefert wurde. 2.
Über ein lokales Netzwerk (LAN) verbinden GERMAN So verbinden Sie sich via LAN: 1. Verbinden Sie ein Ende des RJ-45-Kabels mit dem LAN (RJ-45)-Anschluss auf der Rückseite Ihres Computers und das andere Ende mit dem (Internet) LAN. LAN RJ-45 cable 2. Schalten Sie Ihren Computer ein. 3. Konfigurieren Sie die erforderlichen Internetverbindungseinstellungen. • Für Details und Hilfestellung zur Einrichtung einer Internetverbindung wenden Sie sich an Ihren Internetdienstanbieter (ISP).
Eine dynamische IP/PPPoE-Netzwerkverbindung konfigurieren So konfigurieren Sie eine dynamische IP/PPPoE- oder statische IP-Netzwerkverbindung: Starten Sie das Network and Sharing Center (Netzwerk- und Freigabecenter) auf eine der folgenden beiden Weisen: GERMAN 1. a) Rechtsklicken Sie aus der Taskleiste und , anschließend klicken Sie auf Open Network and Sharing Center (Netzwerk- und Freigabecenter öffnen).
Kehren Sie zum Network and Sharing Center (Netzwerkund Freigabecenter) zurück, klicken Sie dann auf Set up a new connection or network (Neue Verbindung oder neues Netzwerk einrichten). 8. Wählen Sie Connect to the Internet (Verbindung mit dem Internet herstellen), klicken Sie dann auf Next (Weiter). 9. Wählen Sie Broadband (PPPoE) (Breitband (PPPoE), klicken Sie dann auf Next (Weiter). 10. Folgen Sie den Anweisungen auf dem Bildschirm, um die Registrierung abzuschließen. GERMAN 7.
Kapitel 5 GERMAN Fehlerbehebung Fehlerbehebung Dieses Kapitel zeigt einige Probleme, die auftreten können und die möglichen Lösungen. ? ? Mein Computer kann nicht eingeschaltet werden und die Betriebs-LED auf der Frontseite leuchtet nicht. • Prüfen Sie, ob Ihr Computer richtig angeschlossen ist. • Prüfen Sie, ob die (Strom)Steckdose betriebsbereit ist. • Prüfen Sie, ob das Netzteil eingeschaltet ist. Beziehen Sie sich auf den Abschnitt Ein-/ Ausschalten Ihres Computers in Kapitel 1.
? Die Pfeiltasten auf der Zahlentastatur funktionieren nicht. GERMAN Prüfen Sie, ob die Zahlensperre- (NUM)-LED ausgeschaltet ist. Falls die NUM-LED an ist, werden die Tasten auf der Zahlentastatur nur für die Zahleneingabe genutzt. Falls Sie die Tasten auf der Zahlentastatur verwenden möchten, drücken Sie die Taste NUM, um die NUM-LED auszuschalten. ? ? ? 34 Keine Anzeige auf dem Monotor. • Prüfen Sie, ob der Monitor eingeschaltet ist.
Ich möchte die Systemeinstellungen meines Computers wiederherstellen oder rückgängig machen, ohne meine persönlichen Dateien oder Daten zu beeinflussen. GERMAN ? Sie können die Windows® 10-Wiederherstellungsoption Refresh everything without affecting your files (Alles ohne Beeinflussung Ihrer Dateien aktualisieren) zum Wiederherstellen und Zurücknehmen der Systemeinstellungen Ihres Computers ohne Beeinflussung Ihrer persönlichen Daten (wie Dokumente und Fotos) verwenden.
Power GERMAN Problem Kein Strom (Die Betriebs-anzeige ist aus) Mögliche Ursachen Aktion Falsche Betriebsspannung • Passen Sie den Betriebsspannungsschalter Ihres Computers je nach den Anforderungen Ihrer Region an. • Passen Sie die Spannungs-einstellungen an. Vergessen Sie nicht, den Stromkabel aus der Steckdose zu ziehen. Ihr Computer ist nicht eingeschaltet. Drücken Sie den Einschaltknopf auf der Frontseite Ihres Computers, um ihn einzuschalten.
Problem Mögliche Ursachen Aktion Das LAN-Kabel ist nicht angeschlossen. Verbinden Sie das LAN-Kabel mit Ihrem Computer. Probleme mit dem LAN-Kabel Kein Internet Ihr Computer ist nicht sachgemäß mit dem Router oder Hub verbunden. Netzwerkeinstellungen GERMAN LAN Die LAN LED sollte an sein,. Andernfalls probieren Sie ein anderes LAN-Kabel. Falls das Problem weiter besteht, kontaktieren Sie den ASUS Kundendienst. Stellen Sie sicher, dass Ihr Computer sachgemäß mit den Router oder Hub verbunden ist.
System GERMAN Problem Systemgeschwindigkeit ist zu gering Das System bleibt öfters hängen oder reagiert nicht. 38 Mögliche Ursachen Aktion Es werden zu viele Programme ausgeführt. Schließen Sie einige Programme. Computervirusattacke • Verwenden Sie ein Antivirusprogramm, um Ihren Computer nach Viren zu prüfen und zu reparieren. • Reinstallieren Sie das Betriebssystem.
Problem Hoher Geräuschpegel nach Computerstart. Mögliche Ursachen Aktion Ihr Computer wird hochgefahren. Dies ist Normal. Beim Computerstart läuft der Lüfter mit voller Geschwindigkeit. Der Lüfter verlangsamt sich, nachdem das Betriebssystem geladen wurde. Die BIOS-Einstellungen haben sich geändert. Stellen Sie die BIOS-Standardeinstellungen wieder her. Alte BIOS-Version Der CPU-Lüfter wurde ersetzt. Hoher Geräuschpegel beim Computerbetrieb.
GERMAN 40 Kapitel 5: Fehlerbehebung
ASUS Desktop PC Windows® 10 Benutzerhandbuch Anhang Windows 10-Benutzerhandbuch G10435 Erste Ausgabe Mai 2015 Copyright © ASUSTeK Computer Inc.
GERMAN
Der erste Systemstart GERMAN Wenn Sie Ihren Computer das erste Mal starten, erscheint eine Reihe von Bildschirmen, die Sie durch die Konfiguration der Grundeinstellungen Ihres Windows® 10-Betriebssystems führen. So starten Sie Ihren Desktop PC das erste Mal: 1. Drücken Sie zum Einschalten Ihres Desktop PCs die Ein-/Austaste. Warten Sie einige Minuten, bis der Einrichtungsbildschirm erscheint. 2. Wählen Sie am Einrichtungsbildschirm Ihre Region und die Sprache, zur Nutzung auf Ihrem Desktop PC. 3.
Windows 10-Benutzeroberfläche verwenden GERMAN Die Windows 10-Benutzerschnittstelle enthält das Liebings-Startmenü und das Startbildschirm im Kachelformat. Sie beinhaltet folgende Funktionen, die Sie während der Arbeit an Ihrem Desktop PC nutzen können.
Startbildschirm GERMAN Der Startbildschirm, der gemeinsam mit dem Startmenü erscheint, hilft beim Organisieren all Ihrer benötigten Apps an einem einzigen Ort. Die Apps am Startbildschirm werden zum einfachen Zugriff im Kachelformat angezeigt. Bei einigen Apps müssen sich mit Ihrem Microsoft-Konto anmelden, wenn Sie den vollen Funktionsumfang nutzen möchten.
Taskleiste GERMAN Windows® 10 kommt mit der standardmäßigen Taskleiste, die all Ihre aktuell ausgeführten Apps oder Elemente im Hintergrund bewahrt. Apps aus der Taskleiste lösen 1. Rechtsklicken Sie auf den Startbildschirm oder die Taskleiste, rechtsklicken Sie dann auf die App, die Sie lösen möchten. 2. Klicken Sie zum Entfernen der App vom Startbildschirm oder von der Taskleiste Unpin from Start (Von „Start“ lösen) oder Unpin this program from taskbar (Dieses Programm von der Taskleiste lösen).
Einrasten-Funktion GERMAN Die Einrasten-Funktion zeigt etwa vier Apps oder mehr an einem Bildschirm, ermöglicht Ihnen das Ausführen oder Umschalten zwischen Apps. Einrasten verwenden Verwenden Sie zum Aktivieren und Nutzen der Snap-Funktion die Maus bzw. die Tastatur Ihres Desktop PCs. Per Maus a) Starten Sie eine App, dann ziehen und zum Einrasten in einer Bildschirmecke ablegen. b) Lassen Sie eine weitere App an Ihrer bevorzugten Position am Bildschirm einrasten.
Tastaturkürzel GERMAN Über Ihre Tastatur können Sie zudem folgende Tastenkombinationen zum Starten von Anwendungen und zur Windows® 10-Navigation nutzen.
Blendet das Lupensymbol ein und vergrößert Ihren Bildschirm. + <+> + GERMAN Verkleinert Ihren Bildschirm. + <-> Öffnet die Erzähler-Einstellungen. Alles entfernen und Windows 10 neu installieren Wenn Sie Ihren All-in-One PC auf die ursprünglichen Werkseinstellungen zurücksetzten möchten, können Sie dies über die Option „Alles entfernen und neu installieren“ in den PC-Einstellungen erledigen. Mit den folgenden Schritten können Sie diese Möglichkeit nutzen.
ASUS Kontaktinformation ASUS Kontaktinformation GERMAN ASUSTeK COMPUTER INC. Adresse 15 Li-Te Road, Peitou, Taipei, Taiwan 11259 Telefon +886-2-2894-3447 Fax +886-2-2890-7798 E-mail info@asus.com.tw Webseite www.asus.com.tw Technischer Support Telefon +86-21-38429911 Online Support support.asus.com ASUS COMPUTER INTERNATIONAL (Amerika) Adresse 800 Corporate Way, Fremont, CA 94539, USA Telefon +1-510-7393777 Fax +1-510-608-4555 Webseite usa.asus.