G6591 Notebook-PC Benutzerhandbuch Mai 2011
Inhaltsverzeichnis Kapitel 1: Vorstellung des Notebook-PCs Über dieses Handbuch...................................................................................... 6 Anmerkungen zu diesem Handbuch........................................................... 6 Sicherheitshinweise........................................................................................... 7 Vorbereiten Ihres Notebook-PCs.................................................................
Kapitel 4: Benutzen des Notebook-PCs Zeigegerät...........................................................................................................52 Benutzung des Touchpads...........................................................................53 Abbildungen zur Bedienung des Touchpads........................................54 Pflege des Touchpads....................................................................................57 Automatische Touchpad-Sperre...................................
Aussagen zur FCC-Erklärung.................................................................. A-23 FCC-Sicherheitswarnungen zur RF-Aussetzung.............................. A-24 Konformitätserklärung (R&TTE Direktive 1999/5/EC).................... A-24 CE-Kennzeichen.......................................................................................... A-25 TV-Tuner-Hinweis.......................................................................................
1 Kapitel 1: Vorstellung des Notebook-PCs
Über dieses Handbuch Sie lesen gerade das Notebook-Handbuch. Dieses Handbuch enthält Informationen zu den unterschiedlichen Notebook-Komponenten und ihrer Benutzung. Im Folgenden finden Sie die Hauptabschnitte dieses Handbuchs: 1. 2. 3. 4. 5. Vorstellung des Notebook-PCs Stellt Ihnen das Notebook und dieses Handbuch vor. Die einzelnen Teile Bietet Ihnen Information zu den Notebook-Komponenten. Erste Schritte Bietet Ihnen Information zu den ersten Arbeitsschritten mit dem Notebook.
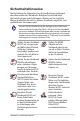
Sicherheitshinweise Die Einhaltung der folgenden Vorsichtsmaßnahmen verlängert die Lebensdauer des Notebooks. Befolgen Sie deshalb bitte alle Vorkehrungen und Anleitungen. Überlassen Sie sämtliche Wartungsarbeiten, die nicht in diesem Handbuch angeführt sind, qualifiziertem Servicepersonal. Trennen Sie das Notebook vor der Reinigung vom Netzstrom und entnehmen Sie den/die Akku(s).
Zulässige Betriebstemperaturen: Dieser Notebook-PC darf nur in einer Umgebung mit einer Temperatur zwischen 5°C und 35° C verwendet werden. Bedecken Sie das eingeschaltete Notebook NICHT mit Materialien, die die Luftzirkulation beeinträchtigen. Stecken Sie es NICHT eingeschaltet in eine Tragetasche. Benutzen Sie KEINE beschädigten Netzkabel, Zubehörteile oder Peripheriegeräte. EINGANGSSPANNUNG: Prüfen Sie am Aufkleber an der Notebook-Unterseite, ob Ihr Adapter den Stromversorgungsanforderungen entspricht.
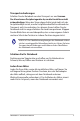
Transportvorkehrungen Schalten Sie das Notebook vor dem Transport aus und trennen Sie alle externen Peripheriegeräte ab, um die Anschlüsse nicht zu beschädigen. Wenn der Strom abgeschaltet wird, zieht sich der Festplattenkopf zurück, um die Festplattenoberfläche während des Transports nicht zu verkratzen. Aus diesem Grund sollten Sie das Notebook nicht im angeschalteten Zustand transportieren.
Vorkehrungen für Flugreisen Rufen Sie Ihre Fluggesellschaft an, wenn Sie das Notebook an Bord des Flugzeugs benutzen möchten. Die meisten Fluggesellschaften haben Einschränkungen für die Benutzung elektronsicher Geräte. Meistens wird deren Verwendung nur im Zeitraum zwischen Start und Landung gestattet.
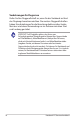
Vorbereiten Ihres Notebook-PCs Es folgt eine Kurzanleitung zur Nutzung Ihres Notebook-PCs. Einlegen des Batteriepacks 3 1 2 Anschließen des Netzteils 2 3 110V -220 V 110V -220 V 1 2 3 1 Das tatsächlich im Lieferumfang enthaltenen Betriebssystem und die Anwendungen unterscheiden sich je nach Verkaufsgebiet und Modell. Es können Unterschiede zwischen den Abbildungen und dem Aussehen Ihres Notebook-PCs auftreten. Nehmen Sie bitte Ihren Notebook-PC als korrekt an.
Öffnen des Bildschirms 1. �������������������������������������������������������� Heben Sie den Bildschirm vorsichtig mit Ihren Daumen an. 2. Kippen Sie den Bildschirm langsam in den gewünschten Betrachtungswinkel. Einschalten des Notebooks 1. 2. Drücken Sie den Stromschalter unterhalb des Bildschirms und lassen Sie ihn wieder los. Benutzen Sie die Tasten [Fn]+[F5] oder [Fn]+[F6], um die LCDHelligkeit einzustellen.
2 Kapitel 2: Die einzelnen Teile
Oberseite (bei bestimmten Modellen) Das Aussehen der Oberseite ist von der Region abhängig.
1 2 3 4 6 esc f1 f2 f3 f4 f5 f6 f7 f8 f9 f10 f11 f12 pause break prt sc sysrq delete insert backspace home pgup pgdn end num lk scr lk tab home pgup end pgdn 7 enter caps lock shift shift enter ctrl fn alt alt ctrl insert delete 8 9 Notebook-PC Benutzerhandbuch 15
1 Kamera Die integrierte Kamera ermöglicht Bild- und Videoaufnahme. Diese Funktion kann bei Videokonferenzen und anderen interaktiven Anwendungen benutzt werden. 2 Kameraanzeige 3 4 5 6 Diese Anzeige leuchtet auf, wenn die eingebaute Kamera aktiv ist. Mikrofon (eingebaut) Das eingebaute Mono-Mikrofon kann für Videokonferenzen, Sprachführungen oder einfache Audio-Aufnahmen benutzt werden. Bildschirm Die Bildschirmfunktionen sind die gleichen wie die eines Desktop-Monitors.
7 Tastatur 8 Die Tastatur bietet Tasten in Standardgrößen mit komfortablem Tastenweg (die Tiefe, bis zu der die Tasten heruntergedrückt werden können) und eine Handflächenauflage für beide Hände. Zwei Windows™ -Funktionstasten helfen bei der Navigation im Windows™ -Betriebsystem. Touchpad und -Tasten 9 Das Touchpad mit seinen Tasten ist ein Zeigegerät mit denselben Funktionen wie eine Desktopmaus.
Unterseite Das Aussehen der Unterseite kann je nach Modell variieren. Die Größe des Akkupacks kann je nach Modell variieren.
2 1 3 4 5 WARNUNG! Die Unterseite des Notebooks kann sehr heiß werden. Seien Sie vorsichtig beim Umgang mit dem Notebook, während es in Betrieb ist oder gerade erst ausgeschaltet wurde. Hohe Temperaturen sind während des Betriebs und beim Laden des Akkus normal. Legen Sie das Notebook nicht auf weichen Oberflächen (z.B. Bett) ab, welche die Lüftungsöffnungen blockieren könnten. SETZEN SIE DAS NOTEBOOK NICHT AUF IHREN SCHOSS ODER ANDERE KÖRPERTEILE, UM HITZEVERLETZUNGEN ZU VERMEIDEN.
2 Akkuverriegelungsfeder Die Akkuverriegelung sichert das Akkupack. Beim Einlegen rastet das Akkupack automatisch ein. Um das Akkupack zu entfernen, lösen Sie die Verriegelung. 3 Akkupack Der Akku lädt sich automatisch auf, sobald er an ein Netzteil angeschlossen wird, und beliefert den NotebookPC weiterhin mit Strom, wenn die Netzteilverbindung unterbrochen wird. Damit kann der Notebook-PC weiter betrieben werden, selbst wenn Sie zeitweilig Ihren Standort wechseln.
1 2 3 4 5 6 Rechte Seite (bei bestimmten Modellen) 1 2 1 2 1 2 3 3 3 3 1 4 5 6 7 5 6 8 5 6 7 8 4 6 7 8 4 6 7 8 4 4 Kopfhörerbuchse Die Stereo-Kopfhörerbuchse (1/8 Zoll) dient zum Verbinden des Audioausgangssignals vom Notebook-PC mit verstärkten Lautsprechern oder einem Kopfhörer. Die integrierten Lautsprecher werden automatisch deaktiviert, wenn diese Buchse verwendet wird.
3 USB-Anschluss (2.0) Universal Serial Bus (USB)-Ports unterstützen viele USBkompatible Geräte wie z.B. Tastaturen, Zeigegeräte, Videokameras, Modems, Festplattenlaufwerke, Drucker, Monitore und Scanner, die alle in Reihe bei einer Übertragungsgeschwindigkeit von bis zu 12 MBits/Sek (USB 1.1) und 480 MBits/Sek (USB 2.0). angeschlossen werden können. USB ermöglicht gleichzeitigen Betrieb von vielen Geräten auf einem Computer, wobei Peripheriegeräte wie z.B.
7 Notauswurf optischen Laufwerk (Position ist von der Modellausführung abhängig) Der Notauswurf wird benutzt, um die Schublade des optischen Laufwerkes herauszufahren, falls der elektrische Auswurf nicht funktioniert. Benutzen Sie den Notauswurf nicht an Stelle des elektrischen Auswurfes. 8 Kensington®-Schlossbuchse Mit dem Kensington®-Schloss können Sie Ihr Notebook mittels Kensington®-kompatibler NotebookSicherheitsprodukte sichern. Diese Sicherheitsprodukte umfassen z.B.
4 3 1 2 Seite Linke 1 12 23 6 34 4 55 3 2 1 5 4 5 7 76 6 67 7 22 33 44 55 88 77 22 33 44 55 66 77 Strom (DC)-Eingang Das beigefügte Netzteil wandelt Wechselstrom zur Verwendung mit dieser Buchse in Gleichstrom um. Diese Buchse versorgt den ASUS Notebook-PC mit Strom und lädt den internen Akku auf. Verwenden Sie nur den beigefügten Netzwerkadapter, um das ASUS Notebook nicht zu beschädigen. DAS NETZTEIL KANN SICH STARK ERHITZEN.
2 3 LAN-Anschluss Der RJ-45 LAN-Anschluss mit acht Polen ist größer als der RJ-11-Modemanschluss und nimmt ein RJ-45 EthernetKabel zur Verbindung eines lokalen Netzwerks auf. Der integrierte RJ45-Anschluss ermöglicht eine bequeme Verwendung ohne weitere Adapter. Lüftungsöffnungen Die Lüftungsöffnungen lassen kühle Luft in den NotebookPC hinein und die warme Luft wieder heraus.
6 7 USB Port (3.0) (nur bei bestimmten Modellen / 2.0) USB Port (3.0) (nur bei bestimmten Modellen / 2.0) Dieser Anschluss unterstützt auch die USB Charger+ Funktion zum Aufladen Ihrer angeschlossenen USB-geräte, auch wenn der Notebook-PC ausgeschaltet ist. 1 Rückseite (bei bestimmten Modellen) 1 1 1 Akkupack Der Akku lädt sich automatisch auf, sobald er an ein Netzteil angeschlossen wird, und beliefert den Notebook1 PC weiterhin mit Strom, wenn die Netzteilverbindung unterbrochen wird.
1 Vorderseite (bei bestimmten Modellen) 1 1 1 Kopfhörerbuchse 2 Die Stereo-Kopfhörerbuchse (1/8 Zoll) dient zum Verbinden des Audio-Ausgangssignals vom Notebook-PC mit verstärkten Lautsprechern oder einem Kopfhörer. Die integrierten Lautsprecher1 werden automatisch deaktiviert, wenn diese Buchse verwendet wird. Mikrofoneingang Mikrofoneingang Die Mono-Mikrofonbuchse (1/8 Zoll) kann ein externes Mikrofon oder Ausgangssignale von Audio-Geräten aufnehmen.
Notebook-PC Benutzerhandbuch
Kapitel 3: 3 Erste Schritte
Energieversorgung Netzanschluss verwenden Die Stromversorgung des Notebook-PCs besteht aus zwei Teilen, dem Adapter und dem Batteriesystem. Der Adapter konvertiert Wechselstrom aus der Steckdose zum für das Notebook benötigten Gleichstrom. Der universale Wechselstrom-Gleichstromadapter ist im Lieferumfang des Notebooks enthalten, das heißt es kann problemlos an alle 100V-120V- sowie 220V-240V-Steckdosen angeschlossen werden.
WICHTIG! Wenn Sie dieses Notebook mit einem anderen Adapter betreiben oder mit dem Notebookadapter andere elektrische Geräte speisen, kann es zu Beschädigungen kommen. Wenn Rauch, Brandgeruch oder extreme Hitze vom Netzadapter kommen, wenden Sie sich an qualifiziertes Wartungspersonal. Wenden Sie sich auch dann an Wartungspersonal, wenn Sie einen fehlerhaften Netzadapter vermuten. Mit einem fehlerhaften Netzadapter können Sie sowohl Ihre Akkus als auch das Notebook beschädigen.
Akku verwenden Der Notebook-PC verfügt über ein auswechselbares Batteriepack, das aus mehreren zusammengeschlossenen Batterieeinheiten besteht. Ein vollständig geladenes Batteriepack liefert mehrere Stunden lang Strom. Diese Dauer kann mit den Energiesparoptionen in den BIOS-Einstellungen noch verlängert werden. Weitere Batteriepacks können zusätzlich noch von Ihrem Notebook-Händler erworben werden. Akku installieren und entfernen Der Akku ist bei Anlieferung des Notebooks u.U. bereits installiert.
So entfernen Sie den Akku 2 1 3 WICHTIG! Verwenden Sie nur die diesem Notebook beigelegten Akkus und Netzadapter, oder solche, die ausdrücklich vom Hersteller oder Händler zur Verwendung mit diesem Modell empfohlen werden, sonst kann Ihr Notebook beschädigt werden. Pflege des Akkus Wie alle wiederaufladbaren Akkus kann auch der NotebookAkku nicht beliebig oft neu aufgeladen werden.
Notebook einschalten Beim Einschalten des Notebooks erscheint seine Systemstartmeldung auf dem Bildschirm. Wenn nötig, können Sie die Helligkeit mit den Hotkeys einstellen. Wenn Sie das BIOS-SetupProgramm aufrufen oder die Systemkonfiguration ändern wollen, drücken Sie [F2] beim Booten des Systems. Wenn Sie die Taste [Tab] während des Begrüßungsbildschirms drücken, erscheinen Standard-Bootinformationen wie z. B. die BIOS-Version.
Self Monitoring and Reporting Technology Die S.M.A.R.T. (Self Monitoring and Reporting Technology) prüft die Festplatten während des POST und zeigt eine Warnung an, wenn das Festplattenlaufwerk gewartet werden muss. Wenn Sie während des Systemstarts kritische Festplattenwarnungen sehen, erstellen Sie sofort Sicherheitskopien Ihrer Daten und starten das Windows-Programm zur Datenträgerprüfung und diagnose.
Überprüfen des Akkus Das Batteriesystem arbeitet mit dem Windows Smart Battery Standard, der den Prozentsatz des im Batteriepack verbleibenden Energielevels akkurat wiedergibt. Ein vollständig geladenes Akkupack versorgt den Notebook-PC mehrere Stunden mit Strom, doch die genaue Dauer hängt von Ihren Stromspareinstellungen, Arbeitsgewohnheiten und von Prozessor, Systemspeicher und Monitorgröße des Notebooks ab. Die hier gezeigten Bilder können sich von den Anzeigen auf Ihrem System unterscheiden.
Laden des Akkus Bevor Sie Ihren Notebook PC ohne Netzanschluss betreiben können, muss die Batterie aufgeladen werden. Die Batterie fängt an zu laden, sobald der Notebook PC an das externe Netzteil angeschlossen ist. Laden Sie die Batterie vollständig auf, bevor Sie sie das erste Mal verwenden. Eine neue Batterie muss vollständig geladen werden, bevor Sie das Netzteil vom Notebook PC trennen.
Energieoptionen Der Stromschalter schaltet den Notebook-PC ein und aus oder versetzt ihn in den Energiesparmodus oder Ruhezustand. In der WindowsSystemsteuerung kann unter “Energieoptionen” festgelegt werden, welche Aktion beim Drücken des Stromschalters ausgeführt werden soll Für andere Optionen wie z.B. “Benutzer wechseln, Neu starten, Energie sparen, Ruhezustand oder Herunterfahren,” klicken Sie das Pfeilsymbol neben dem Schlosssymbol.
Not-Ausschalten Für den Fall, dass Ihr Betriebssystem nicht richtig ausgeschaltet oder neu gestartet werden kann, gibt es noch zwei Möglichkeiten, Ihren • Halten Sie die Stromtaste mehr als vier Sekunden lang gedrückt. WICHTIG! Um Datenverlust zu vermeiden, betätigen Sie die Reset-Taste nicht, während Daten noch geschrieben werden.
Energieverwaltungsmodi Das Notebook verfügt über eine Reihe automatischer und einstellbarer Stromsparfunktionen, mit denen Sie die Batterielebensdauer und Total Cost of Ownership (TCO) maximieren können. Einige dieser Funktionen können Sie über das Power-Menü im BIOS-Setup steuern. ACPI-Strommanagementeinstellungen werden über das Betriebssystem vorgenommen.
Energie sparen ist dasselbe wie Suspend-to-RAM (STR). Diese Funktion speichert Ihre aktuellen Daten und den Systemstatus im RAM (Arbeitsspeicher), während viele Komponenten ausgeschaltet werden. Da R AM flüchtiger Speicher ist, erfordert es Energie, um die Daten aufrechtzuhalten (aufzufrischen). Klicken Sie auf Windows und das Pfeilsymbol neben dem Schlosssymbol, um diese Option anzuzeigen. Sie können auch die Tastenkombination [Fn F1] drücken, um diesen Modus zu aktivieren.
Tastatursonderfunktionen Farbige Hotkeys Im Folgenden finden Sie die Definitionen der farbigen Hotkeys auf der Notebook-Tastatur. Die farbigen Befehle können Sie nur aufrufen, wenn Sie zuerst die Funktionstaste gedrückt halten, während Sie eine Taste mit einem farbigen Befehl drücken. Die Positionen der Hotkeys können sich je nach Modell unterscheiden, die Funktionen der Hotkeys sollten sich deshalb nicht ändern. Halten Sie sich an die Symbole anstatt an die Funktionstasten.
Durchgestrichenes Touchpad (F9) : Schaltet das eingebaute Touchpad auf deaktiviert und aktiviert. Das Sperren des Touchpads verhindert unbeabsichtigte Zeigerbewegungen während des Schreibens und wird am besten mit einer externen Maus zusammen benutzt. ANMERKUNG: Ein Licht leuchtet zwischen den Schaltflächen des Touchpads von bestimmten Modellen auf, wenn das Touchpad NICHT gesperrt ist, und erlischt, wenn das Touchpad gesperrt ist.
Fn+Enter (erweiterte Tastatur): Öffnet das Windows”Rechner”-Programm. Microsoft Windows-Tasten Es gibt die folgenden zwei Windows-Tasten auf der Tastatur. Die Taste mit dem Windows-Logo öffnet das Startmenü in der linken unteren Ecke des Windows-Bildschhirms. Die andere Taste aktiviert das Eigenschaften-Menü und ist äquivalent zum Rechtsklick auf ein Objekt mit der Maus oder dem Touchpad.
Tastatur als numerischer Zeichenblock Der Zeichenblock ist in die Tastatur eingebettet und besteht aus 15 Tasten, die zahlenintensive Eingaben einfacher gestalten. Diese Doppelfunktionstasten werden auf den Tastenoberflächen orange gekennzeichnet. Die Nummernzuweisungen finden Sie in der oberen rechten Ecke jeder Taste, wie in der Abbildung gezeigt. Wenn die Nummerntastatur durch Druck auf [Fn][Ins/Num LK] aktiviert wird, leuchtet die LED für den numerischen Zeichenblock.
Multimediatasten (an bestimmten Modellen) Mit Hilfe der Multimediatasten können Sie Multimediaanwendungen einfach und bequem bedienen. Im Folgenden werden die Funktionen der Multimediatasten am Notebook-PC mit dem Windows Media Player beschrieben. Die Ergebnisse können bei anderen Multimediaprogrammen anders ausfallen. Einige Kontrolltasten können je nach Notebook-Modell anders ausfallen. Für die CD-Kontrollfunktion benutzen Sie die [Fn]-Taste zusammen mit den Pfeiltasten.
Tasten und Statusanzeigen Tasten Stromschalter Der Stromschalter schaltet den Notebook-PC ein und aus oder versetzt ihn in den Energiesparmodus oder Ruhezustand. In der Windows-Systemsteuerung kann unter “Energieoptionen” festgelegt werden, welche Aktion beim Drücken des Schalters ausgeführt werden soll. Die Ausführung des Stromschalters kann je nach Modell unterschiedlich ausfallen.
Statusanzeigen ESC F1 F2 F3 F4 F5 F6 F7 F8 F9 F10 F11 F12 Pause Break Prt sc Sysrq Delete Insert esc Home Pgup Pgdn f1 f2 f3 f4 f5 f6 f7 f8 f9 f10 f11 f12 pause break prt sc sysrq delete insert home pgup pgdn end End backspace Backspace Num lk Scr lk num lk scr lk tab Tab 7 8 Shift Shift 9 home Pgup Home Enter Caps Lock pgup 4 5 1 2 End enter caps lock 6 shift 3 shift pgdn end Pgdn enter Enter Ctrl Fn Alt Alt Ctrl 0 Insert ctrl
Betriebsanzeige Die Betriebsanzeige leuchtet auf, wenn der Notebook.PC eingeschaltet ist und blinkt langsam, wenn sich der NotebookPC im Save-to-RAM (Suspend) -Modus befindet. Diese Anzeige leuchtet nicht, wenn der Notebook-PC ausgeschaltet ist oder sich im Standby-Modus befindet. Batterieladeanzeige (zweifarbig) Die zweifarbige Batterie-Indikator-LED zeigt Ihnen den Batteriestatus wie folgt: Grün EIN: Der Akku ist zwischen 95% und 100% aufgeladen (Netzteil ist angeschlossen).
Nummernverriegelungsanzeige Zeigt an, dass die Nummernverrieglung [Num Lk] aktiviert ist. Mit Hilfe der Nummernverriegelung können einige Tasten der Tastatur zur Zahleneingabe genutzt werden. Capital Lock-Anzeige (Großbuchstaben-Feststelltaste) Zeigt an, dass Capital Lock [Caps Lock] aktiviert ist. Capital Lock ermöglicht die Feststellung der Großschrift einiger Buchstabentasten (z.B. A, B, C). Wenn die Lampe für Capital Lock aus ist, schreiben die Buchstabentasten in Kleinschrift (z.B. a,b,c).
4 Kapitel 4: Benutzen des Notebook-PCs
Zeigegerät Das integrierte Touchpad dieses Notebook ist mit allen zweitastigen/ dreitastigen Mäusen und PS/2-Wheel-Mäusen vollständig kompatibel. Das Touchpad ist druckintensiv und enthält keine beweglichen Teile. Aus diesem Grund können mechanische Fehler vermieden werden. Zur Arbeit mit einigen Anwendungen muss ein Gerätetreiber installiert werden.
Benutzung des Touchpads Zur Benutzung des Touchpads müssen Sie einfach nur etwas Druck mit einer Fingerspitze ausüben. Die Hauptfunktion des Touchpads ist, den Cursor zu bewegen oder Elemente auf dem Bildschirm auszuwählen, wobei Sie Ihre Fingerspitze statt eine DesktopMaus verwenden. Die folgenden Abbildungen zeigen die richtige Bedienung des Touchpads. Bewegen des Zeigers Berühren Sie mit Ihrem Finger die Mitte des Touchpads und gleiten in eine beliebige Richtung, um den Cursor zu bewegen.
Abbildungen zur Bedienung des Touchpads Klicken/Klopfen - Drücken Sie die linke Taste oder klopfen mit Ihrer Fingerspitze leicht auf das Touchpad, wenn sich der Cursor über einem Bildschirmelement befindet (lassen Sie Ihren Finger auf dem Touchpad, bis das Element ausgewählt ist). Dadurch ändert das ausgewählte Element seiner Farbe. Die folgenden beiden Beispiele haben identische Resultate.
Ziehen - Ziehen bedeutet, ein Element “aufzuheben” und es an einen gewünschten Ort auf dem Bildschirm zu ziehen. Bewegen Sie dazu den Cursor über das gewünschte Bildschirmelement. Halten Sie nun die linke Taste des Touchpads gedrückt und bewegen den Cursor auf die gewünschte Position. Lassen Sie die linke Taste daraufhin los. Alternativ können Sie einfach auf das Element doppelklopfen und es mit Ihrer Fingerspitze an den gewünschten Ort ziehen.
Zweifinger-vergrößern/verkleinern - Schieben Sie Ihre Finger zum Vergrößern oder Verkleinern der Ansicht zusammen oder auseinander. Vergrößern Verkleinern Zweifinger tippen - Benutzen Sie zwei Finger, um auf das Touchpad zutippen, um einen Klick mit dem Mausrad zu simulieren. Drei-Finger-Tippen - Benutzen Sie drei Finger, um auf das Touchpad zu tippen, um einen Rechtsklick mit der Maus zu simulieren.
Pflege des Touchpads Das Touchpad ist druckintensiv. Wenn Sie es nicht richtig pflegen, kann es leicht beschädigt werden. Beachten Sie die folgenden Vorkehrungen. • • • • Das Touchpad darf nicht mit Schmutz, Flüssigkeiten oder Fett in Berührung kommen. Berühren Sie das Touchpad nicht mit schmutzigen oder nassen Fingern. Legen Sie keine schweren Objekte auf das Touchpad oder die Touchpad-Tasten. Zerkratzen Sie das Touchpad nicht mit Ihren Fingernägeln oder irgendwelchen harten Objekten.
2. Klicken Sie oben auf ELAN und markieren Sie dann Internes Zeigegerät deaktivieren, wenn externes USB-Zeigegerät angeschlossen ist. 3. Klicken Sie auf OK, um die Konfiguration zu beenden.
Speichergeräte Damit kann der Notebook-PC Dokumente, Bilder und dandere Dateien von/auf die verschiedenen Datenträger lesen oder schreiben. Flash-Speicherkartenleser Um Speicherkarten von Geräten wie Digitalkameras, MP3-Spielern, Handys und PDAs verwenden zu können, muss im Normalfall ein PCMCIA Speicherkartenleser gekauft werden. Dieser Notebook PC hat einen internen Speicherkartenleser, der viele der in der folgenden Abbildung gezeigten Flash-Speicherkarten lesen kann.
Festplatte Festplatten haben sehr viel mehr Kapazität und arbeiten wesentlich schneller als Floppylaufwerke und CD-ROM-Laufwerke. Im Lieferumfang des Notebooks ist eine entfernbare Festplatte enthalten. Derzeitige Festplatten unterstützen die S.M.A.R.T.Technologie (Self Monitoring and Reporting Technology), die Festplattenfehler oder -ausfälle erkennt, noch bevor sie auftreten. Wenden Sie sich für Upgrades an eine authorisierte Kundendienstoder Verkaufsstelle.
2 1 2 1 Entfernen der Festplatte: 2 1 1 2 2 2 1 1 1 2 1 2 2 1 2 1 Installieren einer Festplatte: 1 2 1 2 2 2 2 1 2 1 1 Die tatsächliche Position der Festplatte ist je nach Modell unterschiedlich. Beziehen Sie sich auf2 das vorherige Kapitel, um die Position der festplatte zu bestimmen.
2 1 2 1 2 1 Entfernen der Festplatte: 1 2 2 2 2 2 1 1 1 2 1 2 1 2 1 Installieren der Festplatte: 1 2 1 2 1 2 1 1 2 2 1 Die tatsächliche Position der Festplatte ist je nach Modell unterschiedlich. Beziehen Sie sich auf das vorherige Kapitel, um 1 2 die Position der festplatte zu bestimmen.
Arbeitsspeicher (RAM) Das Speicherfach bietet die Möglichkeit, den vorhandenen Speicher zu erweitern. Wenden Sie sich an einen autorisierten Händler, um Informationen über Speichererweiterungen für Ihr Notebook zu erhalten. Nur der Erwerb der Speichererweiterungsmodule von autorisierten Händlern stellt ein Maximum an Kompatibilität und Funktionssicherheit dar. Das BIOS erkennt automatisch die Größe des Arbeitsspeichers im System und konfiguriert den CMOS dementsprechend während des POSTProzesses.
Anschlüsse Das integrierte Netzwerk kannen nicht zu einem späteren Zeitpunkt als Upgrade eingebaut werden. Nach dem Kauf kann eine Netzwerkkarte nur als Erweiterungskarte installiert werden. Netzwerkanschluss Verbinden Sie ein Ende eines Netzwerkkabels, das RJ-45-Stecker an beiden Enden hat, mit dem Modem/Netzwerk-Anschluss am Notebook-PC und das andere Ende mit einem Hub oder Switch.
Twisted-Pair-Kabel Dieses Kabel zum Anschluss der Ethernetkarte an einen Host (normalerweise ein Hub oder Switch) wird “Straight-through Twisted Pair Ethernet (TPE)” genannt. Die Anschlüsse an den Enden sind sogenannte RJ-45-Anschlüsse, welche nicht kompatibel mit RJ-11Telefonanschlüssen sind. Beim Anschluss zweier Computer ohne zwischengeschalteten Hub ist ein Crossover Twisted-Pair erforderlich. Gigabit-Modellen unterstützen automatisches Crossover, daher ist ein Crossover-LAN-Kabel optional.
Wireless LAN-Anschluss (nur in bestimmten Modellen) Beim optionalen integrierten Wireless LAN handelt es sich um einen kompakten, einfach zu bedienenden Wireless Ethernet-Adapter. Mit dem IEEE 802.11-Standard für Wireless LAN (WLAN), erreicht das optionale integrierte Wireless LAN rasante Datenübertragungsraten durch die Direct Sequence Spread Spectrum (DSSS)- und Octogonal Frequency Division Multiplexing (OFDM)-Technologien auf 2.4 GHz-Frequenzen.
Ad-hoc-Modus Im Ad-hoc-Modus kann das Notebook mit einem anderen WirelessGerät verbunden werden. Hierzu wird kein zusätzlicher Access Point (AP) benötigt. (Alle Geräte müssen 802.11 Wireless LANAdapter installiert haben.) Notebook PC Desktop PC PDA Infrastruktur-Modus andere Geräte über einen Access Point (AP, muss separat erworben werden) auf ein Wireless-Netzwerk zugreifen.
Windows Wireless Netzwerkverbindung Verbindung mit einem Netzwerk 1. 2. Schalten Sie den Wireless-Schalter für Ihr Modell ein, falls erforderlich (siehe Schalter in Abschnitt 3). Drücken Sie mehrmals [FN F2], bis das WLAN- & Bluetooth-Symbol angezeigt wird. oder doppelklicken Sie auf das Symbol der Wireless-Konsole in der Taskleiste und wählen Sie das Wireless LAN-Symbol. 3. Klicken Sie in der Taskleiste auf das WLAN-Symbol mit einen orangen Stern . 4.
5. 6. 7. Bei der Verbindung müssen Sie eventuell ein Kennwort eingeben. Nachdem die Verbindung hergestellt wurde, wird diese in der Liste angezeigt. In der Taskleiste wird das WLAN-Symbol angezeigt. Das Symbol für die WLAN-Verbindung wir durchgestrichen wenn Sie die Tasten + drücken, um die WLAN-Funktion zu deaktivieren.
Bluetooth Wireless-Verbindung (nur in bestimmten Modellen) Notebook PCs mit Bluetooth-Technologie machen die Anschaffung von Kabeln zur Verbindung mit Bluetooth-Geräten überflüssig. Geräte mit Bluetooth-Funktion sind z.B. andere Notebooks, DesktopPCs, Handys und PDAs. Wenn Ihr Notebook-PC keine eingebaute Bluetooth-Funktion besitzt, müssen Sie ein USB- oder ExpressCard-Bluetooth-Modul anschließen, um die Bluetooth-Funktion benutzen zu könnens.
oder doppelklicken Sie auf das Symbol der Wireless-Konsole in der Taskleiste und wählen Sie das Bluetooth-Symbol. 3. Gehen Sie von der Systemsteuerung zu Netzwerk und Internet > Netzwerk- und Freigabecenter und klicken Sie dann in der linken Spalte auf Adaptereinstellungen ändern. 4. Rechtsklicken Sie auf BluetoothNetzwerkverbindung und wählen Sie BluetoothNetzwerkgeräte anzeigen. 5. Klicken Sie auf Gerät hinzufügen, um nach neuen Geräten zu suchen.
6. Wählen Sie auf BluetoothGerät aus der Liste aus und klicken Sie auf Weiter. 7. Geben Sie den BluetoothSicherheits-Code in Ihr Gerät ein, um die Kopplung zu starten. 8. Die Kopplung wurde erfolgreich eingerichtet. Klicken Sie auf Schließen, um die Einstellung zu beenden.
A Anhang
Optionales Zubehör Diese Geräte dienen der optionalen Vervollständigung Ihres Notebooks. USB-Hub (Optional) Durch Anschluss eines optionalen USB-Hubs vermehren sich die USB-Anschlüsse und Sie können schnell viele USB-Peripheriegeräte über ein einziges Kabel anschließen oder abtrennen. USB Flash-Speicherdisk Eine USB-Flash-Speicherdisk ist ein Datenträger, bietet eine Speicherkapazität von bis zu einigen Gigabyte, hohe Transfergeschwindigkeit und lange Lebensdauer.
Betriebssystem und Software Dieses Notebook bietet seinen Kunden (je nach Region) ein vorinstalliertes Microsoft Windows-Betriebssystems. Der Umfang für Hardware- und Software-Support kann vom installierten Betriebssystem abhängig sein. Stabilität und Kompatibilität anderer Betriebssysteme kann nicht garantiert werden.
System BIOS-Einstellungen Die BIOS-Abbildungen sind nur als Referenz gedacht. Die tatsächlichen Anzeigen können sich nach Modell und Region von den Abbildungen abweichen. Boot Device (Boot-Gerät) 1. Wählen Sie im Boot-Menü Boot Option #1. Aptio Setup Utility - Copyright (C) 2010 American Megatrends, Inc. �������������������� Main Advanced Boot Security Save & Exit Set the system boot order.
Security Setting (Sicherheitseinstellung) Aptio Setup Utility - Copyright (C) 2010 American Megatrends, Inc. ������������������������ Main Advanced Boot Security Save & Exit Password Description Set the system boot order. If ONLY the Administrator’s password is set, then this only limits access to Setup and is only asked for when entering Setup. If ONLY the user’s password is set, then this is a power on password and must be entered to boot or enter Setup.
Save Changes (Änderungen speichern) Sie müssen Ihre Änderungen vor Verlassen des BIOS-Setup speichern, damit sie angewendet werden. Wenn Sie die Standardeinstellungen wiederherstellen wollen, wählen Sie Restore Defaults. Daraufhin müssen Sie die Änderungen speichern. Aptio Setup Utility - Copyright (C) 2010 American Megatrends, Inc. ������������������������ Main Advanced Boot Security Save & Exit Save Changes and Exit Discard Changes and Exit Exit system setup after saving the changes.
Häufig auftretende Probleme und ihre Lösungen Hardware-Problem - Optisches Laufwerk Das optische Laufwerk kann Datenträger nicht lesen oder brennen. 1. Aktualisieren Sie das BIOS auf die neueste Version und versuchen Sie es erneut. 2. Falls die Aktualisierung des BIOS nicht weiterhilft, versuchen Sie, Datenträger besserer Qualität zu verwenden. 3. Falls das Problem weiterhin besteht, wenden Sie sich an Ihr örtliches Service Center.
Hardware-Problem - Integrierte Kamera Die integrierte Kamera funktioniert nicht richtig. 1. Prüfen Sie im “Geräte-Manager”, ob ein Problem vorliegt. 2. Versuchen Sie, das Problem durch erneutes Installieren des Webkameratreibers zu beheben. 3. Falls das nicht hilft, aktualisieren Sie das BIOS auf die neueste Version und versuchen Sie es wieder. 4. Falls das Problem weiter auftritt, wenden Sie sich an Ihr örtliches Service Center. Hardware-Problem - Akku Akkupflege. 1.
Symptome & Lösungen: A. Das Problem liegt im Motherboard, der Festplatte oder dem Notebook selbst; wenden Sie sich an Ihr örtliches Service Center. B. Das Problem liegt im Betriebssystem; versuchen Sie, das System über die DVD oder die Wiederherstellungspartition wiederherzustellen. WICHTIG! Sichern Sie vor der Wiederherstellung all Ihre Daten auf einem externen Datenträger. C. Netzteilproblem; überprüfen Sie die Kabelverbindunden, wenden Sie sich für ein Ersatzteil an das örtliche Service Center.
VORSICHT: Verbinden Sie sich nicht mit dem Internet, bevor Sie ein Antivirenprogramm und eine Internet-Firewall installiert haben, um sich vor Computerviren zu schützen. Software-Problem - von ASUS mitgelieferte Software Beim Einschalten des Notebook-PCs erscheint eine Fehlermeldung “open policy file error”. A. Installieren Sie die neueste Version des “Power4 Gear”Programms. Sie finden es auf der ASUS-Webseite.
WICHTIG! Sichern Sie vor der Wiederherstellung all Ihre Daten auf einem externen Datenträger. VORSICHT: Verbinden Sie sich nicht mit dem Internet, bevor Sie ein Antivirenprogramm und eine Internet-Firewall installiert haben, um sich vor Computerviren zu schützen. Installieren Sie zuerst die Treiber “Intel INF Update” und “ATKACPI”, damit die Hardware-Geräte erkannt werden. 6. Falls das Problem weiter auftritt, wenden Sie sich an Ihr örtliches Service Center.
Software Problem - BIOS Aktualisieren des BIOS. 1. 2. 3. Stellen Sie die genaue Modellbezeichnung des NotebookPCs fest und laden Sie die neueste BIOS-Datei von der ASUSWebseite herunter und speichern sie auf einer USB-Flash-Disk. Verbinden Sie Ihr USB-Laufwerk mit dem Notebook-PC und schalten Sie ihn ein. Benutzen Sie die Funktion „Start Easy Flash“ im BIOS. Folgen Sie den nachstehenden Anweisungen. Aptio Setup Utility - Copyright (C) 2010 American Megatrends, Inc.
Wiederherstellen Ihres Notebook-PCs Benutzung der Wiederherstellungspartition Die Wiederherstellungspartition setzt die Software Ihres NotebookPCs schnell in den funktionierenden Werkszustand zurück. Bevor Sie die Wiederherstellungspartition verwenden, sollten Sie Ihre Dateien (z.B. Outlook PST-Dateien) auf USB-Datenträgern oder einem Netzwerklaufwerk speichern und sich persönlich eingestellte Systemkonfigurationen (z.B. Netzwerkeinstellungen) notieren.
Recover Windows to entire HD. Diese Option löscht alle Partitionen auf Ihrer Festplatte und erstellt eine neue Systempartion als Laufwerk “C”. 6. Recover Windows to entire HD with two partitions. Diese Option löscht alle Partitionen auf Ihrer Festplatte und erstellt zwei neue Partitionen “C” (25%) und “D” (75%). Befolgen Sie die Bildschirmanweisungen, um den Wiederherstellungsvorgang abzuschließen. Besuchen Sie die ASUS-Webseite unter www.asus.com für die neusten Treiber und Hilfsprogramme.
Verwenden der Wiederherstellungs-DVD: 1. Legen Sie die Wiederherstellungs-DVD in das optische Laufwerk. Ihr Notebook-PC muss eingeschaltet sein. 2. Starten Sie den Computer neu und drücken Sie beim BootVorgang auf die Taste [Esc] und wählen Sie das optische Laufwerk (bezeichnet als “CD/DVD”) und drücken Sie die [Eingabetaste], um von der Wiederherstellungs-DVD zu booten. 3. Wählen OK, um die Wiederherstellung des Images zu starten: 4. Wählen OK, um die Systemwiederherstellung zu bestätigen.
DVD-ROM-Laufwerksinformationen Das Notebook wird mit einem optionalen DVD-ROM-Laufwerk oder einem CD-ROM-Laufwerk ausgeliefert. Zur Ansicht von DVDTiteln müssen Sie Ihre eigene DVD-Software installieren. Außerdem besteht die Möglichkeit, zusammen mit dem Notebook eine optionale DVD-Software zu kaufen. Das DVD-ROM-Laufwerk spielt sowohl CDs als auch DVDs ab.
Regionsdefinitionen Region 1 Kanada, USA, US-Territories Region 2 Tschechei, Ägypten, Finnland, Frankreich, Deutschland, Golfstaaten, Ungarn, Island, Iran, Irak, Irland, Italien, Japan, Holland, Norwegen, Polen, Portugal, Saudi-Arabien, Schottland, Südafrika, Spanien, Schweden, Schweiz, Syrien, Türkei, GB, Griechenland, ehemalige jugoslawische Republiken, Slovakei Region 3 Burma, Indonesien, Südkorea, Malaysia, Philippinen, Singapur, Taiwan, Thailand, Vietnam Region 4 Australien, Karibik (außer US-Territ
Blu-ray ROM-laufwerkinformationen (nur bei bestimmten Modellen) Regionsdefinitionen Region A Nord-, mittel-, südamerikanische Staaten, Taiwan, Hongkong, Macao, Japan, Korea (Süd und Nord), Südostasien. Region B Europa; Afrika, Südwestasien, Australien, Neuseeland. Region C Mittel-, Südasien, Zentraleuropa, China, Mongolei. Beziehen Sie sich auf die Blu-Ray-Disc-Webseite unter www.blu-raydisc.com/en/Technical/FAQs/Blu-rayDsicforVideo.html für mehr Details.
Kompatibilität des internen Modems Das Notebook mit internem Modem entspricht den Regulationen JATE (Japan), FCC (US, Canada, Korea, Taiwan) und CTR21. Das interne Modem wurde in Übereinstimmung mit dem Ratsbeschluss 98/482/EC für paneuropäische Anschlüsse für einzelne Terminals an öffentliche Telefonnetze (PSTN) zugelassen. Aufgrund von Unterschieden zwischen den einzelnen PSTNs verschiedener Länder garantiert diese Zulassung, aber keinen bedingungslos erfolgreichen Betrieb auf jedem PSTN-Netzwerkpunkt.
Aussage zur Netzwerkkompatibilität Aussage des Herstellers an den Anwender: “Diese Aussage zeigt die Netzwerke auf, mit denen das Gerät zusammenarbeiten soll, sowie Netzwerke, in denen das Gerät Betriebsprobleme aufwerfen könnte. Der Hersteller wird auch eine Aussage herausgeben, die klar stellt, an welchen Stellen die Netzwerkkompatibilität von physischen Einstellungen und Software-Switch-Einstellungen abhängt.
Diese Tabelle zeigt die Länder an, die zur Zeit den CTR21Standard anwenden.
Diese Information wurde von CETECOM kopiert und wird ohne Haftung angeboten. Für Aktualisierungen zu dieser Tabelle besuchen Sie bitte http://www.cetecom.de/technologies/ctr_21.html Nationale Regulationen gelten nur, wenn das Gerät Pulswahl verwendet (der Hersteller kann in seinem Handbuch angeben, dass das Gerät nur DTMF-Signale unterstützt, was zusätzliche Tests überflüssig machen würde). 1 In den Niederlanden sind für seriellen Anschluss und Anruferkennung zusätzliche Tests erforderlich.
Erklärungen und Sicherheitshinweise Aussagen zur FCC-Erklärung Dieses Gerät entspricht Teil 15 der FCC-Vorschriften. Im Betrieb müssen die folgenden beiden Bedingungen erfüllt werden: • • Dieses Gerät darf keine schädliche Störstrahlung abgeben, und Dieses Gerät muss für empfangene Störstrahlung unempfindlich sein, auch für Störstrahlung, die unerwünschte Funktionen hervorrufen an. Dieses Gerät wurde geprüft und entspricht den Grenzwerten für digitale Geräte der Klasse B gemäß Teil 15 der FCC-Vorschriften.
(Nachdruck aus dem Code of Federal Regulations #47, Teil 15.193, 1993. Washington DC: Office of the Federal Register, National Archives and Records Administration, U.S. Government Printing Office.) FCC-Sicherheitswarnungen zur RF-Aussetzung Veränderungen am Gerät, die nicht ausdrücklich vom Hersteller gebilligt wurden, können das Nutzungsrecht ungültig werden lassen.“Der Hersteller erklärt, dass dieses Gerät durch spezifische, in den USA geprüfte Firmware auf die Kanäle 1 bis 11 beschränkt ist.
CE-Kennzeichen CE-Zeichen für Geräte ohne Wireless LAN/Bluetooth Die ausgelieferte Version dieses Gerätes erfüllt die Anforderungen der EEC directives 2004/108/EC “Electromagnetic compatibility” und 2006/95/EC “Low voltage directive”. CE-Zeichen für Geräte mit Wireless LAN/ Bluetooth Diese Ausrüstung erfüllt die Anforderungen der Directive 1999/5/EC of the European Parliament and Commission from 9 March, 1999 governing Radio and Telecommunications Equipment and mutual recognition of conformity.
Wireless-Kanäle für unterschiedliche Gebiete N. Amerika 2,412-2,462 GHz Kanal 01 bis Kanal 11 Japan 2,412-2,484 GHz Kanal 01 bis Kanal 14 Europa ETSI 2,412-2,472 GHz Kanal 01 bis Kanal 13 Verbotene Wireless-Frequenzbänder in Frankreich In einigen Gebiete in Frankreich sind bestimmte Frequenzbänder verboten.
�������������������������������������� 41 Loir et Cher 45 Loiret 50 Manche 55 Meuse 58 Nièvre 59 Nord 60 Oise 61 Orne 63 Puy du Dôme 64 Pyrénées Atlantique 66 Pyrénées Orient.
UL-Sicherheitshinweise Erforderlich für UL 1459 über Telekommunikations(Telefon)-Geräte, die für eine elektrische Verbindung mit einem Telekommunikationsnetzwerk, dessen Betriebsspannung zur Erde nicht 200V Spitze, 300V Spitzezu-Spitze und 105Vrms überschreitet, und für eine Installation und Verwendung entsprechend dem National Electrical Code (NFPA 70) ausgelegt sind.
Stromsicherheitsanforderungen Produkte mit einem elektrischen Strom von bis zu 6A und einem Gewicht über 3kg müssen geprüfte Netzkabel benutzen. Diese müssen mindestens folgende Werte aufweisen: H05VV-F, 3G, 0,75mm2 oder H05VV-F, 2G, 0,75mm2. TV-Tuner-Hinweis Hinweis für Kabel-TV-Installateure—Das Kabel-TV-System muss entsprechend den örtlichen Bestimmungen geerdet sein – die Installation sollte die Verbindung der Abschirmung mit dem Schutzleiter des Gebäudes am Eingang vorsehen.
Nordic-Vorsichtsmaßnahmen (für Lithium-Ionen-Akkus) CAUTION! Danger of explosion if battery is incorrectly replaced. Replace only with the same or equivalent type recommended by the manufacturer. Dispose of used batteries according to the manufacturer’s instructions. (English) ATTENZIONE! Rischio di esplosione della batteria se sostituita in modo errato. Sostituire la batteria con un una di tipo uguale o equivalente consigliata dalla fabbrica. Non disperdere le batterie nell’ambiente.
Sicherheitsinformationen für das optische Laufwerk Laser-Sicherheitsinformationen Interne oder externe optische Laufwerke, die mit diesem Notebook PC verkauft werden, enthalten ein Produkt der Laser Klasse 1. Laser-Klassifizierungen finden Sie im Anhang am Ende dieses Benutzerhandbuches. WARNUNG: Modifikationen oder Vorgehensweisen, die nicht in diesem Benutzerhandbuch beschrieben werden, können zu Belastung durch schädliche Laserstrahlung führen. Nehmen Sie das optische Laufwerk nicht auseinander.
Macrovision Corporation-Produktanmerkung Dieses Produkt verfügt über Kopierschutztechnologie, die durch methodische Anforderungen bestimmter U.S.A.-Patente und anderer geistiger Eigentumsrechte der Macrovision Corporation und anderer Parteien geschützt sind. Die Verwendung dieser Kopierschutztechnologie muss von Macrovision Corporation genehmigt werden und ist, wenn nicht anderweitig von der Macrovision Corporation genehmigt, nur für private oder eingeschränkte Vorführungszwecke vorgesehen.
CTR 21-Genehmigung (für Notebook-PCs mit ingebauten Modem) Danish Dutch English Finnish French German Greek Italian Portuguese Notebook-PC Benutzerhandbuch A-33
Spanish Swedish A-34 Notebook-PC Benutzerhandbuch
European Union Eco-Label Dieser Notebook-PC wurde mit den EU Flower-Label ausgezeichnet, was bedeutet, dass dieses Produkt die folgenden Kriterien erfüllt: 1. 2. 3. 4. 5. 6. Verringerter Energieverbrauch während der Benutzung und im Standby-Modus. Verminderte Verwendung giftiger Schwermetalle. Verminderte Verwendung von für Umwelt und Gesundheit schädlicher Stoffe. Reduzierte Verwendung natürlicher Ressourcen durch vielversprechende Wiederverwertung.
Erklärung zur Erfüllung der weltweiten Umweltschutzbestimmungen ASUS folgt dem Green-Design-Konzept, um unsere Produkte zu entwickeln und zu produzieren und versichert, dass jede Stufe des ASUS-Produktkreislaufs die weltweiten Umweltschutzbestimmungen erfüllt. Zusätzlich veröffentlicht ASUS die relevanten und auf den Bestimmungsanforderungen basierenden Informationen. Besuchen Sie bitte die Webseite http://csr.asus.com/english/ Compliance.
Urheberrechtinformationen Kein Teil dieses Handbuchs, einschließlich der darin beschriebenen Produkte und Software, darf ohne ausdrückliche schriftliche Genehmigung von ASUSTeK COMPUTER INC. (“ASUS”) mit jeglichen Mitteln in jeglicher Form reproduziert, übertragen, transkribiert, in Wiederaufrufsystemen gespeichert oder in jegliche Sprache übersetzt werden, abgesehen von vom Käufer als Sicherungskopie angelegter Dokumentation.
Eingeschränkte Haftbarkeit Es können Sachverhalte auftreten, bei denen Sie aufgrund eines Fehler seitens ASUS oder anderer Haftbarkeiten berechtigt sind, Schadensersatz von ASUS zu fordern.