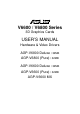
R V6600 / V6800 Series 3D Graphics Cards USER’S MANUAL Hardware & Video Drivers AGP-V6800 Deluxe / 32MB AGP-V6800 (Pure) / 32MB AGP-V6600 Deluxe / 32MB AGP-V6600 (Pure) / 32MB AGP-V6600 MX
USER’S NOTICE No part of this manual, including the products and software described in it, may be reproduced, transmitted, transcribed, stored in a retrieval system, or translated into any language in any form or by any means, except documentation kept by the purchaser for backup purposes, without the express written permission of ASUSTeK COMPUTER INC. (“ASUS”).
ASUS CONTACT INFORMATION ASUSTeK COMPUTER INC. (Asia-Pacific) Marketing Address: Telephone: Fax: Email: 150 Li-Te Road, Peitou, Taipei, Taiwan 112 +886-2-2894-3447 +886-2-2894-3449 info@asus.com.tw Technical Support MB/Others (Tel): +886-2-2890-7121 (English) Notebook (Tel): +886-2-2890-7122 (English) Desktop/Server (Tel):+886-2-2890-7123 (English) Fax: +886-2-2893-7775 Email: tsd@asus.com.tw WWW: www.asus.com.tw FTP: ftp.asus.com.
CONTENTS 1. Introduction .................................................................................... 7 Highlights ......................................................................................... 7 Available Models ............................................................................. 7 ASUS AGP-V6800 Deluxe .................................................. 7 ASUS AGP-V6800 (Pure) .................................................... 7 ASUS AGP-V6600 Deluxe ..........................
CONTENTS Install VideoSecurity ................................................................ 31 Install ASUS Tweak Utility ...................................................... 32 4. Software Reference ........................................................................ 33 Using the Utilities .......................................................................... 33 ASUS TWAIN Interface ......................................................... 33 ASUS Live Utility ................................
FCC & DOC COMPLIANCE Federal Communications Commission Statement This device complies with FCC Rules Part 15. Operation is subject to the following two conditions: • This device may not cause harmful interference, and • This device must accept any interference received, including interference that may cause undesired operation. This equipment has been tested and found to comply with the limits for a Class B digital device, pursuant to Part 15 of the FCC Rules.
1. Introduction I. Introduction Features Thank you for purchasing an ASUS AGP-V6800/AGP-V6600 Graphics and Video Accelerator. With this purchase, you join an elite squadron of graphics enthusiasts.
1. Introduction I. Introduction Features Common Features • AGP 4X with Fast Writes • Peak fill rate of 480 million bilinear filtered, multi-textured pixels and more than 3.
ASUS V6600/V6800 Series User’s Manual Projector ASUS TV Box ® Stereo Glasses Output Composite (RCA) Output S-Video Output VGA Output Video Input (ASUS Video) 7pin S compatible) Composite (RCA) Input S-Video to Composite Cable composite/TV output (RCA) SVHS/TV output (7pin) VGA Monitor output (15pin) (standard) CCD/camcorder input/Tuner/ TV Box Input (7pin) VR Glasses Output ASUS AGP-V6800 Graphics Card (PAL or NTSC) ASUS VR-100G This User’s Manual ASUS V6600/V6800 Series Drivers & Utilities
ASUS V6600/V6800 Series User’s Manual VGA Output ASUS AGP-V6800 Graphics Card This User’s Manual ASUS V6600/V6800 Series Drivers & Utilities Installation CD Disc Item Checklist Projector VGA Monitor output (15pin) (standard) VGA BIOS VIP Connector A TM Chip with Fan (Graphics Processing Unit) TM NVIDIA GeForce256 DDR GPU 32MB Frame Buffer (DDR) FAN_PWR DDR: Double Data Rate The VIP (Video Interface Port) Connector are used for third party add-on modules, such as video capture cards or tel
ASUS V6600/V6800 Series User’s Manual Projector ASUS TV Box ® Stereo Glasses Output Composite (RCA) Output S-Video Output VGA Output Video Input (ASUS Video) 7pin S compatible) Composite (RCA) Input S-Video to Composite Cable composite/TV output (RCA) SVHS/TV output (7pin) VGA Monitor output (15pin) (standard) CCD/camcorder input/Tuner/ TV Box Input (7pin) VR Glasses Output ASUS AGP-V6600 Graphics Card (PAL or NTSC) ASUS VR-100G This User’s Manual ASUS V6600/V6800 Series Drivers & Utilities
ASUS V6600/V6800 Series User’s Manual VGA Output VGA Monitor output (15pin) (standard) VGA BIOS FAN_PWR VIP Connector A TM Chip with Fan (Graphics Processing Unit) TM NVIDIA GeForce256 GPU 32MB Frame Buffer The VIP (Video Interface Port) Connector are used for third party add-on modules, such as video capture cards or television tuners. 32MB Frame Buffer ASUS AGP-V6600 Graphics Card This User’s Manual ASUS V6600 Series Drivers & Utilities Installation CD Disc Item Checklist Projector 2.
ASUS V6600/V6800 Series User’s Manual ASUS AGP-V6600 MX Graphics Card This User’s Manual ASUS V6600 Series Drivers & Utilities Installation CD Disc Item Checklist Projector VGA Output VGA Monitor output (15pin) (standard) FAN_PWR VGA BIOS VIP Connector A TM 2.
2. Hardware Installation ASUS VR-100 Optional Upgrade Kit The ASUS VR-100 Optional Upgrade Kit enables the ASUS VR-100G 3D Glasses to be used with Pure models of the V6600/V6800 Series cards. See your dealer for more information on the ASUS VR-100 Optional Upgrade Kit. The monitor cable that came with your kit may be of the Y- or standard type. Connect your cable accordingly. 2.
2. Hardware Installation NOTE: This graphics card series can only be installed in motherboards with an AGP slot. 2. Installation Procedures WARNING! Computer boards and components contain very delicate Integrated Circuit (IC) chips. To protect the computer board and other components against damage from static electricity, you must follow some precautions. 1. Make sure that you unplug your power supply when adding or removing expansion cards or other system components.
3. Software Setup Operating System Requirements NOTE: This graphics card requires a motherboard with an AGP slot. Windows 98 Windows 98 supports full Direct3D and AGP features. If you are still using the beta version of Windows 98 and you want to fully take advantage the Direct3D and AGP features, you must upgrade your current Windows to the release version before installing the AGP display driver.
3. Software Setup Driver Setup You can use one of three methods to install the Windows 98 drivers for your ASUS AGP-V6600/V6800 series graphics card. Method 2 and Method 3 will not install the appropriate AGP GART driver if your motherboard does not use the Intel AGPset. Installing the AGP GART driver will ensure that the AGPset’s AGP functions are available. Method 2 and Method 3 will not install also the DirectX runtime libraries.
3. Software Setup Method 2: Display Property Page 1. Start Windows. 2. Switch display to Windows’ Standard Display Adapter (VGA) mode and then restart Windows. 3. Right-click the Windows desktop and click Properties. 4. Click the Settings tab and then click Advanced. The Standard Display Adapter (VGA) Properties dialog box appears. 3. Software Setup Driver Installation 5. Click Change on the Adapter tab. The Update Device Driver Wizard dialog box appears.
3. Software Setup Method 3: Plug and Play NOTE: Before proceeding with these steps, replace first your old VGA card with an ASUS AGP-V6600/V6800 series graphics card. 1. Start Windows. 3. Software Setup Driver Installation 2. When Windows detects your ASUS AGP-V6600/V6800 series graphics card, the New Hardware Found dialog box appears. 3. Click Driver from disk provided by hardware manufacturer. 4.
3. Software Setup Drivers Install Display Driver 1. Insert the CD installation disc into your CD-ROM drive or double click the CD drive icon in My Computer to bring up the autorun screen or run Setup.exe in the root directory of your CD-ROM drive. Click Drivers. 3. Software Setup Install Display 2. The Drivers box appears. Click Install Display Driver to install all the drivers and utilities into your computer.
3. Software Setup Install DirectX Microsoft DirectX allows 3D hardware acceleration support in Windows 98. For Software MPEG support in Windows 98, you must first install Microsoft DirectX, and then an MPEG-compliant video player. 1. Insert the CD installation disc into your CD-ROM drive or double click the CD drive icon in My Computer to bring up the autorun screen or run Setup.exe in the root directory of your CD-ROM drive. 3. Software Setup Install DirectX Click Drivers. 2. The Drivers box appears.
3. Software Setup Install GART Driver The AGP GART Driver is used to support AGP functionality for the chipset on your PC’s motherboard. It is recommended to install the GART driver if it is newer than the one you have installed in your system. The GART driver is only necessary for an AGP graphics card. 3. Software Setup Install GART NOTE: Installation dialogs are slightly different for each chipset. Follow the onscreen instructions to finish the GART driver installation.
3. Software Setup 4. If you selected No..., on the previous screen before clicking OK, you will be presented with a selection of other drivers. Make your driver selection and click Install. 3. Software Setup Install GART 5. When the Welcome screen appears, click Next to continue. 6. Once the driver installation is finished, click Finish.
(This page was intentionally left blank.
3. Software Setup Install ASUS TWAIN Driver ASUS TWAIN Driver is a frame capture driver for Adobe Photoshop®, an image editing software. With this driver, you can capture still images through Photoshop using the video input port of your card (Deluxe model only). 1. Insert the CD installation disc into your CD-ROM drive or double click the CD drive icon in My Computer to bring up the autorun screen or run Setup.exe in the root directory of your CD-ROM drive. 3.
3. Software Setup Uninstall Display Driver If you want to update your display drivers or if you no longer need the AGP-V6800 display drivers, you can use one of the following procedures to completely uninstall the drivers from Windows 98 to save disk space. Using the Autorun Screen 1. Insert the CD installation disc into your CD-ROM drive or double click the CD drive icon in My Computer to bring up the autorun screen or run Setup.exe in the root directory of your CD-ROM drive. Click Drivers. 3.
3. Software Setup Run ASUS VGA Live Update The ASUS VGA Live Update is a utility that allows you to update your VGA card’s BIOS and drivers. The use of this utility assumes that you are properly connected to the Internet through an Internet Service Provider (ISP). 1. Insert the CD installation disc into your CD-ROM drive or double click the CD drive icon in My Computer to bring up the autorun screen or run Setup.exe in the root directory of your CD-ROM drive. 3.
3. Software Setup Utilities Install ASUS Live Utility The ASUS Live utility lets you view and capture video images from the card’s video input port. NOTE: Make sure that you have an ASUS graphics card with VIDEO-IN connector before attempting to install the utility. 3. Software Setup Install ASUS Live 1. Insert the CD installation disc into your CD-ROM drive or double click the CD drive icon in My Computer to bring up the autorun screen or run Setup.exe in the root directory of your CD-ROM drive.
3. Software Setup Install Acrobat Reader Acrobat Reader is necessary for reading the PDF copy of this manual. 1. Insert the CD installation disc into your CD-ROM drive or double click the CD drive icon in My Computer to bring up the autorun screen or run Setup.exe in the root directory of your CD-ROM drive. 3. Software Setup Install Reader Click Utilities. 2. The Utilities box appears. Click Install Acrobat Reader. 3. When the Acrobat Reader x.x Setup box appears, click Next.
3. Software Setup Install SmartDoctor SmartDoctor is a utility that monitors the card’s graphic chip state, alerting users about abnormal events, such as a fan malfunction or chip overheat. Likewise, the utility “cools” down the graphic chip temperature when it is idle or returns it to its maximum capability when necessary. 1. Insert the CD installation disc into your CD-ROM drive or double click the CD drive icon in My Computer to bring up the autorun screen or run Setup.
3. Software Setup Install VideoSecurity VideoSecurity is a powerful video stream comparison and detection utility that helps in detecting potential errors or intrusions at a specific time interval by using a video capture device, such as a digital camera. 1. Insert the CD installation disc into your CD-ROM drive or double click the CD drive icon in My Computer to bring up the autorun screen or run Setup.exe in the root directory of your CD-ROM drive. 3.
3. Software Setup Install ASUS Tweak Utility The ASUS Tweak Utility lets you control the core clock speed and the memory interface speed of your graphics card. WARNING! Use this option with caution. Using this inappropriately may damage your card and cause your system to be unstable. 1. Insert the CD installation disc into your CD-ROM drive or double click the CD drive icon in My Computer to bring up the autorun screen or run Setup.exe in the root directory of your CD-ROM drive. 3.
4. Software Reference Using the Utilities ASUS TWAIN Interface TWAIN is a cross-platform interface for acquiring images captured by scanners, digital cameras, and frame grabbers. The ASUS TWAIN Driver is currently supported only when used with Adobe Photoshop® (see www.adobe.com for details). If you already have Photoshop installed and you chose to install the ASUS TWAIN Driver, you can use Photoshop to import a still image using the ASUS TWAIN interface installed. 4.
4. Software Reference 2. When the ASUS TWAIN Driver utility appears, click Options and then Video Format. 3. In the Image Format list of the ASUS Video Format dialog box, click 24 bit RGB. 4. S/W Reference ASUS TWAIN 4. Click Options and then Video Format to select your video source. If desired or necessary, you may adjust the Brightness, Contrast, Saturation, and Hue of your image. You are now ready to capture. 5. To capture, click the capture button Single Frame.
4. Software Reference ASUS Live Utility NOTE: The ASUS Live utility can only be used with the Deluxe model. It can be used to: 1. View images using your monitor as screen from traditional consumer devices, such as videocassette players, camcorders, digital cameras, and laser disc players through the onboard RCA or SVHS VIDEO-IN connectors. 2. Capture live motion video up to 30 frames/second (minimum system requirement: Pentium II/266). 3. Play any *.AVI file. 4.
4. Software Reference Always On Top The Always On Top option is provided for users who may wish to continue watching VCD/DVD/TV programs while doing other tasks, such as when downloading files from the Internet or word processing. To keep your display screen always on top of other programs, rightclick the display screen and then click the Always On Top button. Position the screen where it will not interfere with your other tasks.
4. Software Reference If desired, you may adjust the Brightness, Contrast, Saturation, and Hue of your display by using the video source setup screen. Use the Up or Down Buttons on the ASUS Main Panel or the UP and DOWN arrow keys on your keyboard to select the desired option and then the Left and Right Buttons or the LEFT and RIGHT arrow keys to make the desired adjustments. Click again the Show/Hide Video Source Options button on the ASUS Main Panel to exit from the video source option screen.
4. Software Reference Capturing Images You must be in capture mode to capture images. To do this, click the Capture Mode button on the ASUS Main Panel. NOTE: ASUS Live will automatically detect and warn you if the capture driver installed in your system is not compatible with ASUS Live. Video/Capture Setting 1. Click Video/Capture Setting to adjust the basic video capture settings, such as Capture Image DImension and Format, Capture CODEC selection, and Capture Audio Format and Attribute. 4.
4. Software Reference SnapShot Setting 1. Click SnapShot Setting to select your Capture Picture Format (default: 24 bit), Image Setting and other settings. Under Image Setting, you may set the desired Image File name and path (default: C:\CAPTURE.BMP) and for the filename to be consecutively numbered (Store image use consecutive numbered filename). 4. S/W Reference ASUS Live You are now ready to capture video images. Video Recording Setting 1.
4. Software Reference Video Snapshot (F5) Video Snapshot lets you capture video stream data as single images and then show these images on your desktop almost simultaneously through the image viewer you selected. It supports any plug-in picture viewers or image processing programs (see Step 3 in Capturing Images) to view the captured images. To begin capturing, do the following: 1.
4. Software Reference ASUS SmartDoctor ASUS SmartDoctor is designed to satisfy two major goals. One is to monitor the graphic chip status, alerting users about abnormal events, such as fan malfunction or chip overheat. The other, as the name “SmartDoctor” implies, is to “cool” down the graphic chip smartly when it is not necessary for it to be kept running at full speed.
4. Software Reference Advanced Setup When you click the Setup button, the Advanced Setup dialog box appears. The default setting of SmartDoctor is Run once and terminate, which means that SmartDoctor will run every time Windows starts and checks the graphic card’s status. If your graphics card is working properly, SmartDoctor will just exit or terminate in 5 seconds. 4.
4. Software Reference • Enable overheat protection lets you forcibly cool down the graphic chip when temperature is over the tolerable range or value. When you select Run and keep resident and then click OK, a dialog box appears to warn you of a possible graphic performance drop. This performance penalty is very slight and almost undetectable even under rigorous examination by benchmark programs. 4.
4. Software Reference ASUS VideoSecurity NOTE: The ASUS VideoSecurity utility can only be used with the Deluxe model. ASUS VideoSecurity lets you detect intruders into your system and environmental changes and monitor a specified location or any incoming visitor. If VideoSecurity detects any deviation from the norm that you set, it may give an error message or not. Regardless of any messages, VideoSecurity will record: • Any information about the monitored activity and then store these to an event log 4.
4. Software Reference NOTE: The following descriptions are only for selected features of the ASUS VideoSecurity utility. For a full description of the features described in this manual and other features, refer to the ASUS VideoSecurity Online Help (HTML) format included with your support CD. You may also click the Help button to open the online help file. Main Window VideoSecurity Running Style • Normal Window is the default style, that is, VideoSecurity will function as a 4.
4. Software Reference Sensibility Currently, only one option is available to set the image format This is an important parameter when setting up VideoSecurity. Your environment may change often but VideoSecurity is concerned only when there is a change in the environment. Make sure that you select a suitable sensitivity for your environment. 4.
4. Software Reference Running ASUS VideoSecurity 4. S/W Reference ASUS VideoSecurity Main Control Panel Click to start detecting Click to open the VideoSecurity Setting dialog box Starts the Setup Wizard Lets you define a region with which VideoSecurity will monitor for errors or intrusion.
4. Software Reference ASUS Tweak Utility WARNING! Use the ASUS Tweak Utility with extreme caution and only if you are well acquainted with your display card. Using this inappropriately may damage your card, its components, and your system. To run the ASUS Tweak Utility, click Start and point to Programs, Asus, Tweaking Utilities, and then click Tweak. Timing Adjustment Timing Adjustment lets you adjust the working frequency of the graphic engine and video memory. 4.
4. Software Reference Tweak Safe Mode Recovery Timing Adjustment (Safe Mode) lets you restore the working frequency of the graphic engine and video memory to their factory default settings. This mode is used when you encounter problems when starting or restarting Windows using your customized tweak settings. Using Tweak Safe Mode Recovery 1. Restart Windows in safe mode. To start Windows in safe mode, hold the F8 key until the Windows Startup Menu appears.
4. Software Reference ASUS Control Panel After installation of the display drivers, you will find an ASUS icon on the taskbar’s status area. Clicking or right-clicking this icon opens the ASUS Control Panel, showing a menu composed of shortcuts of the graphics board’s enhanced and other functions. NOTE: Instead of clicking the ASUS Control Panel icon, you may right-click the Windows95/98 desktop, click Properties, and then click Settings. Under Windows98, click Advanced after clicking Settings.
4. Software Reference More Resolution More Resolution lets you change the screen resolution of your monitor. 4. S/W Reference More Resolution 1. Click/right-click the ASUS Control Panel icon, point to More Resolution, and then click the desired screen resolution. The system will automatically set the resolution selected without restarting your computer.
4. Software Reference Color Color allows you to make color adjustments, such as brightness, contrast, and gamma values for each or all of the RGB colors. These adjustments can be made for Desktop, D3D/Game, and Video. The color settings of Desktop and D3D/Game are not adjustable under 8-bit colr depth. D3D/Game Desktop lets you adjust the color of your Windows 98 desktop. D3D/Game lets you make your favorite color settings for D3D games.
4. Software Reference General Functions Brightness / Contrast / Gamma Brightness / Contrast / Gamma sliders let you calibrate the brightness, contrast, and gamma output of your display card. Brightness / Contrast / Hue / Saturation Brightness / Contrast / Hue / Saturation sliders let you calibrate the brightness, contrast, hue, and saturation output of your display card. Video Changes to your settings can be viewed on the displayed picture (shown as race horses).
4. Software Reference Important Notes D3D/Game The color settings of D3D/Game take effect only when you are playing a full-screen DirectDraw/Direct3D game. Video Only one overlay is allowed at a time with either ASUS AGP-V6600 or AGP-V6800. That is, when you click Video first and then run your favorite video player, you can only see the adjustments you made to the settings in the preview window because the video player cannot use the hardware acceleration function (overlay).
4. Software Reference Display Display lets you make monitor adjustments, such as position, size, and refresh rate. WARNING! Adjusting position or size, especially refresh rate is a highly dangerous operation. Selecting a value that is beyond your monitor’s specification may damage it. Press ESC to restore your original settings in case of problems. VGA Adjustment Position sets the screen position Size sets the screen size Synchronization 4.
4. Software Reference Change refresh rate Displays the Change refresh rate box to let you change the refresh rate of any screen resolution. GDI GDI lets you change the refresh rate of the Windows desktop. To change the refresh rate 1. Click Change refresh rate. 2. In the Refresh Rate list under the GDI tab, select the refresh rate you want to use. A Test button appears to let you test the selected refresh rate and resolution combination. Click YES when prompted whether to keep the new refresh rate.
4. Software Reference TV NOTE: This tab is not available with the Pure model. Position Sets the screen position. Standard Sets the TV signal format, for example, PAL or NTSC. Output type Displays the connection status of composite and S-Video. Scan type 4. S/W Reference Display Sets the scan type of the TV display. Black Level Sets the brightness of the TV display. Contrast Sets the contrast of the TV display. Flicker Filter Sets the anti-flicker effect.
4. Software Reference Advanced Advanced provides some advanced settings for the ASUS VR-100G 3D Glasses (setting is available only with the ASUS Deluxe model or models with the ASUS VR-100 Optional Upgrade Kit) and Direct3D and OpenGL, which are software interfaces for your ASUS V6800 Series graphics cards. Direct3D VR VR Effect Enable Stereoscopic Mode When selected, this enables you to use the stereoscopic mode when playing games or watching 3D videos.
4. Software Reference IMPORTANT: Before enabling stereoscopic mode and using your stereoscopic or 3D glasses (ASUS VR-100G), make sure that your monitor can support the selected refresh rate (interlaced mode) under the following display modes: 16 bits: 640 x 480, 800 x 600, 960 x 720, 1024 x 768, 1152 x 864 32 bits: 640 x 480, 800 x 600 WARNING! To prevent discomfort and eye fatigue when using your stereoscopic or 3D glasses, DO NOT try to use your 3D glasses for an extended period of time.
4. Software Reference Direct3D 4. S/W Reference Direct3D Performance and Compatibility Options Enable fog table emulation Some old games do not correctly query the D3D hardware capabilities and expect table fog support. Choosing this option will ensure that such games will run properly. Adjust Z-buffer depth to rendering depth if unequal This option forces the hardware to automatically adjust the depth of its Z-buffer to the depth that the application requests.
4. Software Reference Mipmapping Options Mipmap levels automatically generated This option lets the hardware automatically generate mipmaps to increase the efficiency of texture transfers across the bus and provide higher application performance. Auto-mipmap method This option lets you choose the auto-mipmap method. Choose bilinear method for a generally improved performance or anisotropic method for a generally higher quality image. 4.
4. Software Reference More Options 4. S/W Reference Direct3D Texel Alignment Changing these values will change where the texel origin is defined. The default values conform to the Direct3D specifications. Some software may expect the texel origin to be defined elsewhere. The image quality of such applications will improve if the texel origin is redefined.
4. Software Reference OpenGL VR VR Effect Enable Stereoscopic Mode When selected, this enables you to use the stereoscopic mode when running OpenGL 3D applications AND GAMES. This mode is available only with the ASUS Deluxe models or models with the ASUS VR-100 Optional Upgrade Kit. Eyes Distance between both eyes. Adjust this to bring objects into focus. View Angle The angle by which your two viewing directions intersect. To change this virtual viewing depth, adjust this value. 4.
4. Software Reference On Screen Display (OpenGL OSD) Enable OSD When selected, this lets you to adjust onscreen the settings of your 3D glasses and display card when playing games or watching 3D videos. These settings include Eyes, View Angle, Embossment, Brightness, Contrast, and Gamma. See 4. Software Reference | Advanced for a description of the display settings.
4. Software Reference 4. S/W Reference OpenGL OpenGL Performance and Compatibility Options Enable buffer region extension This option allows the drivers to use the OpenGL extension GL_KTX_buffer_region. Allow the dual planes extension to use local video memory This option allows the use of local video memory when the GL_KTX_buffer_region extension is enabled. Use fast linear-mipmap-linear filtering This option allows increased application performance at the expense of some image quality loss.
4. Software Reference Default color depth for textures Default color depth for textures determines whether textures of a specific color depth should be used by default in OpenGL applications. Options are Use desktop color depth (default), Always use 16 bpp, and Always use 32 bpp. Buffer flipping mode Buffer flipping mode determines the buffer flipping mode for full-screen OpenGL applications. Options are Auto-select (default), Use block transfer, and Use page flip. 4.
4. Software Reference 4. S/W Reference Other Other Monitor Timing Monitor Timing lets you select the proper timing mode for your monitor. Auto-Detect (let Windows determine the proper mode) This option allows Windows to receive the proper timing information directly from the monitor itself. This is the default setting. NOTE: Some older monitors may not support this feature. General Timing Formula (GTF) GTF is a standard used by most new hardware.
4. Software Reference ASUS VR PictureViewer (optional) ASUS VR PictureViewer lets you view stereo images, size your stereo image, set the VR effect of your 3D glasses (ASUS VR-100G), and test your 3D glasses’ functionality. 4. S/W Reference VR PictureViewer To run ASUS VR PictureViewer, click or right-click the ASUS Control Panel icon (see 4. Software Reference ASUS Control Panel) on the taskbar’s status area to display the ASUS Control Panel, point to VR PictureViewer, and then click it.
4. Software Reference 2. Click the File menu and then click Open to select a file. Select the file from the Open dialog box or select another folder and then click Open. The 3D image appears on the VrViewer main window (see preceding page for an opened 3D image file. Note that the 3D effect is not shown in this picture). Changing the View 4. S/W Reference VR PictureViewer 1. Click the Zoom menu and then click the desired zoom percentage. Testing the 3D Glasses 1.
4. Software Reference ASUS StereoTV (optional) NOTE: The ASUS StereoTV utility can only be used with the Deluxe model. It can be used to view stereo video images with the optional 3D glasses (ASUS VR100G) using your monitor or TV as screen from traditional consumer devices, such as videocassette players, camcorders, digital cameras, and laser disc players through the onboard RCA or SVHS VIDEO-IN connectors. NOTE: You should already have installed DirectX 7 or higher to use ASUS StereoTV (see III.
4. Software Reference Channel Setting Use this button to select an appropriate cable standard for your video system. IMPORTANT! Be sure that the system and standard of the country where you will be installing your card is set appropriately. For example, you should have the NTSC model if you plan to use your card in countries with NTSC systems, PAL-BGHI model in countries with PAL-BGHI systems, or PAL-4.43 model in countries with PAL-4.43 systems.
4. Software Reference Install Windows NT 4.0 Display Driver WARNING! Before installing the display driver in Windows NT 4.0, make sure that you have installed Windows NT 4.0 Service Pack3 or later, to take full advantage of the ASUS AGP-V6800 AGP features. (You may download service packs at http://www.microsoft.com/ntworkstation/downloads.) NOTE: The following steps assume your CD-ROM drive letter is D. Installation Procedures 4. S/W REference Win NT 4.0 Driver 1.
5. Resolution Table Vertical Horizontal Frequency Frequency Color Depth 8bpp = 256 colors Standard 16bpp = 65K colors High Color 32bpp = 16.7M colors True Color 640 x 480 60Hz 70Hz 72Hz 75Hz 85Hz 100Hz 120Hz 140Hz 144Hz 150Hz 170Hz 200Hz 240Hz 31.5 34.9 37.9 37.5 43.3 51.0 61.8 72.9 75.2 78.7 90.3 108.0 132.9 √ √ √ √ √ √ √ √ √ √ √ √ √ √ √ √ √ √ √ √ √ √ √ √ √ √ √ √ √ √ √ √ √ √ √ √ √ √ √ 800 x 600 60Hz 70Hz 72Hz 75Hz 85Hz 100Hz 120Hz 140Hz 144Hz 170Hz 200Hz 240Hz 37.9 43.8 48.2 46.9 53.7 63.7 77.
5. Resolution Table Resolution Color Depth 8bpp = 256 colors Standard 16bpp = 65K colors High Color 32bpp = 16.7M colors True Color 60Hz 70Hz 72Hz 75Hz 85Hz 100Hz 120Hz 140Hz 144Hz 150Hz 170Hz 64.0 74.6 76.8 80.0 91.3 108.5 131.7 155.9 159.6 167.3 191.8 √ √ √ √ √ √ √ √ √ √ √ √ √ √ √ √ √ √ √ √ √ √ √ √ √ √ √ √ √ √ 1600 x 900 60Hz 70Hz 72Hz 75Hz 85Hz 100Hz 120Hz 140Hz 144Hz 150Hz 55.9 65.6 67.5 70.5 80.4 95.3 115.4 136.8 140.4 146.
6. Troubleshooting Recommended Action 6.Troubleshooting Description After installation and re- • Make sure the “Assign IRQ to VGA” option is enstarting, Windows 95/98 inabled in the BIOS. forms me that the display • Check if there is enough IRQ for VGA. setting is still incorrect. • Uninstall the driver, restart, and reinstall the driver. My monitor is not capable • It depends on the display characteristics of your of high resolution or refresh monitor. Consult your monitor documentation for the rate.
6. Troubleshooting VI. Troubleshooting I am using VideoSecurity • The only way to remove password protection is to and I set the password oprecall the original password that you assigned. The tion. I have forgotten my password protection is still active even when you password, though. Is there uninstall VideoSecurity and install a new copy. Make a way to recover my passsure that the password that you assigned can be easword? ily remembered. You may write down your password and store it in a safe place.