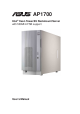
® AP1700 Intel® Xeon Tower/5U Rackmount Server with 533MHz FSB support User’s Manual
Disclaimer/Copyrights No part of this manual, including the products and software described in it, may be reproduced, transmitted, transcribed, stored in a retrieval system, or translated into any language in any form or by any means, except documentation kept by the purchaser for backup purposes, without the express written permission of ASUSTeK COMPUTER INC. (“ASUS”).
ASUS Contact Information ASUSTeK COMPUTER INC. (Asia-Pacific) Address: General Tel: General Fax: General Email: 150 Li-Te Road, Peitou, Taipei, Taiwan 112 +886-2-2894-3447 +886-2-2894-3449 info@asus.com.tw Technical Support MB/Others (Tel): Notebook (Tel): Desktop/Server (Tel): Support Fax: Web Site: +886-2-2890-7121 (English) +886-2-2890-7122 (English) +886-2-2890-7123 (English) +886-2-2890-7698 www.asus.com.
FCC/CDC Statements Federal Communications Commission This device complies with FCC Rules Part 15. Operation is subject to the following two conditions: • • This device may not cause harmful interference, and This device must accept any interference received including interference that may cause undesired operation. This equipment has been tested and found to comply with the limits for a Class B digital device, pursuant to Part 15 of the FCC Rules.
Contents Disclaimer/Copyrights ....................................................................... ii ASUS Contact Information ............................................................... iii FCC/CDC Statements........................................................................ iv Safety Precautions ........................................................................... vii Electrical Safety ............................................................................... vii Operation Safety .
2.7 2.8 2.9 2.10 2.11 2.12 2.13 Screwless Expansion Card Slot ......................................... 2-20 Long Card Support Guide ................................................... 2-21 RAID Card ............................................................................. 2-22 Hard Drive Blower ............................................................... 2-23 Chassis Fan ......................................................................... 2-24 Connecting Cables ................................
Safety Precautions Electrical Safety IMPORTANT • Before installing or removing signal cables, ensure that the power cables for the system unit and all attached devices are unplugged. To prevent electrical shock hazard, disconnect the power cable from the electrical outlet before relocating the system. When adding or removing any additional devices to or from the system, ensure that the power cables for the devices are unplugged before the signal cables are connected.
viii ASUS AP1700
“About This Guide” introduces the contents of this document. This part includes the target audience, chapter description, and conventions used. It also lists other sources of information that are not contained in this manual.
Audience This user guide is intended for system integrators, and experienced users with at least basic knowledge of configuring an entry-level server. Contents This guide contains the following parts: 1. Introduction: About this guide This part introduces the contents of this document. It includes the target audience, chapter description, and conventions used. It also lists other sources of information that are not contained in this manual. 2.
Conventions Symbols To make sure that you perform certain tasks properly, take note of the following symbols used throughout this manual. WARNING: Information to prevent injury to yourself when trying to complete a task. CAUTION: Information to prevent damage to the components when trying to complete a task. IMPORTANT: Information that you MUST follow to complete a task. NOTE: Tips and information to aid in completing a task.
System Package Contents The following checklist enumerates the components included in the standard system package.
This chapter describes the general features of the AP1700 system server. It includes sections on front panel, rear panel and internal specifications.
1.1 System Features The ASUS AP1700 server is a stylish server system featuring the ASUS PR-DLS533 motherboard. The server supports the Intel® Xeon™ processor in a 604-pin socket, and includes the latest I/O, LAN, and video technologies through the chipsets embedded on the motherboard. The following are highlights of the server’s many features: 1-2 • Chassis: Pedestal or rackmount 5U with removable front door bezel and chassis foot stand or roller-wheels.
1.2 Front Panel Features The front panel allows easy access to the hard disk drives. The power and reset buttons, LED indicators, optical drive, floppy drive and two USB connectors are also located on the front panel. For future installation of 5.25 devices, there are two drive bays available. The front panel of the server is protected by a door and lock for added security. CD-ROM Drive 3.5” Floppy Drive 2 empty 5.
1.3 Rear Panel Features The server rear panel includes the connectors, the system devices, a chassis lock and six full-length expansion cards slot. The following shows the features on the rear side of the server.
1.4 Internal Features The standard components inside the server include the motherboard, power supply, floppy and CD-ROM drives, and cables. The picture below shows the standard components of the server. 1 4 2 5 7 11 10 3 6 9 8 1. Redundant power supply cage 6. 5 x 64 bit 3V PCI-X slots 2. 6 x DDR DIMM sockets 8. Internal 68-pin SCSI cable 3. 2 x IDE cable 9. PCI Long Card support guide 4. 51/4” CD-ROM drive 10. 12 cm hot swap module blower 5. HDD hot swap modules 7. CPU sockets 11.
1.5 LED Table The following table describes the LED display found on the front panel and rear panel of the AP1700 server system.
This chapter lists the hardware setup procedures that you have to perform when installing system components.
2.1 Removing and installing chassis cover The chassis is designed for easy assembly and disassembly, making the installation of internal components very convenient. 2.1.1 Removing the chassis cover 1. Loosen the two thumb screws that secure the side cover. 2. Slide the chassis cover for about half an inch toward the rear until it is disengaged from the chassis.
2.1.2 Installing the cover 1. Match and insert the hooks of the cover to the elongated holes on the side of the chassis. All the six hook (three each on the top and bottom) of the cover must properly fit the designated holes. 2. Slide the chassis cover for about half an inch towards the front until it snaps in place. 3. Tighten the thumb screws to secure the cover.
2.2 Motherboard placement Before you install the motherboard, study the configuration of your chassis to ensure that the motherboard fits into it. The PR-DLS533 uses the extended ATX form factor that measures 12 inches x 13 inches (30.5 x 33 cm). Make sure to unplug the power cord before installing or removing the motherboard. Failure to do so may cause you physical injury and damage motherboard components.
2.3 Installing the Central Processing Unit (CPU) In the event of conflict between this instruction and other references cited herein, instructions in this system manual takes precedence. 2.3.1 Overview The motherboard comes with dual surface mount 604-pin Zero Insertion Force (ZIF) sockets. The sockets are designed for the Intel Xeon Processor in the 604-pin package with 512KB L2 cache.
2.3.2 Installing the CPU If you are installing only one CPU, install in CPU socket 1. Follow these steps to install a CPU. 1. Locate the 604-pin ZIF sockets on the motherboard. Unlock the socket by pressing the lever sideways, then lift it up to at least 115° angle. Make sure that the socket lever is lifted up to at least 115° angle, otherwise the CPU does not fit in completely. 2. Position the CPU above the socket as shown. 3. Carefully insert the CPU into the socket until it fits in place.
2.3.3 Installing the CPU heatsink with fan assembly The Intel® Xeon™ processors require especially designed heatsink and fan assembly to ensure optimum thermal condition and performance. Make sure that the heatsink with fan assembly is properly installed on the motherboard. A tilted or improperly installed heatsink with fan assembly can cause damage to motherboard CPU socket and/or CPU. Follow these steps to install the CPU heatsink and fan. 1.
3. When the heatsink and fan assembly is in place, connect the fan cable to the fan connector on the motherboard labeled CPUFAN1. The fan cable plug is slotted so it fits only in one orientation. If it doesn’t fit completely, try reversing it. 4. Make sure that the heatsink and fan assembly is stable in place and the fan power cable are connected properly. Don’t forget to connect the CPU fan cable. Hardware monitoring errors may occur if you fail to plug the fan cable. 5.
2.4 System memory 2.4.1 Overview The motherboard comes with six Double Data Rate (DDR) Dual Inline Memory Module (DIMM) sockets. These sockets support up to 12GB system memory using 184-pin registered PC2100/1600 DIMMs with Serial Presence Detect (SPD) and Error Check and Correction (ECC). 104 Pins 80 Pins DDRA1 DDRA2 DDRB1 DDRB2 DDRC1 DDRC2 PR-DLS533 PR-DLS533 184-Pin DDR DIMM Sockets A DDR DIMM is keyed with a notch so that it fits in only one direction.
2.4.2 Memory Configurations The motherboard supports system memory of up to 12GB in a two-way interleaved configuration. As a rule, this configuration requires that you install identical DDR DIMMs (exactly the same type and size) in pairs for optimum performance. For example, if you installed a 512MB module into DDRA1, you must install the same type of 512MB module into DDRA2. The same rule applies to pairs DDRB1/DDRB2 and DDRC1/DDRC2.
2.4.3 Installing a DIMM Make sure to unplug the power supply before adding or removing DIMMs or other system components. Failure to do so may cause severe damage to both the motherboard and the components. Follow these steps to install a DIMM. 1. Unlock a DIMM socket by pressing the retaining clips outward. 2. Align a DIMM on the socket such that the notch on the DIMM matches the break on the socket. Unlocked Retaining Clip 3.
2.5 Fixed Device Bays 2.5.1 Overview The fixed device bay are cinched by screwless locks for device placement convenience. An IDE CD-ROM drive is installed on the uppermost bay and two free bays are available for installation of additional storage devices like optical disc drives or tape drives.
2.5.2 Installing a 5.25 device Make sure to unplug the AC power supply before adding or removing any 5.25 fixed device or other system components. Failure to do so may cause severe damage to both the motherboard and the system components. 1. Use thumbs or a flat-head screw driver to detach the hooked tabs from the left side of the front panel. Take caution in removing the front panel cover. Do not use too much force when installing or removing items.
2. Remove the appropriate metallic bay panel cover of the bay slot you want to install your device. 3. From the side of the drive bay, unlock and remove the screwless drive bay lock by turning the knob 45º counter-clockwise until it clicks on the reference point near the “unlocked icon”. Unlock icon Reference points Locked icon Knob 4. When released, pull- out the lock and set it aside.
5. Carefully insert device (such as CD/DVD-ROM drive) into the selected bay. 6. Secure the drive to the bay using the screwless drive bay lock that you removed earlier. 6.a Match the two pegs on the lock to the holes on the drive bay. 6.b Turn the knob 45º clockwise until it clicks on the reference point near the “locked icon”. 7. Remove the appropriate plastic bay cover on the front panel. Front Panel door hinges Front Panel plastic bay cover 8.
2.5.3 Removing floppy disk drive tray Follow the following procedures to remove the floppy disk drive tray. 1. Remove the front cover panel. Refer and perform step #1 in section “2.5.2 Installing a 5.25 device” on page 2-13. 2. Remove the two screws that secure the right side chassis cover. 3. Pull out and detach the right side chassis cover. Set aside. 4. Locate the floppy disk drive cable and power connectors.
4.a Carefully detach the floppy disk drive cable. 4.b Carefully detach the floppy disk drive power cable. 5. Pull out the floppy disk drive tray while squeezing the two tabs together.
2.6 Installing a Hard Disk Drive The server comes with six externally accessible drive bays. In each of the drive bays is a removable tray for mounting an SCA SCSI hard disk drive. To release the drive bay, follow these steps. 1. Lift the spring lock upwards, then pull the tray lever outwards. 2. When the tray lever is pulled down, the tray will eject slightly. Pull the tray outwards on the tray lever.
2.6.1 Placing an SCA SCSI Hard Drive to tray 1. Place an SCA SCSI hard drive into drive tray and secure the drive using the bundled four (4) screws. 2. After the drive is secured to the tray, carefully insert the drive into the bay. 3. Push the tray all the way to the depth of the bay until it fits. 4. Push the tray handle back into place until you hear a locking sound. Make sure that the HDD tray is completely in place before you push the handle back to avoid damaging the drive and the tray.
2.7 Screwless Expansion Card Slot The AP1700 chassis is designed with a screwless expansion card slot for Personal Computer Interface (PCI) card installation convenience. To add or remove expansion cards, follow these steps: 1 1. To open, push the lever to the left using your thumb to release the spring lock. 3 2 2. To remove the metal plate of selected slot, pull the metal plate upwards. Take caution in handling the metal plate, the sharp edges may cause body injury. 3.
2.8 Long Card Support Guide The long card support guide secures that long expansion cards are positioned firmly in place. Make sure the handle of the expansion card is locked in the expansion card guide. To install a long expansion card, follow these steps. 1. Before installing the expansion card, read the documentation that came with it and make the necessary hardware settings. 2. Remove the system chassis cover. 3. Remove the bracket opposite the PCI slot. Refer to “2.
2.9 RAID Card (optional) The following picture shows the proper cabling of an installed RAID card. It is recommended that the given RAID card installation specification and settings are followed for easier handling and maintenance. RAID Card 2.9.1 PCI Slot speed (MHz) assignments PCI-X1 133MHz PCI-X2 ~ X4 shared PCI-X5 100MHz PCI6 33MHz • • 2-22 PCI-X2 ~ PCI-X4 BUS speeds vary depending on the number of PCI cards installed.
2.10 Hard Drive Blower The hard drive module is cooled by a blower mounted under the hot swap bays.The drive blower status can be monitored through the ASUS® Server Management Software (ASMS) for remote management convenience. 2.10.1 Removing the hard drive blower To remove the hard drive blower, follow these steps. 1. Remove the hard drive blower 3-pin power cable (FAN1) from the SCSI backplane. Blower Power Cable 2. Pull out the blower housing while squeezing the two tabs together.
2.11 Chassis Fan The chassis is cooled by a 12-cm chassis fan mounted at the rear panel.The chassis fan status can be monitored remotely through the ASUS® Server Management Software (ASMS). 2.11.1 Removing the 12-cm chassis fan To remove the 12-cm chassis fan, follow these steps. 12-cm chassis fan power cable (SYSFAN3) 1. Remove the 12-cm chassis fan 3-pin power cable (SYSFAN3) from the motherboard. chassis fan pin-locks 2.
2.12 Connecting Cables Most of the cables in the server are already pre-connected to their respective connectors. The following illustrates the corresponding components that are connected to these connectors. 1 2 3 5 4 6 12 7 8 9 10 11 1. Chassis fan (SYSFAN3) 7.SMBUS Panel to backplane 2. 8-pin 12V AUX Power 8. Floppy Disk Drive 3. 24-pin ATX Power 9. 20-pin system panel 4. Secondary IDE 10. SCSI Channel B connect to external SCSI connector 5. Primary IDE 6.
2.13 SCSI Backplane 2.13.1 Overview The SCSI backplane assembly defines the distribution of power and signals to the system and its peripherals. Also, the SCSI backplane provides physical and electrical protection in case the current output tipped over the safety limit.
2.13.2 SCSI Backplane frontside and backside The SCSI backplane assembly of this server is comprised of one SCSI board (BP6LS-AS35) with 68-pin SCSI connector, two 12V power inputs, two fan connectors (FAN1, FAN2) and three jumper connectors (J1, J2, J3). This configuration allows SCA SCSI hard disk drives to be docked into the server. A. SCSI Backplane Frontside blower connector Power connectors SCSI 68-pin connector SMBus to power supply connector SMBus to motherboard B.
2-28 ASUS AP1700
This appendix contains the installation procedure for the optional chassis roller-wheel units for the AP1700 server system.
Chassis Roller-wheel Installation The AP1700 comes with an optional roller-wheel for the chassis for server transport convenience. Follow these easy steps to mount the chassis roller-wheels. To install the roller-wheels, follow these steps. 1. Lay chassis on a side-lying position. 2. Affix each plastic rubber wheel unit by mounting its screws on designated slots at the bottom of the chassis. 3. Make sure the screws are tightened accordingly.
This appendix contains detailed hardware operation and specifications of the AP1700 redundant power modules.
Redundant Power Modules The redundant power model has two power supply modules. This hot swap power module can be removed or installed while the server is powered ON. Only one power module is necessary for powering the server, in case two power supply modules are installed, the task of providing power to the server is shared. To remove the redundant power supply module, follow these steps. 1. Remove the screw. 2. Pull on the handle while pressing down the rubber lever.
Redundant Power Module Specifications Output Voltage Regulation Output Voltage Min (V) Nom (V) Max (V) Ripple/Noise +3.33V 3.20 3.33 3.50 50mVp-p +5V 4.75 5.00 5.25 50mVp-p +12V 11.4 12.00 12.60 120mVp-p -12V -10.8 -12.00 -13.20 120mVp-p 4.75 5.00 5.25 50mVp-p +5VSB Output Current Capacity Output Voltage Min (A) Max (A) Max. Load (W) +3.33V 1.0 24.5 81.6 +5V 1.0 17.5 87.5 +12V 2.0 25.0 300 -12V 0.0 0.2 2.4 +5VSB 0.1 2.
Removing Power Supply case The redundant power modules are secured in a power supply case that connects to various power supply connectors on the SCSI backplane and the motherboard. To remove the power supply case, follow these steps: 1. Remove the two (2) top chassis cover screws to release chassis top panel cover. 2. Remove all power cable connections from SCSI backplane, motherboard, floppy and CD-ROM. 3. Remove the six (6) chassis bar screws and release chassis bar. 4.
5. Remove the four (4) power case side screws. 6. Remove the six (6) power case top screws. Make sure the power case is well supported or held when releasing the power case screws. The power case may accidentally detach and cause damage to the other components of the server system. 7. Slowly pull-out the power case. Power case top view Power case rear view 2 3 4 5 6 7 8 9 1 1. 24-pin ATX power 2. 8-pin AUX 12V power 3. Spare 4. SCSI backplane 5. SCSI backplane User’s Manual 6. Spare 7.
A-8 ASUS AP1700
This appendix lists the common problems that you may encounter while using the AP1700 server system. It lists possible causes of the problems and offers solutions. You may refer to this part and try to solve simple problems before calling customer support.
Troubleshooting NOTE Some problems that you may encounter are not due to defects on the system or the components. These problems only requires simple troubleshooting actions that you can perform by yourself. Problem The power LED on the server and/or the monitor do not light up Action 1. Check the power cable connection on the system rear panel if properly connected. 2. Make sure that the power cables are connected to a grounded power outlet. 3.
Problem The system continuously beeps after it was turned on Action 1. Check the memory modules and make sure you installed the correct DIMMs the system supports. 2. Make sure that the DIMMs are properly installed on the sockets. 3. Check if it has VGA output. The message “Non-system disk or disk error” appears 1. Check if a bootable HDD is active. 2. Check if the HDDs are properly installed and connected to the SCSI connectors on the backplane. Network connection not available 1.
A-12 ASUS AP1700