AP2400R-E1 Dual Intel® Xeon™ 4 2U Rackmount Server 533/400MHz Front Side Bus User Guide
E1649 Revised edition V2 July 2004 Copyright © 2004 ASUSTeK COMPUTER INC. All Rights Reserved. No part of this manual, including the products and software described in it, may be reproduced, transmitted, transcribed, stored in a retrieval system, or translated into any language in any form or by any means, except documentation kept by the purchaser for backup purposes, without the express written permission of ASUSTeK COMPUTER INC. (“ASUS”).
Contents Notices ........................................................................................... vi Safety information ......................................................................... vii About this guide ............................................................................ viii Chapter 1: Product introduction ......................................... 1-1 1.1 1.2 1.3 1.4 1.5 1.6 System package contents ..................................................
Contents 2.7 2.6.3 SCSI HDD configurations .................................... 2-26 2.6.4 SCSI ID assignments ........................................... 2-29 2.6.5 SCSI jumper settings ........................................... 2-29 2.6.6 SMBus and backplane power cabling .................. 2-30 2.6.7 Fan boards ........................................................... 2-31 Removable components ................................................... 2-33 2.7.1 Hot-swap mid-fans (80mm) ...................
.4 5.5 5.6 5.7 5.8 Advanced Menu ............................................................... 5-16 5.4.1 Chip Configuration ............................................... 5-18 5.4.2 I/O Device Configuration ...................................... 5-19 5.4.3 PCI Configuration ................................................ 5-21 Power Menu ..................................................................... 5-23 5.5.1 Power Up Control ................................................ 5-25 5.5.
Notices Federal Communications Commission Statement This device complies with Part 15 of the FCC Rules. Operation is subject to the following two conditions: • This device may not cause harmful interference, and • This device must accept any interference received including interference that may cause undesired operation. This equipment has been tested and found to comply with the limits for a Class B digital device, pursuant to Part 15 of the FCC Rules.
Safety information Electrical Safety • Before installing or removing signal cables, ensure that the power cables for the system unit and all attached devices are unplugged. • To prevent electrical shock hazard, disconnect the power cable from the electrical outlet before relocating the system. • When adding or removing any additional devices to or from the system, ensure that the power cables for the devices are unplugged before the signal cables are connected.
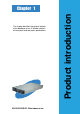
About this guide Audience This user guide is intended for system integrators, and experienced users with at least basic knowledge of configuring a server. Contents This guide contains the following parts: 1. Chapter 1: Product Introduction This chapter describes the general features of the AP2400R-E1 barebone server. It includes sections on front panel and rear panel specifications. 2.
This chapter describes the general features of the barebone server. It includes sections on front panel and rear panel specifications.
1.1 System package contents Check your ASUS AP2400R-E1 package for the following items. Contact your dealer immediately if any of the items is damaged or missing. Package items ASUS AR21 2U rackmount chassis with: • ASUS PR-DLS533/Rack motherboard • 500W redundant power supply, 115V~230V • slim optical drive • slim floppy disk drive • chassis fan • HDD fan • hot-swap SCSI HDD trays • SCSI backplanes • front bezel CPU heatsink (2 pcs.
1.2 System specifications The ASUS AP2400R-E1 is a 2U barebone server system featuring the ASUS PR-DLS533/Rack motherboard. The server supports dual Intel® Xeon™ processors, and includes the latest technologies through the chipsets embedded on the motherboard. Chassis Rackmount 2U (AR21) Motherboard ASUS PR-DLS533/Rack Chipset North Bridge: ServerWorks® Grand Champion LE (GCLE) South Bridge: ServerWorks® South Bridge 5.
1.3 Front panel features The barebone server displays a simple yet stylish front panel with easily accessible features. The power and reset buttons, LED indicators, location switch, slim CD-ROM and floppy drives, and two USB ports are located on the front panel. Reset button Location switch Slim floppy drive Power button Front panel LEDs Hot-swappable HDD bays USB 1.1 ports 1.
1.5 Internal features The barebone system includes the basic components as shown. 1 3 2 5 4 6 7 PCI-X card cage 8 9 10 11 12 13 1. 2 x rear fans 2. 64-bit PCI-X slots 3. 4. 5. 6. 7. 8. SCSI backplane 1 9. SCSI backplane 2 (underneath the PCI-X card cage) 10. SCSI backplane 3 DDR DIMM sockets 11. 3 x HDD bays Power supply cage 12. Top: Slim optical drive CPU2 socket with heatsink Mid: Slim floppy drive Bottom: 2 x HDD bays CPU1 socket with heatsink 13.
1.
Chapter 2 Hardware setup This chapter lists the hardware setup procedures that you have to perform when installing or removing system components.
2.1 Chassis cover The chassis features a “screwless design” that allows convenient assembly and disassembly. • Remove the front bezel to access the hot-swap HDDs, optical drive, and floppy drive. • Remove the chassis cover to access the internal components or if you wish to install system devices. 2.1.1 Removing the front bezel To remove the front bezel: 1. Hold the sides of the front bezel, then slightly press the middle part to disengage it from the front panel. Press here to release 2.
2.1.2 Opening the top cover (front half) To open the top cover: 1. Push the two sliding locks on the top cover to release the front half of the top cover. 2. With both hands, flip up the front corners of the top cover then lift the front half. The front corners of the cover have dents that match those on the chassis. These dents provide a holding mechanism and keeps the cover in place even when the sliding locks are released.
2.1.3 Removing the top cover You need to open the front half of the top cover before you can remove the entire top cover. Refer to section “2.1.1 Opening the top cover (front half)” for instructions. To remove the top cover: Thumbscrew 1. Loosen the thumbscrew that secures the top cover on the rear part of the chassis. 2. With the front half of the top cover open, slide the cover toward the rear panel until the mid-hooks on the top cover are disengaged. 3.
2.1.4 Installing the top cover To install the top cover: 1. Place the top cover over the chassis as shown, and align the mid-hooks with the notches on the sides. 2. Slide the cover toward the front panel until the mid-hooks are locked into the notches. 1 2 3. Flip down the front part of the top cover. 4. Push the sliding locks toward the front edge to secure the top cover in place.
5. Tighten the thumbscrew on the rear corner of the cover to completely secure the top cover. Thumbscrew 2.1.5 Removing the air duct To remove the air duct: 1. Carefully route the cables that may interfere when removing the air duct. 2. Hold the rear part of the air duct and press it for about a fraction of an inch, just enough to tilt the front end. 3. When tilted, carefully pull the air duct upward to release it from the chassis.
2.1.6 Installing the air duct To install the air duct: 1. Take note of the parts of the air duct that should match specific locations inside the chassis. Metal strips to fit the plastic clips on the air duct CPU heatsinks Flat rubber pads should match the top of the two heatsinks Plastic clips to grip the metal strips on the fan cage Vertical rubber pads should fit the spaces between the two heatsinks 2.
5. When the air duct is in place, arrange the power cable cluster to fit the space beside the air duct. 6. Flatten the power cable that runs across the air duct. When properly installed, the air duct should appear as shown.
2.2 Central Processing Unit (CPU) The motherboard comes with two surface mount 604-pin Zero Insertion Force (ZIF) socket and designed for the Intel® Xeon™ processors. Prestonia Gold Arrow PR-DLS533 PR-DLS533 Socket 604 You need to remove the pre-installed CPU heatsink before installing a CPU. 2.2.1 Removing the CPU heatsink If you have previously installed CPUs and heatsinks, follow these steps to remove the heatsinks before proceeding to the next section. To remove the CPU heatsink: 1.
2.2.2 Installing a CPU Note in the illustration that the CPU has a gold triangular mark on one corner. This mark indicates the processor Pin 1 that should match a specific corner of the CPU socket. Incorrect installation of the CPU into the socket may bend the pins and severely damage the CPU! CPU Socket 1 (outer socket) CPU Socket 2 (inner socket) 1. The motherboard supports either one or two CPUs. If you are installing only one CPU, you MUST install it in CPU socket 1. 2.
Incorrect installation of the CPU into the socket may bend the pins and severely damage the CPU! To install the CPUs: 1. Locate the CPU1 socket on the motherboard. Flip up the socket lever and push it all the way to the other side. Make sure that the socket lever is pushed back all the way. Otherwise the CPU does not fit in completely. Marked Corner 2. Position the CPU above the socket as shown. 3. Carefully insert the CPU into the socket until it fits in place.
2.2.3 Installing the CPU heatsink To install the CPU heatsink: 1. Carefully place the heatsink on top of the installed CPU (CPU1), with the thermistor cable near the connector labeled CPUFAN1. Thermistor cable 2. Hold down the heatsink lightly and twist each of the four screws with a Philips (cross) screwdriver just enough to attach the heatsink to the motherboard. When the four screws are attached, tighten them one by one to completely secure the heatsink. 3.
2.3 System memory The motherboard comes with six Double Data Rate (DDR) Dual Inline Memory Module (DIMM) sockets. These sockets support up to 12GB system memory using 2.5V 184-pin registered ECC PC2100/PC1600 DDR DIMMs. 104 Pins 80 Pins DDRA1 DDRA2 DDRB1 DDRB2 DDRC1 DDRC2 PR-DLS533 PR-DLS533 184-Pin DDR DIMM Sockets 2.3.1 Memory configurations As a rule, you need to install identical DDR DIMMs (exactly the same type and size) in pairs.
2.3.2 Installing a DIMM Make sure to unplug the power supply before adding or removing DIMMs or other system components. Failure to do so may cause severe damage to both the motherboard and the components. Follow these steps to install a DIMM. 1. Unlock a DIMM socket by pressing the retaining clips outward. 2. Align a DIMM on the socket such that the notch on the DIMM matches the break on the socket. Unlocked retaining clip 3.
2.4 Hard disk drives To install a hard disk drive: 1. Open the front bezel to access the hot-swap drive trays. 2. Release a drive tray by pushing the spring lock to the right, then pulling the tray lever outward. The drive tray ejects slightly after you pull out the lever. 3. Firmly hold the tray lever and pull the drive tray out of the bay. Metal bracket 4. An empty drive tray includes a metal bracket for support.
5. Place a hard disk drive into the drive tray, and secure it with four screws (two on each side). 6. Carefully insert drive tray and push it all the way to the depth of the bay until just a small fraction of the tray edge protrudes. 7. Push the tray lever until it clicks, and secures the drive tray in place. The drive tray is correctly placed when its front edge aligns with the bay edge.
2.5 Expansion cards The system motherboard comes with two PCI-X expansion slots, one slot installed with the PCI cage to support three full-length expansion cards. PCI-X1 PCI-X2 PCI-X slots inside the PCI cage 2.5.1 Installing a low-profile expansion card To install a low-profile expansion card: 1. Firmly hold the card by the edges and align the card connector to the PCI-X slot. 2. Push the card connector into the slot until it fits in place. 3. Secure the card bracket with a screw.
2.5.2 Installing a full-length expansion card The full-length expansion cards are inside the PCI cage. If you wish to install full-length expansion cards, you need to remove the PCI cage from the chassis. To install a full-length expansion card: 1. Disengage the PCI cage from the chassis by lifting the cage handle to about 45o angle. 2. Firmly hold and lift the cage as shown to completely detach it from the chassis, then turn it over to access the power connector.
4. Place the cage on a flat stable surface with the slot facing up, and prepare the card that you wish to install. Internal view of PCI cage Install PCI-X cards in the following order: • • • first PCI-X card second PCI-X card third PCI-X card top slot (furthest from motherboard) middle slot bottom slot (nearest the motherboard) Exceptions 1. Install a RAID card to the top slot to facilitate connection of SCSI cables. 2.
9. Re-connect the 4-pin power plug to the connector inside the cage. When re-connecting the power plug, place the PCI cage close enough to avoid pulling the power cable. 10. Before re-installing the PCI cage into the chassis, check that all cables on the PCI cage bay are properly connected and routed. Cables on the PCI cage bay 11. Take note of the two pegs on the PCI cage bay. These pegs should match the holes on the cage to make sure it fits in place.
12. Position the PCI cage into the bay making sure that the pegs go into the holes on the front of the cage, and the dents on the rear part match those on the chassis. 13. Match and push the cage card connector into the PCI-X slot (PCI-X2) until the PCI cage fits in place. 14. Ensure that the PCI cage card golden connectors completely fit the slot. If properly installed, the top of the PCI cage aligns with the top edge of the rear panel.
2.5.3 Configuring an expansion card After installing the expansion card, configure the it by adjusting the software settings. 1. Turn on the system and change the necessary BIOS settings, if any. See Chapter 5 for information on BIOS setup. 2. Assign an IRQ to the card. Refer to the following tables. 3. Install the software drivers for the expansion card.
2.6 Cable connections The bundled system cables are pre-connected before shipment. You do not need to disconnect these cables unless you will remove preinstalled components to install additional devices. Refer to this section when reconnecting cables to ensure correct cable connections. 1 2 3 4 5 6 7 9 8 10 11 Pre-connected system cables 1. 2. 3. 4. 5. 6. 7. 8. 9. 10. 11.
2.6.
2.6.
2.6.
SCSI HDD Configuration 2 Single-channel RAID card installed, connects to SCSI BP-1 SCSI-A connector used by SCSI BP-3 SCSI-B connector free for use by external SCSI device SCSI BP-3 SCSI BP-2 SCSI BP-1 SCSI-A connector (connects to SCSI BP-3) SCSI-B connector (connects to external SCSI port on the rear panel) External SCSI connector (on the rear panel) RAID card installed on PCI-X riser card (inside PCI cage) SCSI BP-3 SCSI cable from MB SCSI-A connector Terminator SCSI BP-2 SCSI cable from SCSI BP-1
SCSI HDD Configuration 3 Dual-channel RAID card installed SCSI-A connector has no connected device SCSI-B connector used by external SCSI connector (from rear panel) SCSI BP-3 SCSI BP-2 SCSI BP-1 SCSI-A connector (no connection) SCSI-B connector (connects to external SCSI port on the rear panel) External SCSI connector (on the rear panel) RAID card installed on PCI-X riser card (inside PCI cage) SCSI BP-3 SCSI cable from RAID card channel-2 Terminator SCSI BP-2 SCSI BP-1 SCSI cable from SCSI BP-1 S
2.6.4 SCSI ID assignments SCSI BP-1 SCSI BP-2 SCSI BP-3 0 4 8 2 6 10 1 5 9 SCSI slot 3 SCSI slot 2 SCSI slot 1 Front panel SCSI BP-1 SCSI BP-2 SCSI BP-3 SCSI slot 1 0 4 8 SCSI slot 2 2 6 10 SCSI slot 3 1 5 9 SAF-TE 15 12 13 SCSI card (if present) 7 2.6.
2.6.
2.6.
7 6 5 4 3 2 1 Fan interface board (FAN60M) Side facing rear panel Rear fan board (FAN60BPC) Connects the FAN60BPC board Rear fan cables Connects to FAN60M board Side facing front panel Connects to J2 on FANBPC-AR21 Connects to CPU_FAN1 on MB Connects to SYS_FAN3 on MB 2-32 Chapter 2: Hardware setup
2.7 Removable components You may need to remove previously installed system components when installing or removing system devices, or when you need to replace defective components. This section tells how to remove the following components: 1. Hot-swap mid-fans 2. Rear fans 3. Power supply modules 4. Optical drive/floppy drive 5. Front panel LED/switch board 6. SCSI backplanes 2.7.1 Hot-swap mid-fans (80mm) The fan LED lights up green in normal operation.
2.7.3 Power supply modules The barebone system ships with one power supply module. You may purchase a second power supply module for redundancy. To uninstall a power supply module: 1. Locate the power supply modules on the rear panel, and select the module that you wish to remove. 2. Hold the module lever and press the latch on the inner side to release the module. 3. Firmly pull the lever to slide the power supply module out of the chassis.
2.7.4 Slim optical and floppy drives To uninstall the optical floppy drives: 1. Disconnect the power and signal cables connected to the rear of the drives. 2. Loosen the thumbscrew that secures the drive bracket to the chassis. The optical drive is attached to the top of the bracket, and the floppy drive to bottom. 3. Slide the drive bracket toward the SCSI backplanes to release it from the chassis, then carefully pull it out of the drive bay.
2.7.5 Front panel LED and switch board To uninstall the front panel and swtich board: 1. Disconnect all cables connected to the rear of the board. 2. Remove the three screws the secure the board to the chassis. 3. Carefully remove the board out of the chassis. Rear side When removed, the LED and switch board appears as shown. The LEDs and switches on the board correspond to the LEDs and buttons on the system front panel.
2.7.6 SCSI backplanes To uninstall a SCSI backplane: 1. Disconnect all cables connected to the rear of the SCSI backplane. 2. Carefully push the backplane upward to remove it from the chassis. 3. Repeat steps 1 to 2 to remove the other backplanes.
2-38 Chapter 2: Hardware setup
This chapter describes how to install optional components and devices into the barebone server.
3.
3.2 Attaching the rails to the server To attach the server rails: 1. Locate the hooks on the side of the chassis. Side hooks 2. Position a server rail parallel to the side of the chassis, and match each of the five hooks to the holes on the rail. Side hook locked to rail hole 3. Secure the server rail to the with a screw. 4. Repeat steps 1 to 3 to attach the second server rail to the other side of the chassis.
3.3 Attaching the rack rails To attach the rack rails: 1. Select two units of space (2U) on the rack where you wish to install the barebone server. 2. Remove the screws from the 2U space on the rack front. 3. Remove the screws from the corresponding 2U space on the rack rear. 4. Measure the depth of the rack to determine the length of the rack rails. 5. Take three pieces of rack rail, consisting of the middle piece, one front end (with stopper tab), and one rear end (without stopper tab).
7. Measure the rack rail when assembled to make sure that it fits the rack. 8. Position the rack rail to the 2U space on the rack. 9. Secure the front end of the rail with two rack screws. 10. Secure the rear end of the rail with two rack screws. Rear end (without stopper) Front end (with stopper) 11. Repeat steps 5 to 9 to assemble and attach the second rack rail.
3.4 Rackmounting the server To mount the server to the rack, align the server rails with the rack rails and push the server to the depth of the rack as shown.
This chapter includes the motherboard layout, and brief descriptions of the jumpers and internal connectors.
4.1 Motherboard layout 33cm (13in) PS/2 T: Mouse B: Keyboard SYSFAN3 ATX_POWER CPUFAN1 DDR DIMMA1 (64/72 bit, 184-pin module) DDR DIMMA2 (64/72 bit, 184-pin module) COM1 SYSFAN2 CPU 1 mPGA 604 USB1 USB2 CON12V DDR DIMMB1 (64/72 bit, 184-pin module) DDR DIMMB2 (64/72 bit, 184-pin module) DDR DIMMC1 (64/72 bit, 184-pin module) DDR DIMMC2 (64/72 bit, 184-pin module) CPU 2 ® PR-DLS533 RJ-45 (LAN-2) ServerWorks ® CMIC-LE North Bridge Intel 82544GC Gigabit Ethernet RJ-45 (LAN-1) CLKSW 30.
Layout contents Switches/Jumpers 1. 2. 3. 4. 5. 6. CPU external frequency selection (CLKSW Switches 1-5) CPU clock setting (3-pin CLKSEL) Gigabit LAN2 controller setting (3-pin LAN_SW) Gigabit LAN1 controller setting (3-pin 1GLAN_EN) SCSI setting (2-pin SCSI_EN) Clear RTC RAM (R452) 4-4 4-5 4-5 4-6 4-6 4-7 Connectors 1. 2. 3. 4. 5. 6. 7. 8. 9. 10. 11. 12. 13. 14.
4.2 Switches and jumpers 4.2.1 Switches The following figure shows the location and default settings of the DIP switches on the motherboard. Keep the default settings for stable system operation. CLKSW 1.Frequency Selection ON OFF ON 1 2 3 4 5 2.Frequency Selection 3.Frequency Selection 4.Frequency Selection 5.Reserved (On) PR-DLS533 PR-DLS533 DIP Switches CPU external frequency selection (CLKSW Switches 1-5) This option tells the clock generator what frequency to send the CPU.
4.2.2 Jumpers 1. CPU clock setting (3-pin CLKSEL) This jumper allows you to select the CPU frequency. Set to Auto (pins 1-2) to allow automatic frequency selection depending on the type of the installed CPU. Set to pins 2-3 if you installed a 100MHz CPU. Remove the jumper cap to manually select the CPU frequency using the DIP switches. CLKSEL 2 1 Auto (Default) 3 2 Foster 3 2 1 Select by CLKSW PR-DLS533 PR-DLS533 CLK Setting 2.
3. Gigabit LAN1 controller setting (3-pin 1GLAN_EN) This jumper allows you to enable or disable the 64-bit Intel® 82544GC Gigabit LAN controller. Setting this jumper to pins 2-3 disables the Gigabit LAN port (RJ-45) on the rear panel that corresponds to this controller. 1G LAN_EN Enable (Default) Disable PR-DLS533 PR-DLS533 1G LAN Setting 4. SCSI setting (2-pin SCSI_EN) This jumper allows you to enable or disable the onboard SCSI feature. Keep the jumper open if you wish to install SCSI devices.
5. Clear RTC RAM (R452) This jumper allows you to clear the Real Time Clock (RTC) RAM in CMOS. You can clear the CMOS memory of date, time, and system setup parameters by erasing the CMOS RTC RAM data. The RAM data in CMOS, that include system setup information such as system passwords, is powered by the onboard button cell battery. To erase the RTC RAM: 1. Turn OFF the computer and unplug the power cord. 2. Remove the onboard battery. 3. Short the solder pads for about 5 seconds. 4.
4.3 Connectors This section describes the internal connectors on the motherboard. Refer to section “1.4 Rear panel features” for information on the external (rear panel) connectors. 1. Floppy disk drive connector (34-1 pin FLOPPY1) This connector supports the provided floppy drive ribbon cable. After connecting one end to the motherboard, connect the other end to the floppy drive. (Pin 5 is removed to prevent incorrect insertion when using ribbon cables with pin 5 plug).
3. IDE connectors (40-1 pin PRI_IDE [blue], SEC_IDE [black]) This connector supports the provided UltraDMA/100/66 IDE hard disk ribbon cable. Connect the cable’s blue connector to the primary (recommended) or secondary IDE connector, then connect the gray connector to the UltraDMA/100/66 slave device (hard disk drive) and the black connector to the UltraDMA/100/66 master device. It is recommended that you connect non-UltraDMA/100/66 devices to the secondary IDE connector.
4. Chassis intrusion connector (4-1 pin CHASSIS) This lead is for a chassis designed with intrusion detection feature. This requires an external detection mechanism such as a chassis intrusion sensor or microswitch. When you remove any chassis component, the sensor triggers and sends a high-level signal to this lead to record a chassis intrusion event. By default, the pins labeled “Chassis Signal” and “Ground” are connected to the front panel microswitch.
6. ATX power connectors (24/20-pin ATXPWR, 8-pin CON12V) These connectors connect to an ATX 12V power supply. The plugs from the power supply are designed to fit these connectors in only one orientation. Find the proper orientation and push down firmly until the connectors completely fit. In addition to the 24/20-pin power connector, this motherboard requires that you connect the 8-pin +12V power plug to provide sufficient power to the CPU.
7. CPU, Chassis, and Power Fan Connectors (3-pin CPUFAN1, CPUFAN2, SYSFAN1, SYSFAN2, SYSFAN3) The fan connectors support cooling fans of 350mA~740mA (8.88W max.) or a total of 1A~2.22A (26.64W max.) at +12V. Connect the fan cables to the fan connectors on the motherboard, making sure that the black wire of each cable matches the ground pin of the connector. Do not forget to connect the fan cables to the fan connectors. Lack of sufficient air flow within the system may damage the motherboard components.
IPMIDATA GND IPMICLK NC 9. IPMI connector (4-pin IPMI) The Intelligent Platform Management Interface (IPMI) connector is for the ASMC card. Connect the 4-pin ASMC interface cable to this connector. PR-DLS533 IPMI PR-DLS533 IPMI Connector 10. Wake-On-LAN Connector (3-pin WOL_CON) This connector supports a LAN card with a Wake-On-LAN output. The connector powers up the system when a wakeup packet or signal is received through the LAN card.
11. Two 68-pin Ultra320 SCSI Connectors (SCSI-A, SCSI-B) This motherboard has two 68-Pin Ultra320 SCSI connectors; one for each of the two channels. Each channel can support a maximum of 15 devices as specified by Ultra320 standards.
12. Wake-On-Ring Connector (2-pin WOR) This connector connects to internal modem cards with a Wake-OnRing output. The connector powers up the system when a ringup packet or signal is received through the internal modem card. For external modems, Wake-On-Ring is detected through the COM port. WOR 1 2 Ground Ring# PR-DLS533 PR-DLS533 Wake-On-Ring Connector 13. Hard disk activity LED (2-pin IDELED) This connector supplies power to the hard disk activity LED.
14. System panel connector (20-1 pin PANEL1) This connector accommodates several system front panel functions. PLED Keylock Ground +5 V Power LED 10 Reset Ground 1 PWR Ground 20 +5 V MLED 11 Message LED PR-DLS533 Speaker Connector +5V IDELED+ IDELEDSpeaker Keyboard Lock Reset SW ATX Power Switch* PR-DLS533 System Panel Connectors • System power LED (2-pin PLED) These leads connect to the system power LED on the front panel using a cable. The LED lights up when you turn on the system power.
Chapter 5 BIOS setup This chapter lists the hardware setup procedures that you have to perform when installing or removing system components.
5.1 Managing and updating your BIOS 5.1.1 Creating a bootable disk AFLASH.EXE is a Flash Memory Writer utility that updates the BIOS by uploading a new BIOS file to the programmable flash ROM on the motherboard. This file works only in DOS mode. To determine the BIOS version of your motherboard, check the last four numbers of the code displayed on the upper left-hand corner of your screen during bootup. Larger numbers represent a newer BIOS file. 1.
5. Select 1. Save Current BIOS to File from the Main menu and press . The Save Current BIOS To File screen appears. 6. Type a filename and the path, for example, A:\XXX-XX.XXX, then press .
5.1.2 Updating the BIOS Update the BIOS only if you have problems with the motherboard and you are sure that the new BIOS revision will solve your problems. Careless updating may result to more problems with the motherboard! 1. Download the latest ASUS BIOS file from the ASUS website, and save to the boot floppy disk you created earlier. 2. Boot from the floppy disk. 3. At the “A:\” prompt, type AFLASH and then press . 4. In the Main Menu, type 2 then press .
7. The utility starts to program the new BIOS information into the Flash ROM. The boot block is updated automatically only when necessary. This minimizes the possibility of boot problems in case of update failures. When the programming is done, the message “Flashed Successfully” appears. 8. Follow the onscreen instructions to continue. If you encounter problems while updating the new BIOS, DO NOT turn off the system because this may cause boot problems.
5.2 BIOS Setup program This motherboard supports a programmable Flash ROM that you can update using the provided utility described in section “5.1 Managing and updating your BIOS.” Use the BIOS Setup program when you are installing a motherboard, reconfiguring your system, or prompted to “Run Setup”. This section explains how to configure your system using this utility. Even if you are not prompted to use the Setup program, you may want to change the configuration of your computer in the future.
5.2.1 BIOS menu bar The top of the screen has a menu bar with the following selections: MAIN Use this menu to make changes to the basic system configuration. ADVANCED Use this menu to enable and make changes to the advanced features. POWER Use this menu to configure power management features. BOOT Use this menu to configure the default system device used to locate and load the Operating System.
General help In addition to the Item Specific Help window, the BIOS setup program also provides a General Help screen. You may launch this screen from any menu by simply pressing or the + combination. The General Help screen lists the legend keys and their corresponding functions. Saving changes and exiting the Setup program See “5.8 Exit Menu” for detailed information on saving changes and exiting the setup program.
5.3 Main Menu When you enter the Setup program, the following screen appears. System Time [XX:XX:XX] Sets the system to the time that you specify (usually the current time). The format is hour, minute, second. Valid values for hour, minute and second are Hour: (00 to 23), Minute: (00 to 59), Second: (00 to 59). Use the or + keys to move between the hour, minute, and second fields. System Date [XX/XX/XXXX] Sets the system to the date that you specify (usually the current date).
Supervisor Password [Disabled] / User Password [Disabled] These fields allow you to set passwords. To set a password, highlight the appropriate field and press . Type in a password then press . You can type up to eight alphanumeric characters. Symbols and other characters are ignored. To confirm the password, type the password again and press . The password is now set to [Enabled]. This password allows full access to the BIOS Setup menus.
5.3.1 Primary and Secondary Master/Slave Type [Auto] Select [Auto] to automatically detect an IDE hard disk drive. If automatic detection is successful, Setup automatically fills in the correct values for the remaining fields on this sub-menu. If automatic detection fails, this may be because the hard disk drive is too old or too new. If the hard disk was already formatted on an older system, Setup may detect incorrect parameters.
[User Type HDD] Manually enter the number of cylinders, heads and sectors per track for the drive. Refer to the drive documentation or on the drive label for this information. After entering the IDE hard disk drive information into BIOS, use a disk utility, such as FDISK, to partition and format new IDE hard disk drives. This is necessary so that you can write or read data from the hard disk. Make sure to set the partition of the Primary IDE hard disk drives to active.
Translation Method [LBA] Select the hard disk drive type in this field. When Logical Block Addressing (LBA) is enabled, the 28-bit addressing of the hard drive is used without regard for cylinders, heads, or sectors. Note that LBA Mode is necessary for drives with more than 504MB storage capacity. Configuration options: [LBA] [LARGE] [Normal] [Match Partition Table] [Manual] Cylinders This field configures the number of cylinders. Refer to the drive documentation to determine the correct value.
SMART Monitoring [Disabled] This field allows you to enable or disable the S.M.A.R.T. (Self-Monitoring, Analysis and Reporting Technology) system that utilizes internal hard disk drive monitoring technology. This parameter is normally disabled because the resources used in the SMART monitoring feature may decrease system performance. Configuration options: [Disabled] [Enabled] PIO Mode [4] This option lets you set a PIO (Programmed Input/Output) mode for the IDE device.
5.3.2 Keyboard Features Boot Up NumLock Status [On] This field enables users to activate the Number Lock function upon system boot. Configuration options: [Off] [On] Keyboard Auto-Repeat Rate [6/Sec] This controls the speed at which the system registers repeated keystrokes. Options range from 6 to 30 characters per second.
5.4 Advanced Menu CPU Speed [Manual] This field displays the auto-detected CPU speed. CPU Level 1 Cache, CPU Level 2 Cache [Enabled] These fields allow you to choose from the default [Enabled] or choose [Disabled] to turn on or off the CPU Level 1 and Level 2 built-in cache.
OS/2 Onboard Memory > 64M [Disabled] When using OS/2 operating systems with installed DRAM of greater than 64MB, you need to set this option to [Enabled]. Otherwise, leave to the default setting [Disabled]. Configuration options: [Disabled] [Enabled] USB Legacy Support [Auto] This motherboard supports Universal Serial Bus (USB) devices. The default of [Auto] allows the system to detect a USB device at startup. If detected, the USB controller legacy mode is enabled.
5.4.1 Chip Configuration Video Memory Cache Mode [UC] USWC (uncacheable, speculative write combining) is a new cache technology for the video memory of the processor. It can greatly improve the display speed by caching the display data. You must set this to UC (uncacheable) if your display card cannot support this feature; otherwise your system may not boot. Configuration options: [UC] [USWC] Enhanced Memory Mapping [Enabled] This item allows you to enable or disable the enhanced memory mapping feature.
5.4.2 I/O Device Configuration Floppy Disk Access Control [R/W] When set to [Read Only], this parameter protects files from being copied to floppy disks by allowing reads from, but not writes to, the floppy disk drive. The default setting [R/W] allows both reads and writes. Configuration options: [R/W] [Read Only] Onboard Serial Port 1 [3F8H/IRQ4] Onboard Serial Port 2 [2F8H/IRQ3] These fields allow you to set the addresses for the onboard serial connectors.
Parallel Port Mode [ECP+EPP] This field allows you to set the operation mode of the parallel port. [Normal] allows normal-speed operation but in one direction only; [EPP] allows bidirectional parallel port operation; [ECP] allows the parallel port to operate in bidirectional DMA mode; [ECP+EPP] allows normal speed operation in a two-way mode. Configuration options: [Normal] [EPP] [ECP] [ECP+EPP] ECP DMA Select [3] This field allows you to configure the parallel port DMA channel for the selected ECP mode.
5.4.3 PCI Configuration Slot 1, Slot 2, Slot 3, Slot 4, Slot 5, Slot 6 IRQ [Auto] These fields set how IRQ use is determined for each PCI slot. The default setting for each field is [Auto], which utilizes auto-routing to determine IRQ use. Configuration options: [Auto] [NA] [3] [4] [5] [7] [9] [10] [11] [12] [14] [15] PCI/VGA Palette Snoop [Disabled] Some non-standard VGA cards, like graphics accelerators or MPEG video cards, may not show colors properly.
Onboard SCSI BIOS [Auto] [Auto] allows the motherboard BIOS to detect whether you have a Adaptec SCSI controller. If the SCSI controller is detected, the SCSI BIOS will be enabled. If no SCSI controller is detected, the onboard SCSI BIOS will be disabled. Setting to [Disabled] deactivates the onboard SCSI BIOS so that the BIOS on an add-on SCSI card can be used. If your SCSI card does not have a BIOS, the SCSI card will not function.
5.5 Power Menu The Power menu allows you to reduce power consumption. This feature turns off the video display and shuts down the hard disk after a period of inactivity. Power Management [User Defined] This field allows you to activate or deactivate the automatic power saving features. When set to [Disabled], the power management features do not function regardless of the other settings on this menu.
Video Off Option [Suspend -> Off ] This field determines when to activate the video off feature for monitor power management. Configuration options: [Always On] [Suspend -> Off] Video Off Method [DPMS OFF] This field defines the video off features. The Display Power Management System (DPMS) feature allows the BIOS to control the video display card if it supports the DPMS feature. [Blank Screen] only blanks the screen. Use this for monitors without power management or “green” features.
5.5.1 Power Up Control AC PWR Loss Restart [Disabled] This allows you to set whether or not to reboot the system after power interruptions. [Disabled] leaves your system off while [Enabled] reboots the system. [Previous State] sets the system back to the state it was before the power interruption. Configuration options: [Disabled] [Enabled] [Previous State] Wake/Power Up On Ext.
Power On By PS/2 Keyboard [Disabled] This parameter allows you to use specific keys on the keyboard to turn on the system. This feature requires an ATX power supply that provides at least 1A on the +5VSB lead. Configuration options: [Disabled] [Space Bar] [Ctrl-Esc] [Power Key] Automatic Power Up [Disabled] This allows an unattended or automatic system power up.
5.5.2 Hardware Monitor MB Temperature [xxxC/xxxF] CPU1 Temperature [xxxC/xxxF] CPU2 Temperature [xxxC/xxxF] The onboard hardware monitor is able to detect the MB (motherboard) and CPU temperatures. Set to [Ignore] only if necessary. CPU1 Fan Speed [xxxxRPM] CPU2 Fan Speed [xxxxRPM] The onboard hardware monitor is able to detect the CPU fan speeds in rotations per minute (RPM). The presence of the fans is automatically detected.
5.6 Boot Menu The motherboard BIOS supports the BIOS Boot Specification (BBS) version 1.01. BBS is an intelligent mechanism that provides flexible ways to set boot sequence for Initial Program Load (IPL) devices such as CD-ROMs, network remote boot ROM, and SCSI or RAID controllers on PnP cards. The IPL devices are classified into three categories: 1. BIOS Aware IPL Devices (BAID) 2. PnP devices, includes Boot Connection Vector (BCV) and Bootstrap Entry Vector (BEV) devices 3.
2nd Boot : (BCV) [None] This field allows you to select a Boot Connection Vector (BCV) device to boot from. BCV devices include SCSI controllers or SCSI cards, RAID cards, and other devices on add-on cards with option ROM that hooks INT 13 to BIOS. Some SCSI RAID cards hook INT19 to BIOS. If you use these cards, you should enable INT 19 after installing the card. Otherwise, you cannot enter the RAID card BIOS. The BCV devices present in the system will appear as options for this field.
MPS 1.4 Support [Enabled] This field allows you to enable or disable the MultiProcessor Specification 1.4 support. Configuration options: [Disabled] [Enabled] Quick Power On Self Test [Enabled] This field speeds up the Power-On-Self Test (POST) routine by skipping retesting a second, third, and fourth time. Configuration options: [Disabled] [Enabled] Boot Up Floppy Seek [Enabled] When enabled, the BIOS will seek the floppy disk drive to determine whether the drive has 40 or 80 tracks.
5.7 Server Menu DRAM Hot Spare Memory [Disabled] This field allows you to allocate rows of SDRAM for hot spare. Configuration options: [Disabled] [1 row] [2 rows] [3 rows] Remote Console [Disabled] This field allows the text mode VGA display to be sent out to VT100 terminal through COM1. This function is effective at BIOS POST and DOS environment. Configuration options: [Disabled] [Enabled] [POST Only] Event Log Viewer Pressing on this item gives you a sub-menu.
5.8 Exit Menu When you have made all of your selections from the various menus in the Setup program, save your changes and exit Setup. Select Exit from the menu bar to display the following menu. Pressing does not immediately exit this menu. Select one of the options from this menu or from the legend bar to exit. Exit Saving Changes Once you are finished making your selections, choose this option from the Exit menu to ensure the values you selected are saved to the CMOS RAM.
Load Setup Defaults This option allows you to load the default values for each of the parameters on the Setup menus. When you select this option or if you press , a confirmation window appears. Select [Yes] to load default values. Select Exit Saving Changes or make other changes before saving the values to the non-volatile RAM. Discard Changes This option allows you to discard the selections you made and restore the previously saved values. After selecting this option, a confirmation appears.
5-34 Chapter 5: BIOS setup
Appendix References This appendix includes additional information that you may refer to when configuring your barebone server.
A.1 Power supply A.1.1 General description The barebone server comes with one SSI-type 500W redundant power supply with 115V/230V AC voltage, 50Hz/60Hz frequency. You may purchase and install a second power supply with the same specifications. There are nine (9) power plugs from the power supply unit. Take note of the devices to which you should connect the plugs.
A.1.2 Specifications Output voltage regulation Output Voltage Min (V) Nom (V) Max (V) +3.3V 3.25 3.30 3.35 50mVp-p +5V 4.90 5.00 5.10 50mVp-p +12V 11.40 12.00 12.60 120mVp-p -12V -11.40 -12.00 -13.80 120mVp-p 4.85 5.00 5.20 50mVp-p +5VSB Ripple/Noise Output current capacity Output Voltage Min (A) Max (A) Max. Output(A) +3.3V 0.5 20.0 66.0 +5V 0.5 20.0 100.0 +12V1 1.5 18.0 216.0 +12V2 1.5 18.0 216.0 +12V3 0.0 18.0 300.0 -12V 0.0 0.5 6.0 +5VSB 0.0 2.
A.2 Qualified Vendors List (QVL) CPU Vendor Model L2 cache L3 cache Clock Bus speed Intel Xeon 2.8GHz 512KB – – 400 Intel Xeon 2.4GHz 512KB – – 533 Intel Xeon 2.66GHz 512KB – – 533 Intel Xeon 2.8GHZ 512KB – – 533 Intel Xeon 3.06GHz 512KB – – 533 Intel Xeon 3.06GHz 512KB 1MB – 533 Memory A-4 Vendor Type Size Module Apacer DDR266 256MB 77.10609.112 Apacer DDR266 512MB 77.10709.112 Apacer DDR266 1GB 77.11243.
Qualified Vendors List (QVL) continued SCSI HDD (10K) Vendor Type Size Product No.
A.3 Troubleshooting Some problems that you may encounter are not due to defects on the system or the components. These problems only requires simple troubleshooting actions that you can perform by yourself. A-6 Problem Action The power LED on the server or on the monitor do not light up 1. Check if the power cable is properly connected to the power connector in the system rear panel. 2. Make sure that the power cables are connected to a grounded power outlet. 3.
Problem Action The system continuously beeps after it was turned on 1. Check the memory modules and make sure you installed supported DIMMs. 2. Make sure that the DIMMs are properly installed on the sockets. The message “Non-system disk or disk error” appears 1. Check if a bootable HDD is active. 2. Check if the HDDs are properly installed. Network connection not available 1. Make sure that the network cable is connected to the LAN port on the rear panel. 2.
A-8 Appendix: References