사용 설명서 E5402WVA/E5702WVA 시리즈 A5402WVA/A5702WVA 시리즈
K21898 개정판 V2 2023년 5월 저작권 정보 본 설명서에 기술된 제품과 소프트웨어들은 보완을 목적으로 보관되는 경우를 제외하고는 ASUSTeK COMPUTER INC.(이하 “ASUS”)로부터의 서면 동의 없이 임의의 양식이나 수단을 통해 다른 언어로 번역, 저장매체로 보관, 복사, 전달, 재구성 할 수 없습니다. ASUS는 본 설명서에 대해 그 어떠한 보증도 하지 않으며, 특정 목적을 위한 적합성 또는 제품의 매매 상황, 제품 보증에 관한 함축적 의미 등을 포함한 여타의 보증을 하지 않습니다. 또한 ASUS는 간부, 직원, 그밖의 고용인 및 대리인으로부터의 보증에 관련된, 가접적이거나 특별한 경우 혹은 우연히, 필연적으로 발생하는 손상(수익의 손실, 사업상의 손실, 이용 시 데이터의 손실, 사업상의 장애 또는 이와 비슷한 경우를 포함)에 대해서 그 어떠한 책임도 지지 않습니다. ASUS는 설명서 및 제품에 이러한 결점 및 오류에 의한 피해의 가능성에 대해서 언급하고 있습니다.
목차 설명서에 대한 소개...........................................................................................6 이 설명서에 사용된 규칙.................................................................................7 글씨체.......................................................................................................................... 7 아이콘.......................................................................................................................... 8 안전 정보................................................
3 장 : Windows 작업 처음으로 시작하기.............................................................................................41 Start menu( 시작 메뉴 )...................................................................................42 Start menu( 시작 메뉴 ) 실행하기.................................................................... 43 Start menu( 시작 메뉴 ) 에서 프로그램 열기............................................... 43 Windows 앱..................................................................................................
부록 주의사항.................................................................................................................57 RF 노출 관련 경고사항......................................................................................... 57 코팅 주의사항........................................................................................................... 58 청력 손상 예방......................................................................................................... 58 제품 환경 규제에 대한 적합성 선언.............................
설명서에 대한 소개 이 설명서는 ASUS All-in-One PC 의 하드웨어 및 소프트웨어에 관한 정보를 제공하며 다음과 같은 장으로 구성되었습니다 . 1장: 하드웨어 설치 이 장에서는 ASUS All-in-One PC 의 하드웨어 구성요소에 대해서 자세히 설명합니다 . 2장: ASUS All-in-One PC 사용법 이 장에서는 ASUS All-in-One PC 를 사용하는 방법에 대해서 설명합니다 . 3장: Windows 작업 이 장에서는 ASUS All-in-One PC 에서 Windows 을 사용하는 방법을 개괄합니다 . 4장: 시스템 복구하기 이 장에서는 ASUS All-in-One PC 복구 옵션을 제공합니다 . 부록 이 절에는 ASUS All-in-One PC 사용 시의 주의사항과 안전지침이 들어 있습니다 .
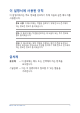
이 설명서에 사용된 규칙 이 설명서에서는 주요 정보를 강조하기 위해 다음과 같은 메시지를 사용합니다: 중요 사항! 이 메시지에는 작업을 완료하기 위해 반드시 준수해야 하는 중요한 정보가 들어있습니다. 참고: 이 메시지에는 작업을 완료하는 데 도움이 되는 추가 정보와 팁이 들어있습니다. 경고! 이 메시지에는 특정 작업을 수행하는 동안 안전을 유지하고 장치의 데이터와 구성요소의 손상을 방지하기 위해 반드시 준수해야 하는 중요한 정보가 들어있습니다. 글씨체 굵은체 =이 글씨체는 메뉴 또는 선택해야 하는 항목을 표시합니다. 기울임체 = 이 는 이 설명서에서 참조할 수 있는 절들을 가리킵니다.
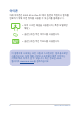
아이콘 아래 아이콘은 ASUS All-in-One PC 에서 일련의 작업이나 절차를 완료하기 위해 어떤 장치를 사용할 수 있는지를 알려줍니다 . = 터치 스크린 패널을 사용합니다 ( 특정 모델에만 해당 ). = (옵션) 유선/무선 마우스를 사용합니다. = (옵션) 유선/무선 키보드를 사용합니다. 이 설명서에 나와있는 모든 그림과 스크린샷은 참조용으로만 사용하십시오. 실제 제품 사양과 소프트웨어 화면 이미지는 지역에 따라 차이가 날 수 있습니다. 최신 정보는 ASUS 웹사이트 www.asus.com을 참조하십시오.
안전 정보 이 ASUS All-in-One PC 는 정보 기술 장비에 대한 최신 안전 기준에 부합하도록 고안되고 테스트를 거쳤습니다 . 그럼에도 불구하고 안전을 위해 다음 안전 지침을 반드시 읽어주시기 바랍니다 . 시스템 설정하기 • 시스템을 조작하기 전에 문서에 있는 지시사항을 빠짐 없이 읽고 이를 준수하십시오 . • 이 제품을 물 근처나 라디에이터 등의 열원 근처에서 사용하지 마십시오 . • 부상을 입지 않도록 시스템을 운반할 때 주의하십시오. • 시스템을 안정된 표면에 설치하십시오 . • 섀시에 있는 구멍은 환기용입니다 . 이 구멍을 막거나 덮지 마십시오 . 환기가 잘 되도록 시스템 주변에 충분한 공간을 남겨 두십시오 . 환기 구멍으로 어떤 종류의 물체도 집어넣지 마십시오 . • 이 제품을 주변 온도가 0˚C ~ 40˚C 인 환경에서 사용하십시오 . • 연장 코드를 사용할 경우 연장 코드에 연결된 장치의 총 전류 정격이 해당 전류 정격을 초과하지 않도록 하십시오 .
사용 중의 주의사항 • 전원 코드를 밟거나 코드 위에 물건을 올려놓지 마십시오 . • 시스템에 물이나 그밖의 액체를 쏟지 마십시오 . • 시스템이 꺼져도 소량의 전류가 아직 제품에 남아 있습니다 . 시스템을 청소하기 전에 반드시 모든 전원 / 모뎀 / 네트워크 케이블을 전기 콘센트에서 분리하십시오 . • 터치 스크린의 터치 감도를 최적화하려면 터치 스크린을 정기적으로 청소해야 합니다. 이물질이나 먼지나 지나치게 쌓이지 않도록 스크린을 깨끗한 상태로 유지하십시오. 스크린을 청소하는 방법은 다음과 같습니다. - 시스템을 끄고 벽에서 전원 코드를 뽑습니다. - 가정용 유리 세정제를 소량 뿌린 깨끗한 천으로 스크린 표면을 살살 닦아줍니다. - 세정제를 스크린에 직접 뿌리지 마십시오. • 스크린을 닦을 때 연마성 세정제나 거친 천을 사용하지 마십시오 . • 제품을 사용하면서 다음과 같은 기술적 문제가 발생할 경우 전원 코드를 뽑고 전문 기술자나 제품을 구매한 대리점에 연락하십시오 .
음압 경고 이어폰 또는 헤드폰의 음압이 과도하면 청력이 떨어지거나 영구적인 손상을 입을 수 있습니다 . 볼륨과 이퀄라이저를 기본 레벨 이상으로 증가하면 출력 전압과 이어폰 또는 헤드폰에서 만들어지는 음압이 증가합니다 . 어댑터 1. 어댑터 사양 입력 전압: 100-240Vac 입력 주파수: 50-60Hz 정격 출력 전류: 6A (120W) 정격 출력 전압: 20V 2. 전원 소켓이 ASUS All-in-One PC 에 가까이 있을 것을 권장합니다 . DC 팬 경고 DC 팬은 움직이는 부품으로서 잘못 사용하면 해로운 결과를 유발할 수 있습니다 . 제품 사용 시 팬에서 멀리 떨어지십시오 .
패키지 내용물 ASUS All-in-One PC War rant y Ca ck St 전원 코드 키보드(옵션) 마우스(옵션) KBM USB 수신기 동글 ( 옵션 ) 케이블 오거나이저 (옵션) rd 보증서 Qui AC 어댑터 art G uide 빠른 시작 설명서 참고 : 12 • 손상되었거나 누락된 품목이 있을 경우 , 제품을 구매한 소매점에 연락하십시오 . • ASUS All-in-One PC 그림은 참조용으로만 사용하십시오 . 실제 제품의 사양은 모델에 따라 다를 수 있습니다 . • 키보드 , 마우스 , 전원 공급 그림은 참조용으로만 사용하십시오 . 실제 제품의 사양은 지역에 따라 다를 수 있습니다 .
1 장 : 하드웨어 설치 ASUS All-in-One PC 정면도 참고: 이 절의 그림은 참조용으로만 사용하십시오. 모델에 따라 ASUS All-in-One PC의 외관이 다를 수 있습니다.
근접 센서 (특정 모델에만 해당) 근접 센서는 해당 공간에서 사용자의 움직임을 감지한 후 자동으로 웨이크업 기능을 사용하여 사용자의 ASUS Allin-One PC 에 Windows Hello 로 로그인합니다 . ASUS All-in-One PC 는 사용자가 공간을 떠나면 슬립 모드로 전환됩니다 . 어레이 마이크 어레이 마이크는 에코 제거 , 소음 저감 , 빔 포밍 기능으로 음성 인식 및 오디오 녹음을 개선했습니다 . 카메라 표시등 내장 카메라가 사용 중이면 카메라 표시등이 켜집니다. 카메라 내장 카메라를 사용하면 ASUS All-in-One PC 로 사진을 촬영하거나 동영상을 녹화할 수 있습니다 . IR 카메라 (특정 모델에만 해당) 내장형 IR 카메라는 적외선 영상을 통한 안면 인식 기능과 Windows Hello 를 지원합니다 . 참고 : Windows Hello 안면 인식으로 로그인할 때 데이터를 읽는 동안 빨간색 IR LED 가 깜박입니다 .
서브우퍼 (특정 모델에만 해당) 내장형 서브우퍼는 더 깊고 풍부한 베이스 음을 전달하여 향상된 청음 경험을 제공합니다 . LCD 디스플레이 LCD 디스플레이 패널은 사진, 동영상 및 기타 멀티미디어 파일 등을 볼 수 있는 탁월한 기능을 갖추고 있습니다. 선택한 모델의 경우 멀티 터치 기능이 지원됩니다 . 터치 제스처를 사용하여 ASUS All-in-One PC 를 조작할 수 있습니다 . 오디오 스피커 내장된 오디오 스피커를 사용하여 ASUS All-in-One PC 에서 직접 오디오를 들을 수 있습니다 . 오디오 기능은 소프트웨어 제어 방식입니다 .
좌측면도 16 ASUS All-in-One PC
메모리 카드 리더 이 내장형 메모리 카드 리더는 SD 카드 형식을 지원합니다 . USB Charger+ 기능이 있는 USB 3.2 Gen 1 포트 USB 3.2(유니버설 시리얼 버스 3.2) Gen 1 포트는 최대 5 Gbit/s의 전송 속도를 제공하고 USB 2.0과 역호환이 가능합니다. 아이콘은 이 포트에 모바일 장치를 급속 충전할 수 있는 USB Charger+ 기능이 있음을 나타냅니다. Thunderbolt™ 4 포트 Thunderbolt™ 4 어댑터를 사용하여 ASUS All-in-One PC 를 DisplayPort, VGA, DVI 또는 HDMI 외부 디스플레이에 연결하여 Intel® Thunderbolt™ 기술을 채택한 고해상도 디스플레이 기능을 경험해 보십시오. 참고: 이 포트의 전송 속도는 모델에 따라 다를 수 있습니다.
USB 3.2 Gen 2 Type-C® 포트 USB 3.2(범용직렬버스 3.2) Gen 2 Type-C® 포트는 최대 10Gbit/s의 전송 속도를 제공하고 USB 2.0과의 역방향 호환성을 지원합니다. 헤드폰/헤드셋/마이크 잭 증폭 스피커 또는 헤드폰을 이 포트에 연결할 수 있습니다. 또한 이 포트를 사용하여 헤드셋 또는 외부 마이크를 연결할 수 있습니다. 전원 표시등 ASUS All-in-One PC 가 켜져 있는 경우 LED 전원 표시등이 켜집니다 . Power( 전원 ) 버튼 이 버튼을 누르면 ASUS All-in-One PC 에서 전원이 켜집니다 .
우측면도 ASUS All-in-One PC 19
광 디스크 드라이브 꺼내기 버튼 (특정 모델에만 해당) 이 버튼을 눌러 광 드라이브 트레이를 꺼냅니다 . 광 드라이브 (특정 모델에만 해당) ASUS All-in-One PC의 광드라이브는 CD, DVD, 쓰기 가능한 디스크 또는 다시 쓰기가 가능한 디스크와 같은 몇 가지 디스크 형식을 지원할 수 있습니다.
후면도 ASUS All-in-One PC 21
웹캠 쉴드 이것을 이용해서 고객님의 ASUS All-in-One PC 카메라 렌즈를 가릴 수 있습니다. Kensington® 보안 슬롯 Kensington® 보안 슬롯은 Kensington® 과 호환되는 보안 제품을 사용하는 ASUS All-in-One PC 를 안전하게 지키도록 해줍니다 . 전원 입력 함께 제공된 전원 어댑터는 이 잭과 함께 사용할 수 있도록 AC 전원을 DC 전원으로 변환합니다. 이 잭을 통해 공급되는 전원이 ASUS All-in-One PC에 전원을 공급합니다. ASUS All-in-One PC 손상을 방지하려면 반드시 함께 제공된 전원 어댑터를 사용하십시오. 경고 ! 전원 어댑터는 사용 중에 뜨거워질 수 있습니다 . 어댑터를 덮지 말고 몸에서 멀리하십시오 . HDMI 입력 포트 (특정 모델에만 해당) 이 포트에서는 ASUS All-in-One PC를 외부 디스플레이로서 사용할 수 있습니다.
DisplayPort (특정 모델에만 해당) 이 포트에서는 ASUS All-in-One PC를 외부 디스플레이 연결할 수 있습니다. RS232 포트 (특정 모델에만 해당) 이 포트에서는 ASUS All-in-One PC 를 외부 디스플레이 연결할 수 있습니다 . LAN 포트 8 핀 RJ-45 LAN 포트는 로컬 네트워크에 연결할 표준 이더넷 케이블을 지원합니다 . USB 2.0 포트 이 USB( 유니버설 시리얼 버스 ) 포트는 키보드 , 포인팅 장치 , 플래시 디스크 드라이브 , 외장 HDD, 스피커 , 카메라 및 프린터와 같은 USB 2.0 또는 USB 1.1 장치와 호환됩니다 . USB 3.2 Gen1 포트 USB 3.2 Gen1(유니버설 시리얼 버스) 포트는 최대 5 Gbit/s 의 전송 속도를 제공합니다. HDMI 출력 포트 이 포트를 통해 ASUS All-in-One PC 에서 HDMI 케이블을 사용하는 HDMI 호환 기기로 음성 및 영상 신호를 보낼 수 있습니다 .
ASUS All-in-One PC
2장: ASUS All-in-One PC 사용법 ASUS All-in-One PC 설정하기 참고: 이 절의 그림은 참조용으로만 사용하십시오. 모델에 따라 ASUS All-in-One PC의 외관이 다를 수 있습니다. 스탠드 설치하기 1. 오리엔테이션에서 보인 대로 베이스 플레이트를 스탠드에 정렬하여 부착합니다. 2. 나사를 이용해 스탠드를 고정시킵니다.
무선 키보드 및 마우스 연결하기 참고: 이 절의 그림은 참조용으로만 사용하십시오. 모델에 따라 ASUS All-in-One PC의 외관이 다를 수 있습니다. 1. 26 배터리를 무선 키보드 및 마우스에 연결합니다 .
2. 2 개의 장치를 ASUS All-in-One PC 에 페어링하기 위해 키보드와 마우스용 무선 동글을 USB 2.0 포트에 연결합니다 . 3. 무선 키보드 및 마우스 사용을 시작할 수 있습니다 . 참고: 연결이 끊길 경우 무선 키보드와 마우스를 무선 동글에 다시 연결하십시오. 장치를 다른 무선 장치 근처에서 사용하지 마십시오. 전파 간섭을 피하려면 마우스와 키보드를 다른 무선 하드웨어로부터 적어도 20cm 이상 떨어진 곳에 놓으십시오.
유선 키보드 및 마우스 연결하기 키보드와 마우스를 후면 패널의 USB 포트에 연결하십시오. 참고: 위의 그림은 참조용으로만 사용하십시오. 실제 하드웨어나 유선 또는 무선 키보드 및 마우스의 사양은 다를 수 있습니다.
시스템 켜기 A. DC 전원 커넥터를 ASUS All-in-One PC 의 전원 (DC) 입력 포트에 연결합니다 . B. AC 전원 코드를 AC/DC 어댑터에 연결합니다 . C. AC 전원 어댑터를 100V~240V 전원에 연결합니다 .
D. 전원 버튼을 누릅니다 . 참고 : ASUS All-in-One PC 를 끄는 방법에 대한 자세한 내용은 Windows 에서 작업하기 의 ASUS All-in-One PC 끄기 를 참조하십시오 .
ASUS All-in-One PC 배치하기 -5O 20O 1. ASUS All-in-One PC 를 테이블 또는 책상과 같이 평평한 표면에 올려놓습니다 . 2. 디스플레이를 -5o ~ 20o 범위에서 기울입니다 . 중요 사항 ! • ASUS All-in-One PC 를 설치할 때 양손을 사용하십시오 . • 권장 값을 초과하는 각도로 디스플레이를 조정하지 마십시오 . 그럴 경우 사용자의 ASUS All-in-One PC 가 손상될 수 있습니다 .
높이 조절 가능 스탠드 설치 ( 특정 모델에만 해당 ) 중요 ! 손상을 피하기 위해 ASUS All-in-One Pc 를 수평 또는 수직 시계 반대방향으로 높이 조절 가능 스탠드에 배치하기 . 1. 오리엔테이션에서 보인 대로 베이스 플레이트를 높이 조절 가능 스탠드에 정렬하여 부착합니다 . 2. 나사를 이용해 높이 조절 가능 스탠드를 고정시킵니다 .
케이블 오거나이저 설치 (특정 모델에만 해당) 1. 케이블 오거나이저의 정리 공간이 왼쪽을 향하도록 오거나이저를 테이블에 결합합니다. 2. 케이블 오거나이저의 마련된 공간에 케이블을 집어넣어 정리합니다.
터치 스크린 사용법 ( 선택한 모델에만 해당 ) ASUS All-in-One PC의 터치 스크린 패널은 ASUS All-in-One PC 에서 사진, 동영상 및 멀티미디어 파일에 대한 탁월한 보기 기능을 제공합니다. 이 패널은 터치 스크린 제스처를 사용하여 작동할 수 있습니다. 중요 사항! 움푹 패이거나 흠집이 생기는 것을 방지하려면 가위나 볼펜처럼 날카로운 물체를 터치 스크린에 사용하지 마십시오. 흠집이 생길 경우 터치 스크린이 반응을 하지 않을 수 있습니다.
터치 스크린 패널용 제스처 제스처를 통해 프로그램을 실행하고 ASUS All-in-One PC 의 설정에 액세스할 수 있습니다 . 터치 스크린 패널에서 손 제스처 사용 시 다음 그림을 참조하십시오 . 참고 : 다음 스크린샷은 참조용입니다 . 터치 스크린 패널의 외양은 모델에 따라 다를 수 있습니다 . 터치 스크린 패널 제스처 사용하기 제스처를 통해 프로그램을 실행하고 ASUS All-in-One PC 의 설정에 액세스할 수 있습니다 . ASUS All-in-One PC 의 터치 스크린 패널에서 손 제스처를 사용하여 기능을 활성화할 수 있습니다 . 탭 / 더블 탭 길게 누르기 • 앱을 탭하여 선택합니다 . • 앱을 더블 탭하여 실행합니다 . 길게 누르면 오른쪽 클릭 메뉴가 열립니다 .
확대 축소 터치 스크린 패널에서 두 손가락을 벌립니다 . 터치 스크린 패널에서 두 손가락을 모읍니다 . 손가락으로 밀기 끌기 손가락을 밀어 위아래로 스크롤하고 , 화면을 왼쪽 또는 오른쪽으로 이동합니다 . • 끌어서 여러 항목 주위에 선택 윤곽을 만듭니다 . • 항목을 끌어서 놓아 새 위치로 옮깁니다 .
키보드 사용 기능 키 키보드의 기능 키로 다음 명령을 실행할 수 있습니다 . 스피커 켜기 또는 끄기 스피커 볼륨 낮추기 스피커 볼륨 높이기 디스플레이 밝기 낮추기 디스플레이 밝기 높이기 디스플레이 모드 전환 참고 : 두 번째 디스플레이가 ASUS All-in-One PC 에 연결되어 있는지 확인하십시오 .
잠금 화면 활성화 이전 트랙으로 건너뛰기 또는 되감기 재생 또는 일시 중지 다음 트랙으로 건너뛰기 또는 빨리 감기 화면 캡처 도구 활성화 38 ASUS All-in-One PC
다른 키 조합 마이크 켜기 또는 끄기 내장 또는 외부 오디오 스피커에 대한 ASUS AI 노이즈 캔슬링 전환 마이크 전방 및 후방 AI 노이즈 캔슬링 모드와 360° AI 노이즈 캔슬링 모드 간 전환을 합니다.
ASUS All-in-One PC
3장: Windows 작업 처음으로 시작하기 ASUS All-in-One PC 를 처음으로 시작하면 Windows 운영 체제 구성을 안내하는 일련의 화면이 나타납니다 . 화면 지침에 따라 다음 기본 항목을 구성하십시오 . • Personalize( 개인 설정 ) • Get online( 온라인 연결 ) • Settings( 설정 ) • Your account( 계정 ) 기본 항목을 구성한 후 Windows 는 앱 및 기본 설정 설치를 진행합니다 . 설치 프로세스 중 ASUS All-in-One PC 의 전원을 계속 켜두십시오 . 설치 프로세스가 완료되면 바탕 화면이 나타납니다 . 참고 : 이 장의 스크린샷은 참조용입니다 .
Start menu( 시작 메뉴 ) Start menu( 시작 메뉴 ) 는 ASUS All-in-One PC 의 프로그램 , Windows 앱 , 폴더 및 설정에 접근할 수 있는 주요 관문입니다 . Start menu( 시작 메뉴 ) 를 사용하여 다음과 같은 주요 활동을 수행할 수 있습니다 .
Start menu( 시작 메뉴 ) 실행하기 바탕 화면에서 Start menu( 시작 메뉴 ) 아이콘을 누릅니다 . 바탕 화면의 시작 아이콘 위에 마우스 포인터를 놓고 클릭합니다 . 키보드에서 Windows 로고 키를 누릅니다 . Start menu( 시작 메뉴 ) 에서 프로그램 열기 Start menu( 시작 메뉴 ) 의 주된 용도 중 하나는 ASUS All-in-One PC 에 설치된 프로그램을 여는 것입니다 . 프로그램을 탭하여 실행합니다 . 프로그램 위에 마우스 포인터를 놓고 클릭하여 실행합니다 . 화살표 키를 사용하여 프로그램을 찾아봅니다 . 키를 눌러 실행합니다 .
Windows 앱 참고 : 일부 Windows 앱의 경우 완전히 실행되려면 먼저 Microsoft 계정에 로그인해야 합니다 . Start menu( 시작 메뉴 ) 에서 Windows 앱 실행하기 앱을 탭하여 실행합니다 . 앱 위에 마우스 포인터를 놓고 클릭하여 실행합니다 . 화살표 키를 사용하여 앱을 찾아봅니다 . 키를 눌러 앱을 실행합니다 .
MyASUS Splendid MyASUS Splendid 는 모든 ASUS 디스플레이 패널이 동일하며 정확한 색상을 표시하도록 합니다 . Normal Mode( 기본 모드 ) 외에 Vivid( 선명한 모드 ), Eye Care( 시력 보호 모드 ) 또는 Manual Mode( 수동 모드 ) 를 선택하여 디스플레이 설정을 조정할 수 있습니다 . • Normal Mode( 기본 모드 ): 감마 및 색상 온도 보정을 통해 , 패널에서 출력되는 이미지는 눈이 본래 보는 이미지와 최대한 가깝게 표시됩니다 . OLED 패널이 있는 모델의 경우 이 모드는 TÜV Low Blue Light 인증을 준수합니다 . • Vivid Mode( 선명한 모드 ): 이 모드를 사용하면 이미지의 채도를 조정하여 더 생생하고 컬러풀하게 표시할 수 있습니다 . • Manual Mode( 수동 모드 ): 이 모드를 사용하면 색상 온도 값을 -50 에서 +50 까지 개인의 필요에 맞게 조정할 수 있습니다 .
눈의 피로를 완화하려면 다음 팁을 참조하십시오 . • 장시간 작업하는 경우 잠시 디스플레이에서 떨어져 시간을 보내십시오 . 1 시간 정도 연속으로 컴퓨터 작업을 한 후에는 짧은 휴식 ( 최소 5 분 ) 을 취하는 것이 좋습니다 . 한 번의 긴 휴식을 취하는 것보다 짧게 자주 휴식을 취하는 것이 더 효과적입니다 . • 눈의 피로와 안구 건조를 최소화하려면 멀리 있는 물체에 초점을 맞춰 바라보며 주기적으로 눈을 쉬어 주십시오 . • 다음 운동을 반복하여 눈의 피로를 줄이십시오 . (1) 위와 아래를 번갈아 바라봅니다 . (2) 천천히 눈을 굴립니다 . (3) 눈을 대각선으로 움직입니다 . 눈의 피로가 지속되면 의사와 상담하십시오 . • 46 고에너지 청색광은 눈의 피로와 AMD( 연령 관련 황반 변성 ) 를 유발할 수 있습니다 . 청색광 필터는 유해한 청색광을 최대 30% 줄여 CVS( 컴퓨터 시각 증후군 ) 를 방지합니다 .
무선 네트워크에 연결하기 Wi-Fi ASUS All-in-One PC 의 Wi-Fi 연결을 사용하여 이메일에 액세스하고 , 인터넷을 검색하고 , 소셜 네트워크에서 애플리케이션을 공유하십시오 . Wi-Fi 연결하기 다음 단계에 따라 ASUS All-in-One PC 를 Wi-Fi 네트워크에 연결하십시오 . 1. 작업 표시줄에서 Wi-Fi 아이콘을 눌러 Wi-Fi 를 활성화합니다 . 2. 사용 가능한 Wi-Fi 연결 목록에서 액세스 지점을 선택합니다 . 3. Connect( 연결 ) 를 선택하여 네트워크 연결을 시작합니다 . 또는 참고 : Wi-Fi 연결을 활성화하기 위해 보안 키를 입력하라는 메시지가 표시될 수 있습니다 .
Bluetooth Bluetooth 를 사용하면 다른 Bluetooth 사용 장치와의 무선 데이터 전송이 용이해집니다 . 다른 Bluetooth 사용 장치와 페어링하기 데이터 전송을 활성화하려면 ASUS All-in-One PC 를 다른 Bluetooth 사용 장치와 페어링해야 합니다 . 다음 단계에 따라 장치를 연결하십시오 . 1. Start menu( 시작 메뉴 ) 에서 Settings( 설정 ) 를 실행합니다 . 2. Devices( 장치 ) > Bluetooth 를 선택하여 Bluetooth 사용 장치를 검색합니다 . (Windows 10 ) 또는 Bluetooth & devices(Bluetooth 및 장치 ) > Add device( 장치 추가 ) 를 선택하여 Bluetooth 사용 장치를 검색합니다 . (Windows 11 ) 3. 목록에서 장치를 선택하여 ASUS All-in-One PC 와 장치를 페어링합니다 .
유선 네트워크에 연결하기 ASUS All-in-One PC 의 LAN 포트를 사용하여 근거리통신망 (LAN) 및 광대역 인터넷 연결과 같은 유선 네트워크에 연결할 수도 있습니다 . 참고 : 자세한 내용은 인터넷 서비스 제공업체 (ISP) 에 문의하십시오 . 인터넷 연결 설정에 도움이 필요한 경우 네트워크 관리자에게 문의하십시오 .
ASUS All-in-One PC 끄기 다음 절차 중 하나를 수행하여 ASUS All-in-One PC 를 끌 수 있습니다 . 또는 • Start menu( 시작 메뉴 ) 를 실행하고 전원 아이콘을 선택한 다음 Shut down( 종료 ) 을 선택하여 정상적인 종료를 수행합니다 . • 로그인 화면에서 전원 아이콘을 선택한 후 Shut down( 종료 ) 을 선택합니다 . • 키를 눌러 Windows Shut Down( 종료 ) 을 실행합니다 . 드롭다운 목록에서 Shut down( 종료 ) 을 선택한 다음 OK( 확인 ) 를 선택합니다 . • 50 ASUS All-in-One PC 가 응답하지 않으면 ASUS All-in-One PC 가 꺼질 때까지 전원 버튼을 최소 4 초 동안 길게 누르십시오 .
ASUS All-in-One PC 를 대기 모드로 전환하기 ASUS All-in-One PC 를 대기 모드로 전환하려면 다음 작업을 수행합니다 . • Start menu( 시작 메뉴 ) 를 실행하고 전원 아이콘을 선택한 다음 Sleep( 대기 ) 을 선택하여 ASUS All-in-One PC 를 대기 상태로 전환합니다 . • 로그인 화면에서 전원 아이콘을 선택한 후 Sleep( 대기 ) 을 선택합니다 . 또는 키를 눌러 Windows Shut Down( 종료 ) 을 실행합니다 . 드롭다운 목록에서 Sleep( 대기 ) 을 선택한 다음 OK( 확인 ) 를 선택합니다 . 참고 : 전원 버튼을 한 번 눌러 ASUS All-in-One PC 를 대기 모드로 전환할 수도 있습니다 .
ASUS All-in-One PC
4장: 시스템 복구하기 BIOS 설정 입력 BIOS(Basic Input and Output System) 는 시스템 시작에 필요한 시스템 하드웨어 설정을 ASUS All-in-One PC 에 저장합니다 . 정상적인 상황에서는 최적의 성능을 보장하기 위해 대부분의 조건에 기본 BIOS 설정이 적용됩니다 . 다음의 경우를 제외하고는 기본 BIOS 설정을 변경하지 마십시오 . • 시스템 부팅 중에 화면에 오류 메시지가 나타나 BIOS 설정을 실행하도록 요청합니다 . • 추가 BIOS 설정 또는 업데이트가 필요한 새 시스템 구성 요소를 설치했습니다 . 경고 ! 부적절한 BIOS 설정으로 인해 시스템이 불안정해지거나 부팅에 실패할 수 있습니다 . 숙련된 서비스 직원의 도움을 받아 BIOS 설정을 변경할 것을 강력하게 권고합니다 . BIOS 에 빠르게 들어가기 BIOS 에 액세스하려면 다음을 수행합니다 .
시스템 복구하기 ASUS All-in-One PC 에서 복구 옵션을 사용하면 시스템을 원래 상태로 복원하거나 단순히 설정을 새로 고쳐 성능을 향상시킬 수 있습니다 . 중요 사항 ! • ASUS All-in-One PC 에서 복구 옵션을 수행하기 전에 모든 데이터 파일을 백업하십시오 . • 데이터 손실을 방지하기 위해 네트워크 설정 , 사용자 이름 및 암호와 같은 중요한 사용자 지정 설정을 기록해 두십시오 . • 시스템을 재설정하기 전에 ASUS All-in-One PC 가 전원에 연결되어 있는지 확인하십시오 . Windows 에서는 다음 복구 옵션을 수행할 수 있습니다 . • Keep my files( 내 파일 유지 ) - 이 옵션을 사용하면 개인 파일 ( 사진 , 음악 , 비디오 , 문서 ) 에 영향을 주지 않고 ASUS All-in-One PC 를 새로 고침할 수 있습니다 .
• Advanced startup( 고급 시작 옵션 ) - 이 옵션을 사용하면 ASUS All-in-One PC 에서 다음과 같은 다른 고급 복구 옵션을 수행할 수 있습니다 . - USB 드라이브 , 네트워크 연결 또는 Windows 복구 DVD 를 사용하여 ASUS All-in-One PC 를 시작합니다 . - 다음과 같은 고급 복구 옵션을 활성화하려면 Troubleshoot( 문제 해결 ) 을 사용합니다 . Startup Repair( 시동 복구 ), Uninstall Updates( 업데이트 제거 ), Startup Settings( 시작 설정 ), UEFI Firmware Settings(UEFI 펌웨어 설정 ), Command Prompt( 명령 프롬프트 ), System Restore( 시스템 복원 ) 및 System Image Recovery( 시스템 이미지 복구 ).
ASUS All-in-One PC
부록 주의사항 RF 노출 관련 경고사항 제공된 지침에 따라 이 장치를 설치하고 작동해야 하고 , 사람으로부터 최소 20 cm 의 거리를 두고 이 송신기에 사용되는 안테나를 설치해야 하고 , 다른 안테나 또는 송신기와 같은 위치에 설치하거나 이와 함께 작동해서는 안 됩니다 . 최종 사용자와 설치자는 최종 사용자와 설치자에게 RF 노출 적합성을 충족시키기 위한 안테나 설치 지침과 송신기 작동 조건을 제공해야 합니다 . 중요 사항 ! 옥외에서는 5.15~5.25 GHz 의 대역을 사용할 수 없습니다 . 이 장치에는 5250~5350 및 5470~5725 MHz 에 대한 애드혹 성능이 없습니다 . 주의 : 이 장치 보증자가 명시적으로 승인하지 않은 변경이나 개조를 할 경우 사용자가 이 장비를 작동할 수 있는 권리가 무효화됩니다 .
코팅 주의사항 중요 사항 ! 절연을 통해 전기 안전을 유지하려면 , IO 포트가 있는 면을 제외하고 노트북 PC 의 본체를 코팅 처리하여 절연해야 합니다 . 청력 손상 예방 가능한 청력 손상을 예방하려면 높은 볼륨으로 장시간 청취하지 마십시오.
– 접지 연결을 통해 콘센트에 전원 코드를 연결합니다. – 배터리를 불이나 뜨거운 오븐에 폐기하거나 기계적으로 배터리를 부수거나 자를 경우 폭발할 수 있습니다. – 배터리를 주변 온도가 극도로 높은 곳에 두면 폭발하거나 인화성 용액 또는 가스가 누출될 수 있습니다. – 배터리가 극도로 낮은 기압이 있을 경우 폭발하거나 인화성 용액 또는 가스가 누출될 수 있습니다. 분해 금지 사용자에 의해 분해된 제품에는 보증이 적용되지 않습니다. 리튬 이온 배터리에 관한 경고 사항 주의 : 맞지 않는 배터리로 교체할 경우 폭발할 위험이 있습니다 . 반드시 제조업체가 권장하는 동일한 유형이나 이에 상응하는 유형의 배터리로 교체하십시오 . 다 사용한 배터리는 제조업체의 지침에 따라 폐기하십시오 . 액체에의 노출 금지 제품이 액체나 비 또는 습기에 노출되거나 그 부근에서 사용하지 않도록 하십시오. 이 제품은 방수성이나 방유성 제품이 아닙니다.
바퀴 달린 쓰레기통 위에 X 표시가 된 라벨이 부착된 제품 (전기 전자 제품, 수은을 포함하고 있는 셀 배터리)은 일반 쓰레기와 함께 폐기해서는 안됩니다. 전자 제품 폐기에 관련된 지역 규정을 확인해 주십시오. 배터리를 일반 쓰레기와 함께 버리지 마십시오. 본 라벨은 배터리를 일반 쓰레기와 함께 폐기해서는 안됨을 의미합니다. 제품 환경 규제에 대한 적합성 선언 ASUS 는 환경 친화적 설계의 이념에 따라 제품을 설계 및 제조하고 있으며 , ASUS 제품 수명 주기의 각 단계가 글로벌 환경 규정을 준수하고 있는지 확인합니다 . ASUS 는 또한 규정 요건에 근거하여 관련 정보를 발표하고 있습니다 . ASUS 가 준수하는 아래 규정 요건에 관계된 정보는 http://csr.asus.com/Compliance.htm 를 확인해 주십시오 .
EU RoHS 본 제품은 EU RoHS 지침을 준수합니다 . 자세한 내용은 http://csr.asus.com/english/article.aspx?id=35 를 참조하십시오 . ASUS 재활용/수거 서비스 ASUS 는 환경 보호 대책의 일환으로 재활용 및 수거 프로그램을 진행하고 있습니다 . 당사는 귀하가 제품 , 배터리 , 기타 구성품 및 포장재를 책임감 있게 재활용할 수 있도록 하는 솔루션을 제공합니다 . 각 지역에 따른 자세한 재활용 정보는 http://csr.asus.com/english/Takeback.htm 에서 확인하실 수 있습니다 .
ENERGY STAR 인증 제품 ENERGY STAR 는 미국 환경보호청과 미국 에너지부의 합동 프로그램으로 에너지 효율적인 제품 및 실천을 통해 비용을 절감하고 환경을 보호하는 데 기여합니다 . ENERGY STAR 로고가 부착된 모든 ASUS 제품은 ENERGY STAR 표준을 준수하며 기본적으로 전원 관리 기능을 사용할 수 있습니다 . 10 분 동안 사용자 활동이 없으면 모니터가 자동으로 대기 모드로 설정되고 , 30 분 동안 사용자 활동이 없으면 컴퓨터가 자동으로 대기 모드로 설정됩니다 . 컴퓨터의 절전 모드를 해제하려면 마우스를 클릭하거나 , 키보드에서 아무 키나 누르거나 , 전원 버튼을 누르십시오 . 전원 관리 및 전원 관리가 환경에 미치는 이점에 관한 자세한 내용은 http://www.energystar.gov/powermanagement 를 참조하십시오 . 그 밖의 ENERGY STAR 합동 프로그램에 관한 자세한 내용은 http://www.energystar.gov 를 참조하십시오 .
EPEAT 등록 제품 ASUS EPEAT (Electronic Product Environmental Assessment Tool) 등록 제품에 대한 주요한 환경 정보의 공개는 https://csr.asus.com/english/article.aspx?id=41 에서 확인할 수 있습니다 . EPEAT 프로그램 및 구매 안내는 www.epeat.net 에서 확인할 수 있습니다 . 간이 EU 적합성 선언 이에 ASUSTek Computer Inc.는 이 장치가 필수 요건 및 명령 2014/53/EU의 기타 관련 조항을 준수함을 선언합니다. EU 적합성 선언 전문은 https://www.asus.com/support/에서 볼 수 있습니다. 5150-5350MHz 대역에서 작동하는 WiFi는 아래 표에 나열된 국가의 경우 실내에서만 사용할 수 있습니다.
미연방 통신 위원회 성명서 본 기기는 FCC 규정 제 15조에 의거하여 테스트 되었으며, B 등급 디지털 장치에 대한 제한 사항을 준수합니다. 이러한 제한 사항은 주거 지역에서 장치 설치 시에 유해한 간섭을 방지하기 위한 것입니다. 본 장치는 RF(Radio Frequency) 에너지를 생성, 사용하고 방출하므로, 지시 사항에 따라 장치를 설치하지 않을 경우 전파 간섭이 발생할 수 있습니다. 장치의 전원을 껐다 켬으로써, 라디오 또는 텔레비전 수신에 대한 유해한 간섭이 발생하는지의 여부를 확인할 수 있습니다. 간섭이 발생하는 경우, 다음과 같은 방법으로 전자파 장애를 교정하는 것이 좋습니다. • 수신 안테나의 방향을 바꾸거나 위치를 바꾸어 주십시오. • 기기와 수신기 사이의 거리를 조정해 보십니다. • 기기를 수신기에 연결된 콘센트가 아닌 다른 콘센트에 연결해 보십시오. • 구매처나 경험이 풍부한 라디오 /TV 기술자에게 도움을 요청하십시오 .
ASUS All-in-One PC 65
제조업체 ASUSTek COMPUTER INC. 주소 1F., No. 15, Lide Rd., Beitou Dist.