EE18386 Uuendatud väljaanne V2 / Juuni 2021 Elektrooniline kasutusjuhend
TEAVE AUTORIÕIGUSE KOHTA Käesoleva kasutusjuhendi ühtegi osa, kaasa arvatud selles kirjeldatud tooteid ja tarkvara, ei tohi paljundada, edastada, kopeerida, säilitada otsingusüsteemis ega tõlkida mistahes keelde mistahes vormis, välja arvatud ostja poolt varundamise eesmärgil säilitatavad dokumendid, ilma ASUSTeK COMPUTER INC. ("ASUS") kirjaliku loata.
Sisukord Teave juhendi kohta..................................................................................................7 Juhendis kasutatavad märksõnad............................................................................. 8 Ikoonid................................................................................................................................ 8 Tüpograafia........................................................................................................................
3. peatükk. Töötamine operatsioonisüsteemiga Windows® 10 Esmakordne käivitamine.........................................................................................44 Menüü Start (Käivitusmenüü)................................................................................45 Windows®-i rakendused...........................................................................................47 Töötamine Windows®-i rakendustega......................................................................
Nipid ja KKK Kasulikke nõuandeid sülearvuti kohta...............................................................74 Riistvara KKK.................................................................................................................76 Tarkvara KKK.................................................................................................................79 Lisad Sisemodemi vastavus..................................................................................................... 82 Ülevaade.
Märkus katte kohta......................................................................................................... 88 Põhjamaade hoiatused seoses liitiumiga (liitiumioonakude korral)............. 89 CTR 21 kinnitus (sisseehitatud modemiga sülearvutile)................................... 90 Deklaratsioon toote vastavuse kohta keskkonnakaitse määrustele............. 92 EÜ REACH ja artikkel 33................................................................................................. 92 EÜ RoHS..
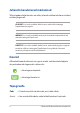
Teave juhendi kohta Käesolev juhend sisaldab teavet teie sülearvuti riist- ja tarkvara funktsioonide kohta ja sisaldab järgmisi korraldatuna järgmistesse peatükkidesse: 1. peatükk. Arvuti koostisosad Selles peatükis on kirjeldatud sülearvuti riistvara üksikosi. 2. peatükk. Sülearvuti kasutamine Selles peatükis on kirjeldatud sülearvuti üksikosade kasutamist. 3. peatükk.
Juhendis kasutatavad märksõnad Tähtsa teabe esiletõstmiseks on selles juhendis oluline tekstiosa esitatud esitatud järgmiselt. OLULINE! See teade sisaldab olulist teavet, mida tuleb toimingu lõpuleviimiseks järgida. MÄRKUS: See teade sisaldab lisateavet ja täiendavaid näpunäiteid, mis aitavad toiminguid lõpule viia. HOIATUS! See teade sisaldab olulist teavet, mida tuleb järgida, et tagada turvalisus oluliste toimingute lõpuleviimisel ning vältida sülearvuti andmete ja komponentide kahjustamist.
Ettevaatusabinõud Sülearvuti kasutamine Seda sülearvutit tohib kasutada ümbritseva keskonna temperatuuril 5 °C (41 °F) kuni 35 °C (95 °F). Vaadake sülearvuti põhjal asuvat silti ja veenduge, et toiteplokk vastab teie toitevõrgu pingele. Sülearvuti võib kasutamise ja aku laadimise ajal soojeneda ning isegi kuumeneda. Ärge hoidke sülearvutit süles või mõne kehaosa läheduses, et vältida kuumusest tingitud vigastusi. Sülearvutiga kasutamise ajal ärge pange seda pindadele, mis tõkestavad õhutusavasid.
Sülearvuti hooldamine Enne sülearvuti puhastamist ühendage vahelduvvoolu toide lahti (kui see on ühendatud) ja eemaldage aku. Kasutage puhastamiseks puhast käsna või seemisnahast lappi, mis on niisutatud mittesöövitava puhastusvahendi ja vähese sooja veega. Eemaldage sülearvutilt liigne niiskus kuiva lapiga. Vältige vedelike sattumist seadme korpusesse ja klaviatuuri sisse, et vältida lühiühendust ning korrosiooni.
Nõuetekohane kasutusest kõrvaldamine ÄRGE visake sülearvutit olmeprügi hulka. Selle toote valmistamisel on kasutatud materjale, mis on korduvkasutatavad ja ümbertöödeldavad. Läbikriipsutatud ratastega prügikasti sümbol näitab, et toodet (elektrilist või elektroonilist seadet ning elavhõbedat sisaldavat nööppatareid) ei tohi olmeprügi hulka visata. Vt kohalikke elektroonikatoodete kõrvaldamise eeskirju. ÄRGE visake kasutuselt kõrvaldatud akut olmeprügi hulka.
Aku ohutusalane teave Aku kaitsmine • Aku laadimine kõrgendatud pinge all võib selle tööiga lühendada. Aku kaitsmiseks võib laadimissüsteem laadimise katkestada, kui aku on laetud tasemeni 90% kuni 100%. MÄRKUS: Täielikult laetud aku laetuse tase on tavaliselt vahemikus 90% kuni 99%. Tegelik laetuse tase võib erinevatel mudelitel varieeruda. • Aku laadimine või hoidmine kõrgel temperatuuril võib mõjutada aku mahtuvust ja lühendada aku tööiga.
Aku kasutamine • Kui te oma sülearvutit pikka aega ei kasuta, siis laadige seda ikkagi aeg-ajalt, et arvuti aku oleks laetud vähemalt 50% ulatuses. Laadige akut täituvusele 50% iga kolme kuu järel, et vältida sellega aku liigtühjenemist ja kahjustumist. • Vältige aku laadimist kõrgendatud pinge all pika aja jooksul, sest see lühendab aku tööiga. Kui seade on pidevalt vooluvõrku ühendatud, laske akul tühjeneda alla 50% üks kord kahe nädala jooksul.
Sülearvuti Elektrooniline kasutusjuhend
1. peatükk.
Sülearvuti osade ülevaade Eestvaade MÄRKUS: Klaviatuuri paigutus võib regiooniti või riigiti siinesitatust erineda. Sülearvuti välimus võib oleneda ka sülearvuti mudelist.
Liitmikrofonid Liitmikrofonid on varustatud kaja eemaldamise, müra summutamise ja kiire moodustamise funktsioonidega, tagades parema häältuvastusvõime ja helisalvestuse kvaliteedi. Kaamera märgutuli Kaamera märgutuli süttib, kui siseehitatud kaamera on kasutusel. Kaamera Sisseehitatud kaamera võimaldab sülearvutiga pildistada ja videoid salvestada. Veebikaamera kate Ekraanipaneel võimaldab vaadata sülearvutis suurepäraseid pilte, videoid ja muid multimeediafaile.
Klaviatuur QWERTY paigutusega klaviatuur on varustatud mugava vajutussügavusega täissuurte klahvidega. See võimaldab kasutada ka funktsiooniklahve, tagab kiire juurdepääsu operatsioonisüsteemile Windows® ja kontrollib multimeediumi funktsioone. MÄRKUS: Klaviatuuri paigutus erineb mudeliti või riigiti. Puuteplaat Puuteplaat võimaldab ekraanikuval navigeerimiseks kasutada mitme sõrmega tehtavaid libistavaid liigutusi, mida kasutaja õpib intuitiivselt tegema. See jäljendab tavahiire funktsioone.
Vaade ülevalt Oleku märgutuled Oleku märgutuled aitavad kindlaks määrata sülearvuti hetkeolekut.
Põhi MÄRKUS: Sõltuvalt mudelist või põhja välimus erineda. HOIATUS! Sülearvuti võib kasutamise ja aku laadimise ajal soojeneda ning isegi kuumeneda. Ärge hoidke sülearvutit süles või mõne kehaosa läheduses, et vältida kuumusest tingitud vigastusi. Sülearvutiga kasutamise ajal ärge pange seda pindadele, mis tõkestavad õhutusavasid. OLULINE! 20 • Aku kestus sõltub sülearvuti kasutamisest ja tehnilistest andmetest. Akut ei saa eemaldada.
Audiosüsteem Helifaile saate kuulata sülearvutisse sisseehitatud kõlarite kaudu. Heliomadusi saab selles sülearvutis seadistada tarkvarapõhiselt.
Parem pool Helitugevuse nupp See nupp suurendab või vähendab sülearvuti helitugevust. Toitenupp Vajutage toitenuppu, et sülearvuti sisse või välja lülitada. Saate toitenuppu kasutada ka selleks et lülitada sülearvuti une- või talveunerežiimi ja neid režiime välja lülitada. Kui sülearvuti on blokeeritud, vajutage toitenuppu ja hoidke seda vähemalt neli (4) sekundit all, kuni sülearvuti lülitub välja.
Kuulari/peakomplekti pistikupesa Sellesse pessa saab ühendada võimendiga kõlarid või kuularid. Seda pesa saab kasutada ka peakomplekti ühendamiseks. Mälukaardi raam (valitud mudelitel) Sisseehitatud mälukaardipesa ühildub kaardivormingutega Nano SIM ja microSD. Pange salve kõrval olevasse avasse tikk, et salv avada. USB 2.0 pesa USB (Universal Serial Bus) pesa ühildub USB 2.0 või USB 1.1 seadmetega nagu klaviatuurid, osutusseadised, välkmäluseadmed, välised kõvakettad, kõlarid, kaamerad ja printerid.
Vasak pool Kensington® lukustuspesa Kensington® lukustuspesa võimaldab kaitsta sülearvutit, kasutades Kensington®-ühilduvaid sülearvutite turvatooteid.
Kahevärviline aku laadimise märgutuli Kahevärviline LED-märgutuli annab aku laadimisoleku kohta järgmist visuaalset teavet. Vt üksikasju järgmisest tabelist: Värv Olek Pidev roheline Sülearvuti on ühendatud pistikupessa, akut laaditakse ja aku täituvus on vahemikus 95% kuni 100%. Pidev oranž Sülearvuti on ühendatud pistikupessa, akut laaditakse ja aku täituvus on alla 95%. Vilkuv oranž Sülearvuti töötab akurežiimis ja aku täituvus on alla 10%.
Toite sisendpesa (alalisvool) Ühendage komplekti kuuluva toiteadapteri pistik sellesse pessa, et laadida akut ja kasutada sülearvutit võrgutoitel. HOIATUS! Adapter võib kasutamisel kuumeneda. Ärge katke toiteadapterit kinni ja hoidke vooluvõrku ühendatud toiteadapter oma kehast eemal. OLULINE! • Kasutage aku laadimiseks ja sülearvuti võrgutoitel kasutamiseks ainult seadme komplekti kuuluvat toiteadapterit. • Sülearvuti vigastamise vältimiseks kasutage laadimiseks ainult toiteallikat 19 V / 2,37 A.
USB 3.2 Gen 1 pesa USB 3.2 (Universal Serial Bus 3.2) Gen 1 pesa võimaldab edastuskiirust kuni 5 Gbit/s ja on tagasiühilduv USB 2.0-ga. HDMI väljundport See port võimaldab ühendada oma sülearvutit teise seadmega, mis ühildub HDMI-ga, et faili jagada või kasutada teist kuvarit.
Sülearvuti Elektrooniline kasutusjuhend
2. peatükk.
Alustamine Sülearvuti laadimine A. Ühendage vahelduvvoolukaabel AC/DC toitplokiga. B. Ühendage alalisvoolu toiteploki pistik sülearvuti sisendiga (DC). C. Ühendage vahelduvvoolu toiteplokk toitevõrguga 100 V ~ 240 V. Laadige sülearvutit 3 tundi, enne kui hakkate seda esmakordselt akurežiimis kasutama. MÄRKUS: Toiteplokk võib välimuselt erineda, sõltuvalt mudelist ja piirkonnast.
USB Type-C® toiteadapter OLULINE! Teave toiteploki kohta: • Toitepinge: vahelduvvool 100–240 v • Toitepinge sagedus: 50–60 hz • Nimiväljundvool: 2,37 A (45 W) / 3 A (45 W) • Nimiväljundpinge: alalisvool 19 v / 15 v Sülearvuti Elektrooniline kasutusjuhend 31
OLULINE! • Tehke kindlaks sisendi/väljundi nimiandmete asukoht sülearvutil ja veenduge, et andmesildil toodud parameetrid vastavad adapteri sisendi/väljundi nimiandmetele. Mõnedel sülearvuti mudelitel võib olla, sõltuvalt tootekoodist, mitu erinevat väljundvoolu parameetrit. • Enne esmakordset sisselülitamist veenduge, et arvuti on ühendatud toiteplokiga. Ühendage toitejuhe pistikupessa otse, ilma pikendusjuhtmeid kasutamata.
Tõstke ekraani paneel üles Vajutage toitenuppu Sülearvuti Elektrooniline kasutusjuhend 33
Puuteplaadi kasutamine Kursori liigutamine Kursori aktiveerimiseks koputage või klõpsake mis tahes puuteplaadi kohas, seejärel libistage oma sõrme puuteplaadil, et kursorit ekraanil liigutada.
Ühe sõrme liigutused Üks koputus / Kaks koputust • Rakenduse avamiseks koputage sellele. • Rakenduse käivitamiseks tehke sellele topeltkoputus. Pukseerimine Koputage kaks korda üksust, seejärel libistage sama sõrme, ilma seda puuteplaadilt tõstmata. Vabastage sõrm puuteplaadilt, et jätta üksus oma uude asukohta.
Vasakklõps Paremklõps • Klõpsake rakendust selle valimiseks. Klõpsake seda nuppu, et avada parempoolse nupu menüü. • Topeltklõpsake rakendust selle käivitamiseks. MÄRKUS: Alad, mis jäävad punktiirjoone sisse, tähistavad hiire vasaknupu ja hiire paremnupu asukohti puuteplaadil. Kahe sõrme liigutused Koputus Koputage puuteplaadil kahe sõrmega, et jäljendada paremklõpsu.
Kahe sõrmega kerimine (üles/alla) Kahe sõrmega kerimine (vasakule/paremale) Libistage kahte sõrmega, et kerida üles või alla. Libistage kahte sõrmega, et kerida vasakule või paremale. Suurendamine Vähendamine Tooge sõrmed puuteplaadil kokku. Viigesõrmed puuteplaadil lahku.
Pukseerimine Valige üksus, seejärel vajutage ja hoidke vasakklõpsu nuppu all. Libistage puuteplaadil teist sõrme, et üksus uude asukohta lohistada, ning vabastage nupp, et üksus asetada. Kolme sõrme liigutused Koputus Koputage puuteplaati nelja sõrmega, et käivitada rakendus Cortana.
Tõmme vasakule / Tõmme paremale Kui on avatud mitu rakendust, saate nende vahel liikuda tõmmates kolme sõrmega vasakule või paremale. Tõmme üles Tõmme alla Tõmmake üles, et vaadata üle kõik hetkel avatud rakendused. Tõmmake alla, et vaadata töölauda.
Nelja sõrme liigutused Koputus Koputage puuteplaati nelja sõrmega, et käivitada Action Center. Puuteplaadi kohandamine 1. Käivitage Action Center All Settings (Kõik sätted). 2. Valige Devices (Seadmed) , seejärel valige Touchpad (Puuteplaat). 3. Määrake sätted vastavalt oma eelistustele.
Klaviatuuri kasutamine Funktsiooniklahvid Sülearvuti klaviatuurilt saab funktsiooniklahvide abil käivitada järgmised käsud. Lülitab kõlari sisse-välja Alandab kõlari helitugevust Tõstab kõlari helitugevust Vähendab ekraani heledust Suurendab ekraani heledust Lülitab puuteplaadi sisse-välja Ekraanirežiimi ümberlülitus MÄRKUS: Veenduge, et teine kuvar on sülearvutiga ühendatud.
Aktiveerib Ekraanikuva Lülitab kaamera sisse või välja Aktiveerib ekraanipildi tööriista Käivitab rakenduse MyASUS Lülitab mikrofoni sisse või välja Funktsiooniklahvid Funktsiooniklahvide sisse- või väljalülitamiseks vajutage klahvikombinatsiooni . Kui funktsiooniklahvid on sisse lülitatud, saate kasutada ka kiirklahve, vajutades klahvi koos mingi ülemise rea nupuga. Windows® 10 klahvid Sülearvuti klaviatuuril on kaks Windows®'i eriklahvi, mida saab kasutada järgmiselt.
3. peatükk.
Esmakordne käivitamine Kui käivitate arvuti esmakordselt, kuvatakse ekraanipiltide seeria, et juhendada teid operatsioonisüsteemi Windows® 10 põhisätete konfigureerimisel. Sülearvuti esmakordne käivitamine: 1. Vajutage toitenuppu sülearvutil. Oodake mõni minut, kuni kuvatakse häälestusaken. 2. Valige häälestusaknas oma piirkond ja keel, milles soovite sülearvutit kasutada. 3. Lugege hoolikalt läbi litsentsi tingimused. Valige I accept (Nõustun). 4.
Menüü Start (Käivitusmenüü) Menüü Start (Käivitusmenüü) on põhiline juurdepääsutee teie sülearvuti programmidele, Windows®-i rakendustele, kaustadele ja sätetele.
Käivitusmenüü käivitamine Paigutage hiirekursor nupule Start (Käivitamine) , mis asub teie töölaua vasakpoolses alumises nurgas ka klõpsake seda. Vajutage Windowsi logoga nupule , mis asub teie töölaual. Programmide avamine menüüs Käivitusmenüü Menüü Start (Käivitusmenüü) põhiline kasutusotstarve on sülearvutisse installitud programmide avamine. Seadke hiirekursor tegumiriba programmi nimele ja klõpsake seda käivitamiseks. Programmide sirvimiseks kasutage noolnuppe. Käivitamiseks vajutage .
Windows®-i rakendused Need on rakendused, mis on kinnitatud käivitusmenüü parempoolsel paneelil ja kuvatakse plaat-vormingus, et pakkuda hõlpsat juurdepääsu. MÄRKUS: Mõned Windows®-i rakendused nõuavad Microsofti kontosse sisselogimist, enne kui need täielikult käivituvad.
Töötamine Windows®-i rakendustega Rakenduste avamiseks, kohandamiseks ja sulgemiseks saate kasutada sülearvuti puuteekraani, puuteplaati või klaviatuuri. Windows®-i rakenduste käivitamine Käivitusmenüüst Seadke hiirekursor tegumiribal rakenduse nimele ja klõpsake seda käivitamiseks. Rakenduste sirvimiseks kasutage noolnuppe. Rakenduse käivitamiseks vajutage .
Rakenduste suuruse muutmine Paigutage hiirekursor rakenduse peale ja tehke parempoolne hiireklõps, seejärel klõpsake Resize (Muuda suurus). Rakendusele navigeerimiseks kasutage noolnuppe. Vajutage või (valikmudelitel) ning valige seejärel Resize (Muuda suurust) ja valige rakenduse ruudu suurus. Rakenduste vabastamine kinnitusest Paigutage hiirekursor rakenduse peale ja tehke parempoolne hiireklõps, seejärel klõpsake Unpin from Start (Vabasta Käivitusmenüüst).
Rakenduste kinnitamine tegumiribale Paigutage hiirekursor rakenduse peale ja tehke parempoolne hiireklõps, seejärel klõpsake Pin to taskbar (Kinnita tegumiribale). Rakendusele navigeerimiseks kasutage noolnuppe. Vajutage või (valikmudelitel) ning valige seejärel Pin to taskbar (Kinnita tegumiribale).
Tegumivaade Tegumivaade võimaldab kiiresti lülitada avatud rakenduste ja programmide vahel, samuti saate tegumivaate abil lülitada ümber töölaudasid. Tegumivaate käivitamine Seadke hiirekursor tegumiriba ikoonile ja klõpsake seda. Vajutage klaviatuuril Sülearvuti Elektrooniline kasutusjuhend .
Akende automaatkorraldamise funktsioon Akende automaatkorraldamise funktsioon kuvab rakendusi üksteise kõrval, mis võimaldab teil neid kiiresti ümber lülitada. Tööpunktide automaatkorraldamine Saate pukseerida rakendusi neisse tööpunktidesse, et võimaldada neid automaatselt ümber korraldada.
Akende automaatkorralduse kasutamine 1. Käivitage rakendus, mida soovite ümber korraldada. 2. Lohistage oma rakenduse tiitliriba ja pukseerige rakendus ekraani serva, et see oleks valmis automaatseks korraldamiseks. 3. Käivitage teine rakendus ja korrake samu toiminguid, et teine rakendus oleks valmis automaatseks korraldamiseks. 1. Käivitage rakendus, mida soovite ümber korraldada. 2. Vajutage nuppu ja hoidke seda all, seejärel kasutage rakenduse automaatseks korraldamiseks noolnuppe. 3.
Tegevuskeskus Tegevuskeskus koondab rakenduste teadaanded ühte kohta, kus saate nendega tegeleda. Selle allosas on väga vajalik kiirtoimingute keskus. Tegevuskeskuse käivitamine Seadke hiirekursor tegumiriba ikoonile ja klõpsake seda. Vajutage klaviatuuril 54 .
MyASUS Splendid Rakendus MyASUS Splendid võimaldab kõikidel ASUS-e kuvapaneelidel kuvada värve ühtemoodi ja täpselt. Kuvari seadistamiseks saate peale režiimi Normal (Tavarežiim) valida järgmisi režiime: Vivid (Särav), Eye Care (Silmade kaitse) ja Manual (Käsitsi). • Normal Mod (Tava režiime): Gamma ja Värvustemperatuuri korrigeerimise tulemusena on paneelil kuvatav pilt võimalikult lähedane sellele, mida silm loomulikult tajub.
Silmade koormuse alandamiseks võtke arvesse järgmist. • Mitmetunnilisel töötamisel pöörake pilk aeg-ajalt ekraanilt mujale. Pärast arvutiga ligikaudu 1-tunnist pidevat töötamist tehke väike paus (vähemalt 5 minutit). Lühikesed ja regulaarsed pausid on tõhusamad kui üks pikk vaheaeg. • Silmade koormuse vähendamiseks ja silmade kuivamise vältimiseks puhake silmi perioodiliselt, selleks fokuseerige silmad kaugesse punkti.
Teised klaviatuuri otseteed Klaviatuuri abil saate kasutada järgmisi otseteid, et lihtsustada rakenduste käivitamist ja navigeerida operatsionisüsteemis Windows® 10.
Käivitab funktsiooni Search (Otsing) Käivitab paneeli Project (Projekt) Avab akna Run (Käivita) Avab utiliidi Ease of Access Center (Ligipääsukeskus) Avab Start-nupu kontekstimenüü Käivitab luubi ikooni ja suurendab vaadet Vähendab vaadet 58 Sülearvuti Elektrooniline kasutusjuhend
Ühenduse loomine traadita võrkudega Wi-Fi Sülearvuti WiFi-ühendus võimaldab kasutada e-posti, surfata Internetis ja jagada rakendusi suhtluskeskkonna saitide kaudu. OLULINE! Funktsioon on Airplane mode (Lennurežiimis) blokeeritud. Enne Wi-Fi kasutamist veenduge, et Airplane mode (Lennurežiim) on välja lülitatud. Ühendamine Wi-Fi-võrku Ühendab teie sülearvuti Wi-Fi võrku, tehes järgmised toimingud: 1. Valige tegumiribalt ikoon . 2. Wi-Fi aktiveerimiseks valige tegumiribalt ikoon . 3.
Bluetooth Kasutades Bluetooth-funktsiooni saate lihtsustada andmeedastust teiste Bluetooth-ühilduvate seadmetega. OLULINE! Funktsioon on Airplane mode (Lennurežiimis) blokeeritud. Enne Bluetoothi kasutamist veenduge, et Airplane mode (Lennurežiim) on välja lülitatud. Paarisidumine teiste Bluetooth-ühilduvate seadmetega Te peate siduma oma sülearvuti teiste Bluetooth-ühilduvate seadmetega, et lubada andmeedastust. Oma seadmete ühendamiseks tehke järgmised toimingud: 1.
Lennurežiim Airplane mode (lennurežiim) lülitab traadita ühendused välja ja võimaldab sülearvutit lennu ajal kasutada turvaliselt. MÄRKUS: Võtke ühendust lennuettevõtjaga, et saada teavet lennu ajal saadaolevate teenuste ja kehtivate piirangute kohta, millega tuleb arvestada sülearvuti kasutamisel lennukis. Lennurežiimi sisse lülitamine 1. Käivitab üksuse Action Center (Tegevuskeskus). 2. Valige ikoon , et aktiveerida Lennurežiim. Lennurežiimi välja lülitamine 1.
Ühendamine traadita võrkudesse Te saate ühendada sülearvuti traadiga võrkudesse näiteks kohtvõrkudesse ja lairiba Interneti-ühendust pakkuvatesse võrkudesse, kasutades selleks sülearvuti LAN pesa. MÄRKUS: Võtke ühendust oma Interneti-teenuse pakkujaga (ISP), et pöörduda võrguadministraatori poole abi saamiseks Interneti-ühenduse häälestamisel. Sätete konfigureerimiseks järgige alltoodud protseduure.
7. Naaske aknasse Network and Sharing Center (Võrk ja jagamiskeskus) ja seejärel valige Set up a new connection or network (Alghäälesta uus ühendus või võrk). 8. Valige Connect to the Internet (Ühenda internetti) ja seejärel valige Next (Järgmine). 9. Valige Broadband (PPPoE) (Lairibaühendus). 10. Tippige sisse User name (Kasutajanimi), Password (Parool) ja Connection name (Ühenduse nimi), seejärel valige Connect (Ühenda). 11. Häälestuse lõpetamiseks valige Close (Sule). 12.
Sülearvuti välja lülitamine Te saate oma sülearvuti välja lülitada, tehes ühte järgmistest. • Käivitage Start menu (Käivitusmenüü), seejärel valige > Shut down (Sule) , et teha tavapärane sulgemine. • Valige sisselogimise aknast (Sule). • Vajutage > Shut down , et käivitada Shut down Windows (Windowsi sulgemine). Valige ripploendist käsk Shut down (Sulge), seejärel valige OK. • 64 Kui sülearvuti ei reageeri, siis vajutage ja hoidke toitenuppu all vähemalt 4 sekundit, kuni sülearvuti lülitub välja.
Sülearvuti lülitamine puhkerežiimi Sülearvuti lülitamine puhkerežiimi: • Käivitage Start menu (Käivitusmenüü), seejärel valige > Sleep (Puhkerežiim), et seada sülearvuti puhkerežiimi. • Valige sisselogimise aknast (Puhkerežiim). Vajutage > Sleep , et käivitada Shut down Windows (Windowsi sulgemine). Valige ripploendist Sleep (Puhkerežiim), seejärel valige OK. MÄRKUS: Sülearvuti lülitamiseks puhkerežiimi võite vajutada ka üks kord toitenuppu.
Sülearvuti Elektrooniline kasutusjuhend
4. peatükk.
Käivituseelne enesetest (POST) Käivituseelne enesetest (POST) on tarkvara poolt juhitud diagnostiliste testide jada, mis käivitub sülearvuti sisse lülitamisel või taaskäivitusel. Tarkvara, mis juhib POST-i, on sülearvuti arhitektuuri püsikomponendiks. POST-i kasutamine BIOS-isse sisenemiseks ja tõrkeotsinguks POST-i ajal saate juurdepääsu BIOS-i sätetele või saate käivitada tõrkeotsingu suvandid, kasutades sülearvuti funktsiooniklahve. Täiendavat teavet leiate altpoolt.
BIOS-isse sisenemine BIOSi sätete avamiseks kasutage üht järgmistest viisidest. • Taaskäivitage sülearvuti ja POSTi ajal vajutage • Avage Start-menüü, valige Settings (Sätted) > Update & security (Värskendamine ja turvalisus) > Recovery (Taaste), seejärel valige Täiustatud käivitus alt Restart now (Taaskäivita kohe). Kui olete avanud täiustatud käivituse kuva, valige Troubleshoot (Veaotsing) > Advanced options (Täiendavad valikud) > UEFI Firmware Settings (UEFI püsivara sätted) > Restart (Taaskäivita).
Süsteemitaaste Sülearvuti taastefunktsioon võimaldab teil taastada süsteemi algse oleku või lihtsalt seadeid värskendada, et parandada sülearvuti jõudlust. OLULINE! • Enne sülearvuti taastefunktsiooni kasutamist tehke kõigist andmefailidest varukoopia. • Andmekao vältimiseks märkige üles kõik olulised kohandatud sätted, nagu võrguandmed, kasutajanimed ja salasõnad. • Enne süsteemi lähtestamist veenduge, et sülearvuti on ühendatud toiteplokiga.
• Advanced startup (Täpsem käivitus) - Valides selle funktsiooni saate seadistad muid täpsemaid sülearvuti taastevaikuid, nagu näiteks: - USB-draivi, võrguühenduse või Windowsi taaste-DVD kasutamine sülearvuti käivitamiseks.
2. 72 Valige suvand Update and security (Uuendamine ja turvalisus) , seejärel valige Recovery (Taaste) ning taastesuvandid, mida soovite kasutada.
Nipid ja KKK Sülearvuti Elektrooniline kasutusjuhend 73
Kasulikke nõuandeid sülearvuti kohta Järgmised nõuanded aitavad teil sülearvuti kasutusvõimalusi maksimaalselt ära kasutada, arvuti jõudlust säilitada ning oma andmeid turvaliselt hoida. • Värskendage Windows®-i regulaarselt, et rakendused kasutaksid kindlasti uusimaid turvasätteid. • Uuendage rakendust MyASUS pidevalt, et ASUS-e rakendustele, draiveritele ja abiprogrammidele oleks määratud uusimad sätted. • Kaitske oma andmeid viirusetõrjetarkvaraga ja hoidke ka see värskena.
• • Enne arvuti lähtestamist ühendage sülearvutist lahti kõik välisseadmed ja veenduge, et teil oleks olemas: - operatsioonisüsteemi ja arvutisse installitud rakenduste tootekoodid; - varundatud andmed; - kasutajanimi ja salasõna; - internetiühenduse andmed. Rikete enim küsitud küsimuste kohta saate teavet, kui vaatate https://www.asus.com/support.
Riistvara KKK 1. Kui käivitan sülearvuti, ilmub ekraanile must, vahel aga värviline punkt. Mida pean tegema? Sellised punktid võivad vahel ekraanile ilmuda, kuid süsteemi need ei mõjuta. Kui nähtus kordub ja hakkab lõpuks mõjutama süsteemijõudlust, pidage nõu ASUS-e volitatud teeninduskeskusega. 2. Ekraani heledus ja värvitoonid ei ole ühtlased. Kuidas seda parandada? Ekraani heledus ja värvitoonid võivad oleneda sülearvuti nurgast ja asendist.
4. 5. Aku leedmärgutuli ei sütti. Milles on viga? • Kontrollige, kas toiteadapter või aku on korralikult paigaldatud. Võite toiteadapteri või aku ka arvutist eemaldada, ühe minuti oodata ning seejärel need taas pistikupesa ja sülearvutiga ühendada. • Kui probleemi ei õnnestu lahendada, pöörduge abi saamiseks kohalikku ASUS-e teeninduskeskusse. Miks puuteplaat ei tööta? Puuteplaadi aktiveerimiseks vajutage 6. .
7. Mida pean tegema, kui minu sülearvuti toiteadapter kaob või aku enam ei tööta? Pöörduge abi saamiseks kohalikku ASUS-e teeninduskeskusse. 8. Ma ei saa oma sülearvuti klahve korralikult kasutada, sest hiirekursor liigub pidevalt. Mida pean tegema? Jälgige, et miski ei puudutaks ega vajutaks puuteplaadile, kui te klaviatuuri kasutate. Võite puuteplaadi ka välja lülitada, vajutades .
Tarkvara KKK 1. Kui sülearvuti sisse lülitan, süttib toite märgutuli põlema, kuid ekraan jääb tühjaks. Kuidas seda parandada? Proovige toimida järgmiste soovituste kohaselt. 2. • Lülitage sülearvuti välja, hoides toitenuppu vähemalt neli (4) sekundit all. Kontrollige, kas toiteadapter ja aku on korralikult ühendatud, ning lülitage sülearvuti sisse. • Kui probleemi ei õnnestu lahendada, pöörduge abi saamiseks kohalikku ASUS-e teeninduskeskusse.
3. Minu sülearvuti käivitub aeglasemalt kui varem ja operatsioonisüsteem ei tööta sujuvalt. Kuidas seda parandada? Eemaldage arvutist rakendused, mille sinna hiljuti installisite või mis ei olnud kaasas operatsioonisüsteemiga, ja taaskäivitage arvuti. 4. Minu sülearvuti operatsioonisüsteem ei käivitu. Kuidas seda parandada? Proovige toimida järgmiste soovituste kohaselt. 5. 80 • Eemaldage kõik sülearvutiga ühendatud seadmed ja taaskäivitage arvuti.
Lisad Sülearvuti Elektrooniline kasutusjuhend 81
Sisemodemi vastavus Sisemodemiga sülearvuti vastab JATE (Jaapan) ja FCC (USA, Kanada, Korea, Taiwan) nõuetele ning normile CTR21. Sisemodem on kooskõlas nõukogu otsusega 98/482/EÜ heaks kiidetud ühe terminaliga ühenduse loomiseks fikstelefonivõrguga (PSTN) kogu Euroopas. Erinevates riikides pakutavate fikstelefonivõrkude erinevuste tõttu ei taga heakskiit aga iseenesest tingimata toimimist igas fikstelefonivõrgu lõpp-punktis. Probleemide korral võtke kõigepealt ühendust seadmete müüjaga. Ülevaade 4.
Võrguühilduvuse deklaratsioon Tootja deklaratsioon, mis esitatakse teavitatud asutustele ja müüjale: „Käesolevas deklaratsioonis nimetatakse võrgud, millega ühendatud seade peab kavakohaselt töötama, ja teavitatud võrgud, mille puhul seadmete koostalitlusvõime võib olla raskendatud.
Antud tabelis on esitatud riigid, mis on hetkel seotud standardiga CTR21.
Käesolev teave on saadud CETECOM-ilt ja esitatud vastutust võtmata. Tabelis tehtud uuendusi võite vaadata aadressilt http://www.cetecom.de/technologies/ ctr_21.html. 1 Riiklikud nõuded kehtivad vaid juhul, kui seadmed võivad kasutada impulssvalimist (tootjad võivad kasutusjuhendis märkida, et seadmed on mõeldud toetama vaid toonvalimist, mis muudab lisakatsetused üleliigseteks). Madalmaades tuleb jadaühenduse ja helistaja ID funktsioonide kontrollimiseks teha lisakatseid.
• Ühendage seade vastuvõtjast erinevasse vooluvõrku. • Pidage nõu edasimüüja või kogenud raadio-/teletehnikuga. HOIATUS! FCC piirangute järgimiseks ning raadio- ja televastuvõtu häirete vältimiseks seadme läheduses on nõutav varjestatud toitejuhtme kasutamine. Tuleb kasutada ainult seadmega kaasas olnud toitejuhet. Kasutage sisend- ja väljundseadmete ühendamiseks selle seadmega ainult varjestatud kaableid.
UL-i ohutusteave Nõutud UL 1459 jaoks, mis hõlmab telekommunikatsiooniseadmeid (telefon), mis on mõeldud elektriliseks ühendamiseks telekommunikatsioonivõrku, mille maandatav tööpinge ei ületa 200 V tipus, 300 V tipust tippu ja 105 V rms ning mis paigaldatakse ja mida kasutatakse riikliku elektrikoodeksi (NFPA 70) kohaselt. Et vähendada tule- ja elektrilöögiohtu ning kehavigastusi, tuleb sülearvuti modemi kasutamisel alati järgida põhilisi ohutusnõudeid, sealhulgas järgmised.
Elektriohutusnõuded Toodetel, mille nimivoolutugevus on kuni 6 A ning mille mass ületab 3 kg, tuleb kasutada sobivaid toitekaableid, mis on parameetritelt võrdväärsed või paremad kui: H05VV-F, 3G, 0,75 mm2 või H05VV-F, 2G, 0,75 mm2. TV-tuuneriga seotud teated Teade CATV-süsteemi paigaldajale.
Põhjamaade hoiatused seoses liitiumiga (liitiumioonakude korral) CAUTION! Danger of explosion if battery is incorrectly replaced. Replace only with the same or equivalent type recommended by the manufacturer. Dispose of used batteries according to the manufacturer’s instructions. (English) ATTENZIONE! Rischio di esplosione della batteria se sostituita in modo errato. Sostituire la batteria con un una di tipo uguale o equivalente consigliata dalla fabbrica. Non disperdere le batterie nell’ambiente.
CTR 21 kinnitus (sisseehitatud modemiga sülearvutile) Dansk Nederlands English Suomi Français 90 Sülearvuti Elektrooniline kasutusjuhend
Deutsch Ελληνικά Italiano Português Español Svenska Sülearvuti Elektrooniline kasutusjuhend 91
Deklaratsioon toote vastavuse kohta keskkonnakaitse määrustele ASUS järgib rohelise disaini ja tootmise kontseptsiooni ning tagab, et ASUS-e toote olelustsükli kõik etapid oleksid kooskõlas üleilmsete keskkonnamäärustega. Lisaks avaldab ASUS vastavat teavet kooskõlas kehtivate seadusnõuetega. Lisateavet teabe avaldamise nõuete kohta, mida ASUS täidab, leiate aadressilt http://csr.asus.com/Compliance.htm.
ASUS-e ringlussevõtu-/tootetagastusteenus ASUS-e ringlussevõtu- ja tootetagastuskavad saavad alguse meie kohustusest kaitsta keskkonda rangeid standardeid silmas pidades. Me usume lahenduste pakkumisse, mis võimaldavad kasutuselt kõrvaldatud tooteid, akusid ja muid komponente ning pakkematerjale vastutustundlikul viisil ringlusse võtta. Ringlussevõtuga seotud teavet erinevate piirkondade kohta leiate aadressilt http://csr.asus.com/english/Takeback.htm.
Energiatõhususmärgiga ENERGY STAR toode ENERGY STAR on USA keskkonnakaitseameti ja USA energiaministeeriumi ühiskava, mille eesmärk on aidata tarbijatel säästa raha ning kaitsta keskkonda toodete ja tegevuse energiatõhususe parandamise teel. Kõik ASUS-e tooted, mis kannavad ENERGY STAR-i logo, vastavad ENERGY STAR-i standardile ning neis on vaikimisi aktiveeritud energiahalduse funktsioon.
EL-i lihtsustatud vastavusdeklaratsioon Käesolevaga kinnitab ASUSTek Computer Inc, et seade vastab direktiivi 2014/53/ EL olulistele nõuetele ja teistele asjakohastele sätetele. EL-i vastavusdeklaratsiooni täistekst on saadaval veebisaidil https://www.asus.com/support/.
Sülearvuti Elektrooniline kasutusjuhend