ノートパソコン ユーザーマニュアル
J7553 2012年10月 COPYRIGHTについて バックアップの目的で利用する場合を除き、本書に記載されているハードウェア・ソフトウェ アを含む、全ての内容は、ASUSTeK Computer Inc.
もくじ 本マニュアルについて............................................................................... 6 このマニュアルの表記について...........................................................7 アイコン.........................................................................................................7 表記 ..........................................................................................................7 安全上の注意.................................................................................................
Windows® アプリ.....................................................................................39 ホットスポット.........................................................................................40 Windows®アプリと一緒に使用する...................................................42 アプリの起動.............................................................................................42 アプリのカスタマイズ...........................................................................42 アプリの終了..........................................
Chater 6:付録 光学ドライブ情報....................................................................................88 内蔵モデムの適応規格(規格/プロトコルなど原文掲載)....90 Overview.....................................................................................................90 Network Compatibility Declaration..................................................90 Network Compatibility Declaration ................................................91 Non-Voice Equipment ....................................................................
本マニュアルについて 注:次の記載内容はWindows® 8プリインストールモデルについての 記載です。 このマニュアルには本機のハードウェアとソフトウェアについての説 明が記載されており、以下のChapterから構成されています。 Chapter 1:ハードウェアのセットアップ 本機のハードウェアとコンポーネントについての説明が記載さ れています。 Chapter 2:ノートパソコンを使用する 本機の使用方法についての説明が記載されています。 Chapter 3:Windows® 8環境で使用する 本機でのWindows® 8の使用方法についての説明が記載され ています。 Chapter 4:ASUSアプリ 本機に搭載のASUSアプリについての説明が記載されていま す。 Chapter 5:Power-on Self-test(POST) POSTを使用した本機の設定変更方法についての説明が記載 されています。 Chapter 6:付録 製品の規格や海外の法令についての説明が記載されていま す。 注:本書で使用されている名称は正式なものではない可能性があり ます。 ノートパソコン ユーザーマニュア
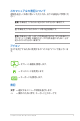
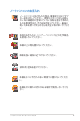
このマニュアルの表記について 本製品を正しくお取り扱いいただくため、以下の表記をご参照くだ さい。 重要:作業を完了するために従わなければならない事項です。 注:作業を完了するためのヒント等の追加情報です。 警告:作業を行う際、人体への危険を避けるため、または本機のコン ポーネントへの損害、本機内のデータの消失を避けるために、必ず 従わなければならない事項です。 アイコン タスクを完了するために使用するデバイスをアイコンで表していま す。 = タブレット画面を使用します。 = タッチパッドを使用します。 = キーボードを使用します。 表記 太字 = 選択するメニューや項目を表示します。 <> = 操作のために押す、キーボード上のキーです。 ノートパソコン ユーザーマニュアル
安全上の注意 ノートパソコンを使用する 本機は5°〜35°の周辺温度でご使用ください。 入力定格は本機の底部に記載があります。ACアダプター が対応していることを確認してください。 本機の使用中は、底面が熱くなります。ひざの上など人 体に長時間接触させて使用すると火傷を負う恐れがあ ります。 破損した電源コード、アクセサリーまたはその他の周辺 機器をご使用にならないでください。 電源がONのまま本機を持ち運ばないでください。また キャリーバッグに入れたり、カバーをしたりしないでくだ さい。通気が悪くなり故障の原因となります。 本機を平らでない、不安定な場所に置かないでくださ い。 本機をX線装置(ベルトコンベアー)に通すことは問題あ りませんが、磁気センサーや磁気ワンドはお避けくださ い。 多くの航空会社では、電子機器の使用に対して規定を 設けています。航空機内での本機の使用については、各 航空会社にお問い合わせください。 ノートパソコン ユーザーマニュアル
ノートパソコンのお手入れ ノートパソコンのお手入れの際は、電源を切りACアダプ ターを取り外してください。清潔なスポンジまたは柔ら かい布に研磨材の含まれていない洗剤を温水で薄めた ものを数滴含ませ、汚れを拭き取ってください。最後に 乾いた布を使って余分な水分を完全に取り除いてくださ い。 本体のお手入れに、シンナー・ベンジンなどの化学薬品 を使用しないでください。 本機の上に物を置かないでください。 本機を強い磁気に近づけないでください。 液体・雨・湿気を避けてください。 本機をホコリや汚れの多い環境下に置かないでくださ い。 本機をガス漏れの恐れがある場所で使用しないでくだ さい。 ノートパソコン ユーザーマニュアル
廃棄・リサイクルについて ノートパソコンやバッテリー(該当する場合)を一般廃棄 物として廃棄しないでください。本製品のコンポーネント の中にはリサイクルできるよう設計されているものがあり ます。なお、本製品は水銀ボタン電池を含む電子機器で す。本製品を一般ゴミとして廃棄しないでください。リサ イクル、廃棄の際は電子機器の廃棄に関する地域の条例 等に従ってください。 バッテリーを一般ゴミとして廃棄しないでください。リサ イクル、廃棄の際は電子機器の廃棄に関する地域の条 例等に従ってください。 10 ノートパソコン ユーザーマニュアル
Chapter 1: ハードウェアのセットアップ ノートパソコン ユーザーマニュアル 11
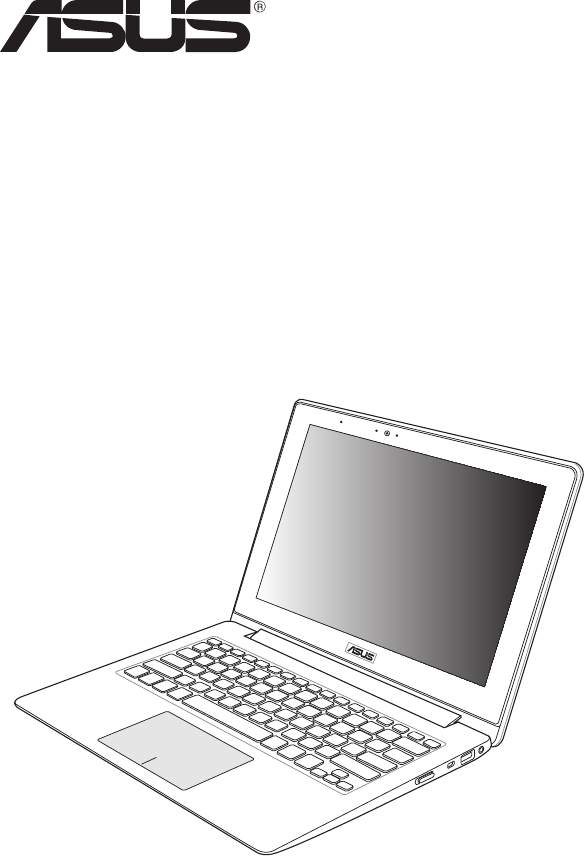
製品の概要 ノートパソコンの概要 注:キーボードのレイアウトはお買い上げの国や地域により異なりま す。モデルによってノートパソコンの外観は異なります。 12 ノートパソコン ユーザーマニュアル
アレイマイク エコー除去、ノイズサプレッション、 指向性録音機能を備え たアレイマイクです。音声認識性能が高くクリアな音声での録 音が可能です。 インカメラ 内蔵カメラにより、画像の撮影と動画の録画ができます。 カメラインジケーター 内蔵型カメラの使用時に点灯します。 アンビエント・ライトセンサー 周囲の明るさに応じ、ディスプレイの明るさを調節します。 ノートパソコン画面 ノートパソコン画面では画像、動画、その他ファイルを参照す ることができます。 通気孔 通気孔により本体から熱を逃がします。 警告:通気口からは高温の空気が排気されます。故障や事故 の原因となりますので、人体、紙、本、衣類、ケーブルまたはそ の他の物で通気孔は絶対に塞がないでください。 ノートパソコン ユーザーマニュアル 13
Taichiキー このキーでTaichiホーム画面を起動し、次のモードで表示を切 り替えることができます。 ノートパソコン、タブレット、ミラー、デュアルスクリーン 注:詳細は「Taichiキーの使用」のセクションをご参照くださ い。 タブレット画面インジケーター タブレット画面が有効のときに点灯します。 Bluetooth/無線インジケーター 本機のワイヤレス機能(Wi-FiもしくはBluetoothなど)が有効 になっているときに点灯します。 Caps Lockインジケーター 点灯時はCaps Lockが有効になっています。有効になっている ときは、入力される文字は大文字(例、ABC)になります。無効 になっているときは、入力される文字は小文字(例、abc)にな ります。 14 ノートパソコン ユーザーマニュアル
キーボード クウォーティー(QWERTY)配列のキーボードには十分なスト ロークを持たせてあり、パームレストが付いているため快適な 操作が可能です。また、Functionキー でのコマンドの実 行や、Windows®へのクイックアクセス、その他マルチメディア 機能の操作も可能です。 注:キーボードのレイアウトはお買い上げの地域により異なり ます。 タッチパッド 指先を使用して、カーソルを移動したり画面に表示された項目 を選択することができます。タッチパッドはマウスと同等の機 能を提供するポインティングデバイスです。 注:詳細は「タッチパッドの操作」のセクションをご参照くださ い。 NFC(Near Field Communication) (特定モデルのみ) NFCにより、対応アプリで連絡先や画像、動画、名刺等のファ イルを共有することができます。NFC機能を利用するには、 NFC対応デバイスを本機のタッチパッドの左側にかざします。 注:イラストの点線の枠外がNFC機能に反応します。タッチパッ ドの操作はできません。 ノートパソコン ユーザーマニュアル 15
タブレットの概要 Windows® 8 タッチボタン このボタンをタッチし、スタート画面に戻ることができます。ス タート画面でタッチすると、最後に使用した起動中のアプリに 戻ります。 マイク ビデオ会議や、ナレーション、オーディオの録音、 マルチメディ アアプリケーション等にご利用ください。 アンビエント・ライトセンサー 周囲の明るさに応じ、ディスプレイの明るさを調節します。 16 ノートパソコン ユーザーマニュアル
アウトカメラ 内蔵カメラにより、画像の撮影と動画の録画ができます。 タブレット画面 タブレット画面では、タッチ操作で操作することができます。 注:タッチ操作に関する詳細は、セクション「タブレット画面の 操作」をご参照ください。 ノートパソコン ユーザーマニュアル 17
底面 注:モデルによって底面の外観は異なります。 警告:本機の底面は使用中、または充電中に高温になることがあり ます。本機の使用中は通気孔を塞がないようにしてください。 重要:バッテリー駆動時間はコンピューターの使用方法、仕様により 異なります。バッテリーパックは分解できません。 18 ノートパソコン ユーザーマニュアル
オーディオスピーカー 本機はBang & Olufsen ICEpower® との共同開発の SonicMaster Technologyを搭載しており、高品位の音質を提 供します。 通気孔 通気孔により本体から熱を逃がします。 警告:通気口からは高温の空気が排気されます。故障や事故の 原因となりますので、人体、紙、本、衣類、ケーブルまたはその 他の物で通気孔は絶対に塞がないでください。 ノートパソコン ユーザーマニュアル 19
右側 電源スイッチ このスイッチを左へスライドし、本機の電源がONになります。 また、設定により本機をスリープ/休止状態/シャットダウンに移 行することができます。復帰するにはもう1度電源スイッチをス ライドします。 システムからの応答がなくなった場合は、電源スイッチを約4秒 スライドしたままにし、強制終了することができます。 電源インジケーター 点灯時は本機の電源はON、点滅時は本機はスリープモードに 入っています。 Micro HDMI ポート 著作権保護技術のひとつであるHDCP(High-bandwidth Digital Content Protection)にも対応していますので、Blu-ray 等の著作権保護コンテンツの再生も可能です。 20 ノートパソコン ユーザーマニュアル
USB 3.0ポート(USB Charger+兼用) が付いたUSB 3.0ポートはUSB Charger+ 機能対応ポートで す。USB充電をサポートしているデバイスを、このUSB3.
左側 マイクロフォン/ヘッドホンコンボジャック 3極ミニプラグをサポートするスピーカーまたはヘッドホン、ま たは3極ミニプラグをサポートするマイクロフォンなどを使用す ることができます。 注:特定モデルでは4極ミニプラグをサポートしておりますので、 マイクを使用する場合は4極タイプのヘッドセットをご使用くださ い。3極タイプのマイクは使用することはできません。 USB 3.0ポート(USB Charger+兼用) が付いたUSB 3.0ポートはUSB Charger+ 機能対応ポートで す。USB充電をサポートしているデバイスを、 このUSB3.
Chapter 2: ノートパソコンを使用する ノートパソコン ユーザーマニュアル 23
使用の手引き ノートパソコンの充電 A. ACアダプターを100V~240Vの電源に接続します。 B. 電源コネクターをノートパソコンの電源入力ポートに接続します。 初めてバッテリー電源で本機を使用する際は、3時間程度 充電してください。 重要: • 本機の電源を初めてONにするときは、電源アダプターが本機 に接続されていることをご確認ください。 • 入出力定格は製品本体に記載があります。 • 本機を電源アダプターに接続しているときは、電源コンセン トや電源タップの近くでご使用ください。 • ACアダプターについて - 入力電圧:100-240V - 入力周波数:50-60Hz - 定格出力電流:2.
ディスプレイパネルを持ち上げる 電源スイッチを左へスライドする ノートパソコン ユーザーマニュアル 25
タブレット画面の操作 プログラムの起動、ノートパソコンの各種設定を行います。タブレッ ト画面の操作方法は次のイラストと説明をご参照ください。 注:ご使用のアプリによっては、以下で紹介する操作に対応していな い場合があります。 左側からなぞる 右側からなぞる 左側からなぞり、起動中のアプリ 画面を右側からなぞり、チャー を切り替えます。 ムバーを起動します。 ズームアウト ズームイン 2本の指先の間隔を狭めることで 2本の指先の間隔を広げること ズームアウトが可能です。 でズームインが可能です。 26 ノートパソコン ユーザーマニュアル
上側からなぞる 指でのスライド • スタート画面で、画面の上側 からなぞると、すべてのアプ リバーが表示されます。 • 起動中のアプリを上側から なぞると、メニューが表示さ れます。 指を上下になぞると上下方向 へのスクロール、左右になぞる と左右へのスクロールができ ます。 タップ・アンド・ホールド • • タップ/ダブルタップ アプリタイルをタップしたま • ま目的の場所までドラッグし • ます。 アプリを閉じるには、起動中 のアプリの上側をタップし、 そのまま画面下までドラッ グします。 ノートパソコン ユーザーマニュアル アプリをタップし起動します。 デスクトップモードでは、 アプリをダブルタップして 起動します。 27
タッチパッドの操作 タッチパッドの操作方法は次のイラストと説明をご参照ください。 注:ご使用のアプリによっては、以下で紹介する操作に対応していな い場合があります。 指1本での操作 タップ/ダブルタップ • スタート画面でアプリをタップし起動します。 • デスクトップモードでは、アプリをダブルタップして起動しま す。 ドラッグとドロップ: 項目をダブルタップし、そのままスライドします。指先をタッチパッ ドから離すと、ドロップされます。 28 ノートパソコン ユーザーマニュアル
左クリック 右クリック • スタート画面でアプリをク リックし起動します。 • • デスクトップモードでダブル クリックすると、アプリケー ションが起動します。 スタート画面でアプリを右ク リックし選択し、設定バーを 起動します。アプリ上でない 場合は、すべてのアプリバー が起動します。 • デスクトップモードでこのボ タンを使用して、右クリック メニューを開きます。 ノートパソコン ユーザーマニュアル 29
上側からなぞる • スタート画面で、画面の上側からなぞると、すべてのアプリバー が表示されます。 • 起動中のアプリを上側からなぞると、メニューが表示されま す。 左側からなぞる 右側からなぞる 左側からなぞり、起動中のアプリ 右側からなぞり、チャームバー をシャッフルします。 を起動します。 30 ノートパソコン ユーザーマニュアル
指2本での操作 タップ 回転 指2本をタッチパッド上でタップす タッチパッド上で指2本を使用し ると、 マウスの右クリックと同じ操 1本を軸にして時計回りまたは反 作を行うことができます。 時計回りの円を描き、画像を回転 させます。 指2本でのスクロール(上下) 指2本でのスクロール(左右) 指2本を上下に滑らせると、ウイン 指2本で左右に滑らせると、ウイン ドウが上下にスクロールします。 ドウが左右にスクロールします。 ズームアウト ズームイン 2本の指先の間隔を狭めることで 2本の指先の間隔を広げることで ズームアウトが可能です。 ズームインが可能です。 ノートパソコン ユーザーマニュアル 31
ドラッグとドロップ: 項目を選択し、クリックしたままにします。もう1本の指でタッチパッ ドを目的の方向にスライドすると、項目を別の場所に移動すること ができます。 指3本での操作 32 上方向になぞる 下方向になぞる 3本の指先をタッチパッド上で上 方向にスライドし、起動中のす べてのアプリを表示します。 3本の指先をタッチパッド上で下 方向にスライドし、デスクトップを 表示します。 ノートパソコン ユーザーマニュアル
キーボードを使用する ホットキー ホットキーについて説明します。コマンドは、Function キー を 押しながら、コマンドが表記されたキーを押して実行します。 注:Windows® 8環境で< f1>から< f12>のFunctionキーの機能を使 用するにはFunction キー と同時に押してください。 ノートパソコンをスリープ状態にします。 ワイヤレス機能のON/OFFを切り替えます。 注:機内モード有効時は、全てのワイヤレス接続が無効にな ります。 (特定モデルのみ)キーボードの明るさを下げます。 (特定モデルのみ)キーボードの明るさを上げます。 ディスプレイの明るさを下げます。 ディスプレイの明るさを上げます。 ディスプレイパネルの電源をOFFにします。 外付けディスプレイの表示を切り替えます。 注:ノートパソコンに外付けディスプレイが接続されたとき に利用できるコマンドです。 タッチパッドを有効または無効にします。 ノートパソコン ユーザーマニュアル 33
スピーカーのONとOFFを切り替えます。 スピーカーのボリュームを下げます。 スピーカーのボリュームを上げます。 (特定モデルのみ)ライトセンサーのON/OFFを切 り替えます。 ASUSアプリでのホットキー操作 ホットキーでASUSアプリの操作を行うこともできます。 「Splendid Video Enhancement Technology」 を起動します。このアプリはコントラスト、明るさ、 色調、彩度(赤、緑、青を個々に調整)を変更して ディスプレイの色彩モードを変えるアプリです。 ASUS LifeFrameを起動します。 ASUS Power4Gear Hybridを起動します。 Windows®8 キー キーボードには以下の説明のように、2つの特別なWindows® キー があります。 このキーを押すと、スタート画面に戻ります。スタート画面 で押すと、最後に使用した起動中のアプリに戻ります。 マウスの右クリックと同じ操作を行うことができます。 34 ノートパソコン ユーザーマニュアル
Taichiキーの使用 本機キーボードのTaichiキーで、Taichiホーム画面を起動し、4つの表 示モードからモードを選択することができます。 手順 1. 2.
ノートパソコン ユーザーマニュアル
Chapter 3: Windows® 8環境で使用する ノートパソコン ユーザーマニュアル 37
初めて使用する コンピューターを初めて使用するときは、Windows® 8 OSの基本設 定を行う設定画面が表示されます。 設定手順 1. ノートパソコンの電源ボタンを押します。設定画面が表示され るので、暫くお待ちください。 2. ライセンス条項を読み、内容を確認します。 「Windows を使う ためのライセンス条項に同意します」にチェックを入れ、 「同意 する」をクリックします。 3. 画面上に指示に従い、次の各基本設定を行います。 4.
Windows®UI Windows® 8 アプリはWindows®8で使用されるタイル表示のユー ザーインターフェースで、スタート画面から簡単にアクセス可能です。 次の各機能を利用することができます。 スタート画面 Windows®8にサインイン後に表示され、Windows® アプリが表示 されます。 ユーザーアカウント ズームイン/ズームアウトボタン Windows® アプリ アプリはスタート画面にピン留めされており、タイル形式で表示さ れます。 注:特定のアプリはその機能を十分活用するため、Microsoftアカウ ントでのサインインが必要になる場合があります。 ノートパソコン ユーザーマニュアル 39
ホットスポット プログラムの起動、ノートパソコンの各種設定を行います。各機能は タッチパッドで有効にすることができます。 起動済みアプリのホットスポット 画面上のホットスポット 40 ノートパソコン ユーザーマニュアル
ホットスポット 操作 左上 マウスのポインターをこの位置まで移動し、最 近使用したアプリのサムネイルをクリックする と、そのアプリが表示されます。 複数のアプリを起動した状態で、 下方向にスライ ドすると、起動しているアプリが表示されます。 左下 起動中のアプリ画面から: マウスのポインターをこの位置まで移動し、ス タート画面のサムネイルをクリックすると、ス タート画面に戻ります。 注:キーボードのWindows®キー ても同様の操作が可能です。 を押し スタート画面から: マウスのポインターをこの位置まで移動し、最 近使用したアプリのサムネイルをクリックする と、そのアプリが表示されます。 上面 マウスのポインターを手のアイコンに切り替わ るまで移動します。アプリをドラッグ&ドロッ プし、別の場所へ移動することができます。 注:このホットスポット機能は起動中のアプ リ、またはスナップ機能を使用する場合にの み動作します。詳細は「Windows®アプリと一 緒に使用する」の「スナップ機能」をご参照く ださい。 右上、右下 マウスのポインターをこの位置まで移動する と、チャームバーが起動しま
Windows®アプリと一緒に使用する タブレット画面、タッチパッド、キーボードを使用し、アプリの起動 やカスタマイズ、また、アプリを終了することができます。 アプリの起動 (特定モデルのみ)アプリをタップし起動します。 アプリの上に マウスのポインターを合わせ、左クリック、 またはタップして起動します。 を2回押し、カーソルキーでアプリを選択します。 を押すと、選択したアプリが起動します。 アプリのカスタマイズ 次の手順で、スタート画面上でアプリの移動、サイズ変更、ピンの解 除を行うことができます。 アプリの移動 (特定モデルのみ)アプリタイルをタップしたまま目的の 場所までドラッグします。 アプリをダブルタップし、目的の場所までドラッグしま す。 42 ノートパソコン ユーザーマニュアル
アプリのサイズ変更 (特定モデルのみ) 1. アプリタイルを下方向へなぞり、設定バーを起動し ます。 2. 「小さくする」 タップします。 、または「大きくする」 を アプリ上で右クリックし、設定メニューを表示し、「小さく する」 または「大きくする」 をタップします。 ピン留めの解除 (特定モデルのみ) 1. アプリタイルを下方向へなぞり、設定バーを起動しま す。 2.
アプリの終了 (特定モデルのみ)起動中のアプリの上側をタップしたま ま画面下までドラッグします。 1. 起動したアプリの上側にマウスのポインターを当 て、ポインターが手のアイコンになるまで待ちます。 2.
すべてのアプリ画面へのアクセス スタート画面にピンされたアプリ以外にも、ノートパソコンに搭載 のASUSアプリ等、他のアプリをすべてのアプリ画面から起動するこ とができます。 すべてのアプリの起動 水平スクロールバー タブレット画面、タッチパッドまたはキーボードを使用し、すべての アプリ画面を開きます。 (特定モデルのみ) 1. 画面の上側または下側からなぞり、全てのアプリバー を起動します。 2.
スタート画面へのアプリの追加 タブレット画面またはタッチパッドを使用し、スタート画面にアプリ を追加することができます。 (特定モデルのみ) 46 1. すべてのアプリ画面でアプリを下方向になぞり、設 定バーを選択し起動します。 2. 「スタート画面にピン留めする」 をタップし、 選択したアプリをスタート画面に追加します。 1. スタート画面に追加したいアプリの上にマウスのポ インターを当てます。 2. アプリ上で右クリックし、設定メニューを表示させ ます。 3.
チャームバー チャームバーは画面右側に表示されるツールバーです。アプリケー ションの共有などの操作やノートパソコンのカスタマイズ設定へ簡 単にアクセスできます。 チャームバー チャームバーの起動 注: チャームバーは起動すると、上の画像のように表示されます。 タブレット画面、タッチパッド、キーボードを使用し、チャームバーを 起動します。 (特定モデルのみ)画面を右側からなぞり、チャームバー を起動します。 マウスのポインターを画面右上または右下まで移動しま す。 を押します。 ノートパソコン ユーザーマニュアル 47
チャームバーのコンテンツ 検索 ノートパソコン内のファイルやアプリケーション、プログ ラムを検索します。 共有 ソーシャルネットワークサービス(SNS)やメールなどを 使用し、アプリケーションを共有します。 スタート 画面をスタート画面に戻します。スタート画面から使用 していたアプリに戻ることもできます。 デバイス 外付けモニターやプリンター 等、ノートパソコンと接続 したデバイスに関する操作を行います。 設定 ノートパソコンの各種設定を行います。 48 ノートパソコン ユーザーマニュアル
スナップ機能 ノートパソコン上で2つのアプリケーションを同時に操作することが できます。この機能を有効にすると、スナップした際にサイドバーが 表示され、ディスプレイを2分割します。 重要:スナップ機能の利用には、1366×768ピクセル以上の解像度が 必要です。 スナップバー スナップを有効にする タブレット画面、タッチパッド、キーボードを使用し、スナップ機能の 起動と操作を行います。 1. アプリをタップし、起動します。 2. アプリの上の部分をタップしたまま、スナップバーが 表示されるまで画面の左側または右側までドラッグ します。 3.
1. アプリをタップし、起動します。 2. マウスのポインターを画面の上側に移動します。 3. ポインターが手のアイコンに切り替わったら、アプ リをディスプレイパネルの左側/右側にドラッグ&ド ロップします。 4. 他のアプリを起動します。 1. アプリをタップし、起動します。 2. 3.
その他キーボードのショートカット 次のショートカットを使用し、アプリケーションの起動やWindows®8 の操作が可能です。 \ スタート画面と最後に使用した起動中のアプリを 切り替えます。 デスクトップを起動します。 デスクトップモードでコンピュータウィンドウを起 動します。 ファイル検索画面を開きます。 共有画面を開きます。 設定画面を開きます。 デバイス画面を開きます。 ロック画面を有効にします。 Internet Explorerウィンドウを最小化します。 ノートパソコン ユーザーマニュアル 51
「セカンドスクリーン」画面を開きます。 アプリ検索画面を開きます。 「ファイル名を指定して実行」画面を開きます。 「コンピューターの簡単操作センター」を開きま す。 設定検索画面を開きます。 Windows®のPower User Tasksメニューを開きま す。 ナレーターの設定を開きます。 ピクチャー内のスクリーンショットフォルダーに プリントスクリーンが保存されます。スクリーン ショットフォルダーが無い場合は、自動で生成さ れます。 52 ノートパソコン ユーザーマニュアル
ワイヤレスネットワークへの接続 Wi-Fi ノートパソコンに搭載のWi-Fi機能により、SNSを使用したアプリの 共有、メールの閲覧、インターネットサーフィン等がお楽しみいただ けます。 重要:Wi-Fi機能を使用する際は、 「機内モード」をOFFにする必要が あります。詳細は「機内モード」をご参照ください。 Wi-Fiを有効にする タブレット画面またはタッチパッドを使用し、次の手順でノートパソ コンに搭載のWi-Fi機能を有効にします。 1. チャームバーを起動します。 2. 「設定」 をタップし「Wi-Fi機能」 注:「機内モード」が有効な場合は ドをオフにする必要があります。 3.
4. 「接続」をタップし、ネットワーク接続を開始します。 注:Wi-Fi接続を開始するときに、セキュリティキーの入力が求められ る場合があります。 5.
Bluetooth Bluetoothデバイス間では、ファイル転送、インターネット接続やネッ トワーク接続の共有などが可能です。 重要:Bluetooth機能を使用する際は、 「機内モード」をOFFにする必 要があります。詳細は「機内モード」をご参照ください。 Bluetooth対応デバイスとのペアリング データ転送を可能にするために、他のBluetooth対応デバイスとノー トパソコンのペアリングを行う必要があります。タブレット画面また はタッチパッドを使用し、次の手順で設定を行います。 1. チャームバーを起動します。 2. 「設定」 3. 「PC設定」の「デバイス」を選択し、 「デバイスの追加」をタップ し、Bluetooth対応デバイスを検索します。 4.
航空機内での使用について 機内モードを有効にすると、無線接続は無効になります。 機内モードを有効にする または 1. チャームバーを起動します。 2. 「設定」 プします。 3. スライドバーを右に移動し機内モードをONにしま す。 をタップし、 「Wi-Fi機能」 をタッ を押します。 機内モードを無効にする または 1. チャームバーを起動します。 2. 「設定」 します。 3.
有線ネットワークへの接続 本機のLANポートを使用し、本機をLANネットワークやブロードバン ドインターネット接続等の有線ネットワークに接続することができ ます。 注:インターネット接続セットアップ時の詳細やサポートについて は、ネットワーク管理者またはインターネットサービスプロバイダ (ISP)にご確認ください。 設定を行うには、次の手順をご参照ください。 重要: 設定を行う前に、ネットワークケーブルで本機のLANポート とローカルエリアネットワークが接続されていることをご確認くださ い。 動的(ダイナミック)IP/PPPoEのネットワーク接続の設定 1. ������������� デスクトップを起動します。 または 2. Windows®のタスクトレイから、ネットワークアイコン を右クリックし、 「ネットワークと共有センターを 開く」をタップします。 3. ネットワークと共有センターで、 「アダプター設定の変 更」をタップします。 4.
5. 「インターネットプロトコルバージョン4(TCP/IPv4)」 をタップして「プロパティ」をタップします。 6.
7. 「ネットワークと共有センター」に戻り、 「新しい接続 またはネットワークのセットアップ」をタップします。 8.
9. 「ブロードバンド(PPPoE)」をタップします。 10. ユーザー名、パスワード、接続名を入力し、 「接続」を タップします。 11. 「閉じる」をタップし、設定を終了します。 12. タスクトレイの をタップし、上の手順で作成した接 続をタップします。 13.
静的(スタティック)IPのネットワーク接続の設定 または 1. 動的IP/PPPoEのネットワーク接続の設定の手順1~5 を行います。 2 「次のIPアドレスを使う」をタップします。 3. ご利用のサービスプロバイダ提供のIPアドレス、サブ ネットマスク、デフォルトゲートウェイを入力します。 4.
ノートパソコンの電源をOFFにする 次のいずれかの手順で本機の電源をOFFにすることができます。 • または • • • チャームバーから「設定」 をタップし、 をタップします。続いて「シャットダウン」をタップ し、本機をシャットダウンします。 ログイン画面から ン」をタップします。 をタップし、 「シャットダウ デスクトップモードでも本機をシャットダウンする ことができます。デスクトップモードを起動し、 を押しシャットダウンウィンドウを起動し ます。ドロップダウンリストから「シャットダウン」を 選択し、 「OK」を選択します。 システムからの応答がなくなった場合は、電源ボタ ンを約4秒間押し、強制終了することができます。 ノートパソコンをスリープ状態にする スリープモードにするには、電源ボタンを1回押します。設定によって は、休止状態/シャットダウンに移行することもできます。 デスクトップモードを起動し、を押しシャットダ ウンウィンドウを起動します。 「スリープ」を選択し、ドロッ プダウンリストから「OK」を選択します。 62 ノートパソコン ユー
Chapter 4: ASUSアプリ ノートパソコン ユーザーマニュアル 63
お勧めのASUSアプリ 注:管理者権限でのみ動作を保証しております。 LifeFrame ASUS製ノートパソコンのうちWebカメラが内蔵されているモデルで は、LifeFrameを使用してスナップショットの撮影や画像の編集、動 画の録画、音声の録音、ゲーム、Webカメラを防犯カメラとして使用 するなど、Webカメラ機能を活用することができます。 LifeFrameを起動する を押します。 アカーブツールバー:保存 ファイルをサムネイル形 式で表示します。 アクションボタン モード 録画/録音/撮影 の開始 64 フェイストラッカー ウェブカメラの 設定 ズームイン/ ズームアウト ノートパソコン ユーザーマニュアル
LifeFrameの各機能 カメラ Webカメラで画像を撮影することができます。 ビデオ Webカメラで動画を撮影することができます。 モニター Webカメラに動く物体が映ると自動的に撮影し、画像 ファイルとして保存します。Webカメラを防犯カメラとし て使用することができる機能です。 ボイスレコーダー 音声を録音し、ノートパソコンに保存することができま す。 ゲーム Webカメラを使用したゲームをプレイすることができま す。 注:モデルにより搭載されているアプリ、操作方法および仕様が異 なる場合があります。 ノートパソコン ユーザーマニュアル 65
Power4Gear Hybrid 各電力モードの切り替えを行います。Battery saving modeはノート パソコンを制御し、パフォーマンスを調整しバッテリー駆動時間を 延ばします。 注:ACアダプターを取り外すとPower4Gear HybridはBattery Saving modeに自動的に切り替わります。 Power4Gear Hybridを起動する を押します。 モード選択 設定のカスタマイズ デスクトップ アイコンとプレゼンモード の有効/無効の設定 Performance mode ゲームやプレゼンテーションなど、CPUのリソースをより多く使用す る作業時にこのモードをご使用ください。 Battery Saving mode ノートパソコンを制御し、パフォーマンスを調整しバッテリー時間を 最大化します。 注:モデルにより搭載されているアプリ、操作方法および仕様が異 なる場合があります。 66 ノートパソコン ユーザーマニュアル
USB Charger+ USB充電に対応しているデバイスを特定のUSB3.0ポートで急速充電 することができます。 特定モデルでは、ノートパソコンの電源モード(ON/OFF/スリープ/休 止状態)に関わらず、USBデバイスをUSBポートで充電することがで きます。 注: アイコンのあるUSB 3.0ポートでのみ USB Charger+機能がご 利用いただけます。すべてのUSB機器の充電を保証するわけではあ りません。 警告:接続したデバイスがオーバヒートした場合は、接続しているデ バイスを直ちに取り外してください。 USB Charger+ の設定 USB Charger+ では、ノートパソコンがバッテリー電力駆動時の、 USBデバイスへの充電を制限することでバッテリー電力を温存する ことができます。 注:設定は電源OFF/スリープ/休止状態での急速充電をサポートして いるモデルのみ可能です。 1. デスクトップのタスクトレイのUSB Charger+ アイコン を右クリックし、 「設定」をクリックします。 2.
3. 次のいずれかのオプション、または両方を選択します。 「システム作動中のQuick Chargeを有効にする」 「システムがスリープ/休止状態/シャットダウン状態での Quick Chargeを有効にする」。 注:モデルによっては両方のオプションが自動選択されます。これら の項目は無効に設定することもできます。 4. スライドバーで本機のバッテリー残量を%で設定します。本機 のバッテリー残量がここで設定した%になると、急速充電を停 止します。 5.
Instant On Instant On機能はノートパソコンを省電力スリープ状態に移行さ せ、長時間のスリープ状態、高速復帰を可能にします。 注:この独自のテクノロジーは本機がスリープモードのときにバッテ リー電力を大幅に節約することができます。 重要:スタンバイ時間はバッテリー残量、モデル、システム構成、OS の状況により異なります。 パフォーマンスモード このモードはデフォルトで有効に 設定されています。約2秒の短時 間でコンピューターをスリープか ら復帰することができます。 バッテリー省電力モード このモードでは効果的に使用電力 を低減させることで、より長いス タンバイ時間を実現します。スリー プに入ってから約4時間までは約2 秒での復帰、4時間経過以降から は約7秒での復帰をすることがで きます。 または タップしバッテリー省 電力モード に切り替え る。 注:特定モデル以外では4時間経過以降での復帰に10数秒を要しま す。 注:モデルにより搭載されているアプリ、操作方法および仕様が異 なる場合があります。 ノートパソコン ユーザーマニュアル 69
ノートパソコン ユーザーマニュアル
Chapter 5: Power-on Self Test(POST) ノートパソコン ユーザーマニュアル 71
Power-on Self-test (POST) Power-on Self-test(POST)はシステム起動時に実行されるシステ ム自己診断テストです。 BIOSとトラブルシューティングにアクセスする POST実行中は、本機のFunctionキー操作でBIOS Setupプログラム へのアクセス、トラブルシューティングの実行が可能です。詳細は以 降の記載をご参照ください。 BIOS Basic Input and Output System(BIOS)はシステムの起動に必要な ハードウェアを制御するプログラムです。 BIOSのデフォルト設定は通常の使用環境で、最適なパフォーマン スを実現できるように設定されています。以下の状況以外では、デ フォルト設定のままで使用することをお勧めします。 • システム起動時にエラーメッセージが表示され、BIOS Setupを 起動するように指示があった場合。 • BIOS設定を必要とするコンポーネントをシステムに取り付けた 場合。 警告:不適切な設定を行うと、システムが起動しない、または不安定 になるといった症状が出ることがあります。設定を変更する際は、専
BIOS設定 注:本マニュアルに記載の図や画面は参考用です。実際の画面はモ デルや地域により異なる場合があります。 Boot(起動) このメニューでは、ブートオプションの優先順位を設定することがで きます。次の手順に従って設定します。 1. 「Boot」画面で「Boot Option #1」を選択します。 Main Aptio Setup Utility - Copyright (C) 2012 American Megatrends, Inc.
Security(セキュリティ) このメニューでは、管理者パスワードとユーザーパスワードを設定 することができます。また、ノートパソコンの記憶装置、入力/出力 (I/O)インターフェース、USBインターフェースへのアクセスを制御す ることがもできます。 注: Main • 「User Password」を設定すると、OSを起動する際にパス ワードの入力を求めるプロンプトが表示されます。 • 「Administrator Password」を設定すると、BIOSを起動する 際にパスワードの入力を求めるプロンプトが表示されます。 Aptio Setup Utility - Copyright (C) 2012 American Megatrends, Inc.
パスワードを削除する 1. 「Security」タブを選択し、 「Administrator Password」また は「User Password」を選択します。 2. 現在のパスワードを入力し、 3. 「Create New Password」の欄を空欄にしたまま、 押します。 4. 確認ボックスで「Yes」を選択し、 を押します。 を を押します。 I/O Interface Security(I/Oインターフェースセキュリティ) Securityメニューでは、I/Oインタフェースセキュリティにアクセス し、本機の一部のインターフェース機能をロック/ロック解除す ることができます。 Aptio Setup Utility - Copyright (C) 2012 American Megatrends, Inc. Security If Locked, LAN controller will be disabled.
USB Interface Security(USBインタフェースセキュリティ) I/Oインターフェースセキュリティメニューでは、USBインター フェースセキュリティにアクセスし、ポートとデバイスをロック /ロック解除することができます。 Aptio Setup Utility - Copyright (C) 2012 American Megatrends, Inc. Security USB Interface Security USB Interface [UnLock] External Ports Bluetooth CMOS Camera [UnLock] [UnLock] [UnLock] USB Interface Lock UnLock If LOCKED, all USB devices will be disabled →← : : ↑↓ Enter: +/— : F1 : F9 : F10 : ESC : Select Screen Select Item Select Change Opt.
マスターパスワードの設定 Securityメニューの「Set Master Password」オプションでは、 パスワードによるハードディスクドライブへのアクセス制御の設 定が可能です。 Aptio Setup Utility - Copyright (C) 2012 American Aptio Setup Utility - Copyright (C) 2011 American Main Advance Boot Security Save & Exit Password Description If ONLY the Administrator’s password is set,then this only limits access to Setup and is only asked for when entering Setup. If ONLY the user’s password is set, then this is a power on password and must be entered to boot or enter Setup.
Save & Exit(保存して終了) 設定変更を保存するには、BIOSを終了する前に「Save Changes and Exit」を選択します。 Aptio Setup Utility - Copyright (C) 2012 American Megatrends, Inc. Main Advance Boot Security Save & Exit Save Changes and Exit Exit system setup after saving the changes. Discard Changes and Exit Save Options Save Changes Discard Changes Restore Defaults Boot Override Windows Boot Manager Launch EFI Shell from filesystem device →← : : ↑↓ Enter: +/— : F1 : F9 : F10 : ESC : Select Screen Select Item Select Change Opt.
Main Aptio Setup Utility - Copyright (C) 2012 American Megatrends, Inc. Aptio Setup Utility - Copyright (C) 2011 American Megatrends, Inc. Advance Boot Security Save & Exit Start Easy Flash Internal Pointing Device Wake On Lid Open Power Off Energy Saving ASUS USB Charger+ in battery mode Press Enter to run the utility to select and update BIOS.
トラブルシューティング POST中に を押すと、次のWindows®8トラブルシューティングの オプションにアクセスできます。 • PCのリフレッシュ • PCを初期状態に戻す • 詳細オプション PCのリフレッシュ 現在のファイルやアプリケーションを失うことなく、システムを更新 したい場合は「PCのリフレッシュ」オプションを使用します。 POST中にアクセスする 1. システムを再起動し、POST中に を押します。 2. Windows®が「オプションの選択」を読み込むまで待 機し、 「トラブルシューティング」をタップします。 3. 「PCのリフレッシュ」をタップします。 4. 「PCのリフレッシュ」画面に表示されるこのオプショ ンに関する説明項目を読み、 「次へ」をタップしま す。 5. 更新するアカウントをタップします。 6. アカウントのパスワードを入力し、 「続行」をタップし ます。 7.
PCを初期状態に戻す 重要:このオプションを実行する前に全てのデータをバックアップし てください。 「PCを初期状態に戻す」オプションを使用し、本機をデフォルト設 定にリセットします。 POST中にアクセスする または 1. システムを再起動し、POST中に を押します。 2. Windows®が「オプションの選択」を読み込むまで待 機し、 「トラブルシューティング」をタップします。 3. 「PCを初期状態に戻す」をタップします。 4. 「PCを初期状態に戻す」画面に表示されるこのオプ ションに関する説明項目を読み、 「次へ」をタップし ます。 5. 「Windowsがインストールされているドライブの み」または「すべてのドライブ」のいずれかを選択し ます。 6. 「ファイルの削除のみ行う」または「ドライブを完全に クリーンアップする」のいずれかを選択します。 7.
詳細オプション 「詳細オプション」で本機に搭載の追加トラブルシューティングオ プションを実行することができます。 POST中にアクセスする または 1. システムを再起動し、POST中に を押します。 2. Windows®が「オプションの選択」を読み込むまで待 機し、 「トラブルシューティング」をタップします。 3. 「詳細オプション」をタップします。 4. 詳細オプション画面で、実行するトラブルシューティ ングオプションを選択します。 5. 以降の手順に従い、作業を完了します。 イメージでシステムを回復 「詳細オプション」の「イメージでシステムを回復」オプションで、 イメージファイルを使用したシステムリカバリーを実行することがで きます。 POST中にアクセスする または 82 1. システムを再起動し、POST中に を押します。 2. Windows®が「オプションの選択」を読み込むまで待 機し、 「トラブルシューティング」をタップします。 3.
4. 詳細オプション画面で「イメージでシステムを回復」 を選択します。 5. システムイメージファイルでリカバリーを行うアカウ ントを選択します。 6. アカウントのパスワードを入力し、 「続行」をタップし ます。 7. 「利用可能なシステムイメージのうち最新のものを 使用する(推奨)」を選択し、 「次へ」をタップします。 システムイメージが外部デバイスまたはDVD内にある 場合は、 「システムイメージを選択する」を選択する こともできます。 8.
ノートパソコン ユーザーマニュアル
Chater 6:付録 ノートパソコン ユーザーマニュアル 87
光学ドライブ情報 Blu-rayディスクおよびDVDの再生には、読み取り可能なデバイス、お よび、再生ソフトウェアを使用する必要があります。Blu-rayドライブ は多くの場合、従来のCDとDVDのどちらも使用することができます。 DVDドライブは多くの場合、従来のCDを使用することができます。 地域再生情報 Blu-ray/DVDムービータイトルの再生には、MPEGビデオの復号、デジ タルオーディオ、CSS保護されたコンテンツの復号化が含まれます。CSS (コピーガードと呼ばれることもある)は動画産業が採用したコンテン ツ保護計画の名称で、違法コピーを防ぐものです。 CSSライセンサに課された設計規則はたくさんありますが、もっと も適切な規則の一つは、地域化されたコンテンツに関する再生の 制限です。場所によって異なるムービーのリリースを円滑にするた めに、Blu-ray/DVDビデオタイトルは下の「地域定義」で定義された 特定の地域に対してリリースされています。著作権法は、全てのBluray/DVDムービーを特定の地域(普通、販売されている地域に対して コード化されている)に限定するよう要求しており、B
地域定義(DVD) 地域1 カナダ、米国、米国の領土 地域2 日本、チェコ、エジプト、フィンランド、フランス、ドイツ、 ペルシア湾岸諸国、ハンガリー、アイスランド、イラン、イラク、 アイルランド、イタリア、オランダ、ノルウェー、ポーランド、ポルトガル、 サウジアラビア、スコットランド、南アフリカ、スペイン、スウェーデン、 スイス、シリア、トルコ、イギリス、ギリシア、前ユーゴスラビア共和国、 スロバキア 地域3 ビルマ、インドネシア、韓国、 マレーシア、フィリピン、シンガポール、 台湾、タイ、ベトナム 地域4 オーストラリア、西インド諸島(米国領土を除く)、中央アメリカ、 ニュージーランド、太平洋諸島、南アメリカ大陸 地域5 CIS、インド、パキスタン、その他のアフリカ諸国、ロシア、 朝鮮民主主義人民共和国 地域6 中国 地域定義(Blu-ray) 地域A 日本 、 南北アメリカ諸国、 台湾、 香港、 マカオ、 韓国、 朝鮮民主主義人民共和国、 東南アジア諸国とその領土 地域B ヨーロッパ諸国、 アフリカ諸国、 中近東諸国とその領土、 オーストラリア、 ニュージーランド 地域C 中央・南アジア諸国、 東ヨー
内蔵モデムの適応規格 (規格/プロトコルなど原文掲載) The Notebook PC with internal modem model complies with JATE (Japan), FCC (US, Canada, Korea, Taiwan), and CTR21. The internal modem has been approved in accordance with Council Decision 98/482/EC for pan-European single terminal connection to the public switched telephone network (PSTN).
Network Compatibility Declaration Statement to be made by the manufacturer to the user: “This declaration will indicate the networks with which the equipment is designed to work and any notified networks with which the equipment may have inter-working difficulties. The manufacturer shall also associate a statement to make it clear where network compatibility is dependent on physical and software switch settings.
This table shows the countries currently under the CTR21 standard.
This information was copied from CETECOM and is supplied without liability. For updates to this table, you may visit http:// www.cetecom.de/technologies/ctr_21.html 1 National requirements will apply only if the equipment may use pulse dialling (manufacturers may state in the user guide that the equipment is only intended to support DTMF signalling, which would make any additional testing superfluous). In The Netherlands additional testing is required for series connection and caller ID facilities.
• Reorient or relocate the receiving antenna. • Increase the separation between the equipment and receiver. • Connect the equipment into an outlet on a circuit different from that to which the receiver is connected. • Consult the dealer or an experienced radio/TV technician for help. WARNING! The use of a shielded-type power cord is required in order to meet FCC emission limits and to prevent interference to the nearby radio and television reception.
FCC Radio Frequency (RF) Exposure Caution Statement WARNING! Any changes or modifications not expressly approved by the party responsible for compliance could void the user’s authority to operate this equipment. “The manufacture declares that this device is limited to Channels 1 through 11 in the 2.4GHz frequency by specified firmware controlled in the USA.” This equipment complies with FCC radiation exposure limits set forth for an uncontrolled environment.
CE Marking CE marking for devices without wireless LAN/Bluetooth The shipped version of this device complies with the requirements of the EEC directives 2004/108/EC “Electromagnetic compatibility” and 2006/95/EC “Low voltage directive”. CE marking for devices with wireless LAN/ Bluetooth This equipment complies with the requirements of Directive 1999/5/EC of the European Parliament and Commission from 9 March, 1999 governing Radio and Telecommunications Equipment and mutual recognition of conformity.
Wireless Operation Channel for Different Domains N. America 2.412-2.462 GHz Ch01 through CH11 Japan 2.412-2.484 GHz Ch01 through Ch14 Europe ETSI 2.412-2.472 GHz Ch01 through Ch13 France Restricted Wireless Frequency Bands Some areas of France have a restricted frequency band. The worst case maximum authorized power indoors are: • 10mW for the entire 2.4 GHz band (2400 MHz–2483.5 MHz) • 100mW for frequencies between 2446.5 MHz and 2483.
Departments in which the use of the 2400–2483.
UL Safety Notices Required for UL 1459 covering telecommunications (telephone) equipment intended to be electrically connected to a telecommunication network that has an operating voltage to ground that does not exceed 200V peak, 300V peak-to-peak, and 105V rms, and installed or used in accordance with the National Electrical Code (NFPA 70).
Power Safety Requirement Products with electrical current ratings up to 6A and weighing more than 3Kg must use approved power cords greater than or equal to: H05VV-F, 3G, 0.75mm2 or H05VV-F, 2G, 0.75mm2. TV Tuner Notices Note to CATV System Installer—Cable distribution system should be grounded (earthed) in accordance with ANSI/NFPA 70, the National Electrical Code (NEC), in particular Section 820.
Nordic Lithium Cautions (for lithium-ion batteries) CAUTION! Danger of explosion if battery is incorrectly replaced. Replace only with the same or equivalent type recommended by the manufacturer. Dispose of used batteries according to the manufacturer’s instructions. (English) ATTENZIONE! Rischio di esplosione della batteria se sostituita in modo errato. Sostituire la batteria con un una di tipo uguale o equivalente consigliata dalla fabbrica. Non disperdere le batterie nell’ambiente.
注意:バッテリーの交換は正しく行ってください。破裂する危険がありま す。交換の際は、 メーカーが指定したバッテリーをお使いください。 ま た、廃棄の際は家庭ゴミとまとめて捨てずに、最寄の廃棄物処理施設等 に問い合わせ、 バッテリーの処分方法を確認してください。 (Japanese) ВНИМАНИЕ! При замене аккумулятора на аккумулятор иного типа возможно его возгорание. Утилизируйте аккумулятор в соответствии с инструкциями производителя.
Optical Drive Safety Information Laser Safety Information CD-ROM Drive Safety Warning CLASS 1 LASER PRODUCT WARNING! To prevent exposure to the optical drive’s laser, do not attempt to disassemble or repair the optical drive by yourself. For your safety, contact a professional technician for assistance. Service warning label WARNING! INVISIBLE LASER RADIATION WHEN OPEN. DO NOT STARE INTO BEAM OR VIEW DIRECTLY WITH OPTICAL INSTRUMENTS.
CTR 21 Approval (for Notebook PC with built-in Modem) Danish Dutch English Finnish French German Greek Italian Portuguese Spanish 104 ノートパソコン ユーザーマニュアル
Swedish Japanese 本装置は、第二種情報装置(住宅地域またはその隣接した地域において 使用されるべき情報装置)で住宅地域での電波障害防止を目的とした情 報処理装置等電波障害自主規制協議会(VCCI)基準に適合しております。 しかし、本装置をラジオ、テレビジョン受信機に、近接してご使用にな ると、受信障害の原因となることがあります。本書の説明にしたがって 正しい取り扱いをしてください。 技適マーク 本製品を日本で使用する場合は必ず日本国モードでご使用ください。他 国のモードをご使用になると電気通信事業法 (技術基準) に違反す行為と なります。なお、ご購入時は初期値が日本国モードとなっておりますの で、そのままご利用ください。 本機搭載の内蔵無線LANモジュールは、下記の通り技適マークを取 得しています。 Intel 6235ANHMW 003WWA111040 003WWA111041 003XWA111042 003YWA111043 ENERGY STAR complied product ENERGY STAR is a joint program of the U.S.
European Union Eco-label This Notebook PC has been awarded the EU Flower label, which means that this product has the following characteristics: 1. Decreased energy consumption during use and stand-by modes. 2. Limited use of toxic heavy metals. 3. Limited use of substances harmful to the environment and health. 4. Reduction of the use of natural resources by encouraging recycling. 5.
Global Environmental Regulation Compliance and Declaration ASUS follows the green design concept to design and manufacture our products, and makes sure that each stage of the product life cycle of ASUS product is in line with global environmental regulations. In addition, ASUS disclose the relevant information based on regulation requirements. Please refer to http://csr.asus.com/english/Compliance.
EC Declaration of Conformity We, the undersigned, Manufacturer: ASUSTek COMPUTER INC. Address, City: 4F, No. 150, LI-TE RD., PEITOU, TAIPEI 112, TAIWAN R.O.C. Country: TAIWAN Authorized representative in Europe: ASUS COMPUTER GmbH Address, City: HARKORT STR. 21-23, 40880 RATINGEN Country: GERMANY declare the following apparatus: Product name : Notebook P.