RO9188 Prima ediţie Aprilie 2014 Notebook PC Manual electronic
Informaţii referitoare la drepturile de autor Nicio parte a acestui manual, inclusiv produsele şi software-ul descrise în acesta, nu poate fi reprodusă, transmisă, transcrisă, stocată într-un sistem de regăsire sau tradusă într-o altă limbă în orice formă sau prin orice metodă, cu excepţia documentaţiei păstrate de cumpărător din motive de siguranţă, fără permisiunea exprimată în scris a ASUSTeK Computer INC. („ASUS”).
Cuprins Despre acest manual.................................................................................................7 Convenţii utilizate în acest manual........................................................................... 8 Pictograme......................................................................................................................... 8 Elemente tipografice......................................................................................................
Capitolul 3: Lucrul cu Windows® 8.1 Prima pornire a computerului................................................................................46 Interfaţa cu utilizatorul Windows®........................................................................47 Ecranul Start...................................................................................................................... 47 Punctele de interes......................................................................................................
Depanare.......................................................................................................................87 Refresh your PC (Reîmprospătare PC)...................................................................... 87 Reset your PC (Resetare PC)......................................................................................... 88 Advanced options (Opţiuni complexe)...................................................................
Notă pentru produsele Macrovision Corporation............................................... 111 Prevenirea pierderii auzului......................................................................................... 111 Precauţii pentru litiul nordic (pentru baterii cu ioni de litiu)........................... 112 Informaţii de siguranţă pentru unitatea optică.................................................... 113 Informaţii de siguranţă pentru laser..........................................................
Despre acest manual În acest manual sunt furnizate informaţii despre componentele hardware şi caracteristicile software ale notebookului dvs. Manualul este organizat în următoarele capitole: Capitolul 1: Configurarea componentelor hardware În acest capitol sunt detaliate componentele hardware ale notebookului. Capitolul 2: Utilizarea notebookului În acest capitol este arătat modul de utilizare a diferitelor componente ale notebookului dvs. Capitolul 3: Lucrul cu Windows® 8.
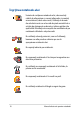
Convenţii utilizate în acest manual Pentru a evidenţia informaţii cheie din acest manual, mesajele sunt prezentate după cum urmează: IMPORTANT! Acest mesaj conţine informaţii esenţiale care trebuie respectate pentru realiza o activitate. NOTĂ: Acest mesaj conţine informaţii şi sfaturi suplimentare care pot fi utile la realizarea activităţilor. AVERTISMENT! Acest mesaj conţine informaţii importante care trebuie respectate pentru siguranţa dvs.
Precauţii referitoare la siguranţă Utilizarea notebook-ului Acest notebook PC ar trebui utilizat numai în medii cu temperaturi cuprinse între 5°C (41°F) şi 35°C (95°F). Consultaţi eticheta pe care este înscrisă puterea nominală, din partea de jos a Notebook PC şi asiguraţi-vă că adaptorul dumneavoastră de putere este conform cu puterea nominal. Nu aşezaţi notebook-ul pe genunchi sau pe orice altă parte a corpului pentru a preveni disconfortul şi rănile provocate de expunerea la căldură.
Îngrijirea notebook-ului Înainte de curăţarea notebook-ului, deconectaţi cablul de alimentare cu curent alternativ şi scoateţi acumulatorul (dacă este cazul). Utilizaţi un burete de celuloză curat sau o bucată de piele muiată într-o soluţie de detergent neabraziv şi câteva picături de apă caldă. Eliminaţi orice surplus de umiditate de pe notebook utilizând o cârpă uscată. Nu utilizaţi solvenţi puternici, cum ar fi diluanţi, benzen sau alte produse chimice pe sau în apropierea notebook-ului.
Casarea corectă NU aruncaţi Notebook PC împreună cu gunoiul menajer. Acest produs a fost proiectat să permită reutilizarea în condiţii corespunzătoare a componentelor şi reciclarea. Simbolul care reprezintă un container tăiat înseamnă că produsul (electric, echipament electronic şi baterie de tip buton cu celule cu mercur) nu trebuie depozitat împreună cu gunoiul menajer. Verificaţi reglementările locale pentru eliminarea produselor electronice. NU aruncaţi bateria împreună cu gunoiul menajer.
Manual electronic pentru notebook
Capitolul 1: Configurarea componentelor hardware Manual electronic pentru notebook 13
Cunoaşterea notebook-ului Vedere de sus NOTĂ: Configuraţia tastaturii poate varia în funcţie de regiune sau ţară. De asemenea, imaginile afişate pe ecranul notebookului pot avea un aspect diferit în funcţie de modelul notebookului.
Indicator cameră Indicatorul camerei arată când camera integrată este utilizată. Cameră Camera încorporată vă permite să realizaţi fotografii sau să înregistraţi materiale video utilizând notebook-ul. Panou de ecran tactil ajustabil la 360º Panoul de ecran tactil al notebookului dvs. poate fi ajustat la un unghi complet de 360º. Această caracteristică vă permite să transformaţi notebookul într-o tabletă cu panou tactil.
Tastatură Tastatura vă oferă taste QWERTY la dimensiune completă cu apăsare confortabilă. De asemenea, vă permite să utilizaţi tastele funcţionale, accesul rapid la Windows® şi controlul altor funcţii multimedia. NOTĂ: Configuraţia tastaturii diferă în funcţie de model sau de teritoriu. Touchpad Touchpad-ul permite utilizarea gesturilor multiple pentru navigarea pe ecran, oferind utilizatorului o experienţă intuitivă. De asemenea, simulează funcţiile unui mouse obişnuit.
Partea inferioară NOTĂ: Partea inferioară poate avea aspect diferit, în funcţie de model. AVERTISMENT! Partea de dedesubt a notebookului se poate încălzi până la înfierbântare în timpul utilizării sau în timpul încărcării acumulatorului. Când utilizaţi notebook-ul, nu îl aşezaţi pe suprafeţe care pot bloca fantele de aerisire. IMPORTANT! Durata de funcţionare a acumulatorului depinde de condiţiile de utilizare şi de specificaţiile acestui notebook. Acumulatorul nu poate fi demontat.
Aerisiri Fantele pentru aerisire permit intrarea aerului rece şi ieşirea aerului cald din notebook. AVERTISMENT! Asiguraţi-vă că fantele de aerisire nu sunt blocate de hârtie, cărţi, cabluri sau alte obiecte, pentru a preveni supraîncălzirea. Difuzoare Difuzoarele audio încorporate vă permit să auziţi sunetul direct din PC notebook. Funcţiile audio ale acestui PC notebook sunt controlate de software.
Partea dreaptă Portul mufei combinate de intrare a microfonului/ieşire a căştilor Acest port vă permite să conectaţi notebookul la difuzoare cu amplificare sau la căşti. De asemenea, puteţi utiliza acest port pentru a conecta notebook-ul la un microfon extern. Port USB 3.0 Acest port Universal Serial Bus 3.0 (USB 3.0) oferă o rată de transfer de până la 5 Gbit/s şi este compatibil cu versiunea anterioară USB 2.0.
Partea stângă Slot de securitate Kensington® Slotul de securitate Kensington® menţine siguranţa notebookului prin folosirea produselor de securitate compatibile Kensington® pentru notebook. Port USB 2.0 Portul USB (Universal Serial Bus) este compatibil cu dispozitive USB 2.0 sau USB 1.1 precum tastaturi, dispozitive de indicare, unităţi de disc flash, unităţi HDD externe, difuzoare, camere foto şi imprimante.
Butonul Windows® 8.1 Apăsaţi acest buton pentru a reveni la ecranul Start. Dacă vă aflaţi deja în ecranul Start, apăsaţi acest buton pentru a reveni la ultima aplicaţie deschisă. Buton de volum Acest buton reglează volumul audio al notebookului. Butonul de alimentare Apăsaţi pe butonul de alimentare de pe notebook pentru pornire sau oprire. De asemenea, puteţi să utilizaţi butonul de alimentare pentru a comuta notebookul în modul de repaus sau hibernare şi a-l scoate din modul repaus sau hibernare.
Partea din faţă Indicatoare de stare Indicatorii de stare ajută la identificarea stării curente a hardwareului notebook-ului. Indicator de putere Indicatorul de alimentare iluminează când notebookul este pornit şi clipeşte lent când notebook-ul este în starea de repaus. Indicator de încărcare a acumulatorului cu două culori 22 LED-urile bicolore oferă o indicaţie vizuală a stării de încărcare a bateriei.
Culoare Stare Verde constant Dispozitivul PC-ul notebook este conectat la o sursă de alimentare, iar nivelul de încărcare al bateriei este între 95% şi 100%. Portocaliu constant Dispozitivul PC-ul notebook funcţionează în modul baterie, iar nivelul de încărcare al bateriei este sub 95%. Portocaliu intermitent OPRIT PC-ul notebook funcţionează în modul baterie, iar nivelul de încărcare al bateriei este sub 10%.
Manual electronic pentru notebook
Capitolul 2: Utilizarea notebookului Manual electronic pentru notebook 25
Noţiuni de bază Încărcaţi notebook-ul. A. Conectaţi adaptorul de alimentare cu curent alternativ la o sursă de alimentare de 100 V~240 V. B. Conectaţi conectorul de alimentare cu curent continuu la intrarea de alimentare (DC) a notebook-ului. Încărcaţi notebook-ul timp de 3 ore înainte de prima utilizare. NOTĂ: Adaptorul de alimentare poate avea aspect diferit, în funcţie de model şi de regiunea în care vă aflaţi.
IMPORTANT! • Găsiţi eticheta cu valorile nominale ale curentului de intrare/ieşire de pe PC-ul notebook şi asiguraţi-vă că acestea corespund cu informaţiie despre valorile nominale electrice de pe adaptorul de alimentare. Unele modele de PC notebook pot accepta mai multe valori nominale ale curentului de ieşire în funcţie de codul SKU disponibil. • Asiguraţi-vă că notebookul este conectat la adaptorul de alimentare înainte de a-l porni pentru prima dată.
Ridicaţi pentru a deschide afişajul. Apăsaţi pe butonul de alimentare.
Gesturi pentru ecranul tactil şi touchpad Gesturile vă permit să lansaţi programe şi să accesaţi setările notebookului dvs. Consultaţi următoarele ilustraţii când utilizaţi gesturi manuale pe ecranul tactil şi touchpad. NOTĂ: Următoarele capturi de ecran sunt numai pentru referinţă. Panoul de ecran tactil poate avea aspect diferit, în funcţie de model. Utilizarea gesturilor pe panoul de ecran tactil Gesturile vă permit să lansaţi programe şi să accesaţi setările notebookului dvs.
Glisare de la marginea superioară Glisare cu degetul • În ecranul Start, glisaţi de la marginea de sus a ecranului pentru a vizualiza bara Customize (Personalizare). • Într-o aplicaţie aflată în execuţie, glisaţi de la marginea de sus a ecranului pentru a-i accesa meniul. Glisaţi degetul pentru a derula în sus sau în jos şi pentru a direcţiona ecranul către stânga sau dreapta. Mărire Micşorare Apropiaţi cele două degete pe panoul tactil. Depărtaţi cele două degete pe panoul tactil.
Atingere/Atingere dublă Atingere şi menţinere • Atingeţi o aplicaţie pentru a o lansa. • • În modul Desktop (Spaţiu de lucru), atingeţi de două ori o aplicaţie pentru a o lansa. Pentru a muta o aplicaţie, atingeţi şi menţineţi apăsat pe cadrul acesteia şi glisaţi-o într-o locaţie nouă. • Pentru a închide o aplicaţie, atingeţi şi menţineţi apăsată partea superioară a unei aplicaţii aflată în execuţie şi glisaţi-o în partea de jos a ecranului.
Glisare în sus Glisare în jos Glisaţi în sus pe ecranul Start pentru a lansa ecranul Apps (Aplicaţii). Glisaţi în jos în ecranul Apps (Aplicaţii) pentru a reveni la ecranul Start.
Utilizarea gesturilor pentru touchpad Mişcarea cursorului Puteţi să apăsaţi oriunde pe touchpad pentru a activa cursorul, apoi să glisaţi degetul pe touchpad pentru a mişca cursorul pe ecran.
Gesturi cu un deget Clic/Atingere/Atingere dublă/ Dublu clic • În ecranul Pornire, atingeţi o aplicaţie pentru a o lansa. • În modul Desktop, atingeţi de două ori un articol pentru a-l lansa. Tragere şi plasare Loviţi uşor de două ori un articol, apoi deplasaţi acelaşi deget fără a-l ridica de pe touchpad. Pentru a plasa articolul în noua sa locaţie, ridicaţi degetul de pe touchpad.
Clic stânga Clic dreapta • În ecranul Start, faceţi clic pe • o aplicaţie pentru a o lansa. • În modul Desktop, faceţi dublu clic pe o aplicaţie pentru a o lansa. • În ecranul Start, faceţi clic pe o aplicaţie pentru a o selecta ţi lansaţi bara de setări. De asemenea, puteţi să apăsaţi pe acest buton pentru a lansa bara All Apps (Toate aplicaţiile). În modul Desktop, utilizaţi acest buton pentru a deschide meniul cu clic dreapta.
Tragerea marginii de sus • În ecranul Pornire, trageţi dinspre marginea de sus pentru a lansa bara All apps (Toate aplicaţiile). • Într-o aplicaţie care rulează, trageţi de marginea de sus pentru a-i vizualiza meniul. Tragerea marginii din stânga Tragerea marginii din dreapta Trageţi dinspre marginea din stânga Glisaţi dinspre marginea din pentru a rearanja aplicaţiile care dreapta pentru a lansa Charms rulează. bar.
Gesturi cu două degete Atingere Rotire Atingeţi touchpadul cu două Pentru a roti o imagine, plasaţi două degete pentru a simula funcţia de degete pe touchpad şi apoi rotiţi clic dreapta. un deget în sens orar sau antiorar în timp ce celălalt deget rămâne nemişcat. Derulare cu două degete (sus/ jos) Derulare cu două degete (stânga/ dreapta) Deplasaţi două degete pentru a derula în sus sau jos. Deplasaţi două degete pentru a derula la stânga sau dreapta.
Micşorare Mărire Alăturaţi-vă cele două degete pe touchpad. Îndepărtaţi-vă cele două degete pe touchpad. Tragere şi plasare Selectaţi un articol şi apoi apăsaţi şi menţineţi apăsat butonul de clic stânga. Deplasaţi celălalt deget în josul pe touchpad pentru a trage şi a plasa articolul într-o nouă locaţie.
Gesturi cu trei degete Glisare în sus Glisare în jos Glisaţi trei degete în sus pentru a se afişa toate aplicaţiile care se execută. Glisaţi trei degete în jos pentru a se afişa modul Desktop.
Utilizarea tastaturii Taste funcţionale Tastele funcţionale de pe tastatura notebookului pot declanşa următoarele comenzi: trece notebook-ul în modul Sleep (Repaus) activează sau dezactivează modul Airplane (Avion) NOTĂ: Atunci când este activat, modul Airplane (Avion) dezactivează toate conexiunile wireless. scade luminozitatea ecranului creşte luminozitatea ecranului stinge ecranul comută modul de afişaj NOTĂ: Asiguraţi-vă că al doilea afişaj este conectat la dispozitivul Notebook PC.
Activează sau dezactivează touchpad-ul Activează sau dezactivează difuzorul Micşorează volumul difuzorului Măreşte volumul difuzorului Taste Windows® 8.1 Pe tastatura notebookului există două taste Windows® speciale utilizate după cum urmează: Apăsaţi această tastă pentru a reveni la ecranul Pornire. Dacă vă aflaţi deja în ecranul Pornire, apăsaţi această tastă pentru a reveni la ultima aplicaţie pe care aţi deschis-o. Apăsaţi pe această tastă pentru a simula funcţia de clic dreapta.
Tastatura numerică NOTĂ: dispunerea tastaturii numerice poate diferi în funcţie de model şi de teritoriul în care vă aflaţi, însă procedurile de utilizare sunt aceleaşi. La anumite modele de notebookuri este disponibilă o tastatură numerică. Puteţi utiliza această tastatură pentru introducerea de cifre sau ca taste de indicare a direcţiei. Apăsaţi pe to pentru a comuta între utilizarea tastaturii pentru taste numerice sau pentru taste de indicare a direcţiei.
Utilizarea panoului de ecran tactil ca tabletă Pentru a utiliza panoul de ecran tactil al notebookului ca tabletă, puteţi regla dispozitivul la un unghi complet de 360º, după cum se arată mai jos.
Manual electronic pentru notebook
Capitolul 3: Lucrul cu Windows® 8.
Prima pornire a computerului La prima pornire a computerului apar o serie de ecrane care vă ghidează în configurarea setărilor de bază ale sistemului de operare Windows® 8.1. Pentru a porni prima oară notebookul: 1. Apăsaţi pe butonul de alimentare de pe notebook. Aşteptaţi câteva minute până când apare ecranul de configurare. 2. Din ecranul de configurare, alegeţi regiunea şi limba pe care le veţi folosi pe notebook. 3. Citiţi cu atenţie termenii licenţei. Selectaţi I accept (Accept). 4.
Interfaţa cu utilizatorul Windows® Windows® 8.1 este prevăzut cu o interfaţă cu utilizatorul (UI) împărţită în dale, care vă permite să organizaţi şi accesaţi cu uşurinţă aplicaţiile Windows® din ecranul de start. De asemenea, include următoarele caracteristici pe care le puteţi utiliza în timp ce lucraţi pe PC-ul dvs. Notebook. Ecranul Start Ecranul Start apare după conectarea cu succes la contul dvs. de utilizator.
Punctele de interes Punctele de interes (hotspot) de pe ecran vă permit să lansaţi programe şi să accesaţi setările notebook-ului dvs. Funcţiile acestor puncte de interes (hotspot) pot fi activate utilizând touchpadul.
Punct de interes (hotspot) colţul din stânga sus Acţiune Deplasaţi cursorul mouse-ului în colţul din stânga-sus şi apoi atingeţi miniatura aplicaţiei recente pentru a reveni la aplicaţia respectivă care se execută. Dacă aţi lansat mai multe aplicaţii, glisaţi în jos pentru a afişa toate aplicaţiile lansate. colţul din stânga jos Din ecranul unei aplicaţii care se execută: Deplasaţi cursorul mouse-ului în colţul din stânga-jos şi apoi atingeţi pentru a reveni la ecranul Start.
Punct de interes (hotspot) latura superioară Acţiune Deplasaţi cursorul mouse-ului pe latura superioară până când aceasta devine o pictogramă în formă de mână. Glisaţi şi fixaţi aplicaţia într-o locaţie nouă. NOTĂ: Această funcţie funcţie hotspot funcţionează numai pentru o aplicaţie care se execută sau atunci când doriţi să utilizaţi caracteristica Snap (Aliniere). Pentru detalii suplimentare, consultaţi secţiunea Caracteristica Snap (Aliniere) din Lucrul cu aplicaţii Windows®.
Buton Start Sistemul de operare Windows® 8.1 vă pune la dispoziţie butonul Start. Acesta vă permite să comutaţi între ultimele două aplicaţii pe care le-aţi deschis. Butonul Start poate fi accesat din ecranul Start, când vă aflaţi în modul Desktop sau în orice aplicaţie deschisă pe ecran. Butonul Start pe ecranul Start NOTĂ: Culoarea efectivă a butonul Start diferă în funcţie de setările de afişare pe care le alegeţi din ecranul Start.
Butonul Start în modul Desktop Meniu contextual Meniul contextual apare sub forma unei casete atunci când atingeţi şi menţineţi apăsat butonul Start. În această casetă există comenzi de acces rapid către o parte din programele sistemului de operare Windows® 8.1. Meniul contextual include, de asemenea, următoarele opţiuni de închidere pentru PC-ul notebook. deconectare, repaus, închidere, repornire.
Personalizarea ecranului Start Windows® 8.1 vă permite să personalizaţi ecranul Start. Astfel, atunci când încărcaţi sistemul, puteţi accesa direct modul Desktop şi puteţi să personalizaţi modul în care sunt aranjate aplicaţiile pe ecran. Pentru a personaliza setările ecranului Start: sau 1. Lansaţi desktopul. 2. Faceţi clic dreapta oriunde pe bara de sarcini, cu excepţia butonului Start, pentru a lansa fereastra pop-up. 3.
Lucrul cu aplicaţiile Windows® Utilizaţi panoul de ecran tactil, touchpadul sau tastatura dispozitivului Notebook PC pentru a lansa, a particulariza și a închide aplicații. Lansarea aplicaţiilor Atingeţi o aplicaţie pentru a o lansa. Aşezaţi cursorul mouse-ului peste aplicaţie, apoi faceţi clic stânga sau apăsaţi o dată pentru a o lansa. Apăsaţi de două ori pe şi apoi utilizaţi tastele cu săgeţi pentru a răsfoi aplicaţiile. Apăsaţi pe to pentru a lansa o aplicaţie.
Redimensionarea aplicaţiilor Atingeţi şi menţineţi apăsat pe aplicaţie pentru a activa bara personalizare, apoi atingeţi şi selectaţi o dimensiune pentru cadrul aplicaţiei. Faceţi clic dreapta pe aplicaţie pentru a activa bara de personalizare, apoi atingeţi/faceţi clic pe şi selectaţi o dimensiune pentru cadrul aplicaţiei. Anularea fixării unor aplicaţii Atingeţi şi menţineţi apăsat pe aplicaţie pentru a activa bara personalizare, apoi atingeţi pentru a anula fixarea aplicaţiei.
Închiderea aplicaţiilor Atingeţi şi menţineţi apăsată partea superioară a unei aplicaţii aflată în execuţie, apoi glisaţi-o în partea de jos a ecranului. 1. Deplasaţi cursorul mouse-ului în partea superioară a aplicaţiei lansate, apoi aşteptaţi ca acesta să se schimbe într-o pictogramă în formă de mână. 2. Trageţi şi apoi plasaţi aplicaţia în partea de jos a ecranului pentru a o închide. Din ecranul aplicaţiei lansate, apăsaţi tastele .
Accesarea ecranului Apps (Aplicaţii) În afară de aplicaţiile deja fixate în ecranul Start, puteţi deschide şi alte aplicaţii prin intermediul ecranului Apps (Aplicaţii). NOTĂ: Aplicaţiile care apar efectiv pe ecran diferă în funcţie de model. Următoarea captură de ecran este numai pentru referinţă. Lansarea ecranul Apps (Aplicaţii) Lansați ecranul Aplicații utilizând panoul de ecran tactil, touchpadul sau tastatura dispozitivului Notebook PC. Glisaţi în sus în ecranul Start.
Fixarea mai multor aplicaţii în ecranul Start Puteți fixa mai multe aplicații în ecranul Start utilizând panoul de ecran tactil sau touchpadul. 1. Lansaţi ecranul All Apps (Toate aplicaţiile) 2. Atingeţi şi menţineţi apăsat pe aplicaţia pe care doriţi să o fixaţi în ecranul Start pentru a activa bara de personalizare. După ce bara de personalizare este activată, puteţi atinge şi alte aplicaţii pe care doriţi să le fixaţi în ecranul Start. 3.
Charms bar Charms bar este o bară de instrumente care poate fi iniţiată în partea dreaptă a ecranului. Aceasta este alcătuită din mai multe instrumente care vă permit să partajaţi aplicaţii şi care asigură accesul rapid pentru personalizarea setărilor notebook-ului dvs.
Lansarea barei Charms bar NOTĂ: Atunci când este apelată, bara Charms bar apare sub forma unui set de pictograme albe. Imaginea de mai sus arată aspectul barei Charms bar după activare. Utilizați panoul de ecran tactil, touchpadul sau tastatura dispozitivului Notebook PC pentru a lansa bara de butoane. Glisaţi dinspre marginea din dreapta a ecranului pentru a lansa Charms bar. Deplasaţi cursorul mouse-ului în colţurile din dreapta sau stânga sus ale ecranului. Apăsaţi tastele 60 .
În interiorul barei Charms bar Search (Căutare) Acest instrument vă permite să căutaţi fişiere, aplicaţii sau programe din notebook-ul dvs. Share (Partajare) Acest instrument vă permite să partajaţi aplicaţii prin site-uri de reţele sociale sau e-mail. Start (Start) Acest instrument aduce afişajul înapoi la ecranul Start. De asemenea, îl puteţi utiliza din ecranul Start pentru a reveni la o aplicaţie deschisă de curând.
Caracteristica Snap (Aliniere) Caracteristica Snap (Aliniere) afişează două aplicaţii alăturate, permiţându-vă să lucraţi în acestea sau să comutaţi între acestea. IMPORTANT! Înainte de a utiliza caracteristica Snap (Aliniere), asiguraţi-vă că rezoluţia ecranului notebookului este setată la 1366 x 768 pixeli.
Activarea caracteristicii Snap (Aliniere) Utilizați panoul de ecran tactil, touchpadul sau tastatura dispozitivului Notebook PC pentru a activa și a utiliza caracteristica Aliniere. 1. Lansaţi aplicaţia pe care doriţi să o aliniaţi. 2. Atingeţi şi menţineţi apăsat pe partea cea mai de sus a aplicaţiei, apoi glisaţi-o în partea stângă sau dreaptă a ecranului până când apare bara de aliniere. 3. Lansaţi o altă aplicaţie. 1. Lansaţi aplicaţia pe care doriţi să o aliniaţi. 2.
Alte comenzi rapide de la tastatură Utilizând tastatura, puteţi utiliza şi următoarele comenzi rapide pentru a vă ajuta să lansaţi aplicaţii şi să navigaţi prin Windows® 8.1.
Lansează panoul Project (Proiect) Deschideţi opţiunea Everywhere (Oriunde) din butonul Search (Căutare) Deschide fereastra Executare Deschide Centrul pentru acces facil Deschideţi opţiunea Settings (Setări) din cadrul butonului Search (Căutare) Deschide meniul contextual al butonului Start Lansează pictograma lupă şi măreşte ecranul Micşorează ecranul Deschide Setări narator Manual electronic pentru notebook 65
Conectarea la reţele wireless Wi-Fi Accesaţi e-mailuri, navigaţi pe internet şi partajaţi aplicaţii prin site-uri de reţele sociale utilizând conexiunea Wi-Fi a notebook-ului dvs. IMPORTANT! Asiguraţi-vă că Airplane mode (modul Avion) este dezactivat pentru a activa funcţia Wi-Fi pe notebook. Pentru detalii suplimentare, consultaţi secţiunea Modul Avion din acest manual. Activarea Wi-Fi Activaţi Wi-Fi pe notebook-ul dvs. utilizând următorii paşi: 1. Lansaţi bara Charms bar. 2. Atingeţi 3.
Bluetooth Utilizaţi conectivitatea Bluetooth pentru a facilita transferuri wireless de date cu alte dispozitive cu conectivitate Bluetooth. IMPORTANT! Asiguraţi-vă că Airplane mode (modul Avion) este dezactivat pentru a activa funcţia Bluetooth pe notebook. Pentru detalii suplimentare, consultaţi secţiunea Modul Avion din acest manual.
Airplane mode (Mod avion) Airplane mode (Modul Avion) dezactivează comunicaţia wireless, permiţându-vă să utilizaţi notebookul în condiţii de siguranţă atunci când călătoriţi cu avionul. Activarea modului Avion sau 1. Lansaţi bara Charms bar. 2. Atingeţi 3. Mişcaţi cursorul spre dreapta pentru a activa modul Avion. Apăsaţi pe , apoi . . Dezactivarea modului Avion sau 1. Lansaţi bara Charms bar. 2. Atingeţi 3. Mişcaţi cursorul spre stânga pentru a dezactiva modul Avion.
Conectarea la reţele cablate Aveţi posibilitatea, de asemenea, să vă conectaţi la reţele cablate, de exemplu reţele locale şi conexiuni la Internet de bandă largă, utilizând portul LAN al notebookului. NOTĂ: Contactaţi furnizorul dvs. de servicii Internet (ISP) pentru detalii sau administratorul reţelei pentru asistenţă privind configurarea conexiunii la Internet. Pentru a configura setările, consultaţi următoarele proceduri.
6. Atingeţi Obtain an IP address automatically (Obţinere automată a adresei IP), apoi OK. NOTĂ: Dacă utilizaţi o conexiune PPPoE, continuaţi cu paşii următori. Reveniţi la fereastra Network and Sharing Center (Centru reţea şi partajare), apoi atingeţi Set up a new connection or network (Configurare conexiune sau reţea nouă). 8. Selectaţi Connect to the Internet (Conectare la Internet), apoi atingeţi Next (Următorul). 9. Atingeţi Broadband (PPPoE) (Bandă largă (PPPoE)). 10.
Oprirea notebookului Puteţi opri notebookul utilizând una dintre următoarele proceduri: • Atingeţi din Charms bar, apoi > Shut down (Închidere) pentru a efectua o închidere normală. sau • În ecranul de conectare atingeţi > Shut down (Închidere). • De asemenea, puteţi să închideţi notebook PC-ul utilizând modul Desktop. Pentru aceasta, lansaţi desktop-ul şi apăsaţi tastele alt + f4 pentru a lansa fereastra de închidere. Selectaţi Shut Down (Închidere) din lista derulantă şi faceţi clic pe OK.
Ecranul de blocare Windows® 8.1 Ecranul de blocare Windows® 8.1 apare atunci când reactivaţi notebookul din modul de inactivitate sau de hibernare. Ecranul mai apare atunci când blocaţi sau deblocaţi sistemul Windows® 8.1. Ecranul de blocare poate fi personalizat astfel încât să restricţioneze accesul la sistemul dvs. de operare. Puteţi schimba imaginea de fundal şi puteţi să accesaţi o parte din aplicaţii, chiar şi când notebookul este blocat. Pentru a închide ecranul de blocare sau 72 1.
Personalizarea ecranului de blocare Puteţi personaliza ecranul de blocare pentru a afişa fotografia preferată, o expunere de fotografii, actualizări ale aplicaţiilor, dar şi pentru a dobândi acces rapid la camera notebookului dvs. Pentru a modifica setările ecranului de blocare, puteţi face referire la următoarele informaţii: Selectarea unei fotografii 1. Lansaţi bara cu butoane > Settings (Setări). 2. Selectaţi Change PC Settings (Modificare setări pentru PC) > Lock Screen (Ecran de blocare). 3.
Adăugarea actualizărilor de aplicaţii 1. Lansaţi bara cu butoane > Settings (Setări). 2. Selectaţi Change PC Settings (Modificare setări pentru PC) > Lock Screen (Ecran de blocare). 3. Defilaţi în jos până când vedeţi opţiunea Lock screen apps (Aplicaţii ecran de blocare). 4. Folosiţi următoarele opţiuni pentru a adăuga aplicaţiile ale căror actualizări doriţi să le vedeţi pe ecranul de blocare: Activarea camerei notebookului dvs.
Capitolul 4: Procedura POST (Power-on Self-test) Manual electronic pentru notebook 75
Procedura POST (Power-on Self-test) Procedura POST (Power-on Self-test) este o serie de teste de diagnosticare controlate de software care se execută la pornirea notebookului. Software-ul care controlează procedura POST este instalat ca o componentă permanentă a arhitecturii notebookului.
Setări din BIOS NOTĂ: Poziţia efectivă a portului LAN diferă în funcţie de model. Consultaţi capitolul precedent pentru a vedea unde se află portul LAN. Boot (Pornire sistem) Acest meniu vă permite să stabiliţi prioritatea dispozitivelor de pornire a sistemului de operare. Atunci când stabiliţi această prioritate, puteţi consulta următoarele proceduri. În ecranul Boot (Pornire sistem), selectaţi Boot Option #1. (Pornire sistem prima opţiune). 1.
Apăsaţi pe şi selectaţi un dispozitiv, conform cu Boot Option #1 (Pornire sistem prima opţiune). 2. Main Aptio Setup Utility - Copyright (C) 2012 American Megatrends, Inc.
Security (Securitate) Acest meniu vă permite să setaţi parola de administrator şi parola de utilizator pentru accesarea notebookului. De asemenea, acest meniu vă permite să controlaţi accesul la unitatea de hard disc, la interfaţa de intrare/ieşire (I/O) şi la interfaţa USB. NOTĂ: Main • Dacă instalaţi o User Password (Parolă utilizator), vi se va solicita să introduceţi această parolă înainte de intrarea în sistemul de operare al notebookului.
Pentru a seta parola: 1. În ecranul Security (Securitate), selectaţi Setup Administrator Password (Configurare parolă administrator) sau User Password (Parolă administrator). 2. Introduceţi o parolă şi apăsaţi . 3. Introduceţi din nou parola şi apăsaţi . Pentru a şterge parola: 1. În ecranul Security (Securitate), selectaţi Setup Administrator Password (Configurare parolă administrator) sau User Password (Parolă administrator). 2. Introduceţi parola curentă şi apăsaţi pe 3.
Securitate interfaţă I/O (intrare/ieşire) În meniul Security (Securitate) puteţi accesa I/O Interface Security (Securitate interfaţă I/O) pentru a bloca sau a debloca anumite funcţii de interfaţă ale notebookului. Aptio Setup Utility - Copyright (C) 2012 American Megatrends, Inc.
Securitate interfaţă USB De asemenea, meniul I/O Interface Security (Securitate interfaţă I/O) vă permite să accesaţi USB Interface Security (Securitate interfaţă USB) pentru a bloca sau a debloca porturi şi dispozitive. Aptio Setup Utility - Copyright (C) 2012 American Megatrends, Inc.
Set Master Password (Setare parolă principală) În meniul Security (Securitate) puteţi utiliza Set Master Password (Setare parolă principală) pentru a configura un acces bazat pe parolă la unitatea de hard disk. Aptio Setup Utility - Copyright (C) 2012 American Megatrends, Inc. Main Setup Advanced Security(C) Save Exit Aptio UtilityBoot - Copyright 2011 &American Megatrends, Inc. Password Description Set HDD Password.
Save & Exit (Salvare şi ieşire) Pentru a păstra setările de configurare, selectaţi Save Changes and Exit (Salvare modificări şi ieşire) înainte de a ieşi din BIOS. Main Aptio Setup Utility - Copyright (C) 2012 American Megatrends, Inc. Advanced Boot Security Save & Exit Save Changes and Exit Discard Changes and Exit Exit system setup after saving the changes.
Actualizarea BIOS-ului. 1. Verificaţi modelul exact al notebookului dvs. şi apoi descărcaţi cel mai recent fişier BIOS pentru modelul dvs. de pe site-ul Web ASUS. 2. Salvaţi o copie a fişierului BIOS descărcat pe o unitate de memorie flash. 3. Conectaţi unitatea de memorie flash la notebook. 4. Reporniţi notebookul, apoi apăsaţi pe în timpul procedurii POST. 5.
6. Localizaţi fişierul BIOS descărcat pe unitatea de memorie flash, apoi apăsaţi pe . ASUSTek Easy Flash Utility FLASH TYPE: MXIC 25L Series New BIOS Current BIOS Platform: TP300 Platform: Unknown Version: 101 Version: Unknown Build Date: Oct 26 2012 Build Date: Unknown Build Time: 11:51:05 Build Time: Unknown FSO FS1 0 EFI
FS2 FS3 FS4 [←→]: Switch [↑↓]: Choose [q]: Exit [Enter]: Enter/Execute 7.Depanare Apăsând pe în timpul procedurii POST, puteţi accesa opţiunile de depanare Windows® 8.1: • Reîmprospătare PC • Resetare PC • Opţiuni complexe Refresh your PC (Reîmprospătare PC) Utilizaţi opţiunea Refresh your PC (Reîmprospătare PC) dacă doriţi să reîmprospătaţi sistemul fără a pierde fişierele şi aplicaţiile curente. Pentru a accesa această opţiune în timpul procedurii POST: 1. Reporniţi notebookul, apoi apăsaţi pe în timpul procedurii POST. 2.
Reset your PC (Resetare PC) IMPORTANT! Înainte de executarea acestei opţiuni, faceţi copii de siguranţă ale tuturor datelor dvs. Utilizaţi opţiunea Reset your PC (Resetare PC) pentru a restabili setările implicite pentru notebookul dvs. Pentru a accesa această opţiune în timpul procedurii POST: 1. Reporniţi notebookul, apoi apăsaţi pe în timpul procedurii POST. 2. Aşteptaţi ca Windows® să încarce ecranul Choose an option (Alegeţi o opţiune), apoi atingeţi Troubleshoot (Depanare). 3.
Advanced options (Opţiuni complexe) Utilizaţi Advanced options (Opţiuni complexe) pentru a executa opţiuni de depanare suplimentare pe notebook. Pentru a accesa această opţiune în timpul procedurii POST: 1. Reporniţi notebookul, apoi apăsaţi pe în timpul procedurii POST. 2. Aşteptaţi ca Windows® să încarce ecranul Choose an option (Alegeţi o opţiune), apoi atingeţi Troubleshoot (Depanare). 3. Atingeţi Advanced options (Opţiuni complexe). 4.
4. În ecranul Advanced options (Opţiuni complexe) selectaţi System Image Recovery (Recuperare imagine sistem). 5. Alegeţi un cont pe care doriţi să îl recuperaţi utilizând un fişier de imagine de sistem. 6. Tastaţi parola contului dvs., apoi atingeţi Continue (Continuare). 7. Selectaţi Use the latest available system image (recommended) (Se utilizează cea mai recentă imagine de sistem disponibilă (recomandat)), apoi atingeţi Next (Următorul).
Sfaturi şi întrebări frecvente Manual electronic pentru notebook 91
Sfaturi utile privind utilizarea notebookului Pentru a vă ajuta să maximizaţi utilizarea notebookului, să menţineţi performanţele sistemului şi să asiguraţi securitatea datelor, vă oferim câteva sfaturi pe care vă recomandăm să le urmaţi: • Actualizaţi periodic sistemul Windows® pentru a vă asigura că aplicaţiile au cele mai recente setări de securitate. • Utilizaţi utilitarul ASUS Live Update pentru a actualiza aplicaţiile, driverele şi utilitarele ASUS de pe notebook.
Întrebări frecvente referitoare la componentele hardware 1. Atunci când pornesc notebookul, pe ecran apare un punct negru sau, uneori, un punct colorat. Ce trebuie să fac? Deşi aceste puncte apar în nod normal pe ecran, ele nu afectează sistemul. Dacă incidentul persistă şi afectează performanţele sistemului, consultă un centru de service ASUS autorizat. 2. Ecranul are luminozitate şi culori neuniforme.
4. 5. 6. Indicatorul LED pentru baterie nu se aprinde. care este problema? • Verificaţi dacă adaptorul de alimentare sau bateria este conectată corect. De asemenea, puteţi să deconectaţi adaptorul de alimentare sau bateria, să aşteptaţi un minut şi apoi să reconectaţi adaptorul la priza electrică şi la notebook. • Dacă problema persistă, contactaţi centrul local de service ASUS pentru asistenţă. De ce nu funcţionează touchpadul? • Apăsaţi pe pentru a activa touchpadul.
8. Deşi aud în continuare sunet la difuzoarele notebookului după ce am conectat căşti la portul corect? Accesaţi Control Panel (Panou de control) > Hardware and Sound (Hardware şi sunet), apoi selectaţi Audio Manager (Manager audio) pentru a configura setările. 9. Notebookul nu interpretează corect apăsările pe taste, deoarece cursorul continuă să se mişte. Ce trebuie să fac? Asiguraţi-vă că nu există nimic care atinge sau apasă accidental touchpadul în timp ce tastaţi.
Întrebări frecvente referitoare la componentele software 1. Atunci când pornesc notebookul, se aprinde indicatorul de alimentare, însă nu şi indicatorul de activitate a hard diskului. De asemenea, nu se încarcă sistemul de operare. Cum pot rezolva această problemă? Puteţi aplica oricare dintre sugestiile următoare: 2. • Închideţi forţat notebookul apăsând pe butonul de alimentare mai mult de patru (4) secunde.
4. Notebookul nu încarcă sistemul de operare. Cum pot rezolva această problemă? Puteţi aplica oricare dintre sugestiile următoare: 5. • Îndepărtaţi toate dispozitivele conectate la notebook, apoi reporniţi sistemul. • La pornire, apăsaţi pe F9. Atunci când notebookul intră în modul Troubleshooting (Depanare), selectaţi Refresh (Reîmprospătare) sau Reset your PC (Resetare PC). • Dacă problema persistă, contactaţi centrul local de service ASUS pentru asistenţă.
Manual electronic pentru notebook
Anexe Manual electronic pentru notebook 99
Informaţii referitoare la unitatea DVD-ROM (pe modele selectate) Unitatea DVD-ROM vă permite să vizualizaţi şi să creaţi propriile CD-uri şi DVD-uri. Puteţi să achiziţionaţi un software de vizualizare DVD opţional pentru a vizualiza titluri DVD. Informaţii regionale referitoare la redarea înregistrărilor Redarea titlurilor filmelor DVD implică decodarea fişierelor video MPEG2, a fişierelor audio digitale AC3 şi decriptarea conţinutului protejat CSS.
Definiţii regionale Regiunea 1 Canada, SUA, Teritoriile SUA Regiunea 2 Republica Cehă, Egipt, Franţa, Finlanda, Germania, Statele din regiunea Golfului, Ungaria, Islanda, Iran, Irak, Irlanda, Italia, Olanda, Norvegia, Polonia, Portugalia, Arabia Saudită, Scoţia, Africa de Sud, Spania, Suedia, Elveţia, Siria, Turcia, Marea Britanie, Grecia, Fostele Republici Yugoslave, Slovacia Regiunea 3 Burma, Indonezia, Coreea de Sud, Malaiezia, Filipine, Singapore, Taiwan, Thailanda, Vietnam Regiunea 4 Australia, Caraibe
Informaţii unitate ROM Blu-ray (pe modele selectate) Unitatea Blu-ray ROM vă permite să vizualizaţi clipuri video la înaltă definiţie (HD) şi alte formate de fişiere de disc, cum ar fi DVD-uri şi CD-uri. Definiţii regionale Regiunea A Ţări din America de Nord, Centrală şi de Sud şi teritoriile acestora; Taiwan, Hong Kong, Macao, Japonia, Coreea (de Sud şi de Nord), ţări din Asia de Sud-Est şi teritoriile acestora.
Prezentare generală În data de 4 august 1998 a fost publicată în Jurnalul oficial al Curţii Europene decizia Consiliului european referitoare la CTR 21. CTR 21 se aplică tuturor echipamentelor terminale non-voce cu apelare prin DTMF destinate conectării la PSTN (Reţea telefonică publică comutată) analog.
În acest tabel sunt afişate ţările care se conformează în prezent standardului CTR21.
Aceste informaţii au fost copiate de la CETECOM şi sunt furnizate fără nicio garanţie. Pentru actualizări ale acestui tabel, puteţi vizita http://www.cetecom. de/technologies/ctr_21.html 1 Cerinţele naţionale se vor aplica doar în cazul în care echipamentul poate utiliza apelarea puls (producătorii pot declara în ghidul utilizatorului că echipamentul este conceput doar pentru a suporta semnalizarea DTMF, caz în care testarea suplimentară este de prisos).
• Conectaţi dispozitivul la o priză dintr-un circuit diferit de cel în care este conectat receptorul. • Cereţi sfatul distribuitorului sau al unui tehnician radio/TV experimentat. ATENŢIE! Utilizarea unui cablu de alimentare de tip ecranat este necesară pentru încadrarea în limitele de emisii FCC şi pentru prevenirea interferenţelor cu recepţia radio şi TV din apropiere. Este esenţial să utilizaţi numai cablul de alimentare furnizat.
Declaraţie de conformitate (Directiva R&TTE 1999/5/CE) Următoarele articole au fost completate şi se consideră a fi relevante şi suficiente: • Cerinţe esenţiale conform [Articolului 3] • Cerinţe de protecţie pentru sănătate şi securitate conform [Articolului 3.1a] • Testarea siguranţei electrice în conformitate cu [EN 60950] • Cerinţe de protecţie pentru compatibilitate electromagnetică în [Articolul 3.
Canalul de funcţionare wireless pentru diferite domenii America de Nord 2.412-2.462 GHz Canalul 1 până la Canalul 11 Japonia 2.412-2.484 GHz Canalul 1 până la Canalul 14 Europa ETSI 2.412-2.472 GHz Canalul 1 până la Canalul 13 Benzile de frecvenţă wireless restricţionate în Franţa Unele zone din Franţa au restricţii în ceea ce priveşte banda de frecvenţă.
Departamentele în care utilizarea benzii de 2400–2483,5 MHz este permisă cu EIRP de mai puţin de 100 mW în interior şi mai puţin de 10 mW în exterior: 01 Ain 02 Aisne 05 Hautes Alpes 08 Ardennes 09 Ariège 03 Allier 11 Aude 12 Aveyron 16 Charente 24 Dordogne 25 Doubs 26 Drôme 32 Gers 36 Indre 37 Indre et Loire 41 Loir et Cher 45 Loiret 50 Manche 55 Meuse 58 Nièvre 59 Nord 60 Oise 61 Orne 63 Puy du Dôme 64 Pyrénées Atlantique 66 Pyr
Note de siguranţă UL Necesare pentru dispozitivul de telecomunicaţii (telefon) care acoperă UL 1459, care va fi conectat electric la o reţea de telecomunicaţii cu o tensiune de funcţionare la masă care nu depăşeşte limita de 200V, 300 V şi 105 rms şi care este instalat sau utilizat în conformitate cu Codul electric naţional (NFPA 70).
Cerinţă de siguranţă pentru energie Pentru produsele cu valori nominale ale curentului electric de până la 6A şi care cântăresc mai mult de 3 kg trebuie să utilizaţi cabluri de alimentare mai mari sau egale cu: H05VV-F, 3G, 0,75 mm2 sau H05VV-F, 2G, 0,75 mm2. Notificări pentru tunerul TV Notă pentru instalatorul sistemului CATV - Sistemul de distribuţie prin cablu va fi legat la pământ (împământat) conform cu ANSI/NFPA 70, Normativul Naţional pentru Electricitate (NEC), în special Secţiunea 820.
Precauţii pentru litiul nordic (pentru baterii cu ioni de litiu) CAUTION! Danger of explosion if battery is incorrectly replaced. Replace only with the same or equivalent type recommended by the manufacturer. Dispose of used batteries according to the manufacturer’s instructions. (English) ATTENZIONE! Rischio di esplosione della batteria se sostituita in modo errato. Sostituire la batteria con un una di tipo uguale o equivalente consigliata dalla fabbrica. Non disperdere le batterie nell’ambiente.
Informaţii de siguranţă pentru unitatea optică Informaţii de siguranţă pentru laser Avertizări de siguranţă privind unitatea CD-ROM PRODUS LASER CLASA 1 AVERTISMENT! Pentru a preveni expunerea la laserul unităţii optice, nu demontaţi şi nu reparaţi singur unitatea optică. Pentru siguranţa dvs., contactaţi un tehnician autorizat pentru asistenţă. Eticheta de avertizare pentru service ATENŢIE: RADIAŢII LASER INVIZIBILE CÂND ESTE DESCHIS.
Aprobare CTR 21 (pentru notebook PC cu modem încorporat) Danish Dutch English Finnish French 114 Manual electronic pentru notebook
German Greek Italian Portuguese Spanish Swedish Manual electronic pentru notebook 115
Conformitate produs ENERGY STAR ENERGY STAR este un program comun al Agenției pentru Protecția Mediului SUA și al Departamentului Energiei SUA, care ne ajută să economisim bani și să protejăm mediul cu ajutorul produselor și tehnicilor eficiente din punct de vedere energetic. Toate produsele ASUS care poartă marca ENERGY STAR sunt în conformitate cu standardul ENERGY STAR și includ în mod implicit funcția de gestionare a energiei.
Declaraţia şi conformitatea cu regulamentul internaţional referitor la mediu ASUS respectă conceptul de proiectare ecologică la proiectarea şi fabricaţia produselor noastre şi se asigură că fiecare etapă a duratei de viaţă a produsului ASUS respectă regulamentele internaţionale referitoare la mediu. În plus, ASUS pune la dispoziţie informaţii relevante pe baza cerinţelor reglementărilor. Consultaţi http://csr.asus.com/english/Compliance.
EC Declaration of Conformity We, the undersigned, Manufacturer: ASUSTeK COMPUTER INC. Address: 4F, No. 150, LI-TE Rd., PEITOU, TAIPEI 112, TAIWAN Authorized representative in Europe: ASUS COMPUTER GmbH Address, City: HARKORT STR.