TH15836 การแก ้ไขครัง้ ที่ 1 / กันยายน 2019 คูม ่ อ ื อิเล็กทรอนิกส์
ข้อมูลเกีย ่ วก ับลิขสิทธิ์ ห ้ามท�ำซ�้ำ ส่งต่อ คัดลอก เก็บในระบบทีส ่ ามารถเรียกกลับมาได ้ หรือแปลส่วนหนึง่ ส่วนใดของคูม ่ อ ื ฉบับนีเ้ ป็ นภาษาอืน ่ ้ เป็ นผู ้เก็บไว ้เพือ ซึง่ รวมถึงผลิตภัณฑ์และซอฟต์แวร์ทบ ี่ รรจุอยูภ ่ ายใน ยกเว ้นเอกสารทีผ ่ ู ้ซือ ่ จุดประสงค์ในการ ส�ำรองเท่านัน ้ โดยไม่ได ้รับความยินยอมเป็ นลายลักษณ์อก ั ษรอย่างชัดแจ ้งจาก ASUSTeK COMPUTER INC.
สารบ ัญ เกีย่ วกับคูม ่ อ ื ฉบับนี.้ .................................................................... 7 ข ้อก�ำหนดทีใ่ ช ้ในคูม ่ อ ื นี.้ ..................................................................8 ไอคอน.........................................................................................8 การใช ้ตัวพิมพ์. ..............................................................................8 ข ้อควรระวังเพือ ่ ความปลอดภัย. .....................................................
บทที่ 3: การท�ำงานก ับ Windows® 10 การเริม่ ต ้นใช ้งานในครัง้ แรก.......................................................... 48 เมนูเริม่ ..................................................................................... 49 การเปิ ดเมนูเริม่ . .............................................................................50 การเปิ ดโปรแกรมจากเมนูเริม่ .............................................................50 แอป Windows® .......................................................................
บทที่ 4: การทดสอบต ัวเองเมือ ่ เปิ ดเครือ ่ ง (POST) การทดสอบตัวเองเมือ ่ เปิ ดเครือ ่ ง (POST)......................................... 68 การใช ้ POST เพือ ่ เข ้าถึง BIOS และการ แก ้ไขปั ญหา..................................................................................68 BIOS....................................................................................... 68 การเข ้าถึง BIOS.............................................................................69 การตัง้ ค่า BIOS..........................
ถ ้อยแถลงของคณะกรรมการการสือ่ สารกลาง........................................95 ถ ้อยแถลงข ้อควรระวังการสัมผัสถูกความถีว่ ท ิ ยุของ FCC..........................96 ข ้อมูลเกีย่ วกับการสัมผัสถูก RF (SAR).................................................97 ประกาศเกีย่ วกับการเคลือบ...............................................................97 ประกาศด ้านความปลอดภัยของ UL.....................................................98 ข ้อก�ำหนดด ้านความปลอดภัยทางไฟฟ้ า..............................................
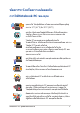
เกีย ่ วก ับคูม ่ อ ื ฉบ ับนี้ คูม ่ อ ื นีใ้ ห ้ข ้อมูลเกีย ่ วกับคุณสมบัตด ิ ้านฮาร์ดแวร์และซอฟต์แวร์ของNotebook PC ของคุณ โดยจัดหมวดหมูเ่ ป็ นบทต่างๆ ดังนี:้ บทที่ 1: การตงค่ ั้ าฮาร์ดแวร์ บทนีใ้ ห ้รายละเอียดเกีย ่ วกับองค์ประกอบด ้านฮาร์ดแวร์ของNotebook PC ของคุณ ้ otebook PC ของคุณ บทที่ 2: การใชN บทนีแ ้ สดงถึงวิธก ี ารใช ้ส่วนต่างๆ ของNotebook PC ของคุณ บทที่ 3: การท�ำงานก ับ Windows® 10 บทนีใ้ ห ้ภาพรวมเกีย ่ วกับการใช ้ Windows® 10 ในNotebook PC ของ คุณ บทที่ 4: การทดสอบต ัวเองเมือ ่ เปิ ดเครือ ่
ข้อก�ำหนดทีใ่ ชใ้ นคูม ่ อ ื นี้ เพือ ่ เน ้นข ้อมูลส�ำคัญในคูม ่ อ ื นี้ ข ้อความจะถูกน� ำเสนอดังนี:้ ส�ำคัญ! ข ้อความนีป ้ ระกอบด ้วยข ้อมูลส�ำคัญทีค ่ ณ ุ ต ้องท�ำตาม เพือ ่ ท�ำงาน ให ้สมบูรณ์ หมายเหตุ: ข ้อความนีป ้ ระกอบด ้วยข ้อมูลเพิม ่ เติม และเทคนิคต่างๆ ทีส ่ ามารถช่วยให ้ท�ำงานสมบูรณ์ ค�ำเตือน! ข ้อความนีป ้ ระกอบด ้วยข ้อมูลส�ำคัญทีค ่ ณ ุ ต ้องปฏิบต ั ต ิ าม เพือ ่ ให ้คุณปลอดภัยในขณะทีท ่ �ำงานบางอย่าง และป้ องกันความเสียหาย ้ ส่วนต่างๆ ของNotebook PC ของคุณ ต่อข ้อมูลและชิน ไอคอน ไอคอนด ้า
ข้อควรระว ังเพือ ่ ความปลอดภ ัย การใช้Notebook PC ของคุณ คุณควรใช ้ โน ้ตบุค ๊ พีซเี ฉพาะในสภาพแวดล ้อมทีม ่ อ ี ณ ุ หภูมอ ิ ยู่ ระหว่าง 5˚C (41˚F) ถึง 35˚C (95˚F) อย่าถือ หรือปกคลุมโน ้ตบุค ๊ พีซใี นขณะ ทีเ่ ปิ ดเครือ ่ งอยูด ่ ้วย วัสดุใดๆ เนือ ่ งจาก จะท�ำให ้การระบายอากาศลดลง เช่น การใส่ไว ้ในกระเป๋ าถือ โน ้ตบุค ๊ PC ของคุณสามารถอุน ่ ขึน ้ จนถึงร ้อนได ้ ในขณะทีใ่ ช ้งาน หรือในขณะทีก ่ �ำลังชาร์จแบตเตอรีแ ่ พค อย่าวาง โน ้ตบุค ๊ PC ไว ้บนตัก หรือใกล ้ ส่วนใดส่วนหนึง่ ของร่างกาย เพือ ่ ป้ องกันไม่ให ้เ
การดูแลNotebook PC ของคุณ ถอดสายไฟ AC และถอดแบตเตอรีแ ่ พคออก(ถ ้าท�ำได ้) ก่อน ท�ำความสะอาดNotebook PC ของคุณ ใช ้ฟองน�้ ำเซลลูโลส หรือผ ้าชามัวร์ทส ี่ ะอาด ชุบสารละลายผงซักฟอกทีไ่ ม่มฤ ี ทธิก ์ ด ั ้ ส่วนเกินออกจากNotebook ผสมน�้ ำอุน ่ เล็กน ้อย เช็ดความชืน PC ของคุณโดยใช ้ผ ้าแห ้ง อย่าใช ้สารทีม ่ ค ี วามเข ้มข ้น เช่น ทินเนอร์ เบนซิน หรือสารเคมี อืน ่ ๆ บนหรือใกล ้Notebook PC ของคุณ อย่าวางวัตถุใดๆ บนNotebook PC ของคุณ อย่าให ้Notebook PC สัมผัสถูกสนามแม่เหล็ก หรือสนาม ไฟฟ้ าพลังสูง อย่าใช ้ หรือให ้
การทิง้ อย่างเหมาะสม ี ะปนกับของเสียจากภายในบ ้าน ตรวจ ผลิตภัณฑ์นี้ อย่าทิง้ โน ้ตบุค ๊ พีซป ้ ส่วนต่างๆ มาใช ้ซ�้ำ และรีไซเคิลได ้อย่าง ได ้รับการออกแบบเพือ ่ ให ้น� ำชิน เหมาะสม สัญลักษณ์ถงั ขยะติดล ้อทีม ่ เี ครือ ่ งหมายกากบาท เป็ นการระบุ ว่าไม่ควรทิง้ ผลิตภัณฑ์ (อุปกรณ์ไฟฟ้ า, อิเล็กทรอนิกส์ และแบตเตอรี่ เหรียญทีม ่ ส ี ว่ นประกอบของปรอท) ปะปนไปกับของเสียทัว่ ไปจาก ภายในบ ้าน สอบกฏข ้อบังคับในการทิง้ ผลิตภัณฑ์อเิ ล็กทรอนิกส อย่าทิง้ แบตเตอรีป ่ ะปนกับของเสียทัว่ ไปภายในบ ้าน สัญลักษณ์ถงั ขยะ ติดล ้อที
Notebook PC คูม ่ อ ื อิเล็กทรอนิกส์
บทที่ 1: การตงค่ ั้ าฮาร์ดแวร์ Notebook PC คูม ่ อ ื อิเล็กทรอนิกส์ 13
ท�ำความรูจ ้ ัก Notebook PC ของคุณ มุมมองด้านบน หมายเหตุ: รูปแบบแป้ นพิมพ์อาจแตกต่างกันไปตามภูมภ ิ าคหรือประเทศ รูปลักษณ์ของ Notebook อาจแตกต่างกันไปขึน ้ อยูก ่ บ ั รุน ่ ของ Notebook PC รุ่น 13” 14 Notebook PC คูม ่ อ ื อิเล็กทรอนิกส์
รุ่น 14” Notebook PC คูม ่ อ ื อิเล็กทรอนิกส์ 15
รุ่น 15” 16 Notebook PC คูม ่ อ ื อิเล็กทรอนิกส์
ไมโครโฟนอาร์เรย์ ไมโครโฟนอาร์เรย์มค ี ณ ุ สมบัตต ิ ด ั เสียงก ้อง ลดเสียงรบกวน และ ั บีมฟอร์มมิง่ เพือ ฟั งก์ชน ่ การได ้ยินและการบันทึกเสียงทีด ่ ข ี น ึ้ กล้อง กล ้องในตัวช่วยให ้คุณถ่ายภาพหรือบันทึกวิดโี อด ้วย Notebook PC ของคุณได ้ กล้อง IR กล ้องในตัวช่วยให ้คุณถ่ายภาพหรือบันทึกวิดโี อด ้วย Notebook PC ของคุณได ้ กล ้อง IR ยังรองรับ Windows Hello อีกด ้วย หมายเหตุ: ไฟ LED สีแดงของ IR จะกะพริบขณะก�ำลังอ่าน ่ ใช ้งานด ้วยการจดจ�ำใบหน ้าของ ข ้อมูล ก่อนทีค ่ ณ ุ จะลงชือ Windows Hello แผงจอแสดงผล แผงจอแส
แป้นพิมพ์ แป้ นพิมพ์เป็ นปุ่ ม QWERTY ขนาดมาตรฐานพร ้อมระยะความลึกของ ั ท�ำให ้เข ้า ปุ่ มทีเ่ หมาะสมต่อการพิมพ์ ซึง่ ยังช่วยให ้คุณใช ้ปุ่ มฟั งก์ชน ั ถึง Windows® ได ้อย่างรวดเร็ว และควบคุมฟั งก์ชน มัลติมเี ดียอืน ่ ๆ ได ้ หมายเหตุ: รูปแบบแป้ นพิมพ์แตกต่างกันไปตามรุน ่ หรือเขต ภูมภ ิ าค ไฟแสดงสถานะ Capital Lock ั Capital Lock ไฟแสดงสถานะจะสว่างขึน ้ เมือ ่ เปิ ดใช ้งานฟั งก์ชน การใช ้ Capital Lock ช่วยให ้คุณพิมพ์อก ั ษรตัวพิมพ์ใหญ่ (เช่น A, B, C) โดยใช ้แป้ นพิมพ์บน Notebook PC ของคุณ ั ไฟแสดงสถานะการล็
ั ัส (ในเครือ ท ัชแพด/ปุ่มต ัวเลขสมผ ่ งบางรุน ่ ) ทัชแพด/ปุ่ มตัวเลขสัมผัสช่วยให ้คุณสลับการใช ้งานระหว่าง ทัชแพดและปุ่ มตัวเลขสัมผัสได ้ ทัชแพดช่วยให ้ใช ้งานค�ำสัง่ นิว้ ได ้อย่างหลากหลายเพือ ่ ควบคุม หน ้าจอ มอบประสบการณ์การใช ้งานทีง่ า่ ยดายแก่ผู ้ใช ้ อีกทัง้ ยังจ�ำลองการท�ำงานของเมาส์ธรรมดาได ้ด ้วย หมายเหตุ: ส�ำหรับข ้อมูลเพิม ่ เติม ดูทส ี่ ว่ น การใช ้ทัชแพด ในคูม ่ อ ื ฉบับนี้ ปุ่ มตัวเลขสัมผัสใช ้ป้ อนตัวเลขได ้ หมายเหตุ: ส�ำหรับข ้อมูลเพิม ่ เติม ดูทส ี่ ว่ น การใช ้ปุ่ มตัวเลข ในคูม ่ อ ื ฉบ
ไฟแสดงการท�ำงาน ไฟแสดงการท�ำงานจะสว่างขึน ้ เมือ ่ เปิ ดใช ้งาน Notebook PC ของคุณและกะพริบช ้าๆ เมือ ่ Notebook PC ของคุณ อยูใ่ นโหมดสลีป ท ัชแพด ทัชแพดช่วยให ้ใช ้งานค�ำสัง่ นิว้ ได ้อย่างหลากหลายเพือ ่ ควบคุม หน ้าจอ มอบประสบการณ์การใช ้งานทีง่ า่ ยดายแก่ผู ้ใช ้ อีกทัง้ ยังจ�ำลองการท�ำงานของเมาส์ธรรมดาได ้ด ้วย หมายเหตุ: ส�ำหรับข ้อมูลเพิม ่ เติม ดูทส ี่ ว่ น การใช ้ทัชแพด ในคูม ่ อ ื ฉบับนี้ ั ัส แผงหน้าจอสมผ แผงหน ้าจอสัมผัสช่วยให ้คุณสลับหน ้าจออืน ่ ให ้เป็ นทัชแพดได ้ เพือ ่ ให ้คุณควบคุมได ้อย่าง
ด้านล่าง หมายเหตุ: รูปลักษณ์ด ้านล่างอาจแตกต่างกันไปขึน ้ อยูก ่ บ ั รุน ่ ค�ำเตือน! โน ้ตบุค ๊ PC ของคุณสามารถอุน ่ ขึน ้ จนถึงร ้อนได ้ในขณะทีใ่ ช ้งาน หรือในขณะทีก ่ �ำลังชาร์จแบตเตอรีแ ่ พค อย่าวางโน ้ตบุค ๊ PC ไว ้บนตัก หรือ ใกล ้ส่วนใดส่วนหนึง่ ของร่างกาย เพือ ่ ป้ องกันไม่ให ้เกิดการบาดเจ็บเนือ ่ งจาก ความร ้อน เมือ ่ ท�ำงานบนโน ้ตบุค ๊ PC ของคุณ อย่าวางไว ้บนพืน ้ ผิวทีส ่ ามารถ ปิ ดกัน ้ ช่องระบายอากาศได ้ ส�ำค ัญ! • ระยะเวลาการท�ำงานของแบตเตอรีแ ่ ตกต่างไปตามการใช ้งานและ ข ้อก�ำหนดเฉพาะของ Not
รุ่น 14” รุ่น 15” 22 Notebook PC คูม ่ อ ื อิเล็กทรอนิกส์
ช่องระบายอากาศ ช่องระบายอากาศช่วยให ้อากาศเย็นไหลเข ้าไปใน Notebook PC และ อากาศอุน ่ ออกจากเครือ ่ ง ้ ผ ้า สายเคเบิล ค�ำเตือน! ตรวจสอบให ้แน่ใจว่ากระดาษ หนังสือ เสือ หรือวัตถุอน ื่ ๆ ไม่ได ้กีดขวางช่องระบายอากาศใดๆ ไม่เช่นนัน ้ เครือ ่ งอาจร ้อนเกินไปได ้ ล�ำโพง ล�ำโพงในตัวช่วยให ้คุณได ้ยินเสียงจาก Notebook PC ของคุณ โดยตรง คุณสมบัตเิ สียงควบคุมโดยซอฟต์แวร์ Notebook PC คูม ่ อ ื อิเล็กทรอนิกส์ 23
ด้านขวา รุ่น 13” รุ่น 14” รุ่น 15” ไฟแสดงสถานะ ไฟแสดงสถานะช่วยระบุสถานะฮาร์ดแวร์ปัจจุบน ั ของ Notebook PC ของคุณ ไฟแสดงการทำ�งาน ไฟแสดงการท�ำงานจะสว่างขึน ้ เมือ ่ เปิ ดใช ้งาน Notebook PC ของคุณและกะพริบช ้าๆ เมือ ่ Notebook PC ของคุณอยูใ่ นโหมดสลีป 24 Notebook PC คูม ่ อ ื อิเล็กทรอนิกส์
ไฟแสดงสถานะการชาร์จแบตเตอรี่สองสี ไฟ LED สองสีแสดงการบ่งบอกทีม ่ องเห็นได ้ ของสถานะการชาร์จแบตเตอรี่ ดูรายละเอียด ตามตารางด ้านล่างนี:้ สี สถานะ สีขาวต่อเนือ ่ ง Notebook PC ถูกเสียบเข ้ากับ แหล่งพลังงานและพลังงาน แบตเตอรีอ ่ ยูร่ ะหว่าง 95% ถึง 100% ้ ต่อเนือ สีสม ่ ง Notebook PC ถูกเสียบเข ้ากับ แหล่งพลังงาน ก�ำลังชาร์จ แบตเตอรี่ และพลังงานแบตเตอรี่ น ้อยกว่า 95% ้ กะพริบ สีสม Notebook PC ก�ำลังท�ำงาน ในโหมดแบตเตอรี่ และพลังงาน แบตเตอรีน ่ ้อยกว่า 10% ไฟด ับ Notebook PC ก�ำลังท�ำงาน ในโหมดแบตเตอ
พอร์ต USB 2.0 พอร์ต USB (บัสอนุกรมสากล) ใช ้ร่วมกับอุปกรณ์ USB 2.0 หรือ ี้ �ำแหน่ง แฟลชไดรฟ์ HDD USB 1.1 ได ้ เช่น แป้ นพิมพ์ อุปกรณ์ชต ภายนอก ล�ำโพง กล ้อง และเครือ ่ งพิมพ์ สล็อตการ์ด MicroSD เครือ ่ งอ่านการ์ดหน่วยความจ�ำในตัวนีร้ องรับรูปแบบการ์ด MicroSD เครือ ่ งอ่านการ์ดหน่วยความจ�ำ เครือ ่ งอ่านการ์ดหน่วยความจ�ำในตัวนีร้ องรับรูปแบบการ์ด SD พอร์ตคอมโบ USB 3.1 Gen 2 Type-C™/DisplayPort (ในเครือ ่ งบางรุน ่ ) พอร์ต USB 3.1 (บัสอนุกรมสากล 3.
พอร์ต USB 3.1 Gen 2 พอร์ต USB 3.1 (บัสอนุกรมสากล 3.1) Gen 2 ให ้อัตราการถ่ายโอน ข ้อมูลสูงสุดถึง 10 Gbit/s และใช ้งานได ้กับ USB 2.
ด้านซา้ ย รุ่น 13” รุ่น 14” รุ่น 15” 28 Notebook PC คูม ่ อ ื อิเล็กทรอนิกส์
พอร์ตพล ังงาน (DC) ขาเข้า เสียบอะแดปเตอร์ไฟฟ้ าทีม ่ ากับเครือ ่ งเข ้ากับพอร์ตนีเ้ พือ ่ ชาร์จ ชุดแบตเตอรีแ ่ ละจ่ายพลังงานให ้กับ Notebook PC ของคุณ ค�ำเตือน! อะแดปเตอร์อาจอุน ่ หรือร ้อนขึน ้ ขณะใช ้งาน อย่าคลุม ่ มต่อกับ อะแดปเตอร์และวางให ้ห่างจากร่างกายของคุณขณะเชือ แหล่งพลังงาน ส�ำค ัญ! ใช ้เฉพาะอะแดปเตอร์ไฟฟ้ าทีม ่ ากับเครือ ่ งเพือ ่ ชาร์จ ชุดแบตเตอรีแ ่ ละจ่ายพลังงานให ้กับ Notebook PC ของคุณ เท่านัน ้ พอร์ต HDMI ่ มต่อ HDMI (ระบบส่งสัญญาณมัลติมเี ดีย พอร์ตนีม ้ ไี ว ้ส�ำหรับตัวเชือ ความละเอียด
พอร์ต USB 3.1 Gen 2 TYPE-CTM พอร์ต USB 3.1 (บัสอนุกรมสากล 3.1) Gen 2 TYPE-C™ ให ้อัตราการถ่ายโอนข ้อมูลสูงสุดถึง 10 Gbit/s และใช ้งานได ้กับ USB 2.0 รุน ่ เก่า หมายเหตุ: อัตราการถ่ายโอนของพอร์ตนีอ ้ าจแตกต่างกันไป ตามรุน ่ พอร์ต USB 3.1 Gen 1 พอร์ต USB 3.1 (บัสอนุกรมสากล 3.1) Gen 1 ให ้อัตราการถ่ายโอน ข ้อมูลสูงสุดถึง 5 Gbit/s และใช ้งานได ้กับ USB 2.
บทที่ 2: ้ otebook PC ของคุณ การใชN Notebook PC คูม ่ อ ื อิเล็กทรอนิกส์ 31
เริม ่ ต้นการใชง้ าน ชาร์จNotebook PC ของคุณ A. เสียบขั้วต่อเพาเวอร์ DC เข้ากับอินพุตไฟ (DC) ของNotebook PC ของคุณ B. เสียบอะแดปเตอร์เพาเวอร์ AC เข้ากับแหล่งจ่ายไฟ 100V~240V ชาร์จNotebook PC เป็ นเวลา 3 ชว่ ั โมง ก่อนทีจ ่ ะใช ้ในครัง้ แรก หมายเหตุ: อะแดปเตอร์เพาเวอร์อาจมีลก ั ษณะแตกต่างกัน ขึน ้ อยูก ่ บ ั รุน ่ และภูมภ ิ าคของคุณ ส�ำค ัญ! ข ้อมูลอะแดปเตอร์เพาเวอร์: 32 • แรงดันไฟฟ้ าขาเข ้า: 100–240Vac • ความถีไ่ ฟฟ้ าขาเข ้า: 50-60Hz • กระแสไฟฟ้ าขาออกทีร่ ะบุ: 1 3”/14”: 2.37A (45W) UMA / 3.
ส�ำค ัญ! • ค ้นหาฉลากอินพุต/เอาต์พต ุ บนNotebook PC ของคุณ และตรวจดู ให ้แน่ใจว่าตรงกับข ้อมูลอินพุต/เอาต์พต ุ ทีร่ ะบุบนอะแดปเตอร์เพาเวอร์ ของคุณ Notebook PC บางรุน ่ มีกระแสเอาต์พต ุ ทีร่ ะบุหลายระดับตาม SKU ทีว่ างจ�ำหน่าย • ี องคุณเชือ ่ มต่ออยูก ให ้แน่ใจว่าโน ้ตบุค ๊ พีซข ่ บ ั อะแดปเตอร์ไฟฟ้ าก่อนที่ จะเปิ ดเครือ ่ งในครัง้ แรก เราแนะน� ำให ้คุณใช ้เต ้าเสียบไฟฟ้ าทีม ่ ส ี ายดิน เมือ ่ ใช ้Notebook PC ของคุณด ้วยอะแดปเตอร์เพาเวอร์ • เต ้าเสียบไฟฟ้ าต ้องสามารถเข ้าถึงได ้ง่าย และอยูใ่ กล ้Noteb
ยกเพือ ่ เปิ ดหน้าจอแสดงผล กดปุ่ม Start (เริม ่ ) 34 Notebook PC คูม ่ อ ื อิเล็กทรอนิกส์
้ ัชแพด การใชท การเคลื่อนย้ายตัวชี้ คุณสามารถแทป หรือคลิกทีใ่ ดก็ได ้บนทัชแพด เพือ ่ เปิ ดท�ำงานตัวชี้ ้ นหน ้าจอ จากนัน ้ เลือ ่ นนิว้ ของคุณบนทัชแพดเพือ ่ เคลือ ่ นย ้ายตัวชีบ เลือ ่ นตามแนวนอน เลือ ่ นตามแนวตงั้ เลือ ่ นตามแนวทแยงมุม Notebook PC คูม ่ อ ื อิเล็กทรอนิกส์ 35
เกสเจอร์หนึ่งนิ้ว แทป/ด ับเบิลแทป • แทปทีแ ่ อปเพือ ่ เลือกแอป • ดับเบิลแทปทีแ ่ อปเพือ ่ เรียกใช ้งานแอป ลากและปล่อย ดับเบิลแทปรายการ จากนัน ้ เลือ ่ นนิว้ เดียวกันโดยไม่ต ้องยกออกจากทัชแพด ในการปล่อยรายการไปยังต�ำแหน่งใหม่ ให ้ยกนิว้ ของคุณออกจากทัชแพด 36 Notebook PC คูม ่ อ ื อิเล็กทรอนิกส์
คลิกซา้ ย คลิกขวา • แทปทีแ ่ อปเพือ ่ เลือกแอป คลิกปุ่ มนี้ เพือ ่ เปิ ดเมนูคลิกขวา • ดับเบิลคลิกทีแ ่ อปเพือ ่ เรียกใช ้งาน แอป หมายเหตุ: พืน ้ ทีด ่ ้านในเส ้นประ แทนต�ำแหน่งของปุ่ มเมาส์ซ ้ายและปุ่ ม เมาส์ขวาบนทัชแพด เกสเจอร์สองนิ้ว แทป ั่ คลิกขวา แทปสองนิว้ บนทัชแพด เพือ ่ จ�ำลองฟั งก์ชน Notebook PC คูม ่ อ ื อิเล็กทรอนิกส์ 37
้ /ลง) เลือ ่ นสองนิว้ (ขึน เลือ ่ นสองนิว้ (ซา้ ย/ขวา) สไลด์สองนิว้ เพือ ่ เลือ ่ นขึน ้ หรือลง สไลด์สองนิว้ เพือ ่ เลือ ่ นไปทางซ ้ายหรือขวา ซูมออก ซูมเข้า หุบนิว้ ทัง้ สองเข ้าหากันบนทัชแพด แยกนิว้ ทัง้ สองออกจากกันบนทัชแพด 38 Notebook PC คูม ่ อ ื อิเล็กทรอนิกส์
ลากและปล่อย เลือกรายการ จากนัน ้ กดปุ่ มคลิกซ ้ายค ้างไว ้ ใช ้นิว้ อืน ่ ของคุณ เลือ ่ นบนทัชแพดเพือ ่ ลากรายการ ยกนิว้ ออกจากปุ่ มเพือ ่ ปล่อยรายการ่ เจสเจอร์สามนิ้ว แทป แทปสามนิว้ บนทัชแพด เพือ ่ เรียก Cortana ขึน ้ มา Notebook PC คูม ่ อ ื อิเล็กทรอนิกส์ 39
ปัดซา้ ย/ปัดขวา ถ ้าคุณเปิ ดหลายแอป ปั ดด ้วยสามนิว้ ไปทางซ ้ายหรือขวา เพือ ่ สลับระหว่าง แอปเหล่านี้ ้ ปัดขึน ปัดลง ปั ดขึน ้ เพือ ่ ดูภาพรวมของแอป ทัง้ หมดทีเ่ ปิ ดอยูใ่ นปั จจุบน ั ปั ดลงเพือ ่ แสดงเดสก์ทอป 40 Notebook PC คูม ่ อ ื อิเล็กทรอนิกส์
เจสเจอร์สี่นิ้ว แทป ่ วิ้ บนทัชแพด เพือ แทปสีน ่ เรียก Action Center ขึน ้ มา การกำ�หนดค่าทัชแพดของคุณ 1. เรียกใช ้ All settings (การตงค่ ั้ า ทงหมด) ั้ จาก Action Center 2. เลือก Devices (อุปกรณ์) จากนัน ้ เลือก Mouse & touchpad (เมาส ์ & ท ัชแพด) 3.
้ ป้นพิมพ์ การใชแ แป้นล ัด แป้นลัดบนพีซีโน้ตบุ๊กของคุณสามารถเริ่มการทำ�งานของคำ�สั่งต่อไปนี้ เปิ ดหรือปิ ดล�ำโพง ลดระดับเสียงล�ำโพงลง เร่งระดับเสียงล�ำโพงขึน ้ ลดความสว่างของจอแสดงผล เพิม ่ ความสว่างของจอแสดงผล เปิ ดใช ้งานหรือปิ ดใช ้งานทัชแพด/แผงหน ้าจอสัมผัส ปรับความสว่างส�ำหรับไฟส่องหลังแป้ นพิมพ์ สลับโหมดการแสดงผล ่ มต่ออยู่ หมายเหตุ: ให ้แน่ใจว่าหน ้าจอทีส ่ องเเชือ กับNotebook PC ของคุณ 42 Notebook PC คูม ่ อ ื อิเล็กทรอนิกส์
เปิ ดหน ้าจอล็อค เปิ ดหรือปิ ดกล ้อง เปิ ดใช ้งานเครือ ่ งมือจับภาพหน ้าจอ เรียกใช ้ My ASUS ั แป้นฟังก์ชน ั เพือ ่ เปิ ดใช ้งานหรือปิ ดใช ้งานฟี เจอร์แป้ นฟั งก์ชน กด ั แล ้ว คุณจะสามารถเข ้าถึงแป้ นลัด เมือ ่ คุณเปิ ดใช ้งานฟี เจอร์แป้ นฟั งก์ชน ต่างๆ ได ้ โดยการกดแป้ น พร ้อมกันกับการกดแป้ นต่างๆ บนแถวด ้านบนสุด ปุ่ม Windows® 10 มีปม ุ่ Windows® พิเศษสองปุ่ มบนแป้ นพิมพ์ของNotebook PC ของคุณโดยใช ้งานตามทีแ ่ สดงด ้านล่าง: เปิ ดเมนู Start (เริม ่ ) แสดงเมนูแบบดึงลง* *ในเครือ ่ งบางรุน ่ Notebook
ปุ่มต ัวเลข หมายเหตุ: โครงร่างของปุ่ มตัวเลขอาจแตกต่างกันในแต่ละรุน ่ หรือ แต่ละ พืน ้ ท ่แต่ขน ั ้ ตอนการใช ้งานนัน ้ เหมือนกัน รุ่น 13” และ 14” (ในเครื่องบางรุ่น) กด เพือ ่ สลับระหว่างปุ่ มตัวเลขหรือทัชแพด หมายเหตุ: กดค ้างไว ้จนกระทัง่ ปุ่ มตัวเลขปรากฏขึน ้ 44 Notebook PC คูม ่ อ ื อิเล็กทรอนิกส์
รุ่น 15” ปุ่ มตัวเลขมีบนNotebook PC บางรุน ่ คุณสามารถใช ้ปุ่ มตัวเลขนี้ ส�ำหรับการป้ อนตัวเลข หรือเป็ นปุ่ ม การเลือ ่ นทิศทางของตัวชี้ กด เพือ ่ สลับระหว่างการ ใช ้ปุ่ มกดเป็ นปุ่ มตัวเลข หรือเป็ นปุ่ มบังคับทิศ ทางตัวช Notebook PC คูม ่ อ ื อิเล็กทรอนิกส์ 45
Notebook PC คูม ่ อ ื อิเล็กทรอนิกส์
บทที่ 3: การท�ำงานก ับ Windows® 10 Notebook PC คูม ่ อ ื อิเล็กทรอนิกส์ 47
การเริม ่ ต้นใชง้ านในครงแรก ั้ เมือ ่ คุณใช ้เริม ่ คอมพิวเตอร์ในครัง้ แรก จะมีหน ้าจอต่างๆ ปรากฏขึน ้ มาเป็ นชุด เพือ ่ แนะน� ำคุณในการก�ำหนดค่าการตัง้ ค่าพืน ้ ฐานต่างๆ ส�ำหรับระบบปฏิบต ั ิ การ Windows® 10 ของคุณ ในการเริม ่ ต ้นNotebook PC ในครัง้ แรก: 1. กดปุ่ มเพาเวอร์บนNotebook PC ของคุณ รอสองสามนาที จนกระทัง่ หน ้าจอตัง้ ค่าปรากฏขึน ้ 2. จากหน ้าจอตัง้ ค่า เลือกภูมภ ิ าคและภาษาทีจ ่ ะใช ้บนNotebook PC ของคุณ 3.
เมนูเริม ่ เมนูเริม ่ เป็ นทางเข ้าหลักไปยังโปรแกรม, แอป Windows®, โฟลเดอร์ และการตัง้ ค่าต่าง ๆ บนNotebook PC ของคุณ เปลีย ่ นแปลงการตงค่ ั้ าบ ัญชี ล็อค หรือออกจากบ ัญชีของคุณ เปิ ดแอปจากหน้าจอเริม ่ เปิ ดมุมมองงาน เปิ ดแอปจากทาสก์บาร์ เรียกใช้ Search (ค้นหา) เปิ ดเมนูเริม ่ เปิ ดแอปทงหมด ั้ ปิ ดเครือ ่ ง เริม ่ ใหม่ หรือสง่ ั ให้Notebook PC เข้าสูโ่ หมดสลีป เปิ ดการตงค่ ั้ า เปิ ดไฟล์เอ็กซ์พลอเรอร์ คุณสามารถใช ้เมนูเริม ่ เพือ ่ ท�ำกิจกรรมต่าง ๆ เหล่านี:้ • เริม ่ โปรแกรม หรือแอป Windows® • เปิ ดโปร
การเปิ ดเมนูเริม ่ วางต�ำแหน่งเมาส์เหนือปุ่ ม Start (เริม ่ ) ทีม ่ ม ุ ซ ้าย ล่างของเดสก์ทอปของคุณ จากนัน ้ คลิกทีป ่ ม ุ่ กดปุ่ มโลโก ้ Windows บนแป้ นพิมพ์ของคุณ การเปิ ดโปรแกรมจากเมนูเริม ่ หนึง่ ในการใช ้เมนูเริม ่ ทีบ ่ อ ่ ยทีส ่ ด ุ ก็คอ ื การเปิ ดโปรแกรมทีต ่ ด ิ ตัง้ บนNotebook PC ของคุณ วางต�ำแหน่งตัวชีเ้ มาส์ของคุณเหนือโปรแกรม จากนัน ้ คลิก เพือ ่ เปิ ดโปรแกรม ใช ้ปุ่ มลูกศรเพือ ่ เรียกดูระหว่างโปรแกรมต่าง ๆ กด เพือ ่ เปิ ดโปรแกรม หมายเหตุ: เลือก All apps (แอปทงหมด) ั้ ทีส ่ ว่ นล่างของหน ้
แอป Windows® นีค ่ อ ื แอปทีอ ่ ยูท ่ แ ี่ ผงด ้านขวาของเมนูเริม ่ และแสดงในรูปแบบสีเ่ หลีย ่ ม เรียงติดกันเพือ ่ ให ้ง่ายแก่การเข ้าถึง ่ เข ้าใช ้ยัง หมายเหตุ: แอป Windows® บางตัวจ�ำเป็ นต ้องให ้คุณลงชือ บัญชี Microsoft ของคุณก่อนทีค ่ ณ ุ จะสามารถเปิ ดใช ้งานได ้ Notebook PC คูม ่ อ ื อิเล็กทรอนิกส์ 51
การท�ำงานก ับแอป Windows® ใช ้ทัชสกรีน, ทัชแพด หรือแป้ นพิมพ์ของNotebook PC ของคุณเพือ ่ เรียกใช ้ ปรับแต่ง และปิ ดแอป การเปิ ดแอป Windows® จากเมนูเริม ่ วางต�ำแหน่งตัวชีเ้ มาส์ของคุณเหนือแอป จากนัน ้ คลิกเพือ ่ เปิ ดโปรแกรม ใช ้ปุ่ มลูกศรเพือ ่ เรียกดูระหว่างแอปต่าง ๆ กด เพือ ่ เปิ ดแอป การปร ับแต่งแอป Windows® คุณสามารถย ้าย เปลีย ่ นขนาด หรือเลิกปั กหมุดแอปไปยังทาสก์บาร์จาก หน ้าจอเริม ่ โดยใช ้ขัน ้ ตอนต่อไปนี:้ การเคลือ ่ นย้ายแอป วางต�ำแหน่งตัวชีเ้ มาส์เหนือแอป จากนัน ้ ลากและปล่อย แอปไปยังต�ำแหน่
การปร ับขนาดแอป วางต�ำแหน่งตัวชีเ้ มาส์เหนือแอป และคลิกขวา จากนัน ้ คลิก Resize (เปลีย ่ นขนาด) และเลือกขนาดสีเ่ หลีย ่ มของแอป ใช ้ปุ่ มลูกศรเพือ ่ เคลือ ่ นทีร่ ะหว่างแอปต่าง ๆ กด หรือ (ในเครือ ่ งบางรุน ่ เท่านัน ้ ), จากนัน ้ เลือก Resize (เปลีย ่ นขนาด) และเลือกขนาดไทล์ของแอป การเลิกปักหมุดแอป วางต�ำแหน่งตัวชีเ้ มาส์เหนือแอป และคลิกขวา จากนัน ้ คลิก Unpin from Start (เลิกปักหมุดจากหน้าจอเริม ่ ) ใช ้ปุ่ มลูกศรเพือ ่ เคลือ ่ นทีร่ ะหว่างแอปต่าง ๆ กด หรือ (ในเครือ ่ งบางรุน ่ เท่านัน ้ ), จากนัน ้ เล
การปักหมุดแอปไปย ังทาสก์บาร์ วางต�ำแหน่งตัวชีเ้ มาส์เหนือแอป และคลิกขวา จากนัน ้ คลิก Pin to taskbar (ปักหมุดไปย ังทาสก์บาร์) ใช ้ปุ่ มลูกศรเพือ ่ เคลือ ่ นทีร่ ะหว่างแอปต่าง ๆ กด หรือ (ในเครือ ่ งบางรุน ่ เท่านัน ้ ) จากนัน ้ เลือก Pin to taskbar (ปักหมุดไปย ังทาสก์บาร์) ้ บนหน้าจอเริม การปักหมุดแอปมากขึน ่ จาก All apps (แอปทงหมด) ั้ วางต�ำแหน่งตัวชีเ้ มาส์ของ คุณเหนือแอปทีค ่ ณ ุ ต ้องการเพิม ่ ไปยังเมนูเริม ่ และคลิกขวา จากนัน ้ แทป Pin to Start (ปักหมุดไปย ังหน้าจอเริม ่ ) จาก All apps (แอปทงหมด) ั้
มุมมองงาน สลับระหว่างแอปและโปรแกรมทีเ่ ปิ ดอยูโ่ ดยใช ้คุณสมบัตม ิ ม ุ มองงาน นอกจากนีค ้ ณ ุ ยังสามารถใช ้มุมมองงานเพือ ่ สลับระหว่างเดสก์ทอปต่าง ๆ ได ้ด ้วย การเปิ ดมุมมองงาน วางต�ำแหน่งเมาส์เหนือไอคอน คลิกไอคอน กด Notebook PC คูม ่ อ ื อิเล็กทรอนิกส์ บนทาสก์บาร์ และ บนแป้ นพิมพ์ 55
คุณสมบ ัติสแน็ ป คุณสมบัตส ิ แน็ ป แสดงแอปเคียงข ้างกัน ช่วยให ้คุณท�ำงานหรือสลับไป มาระหว่างแอปต่าง ๆ ได ้ สแน็ ปฮ็อตสป็อต คุณสามารถลากและปล่อยแอปไปยังฮ็อตสป็ อตเหล่านี้ เพือ ่ สแน็ ป แอปลงในต�ำแหน่ง 56 Notebook PC คูม ่ อ ื อิเล็กทรอนิกส์
้ แน็ ป การใชส 1. เปิ ดแอปทีค ่ ณ ุ ต ้องการสแน็ ป 2. ่ ของแอปของคุณ และปล่อยแอปไปยัง ลากแถบชือ ขอบของหน ้าจอเพือ ่ สแน็ ป 3. เปิ ดอีกแอปหนึง่ และท�ำขัน ้ ตอนด ้านบนซ�้ำ เพือ ่ สแน็ ปอีกแอปหนึง่ 1. เปิ ดแอปทีค ่ ณ ุ ต ้องการสแน็ ป 2. กดปุ่ ม แอป 3.
ศูนย์การกระท�ำ ศูนย์การกระท�ำ รวมการแจ ้งเตือนจากแอปต่าง ๆ เพือ ่ ใส่ไว ้ในสถานที่ เดียวซึง่ คุณสามารถด�ำเนินการต่าง ๆ กับการแจ ้งเตือนเหล่านีไ ้ ด้ นอกจากนี้ ยังมีการเลือก การกระท�ำด่วน ทีม ่ ป ี ระโยชน์มากด ้านล่าง ให ้ใช ้ด ้วย ้ น การเรียกใชศ ู ย์การกระท�ำ วางต�ำแหน่งเมาส์เหนือไอคอน และคลิกไอคอน กด 58 บนทาสก์บาร์ บนแป้ นพิมพ์ Notebook PC คูม ่ อ ื อิเล็กทรอนิกส์
ทางล ัดแป้นพิมพ์อน ื่ ๆ นอกจากนี้ ด ้วยการใช ้แป้ นพิมพ์ของคุณ คุณยังสามารถใช ้ทางลัดต่อไป ่ และเคลือ นีเ้ พือ ่ ช่วยคุณเปิ ดแอพพลิเคชัน ่ นทีใ่ น Windows® 10 ได ้ด ้วย เปิ ด Start menu (เมนูเริม ่ ) เรียกใช ้ Action Center (ศูนย์การกระท�ำ) เปิ ดเดสก์ทอป ์ ลอเรอร์) เปิ ด File Explorer (ไฟล์เอ็กซพ เปิ ด Settings (การตงค่ ั้ า) ่ มต่อ) เรียกใช ้แผง Connect (เชือ เปิ ดหน ้าจอล็อค ย่อหน ้าต่างทีแ ่ อกทีฟปั จจุบน ั ให ้เล็กทีส ่ ด ุ Notebook PC คูม ่ อ ื อิเล็กทรอนิกส์ 59
เรียกใช ้ Search (ค้นหา) เปิ ดหน ้า Project (โครงการ) เปิ ดหน ้าต่างร ัน เปิ ดศูนย์การเข้าถึงอย่างง่าย เปิ ดเมนูเนือ ้ หาของปุ่ ม เริม ่ เปิ ดไอคอนแว่นขยาย และซูมในหน ้าจอของคุณ ซูมหน ้าจอของคุณออก 60 Notebook PC คูม ่ อ ื อิเล็กทรอนิกส์
ื่ มต่อไปย ังเครือข่ายไร้สาย การเชอ ื่ มต่อ Wi-Fi การเชอ ่ ผ่านไซต์เครือข่าย เข ้าถึงอีเมล ท่องอินเทอร์เน็ ต และแชร์แอพพลิเคชัน ่ มต่อ Wi-Fi สังคมออนไลน์ โดยใช ้Notebook PC ของคุณผ่านการเชือ สิง่ ส�ำค ัญ! Airplane mode (โหมดเครือ ่ งบิน) จะปิ ดการใช ้งาน คุณสมบัตน ิ ี้ ให ้แน่ใจว่าปิ ด Airplane mode (โหมดเครือ ่ งบิน) แล ้ว ่ มต่อ Wi-Fi ก่อนเปิ ดใช ้การเชือ ่ มต่อ Wi-Fi การเชือ ่ มต่อNotebook PC ของคุณเข ้ากับเครือข่าย Wi-Fi โดยใช ้ขัน เชือ ้ ตอน ต่อไปนี:้ 1. เลือกไอคอน จากทาสก์บาร์ 2. เลือกไอคอน 3.
บลูทธ ู ใช ้บลูทธ ู เพือ ่ ถ่ายโอนข ้อมูลไร ้สายแบบง่ายๆ กับอุปกรณ์ทม ี่ ค ี ณ ุ สมบัต ิ บลูทธ ู อืน ่ สิง่ ส�ำค ัญ! Airplane mode (โหมดเครือ ่ งบิน) จะปิ ดการใช ้งาน คุณสมบัตน ิ ี้ ให ้แน่ใจว่าAirplane mode (โหมดเครือ ่ งบิน) แล ้วก่อน ่ มต่อบลูทธ เปิ ดใช ้การเชือ ู การจ ับคูก ่ ับอุปกรณ์ทม ี่ ค ี ณ ุ สมบ ัติบลูทธ ู อืน ่ คุณจ�ำเป็ นต ้องจับคูN ่ otebook PC ของคุณกับอุปกรณ์ทม ี่ ค ี ณ ุ สมบัต ิ ่ มต่ออุปกรณ์ของคุณ บลูทธ ู อืน ่ เพือ ่ เปิ ดใช ้งานการถ่ายโอนข ้อมูล เชือ โดยใช ้ขัน ้ ตอนต่อไปนี:้ 1.
โหมดเครือ ่ งบิน ่ สารไร ้สาย ช่วยให ้คุณ Airplane mode (โหมดการบิน) จะปิ ดท�ำงานการสือ ใช ้Notebook PC ได ้อย่างปลอดภัยในระหว่างทีอ ่ ยูบ ่ นเครือ ่ งบิน หมายเหตุ: ติดต่อพนักงานสายการบินของคุณ เพือ ่ เรียนรู ้เกีย ่ วกับบริการ บนเครือ ่ งทีเ่ กีย ่ วข ้องทีส ่ ามารถใช ้ได ้ และข ้อจ�ำกัดต่างๆ ทีต ่ ้องปฏิบต ั ต ิ าม เมือ ่ ใช ้Notebook PC ของคุณในเทีย ่ วบิน การเปิ ดโหมดการบิน 1. เรียกใช ้ Action Center (ศูนย์การกระท�ำ) จากทาสก์บาร์ 2. เลือกไอคอน เพือ ่ เปิ ดท�ำงาน โหมดการบิน การปิ ดโหมดการบิน 1.
การปิ ดเครือ ่ งNotebook PC ของคุณ คุณสามารถปิ ดเครือ ่ งNotebook PC ของคุณโดยการด�ำเนินการอย่างใด อย่างหนึง่ ต่อไปนี:้ 64 • เปิ ดเมนู Start (เริม ่ ) จากนัน ้ เลือก > Shut down (ปิ ดเครือ ่ ง) เพือ ่ ท�ำการปิ ดเครือ ่ ง ตามปกติ • จากหน ้าจอล็อกอิน เลือก (ปิ ดเครือ ่ ง) • กด เพือ ่ เปิ ดเมนู Shut Down (ปิ ดเครือ ่ ง) ของ Windows เลือก Shut Down (ปิ ดเครือ ่ ง) จากรายการแบบดึงลง จาก นัน ้ เลือก OK (ตกลง) • ถ ้าNotebook PC ของคุณค ้าง, ให ้กดปุ่ ม เพาเวอร์ค ้างไว ้เป็ นเวลาสิบ (10) วินาที จน กระทัง่
การสง่ ั ให้Notebook PC เข้าสูโ่ หมดสลีป ในการสัง่ ให ้Notebook PC เข ้าสูโ่ หมดสลีป: • เปิ ดเมนู Start (เริม ่ ) จากนัน ้ เลือก > Sleep (สลีป) เพือ ่ สัง่ ให ้Notebook PC เข ้าสู่ โหมดสลีป • จากหน ้าจอล็อกอิน เลือก > Sleep (สลีป) กด เพือ ่ เปิ ดเมนู Shut Down (ปิ ด เครือ ่ ง) ของ Windows เลือก Sleep (สลีป) จากรายการ แบบดึงลง จากนัน ้ เลือก OK (ตกลง) หมายเหตุ: คุณยังสามารถสัง่ ให ้Notebook PC ของคุณเข ้าสูโ่ หมดสลีป โดยการกดปุ่ มเพาเวอร์หนึง่ ครัง้ Notebook PC คูม ่ อ ื อิเล็กทรอนิกส์ 65
Notebook PC คูม ่ อ ื อิเล็กทรอนิกส์
บทที่ 4: การทดสอบต ัวเองเมือ่ เปิ ดเครือ่ ง (POST) Notebook PC คูม ่ อ ื อิเล็กทรอนิกส์ 67
การทดสอบต ัวเองเมือ ่ เปิ ดเครือ ่ ง (POST) การทดสอบตัวเองเมือ ่ เปิ ดเครือ ่ ง (POST) เป็ นชุดของการทดสอบ วินจ ิ ฉั ยทีค ่ วบคุมโดยซอฟต์แวร์ ซึง่ รันเมือคุณเปิ ดเครือ ่ ง หรือ เริม ่ Notebook PC ใหม่ ซอฟต์แวร์ทค ี่ วบคุม POST ถูกติดตัง้ เป็ นส่วน ถาวรของสถาปั ตยกรรมของNotebook PC การใช ้ POST เพือ ่ เข้าถึง BIOS และการ แก้ไขปัญหา ระหว่างกระบวนการ POST, คุณสามารถเข ้าถึงการตัง้ ค่า BIOS ั่ ของNotebook PC หรือรันตัวเลือกการแก ้ไขปั ญหา โดยใช ้ปุ่ มฟั งก์ชน ของคุณ คุณสามารถดูข ้อมูลต่อไปนี้ ส�ำหรับรายละเอียด
การเข้าถึง BIOS เปิ ดหน ้าจอการตัง้ ค่า BIOS โดยใช ้วิธก ี ารใดวิธก ี ารหนึง่ ดังนี:้ • เริม ่ Notebook PC ของคุณใหม่ จากนัน ้ กด กระบวนการ POST • เปิ ดเมนูเริม ่ และเลือก Settings (การตงค่ ั้ า) > Update & security (อ ัปเดต & ระบบร ักษาความปลอดภ ัย) > Recovery (การกูค ้ น ื ) จากนัน ้ เลือก Restart now (เริม ่ ่ น ้าจอ การ ๋ วนี)้ ภายใต ้ การเริม ใหม่เดีย ่ ต ้นขัน ้ สูง เมือ ่ คุณเข ้าสูห เริม ่ ต ้นขัน ้ สูง เลือก Troubleshoot (การแก้ไขปัญหา) > Advanced options (ต ัวเลือกขนสู ั้ ง) > UEFI Firmware Set
การตงค่ ั้ า BIOS หมายเหตุ: หน ้าจอ BIOS ในส่วนนีใ้ ช ้เพือ ่ การอ ้างอิงเท่านัน ้ หน ้าจอจริง อาจแตกต่างกันไปตามรุน ่ และพืน ้ ทีท ่ จ ี่ ัดจ�ำหน่าย บูต เมนูนอ ี้ นุญาตให ้คุณตัง้ ค่าล�ำดับความส�ำคัญของตัวเลือกการบูต คุณสามารถอ ้างถึงกระบวนการต่อไปนี้ ในขณะทีต ่ งั ้ ค่าล�ำดับความส�ำคัญของการบูตของคุณ บนหน ้าจอ Boot (บูต), เลือก Boot Option #1 (ต ัวเลือก การบูต #1) 1. Main Aptio Setup Utility - Copyright (C) 2018 American Megatrends, Inc.
กด และเลือกอุปกรณ์เป็ น Boot Option #1 (ต ัว เลือกการบูต #1) 2. Main Aptio Setup Utility - Copyright (C) 2018 American Megatrends, Inc. Advanced Boot Security Save & Exit Fast Boot [Enabled] Boot Option Priorities Boot Option #1 [Windows Boot Manager] Add New Boot Option Delete Boot Option Sets the system boot order Boot Option #1 Windows Boot Manager Disabled : →← ↑↓ : Enter: +/— : F1 : F9 : F10 : ESC : Select Screen Select Item Select Change Opt.
ความปลอดภ ัย เมนูนอ ี้ นุญาตให ้คุณตัง้ ค่ารหัสผ่านผู ้ดูแลระบบ และรหัสผ่านผู ้ใช ้ของโน ้ต บุต ๊ PC ของคุณ นอกจากนี้ ยังอนุญาตให ้คุณควบคุมการเข ้าถึงไปยังฮาร์ด ่ มต่ออินพุต/เอาต์พต ่ มต่อ USB ดิสก์ไดรฟ์ , ระบบเชือ ุ (I/O) และระบบเชือ ของNotebook PC ของคุณอีกด ้วย หมายเหตุ: Main • ถ ้าคุณติดตัง้ User Password (รห ัสผ่านผูใ้ ช้), คุณจะถูกขอให ้ป้ อนรหัสนีก ้ อ ่ นทีจ ่ ะเข ้าสูร่ ะบบปฏิบต ั ก ิ าร ของNotebook PC ของคุณ • ถ ้าคุณติดตัง้ Administrator Password (รห ัสผ่านผูด ้ แ ู ล ระบบ), คุณจะถูกขอให ้ป
ในการตัง้ ค่ารหัสผ่าน: 1. บนหน ้าจอ Security (ความปลอดภ ัย), เลือก Administrator Password (รห ัสผ่านผูค ้ วบคุมระบบ) หรือ User Password (รห ัสผ่านผูใ้ ช)้ 2. เลือกแต่ละรายการ และกด 3. พิมพ์รหัสผ่านอีกครัง้ และกด เพือ ่ เลือกอุปกรณ์ ในการล ้างรหัสผ่าน: 1. บนหน ้าจอ Security (ความปลอดภ ัย), เลือก Administrator Password (รห ัสผ่านผูค ้ วบคุมระบบ) หรือ User Password (รห ัสผ่านผูใ้ ช)้ 2. ป้ อนรหัสผ่านปั จจุบน ั และกด 3.
ระบบป้องกันอินเตอร์เฟซ I/O ในเมนู Security (ระบบรักษาความปลอดภัย), ่ มต่อ คุณสามารถเข ้าถึงระบบรักษาความปลอดภัยระบบเชือ ั่ ระบบเชือ ่ มต่อบางอย่าง I/O เพือ ่ ล็อคหรือปลดล็อคฟั งก์ชน ของNotebook PC ของคุณได ้ Main Aptio Setup Utility - Copyright (C) 2018 American Megatrends, Inc. Advanced Boot Security Save & Exit I/O Interface Security LAN Network Interface Wireless Network Interface HD AUDIO Interface USB Interface Security If Locked, LAN controller will be disabled.
ระบบป้องกันอินเตอร์เฟซ USB ่ มต่อ USB นอกจากนี้ คุณยังสามารถเข ้าถึงระบบเชือ เพือ ่ ล็อคหรือปลดล็อคพอร์ต และอุปกรณ์ตา่ งๆ ผ่านเมนู ่ ม I/O Interface Security (ระบบรักษาความปลอดภัยระบบเชือ ต่อ I/O) ได ้ด ้วย Main Aptio Setup Utility - Copyright (C) 2018 American Megatrends, Inc.
บ ันทึก & ออก ในการเก็บการตัง้ ค่าการก�ำหนค่าต่างๆ ของคุณ, เลือก Save Changes and Exit (บ ันทึกการเปลีย ่ นแปลงและออก) ก่อนทีจ ่ ะ ออกจาก BIOS Main Aptio Setup Utility - Copyright (C) 2018 American Megatrends, Inc. Advanced Boot Security Save & Exit Save Changes and Exit Discard Changes and Exit Exit system setup after saving the changes.
การอัปเดต BIOS 1. ตรวจสอบรุ่นที่แน่นอนของNotebook PC จากนั้นดาวน์โหลดไฟล์ BIOS ล่าสุดสำ�หรับรุ่นของคุณจากเว็บไซต์ ASUS 2. บันทึกสำ�เนาของไฟล์ BIOS ที่ดาวน์โหลดมาไปยังแฟลชดิสก์ไดรฟ์ 3. เชื่อมต่อแฟลชดิสก์ไดรฟ์เข้ากับNotebook PC ของคุณ 4. เริ่มNotebook PC ของคุณใหม่ จากนั้นกด กระบวนการ POST 5. จากเมนู BIOS เลือก Advanced (ขนสู ั้ ง) > ASUS EZ Flash ระหว่าง 3 Utility (ยูทล ิ ต ิ ้ี ASUS EZ Flash 3) จากนัน ้ กด Main Aptio Setup Utility - Copyright (C) 2018 American Megatrends, Inc.
6. ค ้นหาไฟล์ BIOS ทีด ่ าวน์โหลดมาในแฟลชดิสก์ไดรฟ์ จากนัน ้ กด ASUSTek EasyFlash Utility FLASH TYPE : Generic Flash Type Current BIOS Platform : Version : New BIOS UX334 Platform : 200 Version : Build Date : 08/15/2018 Unknown Unknown Build Date : Unknown Build Time : 11:51:05 Build Time : Unknown FSO 0 EFI FS1
FS2 FS3 FS4 [←→] : Switch 7.การกูค ้ น ื ระบบของคุณ การใช ้ตัวเลือกการกู ้คืนบนNotebook PC ของคุณ ช่วยให ้คุณกู ้คืนระบบ กลับเป็ นสถานะ ดัง้ เดิม หรือเพียงรีเฟรชการตัง้ ค่าของระบบเพือ ่ ช่วยปรับปรุง สมรรถนะให ้ดีขน ึ้ ก็ได ้ ส�ำค ัญ! • ส�ำรองไฟล์ข ้อมูลของคุณทัง้ หมดก่อนทีจ ่ ะใช ้ตัวเลือกการกู ้คืนใด ๆ บนNotebook PC ของคุณ • จดการตัง้ ค่าต่าง ๆ ทีก ่ �ำหนดเองทีม ่ ค ี วามส�ำคัญ เช่น การตัง้ ค่าเครือข่าย ่ ผู ้ใช ้ และรหัสผ่านต่าง ๆ เพือ ชือ ่ ป้ องกันข ้อมูลสูญหาย • ให ้แน่ใจว่าNotebook PC ของคุณเสียบปลั๊กอยูก ่ บ ั แหล่งจ่ายไฟ
• Advanced startup (เริม ่ ต้นขนสู ั้ ง) - การใช ้ตัวเลือกนี้ อนุญาตให ้คุณใช ้ตัวเลือกการกู ้คืน ขัน ้ สูงอืน ่ ๆ บนNotebook PC ของคุณ เช่น: - ่ มต่อเครือข่าย หรือแผ่น DVD การใช ้ USB ไดรฟ์ , การเชือ การ กู ้คืน Windows เพือ ่ เริม ่ Notebook PC ของคุณ - การใช ้ Troubleshoot (การแก้ไขปัญหา) เพือ ่ เปิ ดใช ้ งานตัวเลือกการกู ้คืนขัน ้ สูงเหล่านี:้ กู ้คืนระบบ, การกู ้คืน อิมเมจระบบ, ซ่อมการเริม ่ ต ้น, พร็อมต์ค�ำสัง่ , การตัง้ ค่า เฟิ รม ์ แวร์ UEFI, การตัง้ ค่าการเริม ่ ต ้น การด�ำเนินการต ัวเลือกการก
2.
Notebook PC คูม ่ อ ื อิเล็กทรอนิกส์
เทคนิคและค�ำถามทีพ ่ บบ่อยๆ Notebook PC คูม ่ อ ื อิเล็กทรอนิกส์ 83
� หร ับ Notebook PC เทคนิคทีม ่ ป ี ระโยชน์สำ ของคุณ เพือ ่ ช่วยให ้คุณใช ้ Notebook PC ของคุณให ้เกิดประโยชน์สงู สุด คงไว ้ ซึง่ สมรรถนะระบบทีส ่ งู และมัน ่ ใจว่าข ้อมูลทัง้ หมดของคุณถูกเก็บอย่าง ปลอดภัย ด ้านล่างนีค ้ อ ื เทคนิคทีม ่ ป ี ระโยชน์บางอย่างทีค ่ ณ ุ ควรปฏิบต ั ิ ตาม • อัปเดต Windows® อย่างสม�ำ่ เสมอ เพือ ่ ให ้มัน ่ ใจว่าแอปพลิเคชั่ นของคุณมีการตัง้ ค่าด ้านความปลอดภัยล่าสุด • ใช ้ซอฟต์แวร์ป้องกันไวรัส เพือ ่ ป้ องกันข ้อมูลของคุณ และอัปเดต ซอฟต์แวร์อย่างสม�ำ่ เสมอด ้วย • ถ ้าไม่จ�ำเป็
ค�ำถามทีพ ่ บบ่อยๆ ของฮาร์ดแวร์ 1. จุดสีดำ � หรือบางครงเรี ั้ ยกว่าจุดสี ปรากฏบนหน้าจอเมือ ่ เปิ ด Notebook PC ควรท�ำอย่างไร ควรท�ำอย่างไร แม ้ว่าโดยปกติจด ุ สีเหล่านีจ ้ ะปรากฏบนหน ้าจอ แต่กไ ็ ม่สง่ ผลก ระทบกับระบบของคุณ ถ ้าเหตุการณ์นย ี้ งั ด�ำเนินต่อไป และต่อมา ภายหลังส่งผลกระทบกับระบบ ให ้ปรึกษาศูนย์บริการ ASUS ทีไ่ ด ้ รับการ แต่งตัง้ 2.
4. 5. ั ้ มา มี สญญาณแสดงสถานะการชาร์ จแบตเตอรีไ่ ม่ตด ิ ขึน อะไรผิดปกติ • ่ มต่อชุดแบตเตอรีห ตรวจสอบว่าเชือ ่ รืออะแดปเตอร์ไฟฟ้ า อยูอ ่ ย่างถูกต ้อง คุณอาจลองถอดอะแดปเตอร์ไฟฟ้ าหรือ ่ มต่อกลับไปยัง ชุดแบตเตอรีอ ่ อก รอหนึง่ นาที จากนัน ้ เชือ เต ้าเสียบไฟฟ้ าและ Notebook PC • ถ ้าปั ญหายังคงมีอยู่ ให ้ติดต่อศูนย์บริการ ASUS ในประเทศ ของคุณเพือ ่ ขอความช่วยเหลือ ท�ำไมท ัชแพดไม่ทำ � งาน กด 6.
8.
ค�ำถามทีพ ่ บบ่อยๆ ของซอฟต์แวร์ 1. เมือ ่ เปิ ดNotebook PC ของฉ ัน ไฟแสดงสถานะเพาเวอร์ตด ิ ้ แต่ไฟแสดงสถานะกิจกรรมของไดรฟ์ไม่ตด ขึน ิ ระบบไม่บต ู ด้วย ต้องท�ำอย่างไรในการแก้ไข คุณสามารถลองท�ำตามค�ำแนะน� ำต่อไปนี้ 2.
4. ้ มา จะแก้ไขได้อย่างไร Notebook PC ของฉ ันไม่บต ู ขึน คุณสามารถลองท�ำตามค�ำแนะน� ำต่อไปนี้ 5.
Notebook PC คูม ่ อ ื อิเล็กทรอนิกส์
ภาคผนวก Notebook PC คูม ่ อ ื อิเล็กทรอนิกส์ 91
ความสอดคล้องของโมเด็มภายใน Notebook PC ทีเ่ ป็ นรุน ่ มีโมเด็มภายในสอดคล ้องกับ JATE (ญีป ่ น), ุ่ FCC (สหรัฐอเมริกา, แคนาดา, เกาหลี, ไต ้หวัน) และ CTR21 โมเด็มภายในดังกล่าวได ้รับ ่ มต่อ การรับรองว่าสอดคล ้องกับค�ำตัดสินของคณะกรรมการ 98/482/EC ส�ำหรับการเชือ เทอร์มน ิ ัลเดีย ่ วเข ้ากับเครือข่ายโทรศัพท์สลับสายสาธารณะ (PSTN) ส�ำหรับประเทศ ในสหภาพยุโรป อย่างไรก็ตาม เนือ ่ งจากความแตกต่างระหว่าง PSTN แต่ละแห่งใน ประเทศต่างๆ การรับรองจึงไม่ได ้เป็ นการประกันถึงการท�ำงานทีส ่ �ำเร็จในจุดปลายทาง ของเครือข่าย PST
การประกาศความเข้าก ันได้ของเครือข่าย ถ ้อยแถลงทีส ่ ร ้างโดยผู ้ผลิตไปยังบุคคล และผู ้จ�ำหน่ายทีแ ่ จ ้งให ้ทราบ: “การประกาศนี้ จะระบุเครือข่ายซึง่ อุปกรณ์ได ้รับการออกแบบมาเพือ ่ ให ้ท�ำงานด ้วย และเครือข่ายทีม ่ ี การแจ ้งเตือนว่าอุปกรณ์อาจมีความยุง่ ยากในการท�ำงานร่วมกัน” ถ ้อยแถลงทีส ่ ร ้างโดยผู ้ผลิตไปยังผู ้ใช ้: “การประกาศนี้ จะระบุเครือข่ายซึง่ อุปกรณ์ได ้ รับการออกแบบมาเพือ ่ ให ้ท�ำงานด ้วย และเครือข่ายทีม ่ ก ี ารแจ ้งเตือนว่าอุปกรณ์อาจมี ความยุง่ ยากในการท�ำงานร่วมกัน” นอกจากนี้ ผู ้ผลิตยังต ้อ
ตารางนี้แสดงประเทศต่างๆที่อยู่ภายใต้มาตรฐาน CTR21 ในขณะนี้ ประเทศ มีการใช้ ทดสอบเพิ่มเติม ออสเตรียออสเตรีย1 ใช่ ไม่ เบลเยี่ยม ใช่ ไม่ สาธารณรัฐเชค ไม่ ไม่ใช้ เดนมาร์ก ใช่ ใช่ ฟินแลนด์ ใช่ ไม่ ฝรั่งเศส ใช่ ไม่ เยอรมนี ใช่ ไม่ กรีซ ใช่ ไม่ ฮังการี ไม่ ไม่ใช้ ไอซ์แลนด์ ใช่ ไม่ ไอร์แลนด์ ใช่ ไม่ อิตาลี ยังคงรออยู่ ยังคงรออยู่ อิสราเอล ไม่ ไม่ ลิกเทนสไตน์ ใช่ ไม่ ลักเซมเ
ข ้อมูลนีถ ้ ก ู คัดลอกมาจาก CETECOM และเตรียมให ้โดยไม่มก ี ารรับผิดชอบใดๆ ส�ำหรับข ้อมูลอัปเดตของตารางนี้ คุณสามารถดูข ้อมูลได ้ที่ http://www.cetecom.de/ technologies/ctr_21.
• ่ มต่ออุปกรณ์ลงในเต ้าเสียบในวงจรทีแ เชือ ่ ตกต่างจากทีใ่ ช ้เสียบเครือ ่ งรับอยู่ • ปรึกษาตัวแทนจ�ำหน่าย หรือช่างเทคนิควิทยุ / โทรทัศน์ทม ี่ ป ี ระสบการณ์เพือ ่ ขอความช่วยเหลือ ค�ำเตือน! จ�ำเป็ นต ้องใช ้สายไฟชนิดทีม ่ ฉ ี นวนหุ ้ม เพือ ่ ให ้ข ้อจ�ำกัดการแผ่พลังงานตรง ตามกฎของ FCC และเพือ ่ ป้ องกันการรบกวนต่อการรับสัญญาณวิทยุ และโทรทัศน์ทอ ี่ ยู่ ่ ม ใกล ้เคียง จ�ำเป็ นต ้องใช ้เฉพาะสาย ไฟทีใ่ ห ้มา ใช ้เฉพาะสายเคเบิลทีม ่ ฉ ี นวนหุ ้มเพือ ่ เชือ ต่ออุปกรณ์ I/O เข ้ากับอุปกรณ์นี้ คุณต ้องระมัดระวังว
ั ัสถูก RF (SAR) ข้อมูลเกีย ่ วก ับการสมผ อุปกรณ์น ้มีคณ ุ สมบัตส ิ อดคล ้องกับข ้อก�ำหนดของรัฐบาลส�ำหรับการสัมผัสถูกคลืนวิทยุ อุปกรณ์นี ได ้รับการออกแบบและผลิตขึนไม่ให ้ปล่อยพลังงานเกินขีดจ�ำกัดส�ำหรับการสัมผัสถูก ่ สารแห่งชาติของรัฐบาลสหรัฐอเมริกา พลังงานความถีว่ ท ิ ยุ (RF)ทีก ่ �ำหนดโดยคณะกรรมการการสือ มาตรฐานการสัมผัสถูกส�ำหรับอุปกรณ์ไร ้สาย ใช ้หน่วยการวัดทีร่ ู ้จักกันว่า อัตรา การดูดกลืนพลังงานจ�ำเพาะ หรือ SAR ขีดจ�ำกัด SAR ทีก ่ �ำหนดโดย FCC คือ 1.6 วัตต์/กก.
ประกาศด้านความปลอดภ ัยของ UL ่ สารโทรคมนาคม (โทรศัพท์) บังคับใช ้ UL 1459 ซึง่ ครอบคลุมถึงอุปกรณ์การสือ ่ มต่อทางไฟฟ้ าไปยังเครือข่ายการสือ ่ สารโทรคมนาคม ซึง่ มี ทีอ ่ อกแบบมาเพือ ่ เชือ แรงดันไฟฟ้ าในการท�ำงานถึงพืน ้ ดินไม่เกิน 200V peak, 300V peak-to-peak และ 105V rms, และมีการติดตัง้ หรือใช ้โดยสอดคล ้องกับหลักปฏิบต ั ท ิ างไฟฟ้ าแห่งชาติ (NFPA 70) เมือ ่ ใช ้โมเด็มของโน ้ตบุค ๊ พีซ ี คุณต ้องปฏิบต ั ต ิ ามข ้อควรระวังเพือ ่ ความปลอดภัย ่ งทีจ่ ะเกิดไฟไหม ้, ไฟฟ้ าช็อต และการบาดเจ็บต่อ พืน ้ ฐานเสมอ เพ
ข้อก�ำหนดด้านความปลอดภ ัยทางไฟฟ้า ผลิตภัณฑ์ที่ใช้กระแสไฟฟ้าสูงถึง 6A และมีน้ำ�หนักมากกว่า 3 กก. ต้องใช้สายไฟที่ได้รับการรับรองที่มากกว่า หรือเท่ากับ: H05VV-F, 3G, 0.75mm2 หรือ H05VV-F, 2G, 0.75mm2 ประกาศเครื่องรับสัญญาณ TV บันทึกถึงผู้ติดตั้งระบบ CATV—ระบบกระจายสายเคเบิลควรได้รับการต่อสายดิน (กราวด์) ตาม มาตรฐาน ANSI/NFPA 70 รัฐบัญญัติ National Electrical Code (NEC) โดยเฉพาะ Section 820.
� หร ับโน้ตบุค ข้อควรระว ังของชาวนอร์ดก ิ (สำ ๊ ที่ ้ บตเตอรีล ใชแ ่ เิ ธียมอิออน) CAUTION! Danger of explosion if battery is incorrectly replaced. Replace only with the same or equivalent type recommended by the manufacturer. Dispose of used batteries according to the manufacturer’s instructions. (English) ATTENZIONE! Rischio di esplosione della batteria se sostituita in modo errato. Sostituire la batteria con un una di tipo uguale o equivalente consigliata dalla fabbrica.
� หร ับNotebook PC ทีม การอนุม ัติ CTR 21 (สำ ่ ี โมเด็มในต ัว) Dansk Nederlands English Suomi Français Notebook PC คูม ่ อ ื อิเล็กทรอนิกส์ 101
Deutsch Ελληνικά Italiano Português Español Svenska 102 Notebook PC คูม ่ อ ื อิเล็กทรอนิกส์
ค�ำประกาศการปฏิบ ัติตามระเบียบข้อบ ังค ับด้าน สงิ่ แวดล้อมของผลิตภ ัณฑ์ ASUS ด�ำเนินการตามแนวคิดการออกแบบสีเขียว เพือ ่ ออกแบบและผลิตผลิตภัณฑ์ ของเรา และท�ำให ้มัน ่ ใจว่าแต่ละสถานะของรอบชีวต ิ ผลิตภัณฑ์ของผลิตภัณฑ์ ASUS นัน ้ สอดคล ้องกับระเบียบข ้อบังคับด ้านสิง่ แวดล ้อมของโลก นอกจากนี้ ASUS ยังเปิ ด เผยข ้อมูลทีเ่ กีย ่ วข ้องกับข ้อก�ำหนดของระเบียบข ้อบังคับด ้วย โปรดดูท ี่ http://csr.asus.com/Compliance.
การรีไซเคิลของ ASUS / บริการน�ำกล ับ โปรแกรมการรีไซเคิลและน� ำกลับของ ASUS มาจากความมุง่ มัน ่ ของเราในการสร ้าง ่ ว่าการให ้ทางแก ้ปั ญหาแก่ มาตรฐานสูงสุดส�ำหรับการปกป้ องสิง่ แวดล ้อมของเรา เราเชือ ้ ส่วนอืน ลูกค ้าของเรา จะท�ำให ้สามารถรีไซเคิลผลิตภัณฑ์ แบตเตอรี่ และชิน ่ ๆ รวมทัง้ วัสดุ บรรจุหบ ี ห่อของเราอย่างมีความรับผิดชอบ โปรดไปที่ http://csr.asus.com/english/Takeback.
ผลิตภ ัณฑ์ทผ ี่ า่ นการร ับรอง ENERGY STAR ENERGY STAR เป็ นโครงการทีท ่ �ำงานร่วมกันระหว่างตัวแทนการปก ป้ องสิง่ แวดล ้อมของสหรัฐอเมริกา และกระทรวงพลังงานของสหรัฐ อเมริกา เพือ ่ ช่วยพวกเราทุกคนประหยัดเงิน และป้ องกันสิง่ แวดล ้อม ด ้วยการใช ้ผลิตภัณฑ์และหลักปฏิบต ั ท ิ ม ี่ ป ี ระสิทธิภาพด ้านพลังงาน ผลิตภัณฑ์ ASUS ทุกรุน ่ ทีม ่ โี ลโก ้ ENERGY STAR สอดคล ้องกับมาตรฐาน ENERGY STAR และตามค่าเริม ่ ต ้นจะมีการเปิ ดคุณสมบัตก ิ ารจัดการพลังงานไว ้ จอภาพถูกตัง้ ค่า โดยอัตโนมัตใิ ห ้สลีปเมือ ่ ผู ้ใช ้ไม่มก ี จ
ประกาศเกีย ่ วก ับความสอดคล้องของสหภาพยุโรป แบบย่อ ASUSTek Computer Inc. ขอประกาศในทีน ่ วี้ า่ อุปกรณ์นม ี้ ค ี วามสอดคล ้องกับความต ้องการ ทีจ่ �ำเป็ นและเงือ ่ นไขทีเ่ กีย ่ วข ้องอืน ่ ๆ ของบทบัญญัตข ิ ้อก�ำหนด 2014/53/EU เนือ ้ หา ทีส ่ มบูรณ์ของประกาศความสอดคล ้องกับ EU มีอยูท ่ ี่ https://www.asus.
ั ัสถูก RF (SAR) ข้อมูลเกีย ่ วก ับการสมผ อุปกรณ์นส ี้ อดคล ้องกับข ้อก�ำหนด EU (2014/53/EU) เกีย ่ วกับขีดจ�ำกัดการสัมผัสถูก สนามแม่เหล็กไฟฟ้ าของประชาชนทัว่ ไปในทีส ่ าธารณะ ซึง่ เกีย ่ วข ้องกับการป้ องกัน สุขภาพ ขีดจ�ำกัดเหล่านีเ้ ป็ นส่วนของค�ำแนะน� ำส�ำหรับการป้ องกันของประชาชนทัว่ ไปใน ทีส ่ าธารณะ ค�ำแนะน� ำเหล่านีไ้ ด ้รับการพัฒนาขึน ้ และตรวจสอบโดย องค์กรวิทยาศาสตร์อส ิ ระ ผ่านการศึกษาทางวิทยาศาสตร์ทงั ้ ตามปกติและ อย่างละเอียด หน่วยของการวัดขีดจ�ำกัดทีแ ่ นะน� ำของสภายุโรปส�ำหรับอุปกรณ์มอ ื ถือ ต
Notebook PC คูม ่ อ ื อิเล็กทรอนิกส์