ASUS Tablet Elektronisk håndbok
NW12243 Tredje utgave desember 2016 Opphavsrettinformasjon Ingen deler av denne manualen, inkludert produkter og programvare som beskrives i den, kan reproduseres, overføres, skrives av, lagres i et gjenopprettingssystem, eller oversettes til et annet språk i enhver form eller på enhver måte, bortsett fra dokumentasjon oppbevart av kjøperen for sikkerhetskopiformål, uten særlig skriftlig tillatelse av ASUSteK COMPUTER INC. ("ASUS").
Innhold Begreper brukt i denne håndboken................................................................................................ 7 Vedlikehold og sikkerhet..................................................................................................................... 7 1 Gjør Zen-en klar! Deler og funksjoner....................................................................................................... 9 Sette inn minnekort...............................................................
Håndtere kontakter.....................................................................................................54 Starte Kontakter-appen......................................................................................................................54 Innstillinger for kontakter..................................................................................................................54 Sette opp profilen din.................................................................................
Kalender.....................................................................................................................102 Opprette hendelser.......................................................................................................................... 102 Legge til en konto i kalenderen................................................................................................... 102 Opprette en hendelse fra kontoen din...................................................................
Bluetooth® ..................................................................................................................124 Aktivere Bluetooth® ......................................................................................................................... 124 Pare ASUS-nettbrettet med en Bluetooth®-enhet................................................................. 125 Oppheve paring mellom ASUS-nettbrettet og Bluetooth®-enheten............................. 125 Internettdeling.............
Begreper brukt i denne håndboken For å utheve viktig informasjon i denne håndboken, presenteres noe tekst på denne måten: VIKTIG! Denne meldingen inneholder vitale instruksjoner som må følges for å fullføre en oppgave. TIPS: Denne meldingen inneholder tilleggsinformasjon og tips som kan hjelpe deg med å fullføre oppgaver. ADVARSEL! Denne meldingen inneholder viktig informasjon som må følges når du utfører visse oppgaver av sikkerhetsgrunner, slik at du ikke skader din ASUS-nettbrett og komponentene i den.
Proper disposal Fare for eksplosjon hvis batteriet erstattes med en feil type. Kast brukte batterier i henhold til instruksjonene. ASUS-nettbrett skal IKKE kastes sammen med vanlig kommunalt avfall. Dette produktet er designet for å muliggjøre korrekt ombruk av deler samt gjenvinning. Symbolet kryss over en søppelkasse med hjul indikerer at produktet (elektrisk, elektronisk utstyr og kvikksølvholdige knappecellebatterier) ikke skal kastes sammen med husholdningsavfall.
1 Gjør Zen-en klar! 1 Gjør Zen-en klar! Deler og funksjoner Plukk opp enheten og få den klar til bruk på et øyeblikk. Høyttalere Fremre kamera Mikro-USB 2.0-kontak Høyttaler / Hodesett-kontakt Bakre kamera Volumknapp Strømknapp Rille Berøringsskjerm Mikrofon VIKTIG: • Pass på at enheten, spesielt berøringsskjermen, er tørr til enhver tid. Vann eller andre væsker kan føre til at berøringsskjermen svikter.
Sette inn minnekort ASUS-nettbrettet støtter minnekort av typene microSD™, microSDHC™, og microSDXC™ med opptil 128 GB kapasitet (64 GB på modeller med kun Wi-Fi). TIPS: Noen minnekort er kanskje ikke kompatible med ASUS-nettbrettet. Pass på at du kun bruker kompatible minnekort for å hindre tap av data eller skade på enheten, minnekortet eller begge deler. ADVARSEL! Vær ekstra forsiktig når du håndterer minnekort. ASUS er ikke ansvarlig for tap av data eller skade på minnekortet.
2. Sett et minnekort inn i minnekortsporet. 3. Skyv minnekortet helt inn i sporet til det sitter godt på plass. 4. Sett tilbake bakdekselet. TIPS: Når du har satt inn et formatert minnekort, kan du få tilgang til innholdet fra ASUS > File Manager (Filbehandling) > SD Memory Card (SD-minnekort).
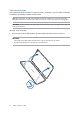
Ta ut et minnekort ADVARSEL! • Vær ekstra forsiktig når du håndterer minnekort. ASUS er ikke ansvarlig for tap av data eller skade på minnekortet. • Løs ut minnekortet på riktig før du tar det ut av enheten. For å løse ut minnekortet går du til Hjem > Alle apper > Innstillinger > Lagring > Demonter eksternt lager. Slik tar du ut et minnekort: 1. Finn sporet på nederste høyre hjørne, og trekk bakdekselet utover til det er tatt helt av. ADVARSEL! 2.
3. Sett tilbake bakdekselet.
Sette inn et micro-SIM-kort (på utvalgte modeller) Mikro-SIM-kortsporet støtter båndene LTE, WCDMA og EDGE/GSM. TIPS: For å forhindre skade på kontakten må du sørge for at du bruker et standard micro-SIM- kort uten SIM-kortadapter eller bruk av en kutter. ADVARSEL! Vær ekstra forsiktig når du håndterer micro-SIM-kort. ASUS er ikke ansvarlig for tap av data eller skade på micro-SIM-kortet. Slik setter du inn et micro-SIM-kort: 1.
2. Innrett og sett et micro-SIM-kort inn i micro-SIM-kortsporet. 3. Skyv micro-SIM-kortet helt inn i sporet til det sitter godt på plass. 4. Sett tilbake bakdekselet.
Ta ut et micro-SIM-kort (på utvalgte modeller) ADVARSEL! Vær ekstra forsiktig når du håndterer micro-SIM-kort. ASUS er ikke ansvarlig for tap av data eller skade på micro-SIM-kortet. Slik tar du ut et micro-SIM-kort: 1. Finn sporet på nederste høyre hjørne, og trekk bakdekselet utover til det er tatt helt av. ADVARSEL! 2. 16 • Vær forsiktig så du ikke skader bakdekslet eller neglene dine når du tar av dekslet. • Bakdekslet må ikke fjernes med makt, rives eller deformeres.
3. Sett tilbake bakdekselet. Lade ASUS-nettbrett ASUS-nettbrettet er delvis ladet når det leveres, men du må lade det helt opp før du bruker det for første gang. Les følgende viktige merknader og advarsler før du lader enheten. VIKTIG! • Bruk bare den medfølgende strømadapter og mikro-USB-kabelen for å lade ASUS-nettbrettet. Hvis du bruker en annen strømadapter eller kabel, kan det skade enheten. • Trekk av beskyttelsesfilmen på strømforsyningen og mikro-USB-kabelen før du bruker den med enheten.
Slik lades ASUS-nettbrett-brettet: 1. Koble mikro-USB-kabelen til strømadapteren. 2. Sett strømadapteren inn i en jordet stikkontakt. 3. Sett mikro-USB-kontakten inn i ASUS-nettbrett. VIKTIG! • Lad ASUS-nettbrett-brettet i åtte (8) timer før du bruker det med batteridrift for første gang. • Statusen for batteriladning indikeres med følgende ikoner: Lav 4. Lader ikke Lader Full Når den er fullt oppladet, kobler du USB-kabelen fra ASUS-nettbrettet før du kobler strømadapteren fra stikkontakten.
Slå ASUS-nettbrettet på eller av Slå på enheten For å slå på enheten trykker og holder du inne strømknappen i tre sekunder til den vibrerer og starter opp. Slå av enheten Slik slår du av enheten: 1. Hvis skjermen er slått av, trykker du på strømknappen for å slå den på. Hvis skjermen er låst, låser du opp skjermen på enheten. 2. Trykk og hold inne strømknappen, vent på meldingen, trykk Slå av og deretter OK.
Grunnleggende Oppdag den instinktive enkelheten til ASUS Zen UI 2.0! ASUS Zen UI 2.0 er et sjarmerende og intuitivt grensesnitt eksklusivt for ASUS-nettbrett. Det har spesielle apper som er integrert i eller med andre apper, som er tilpasset dine individuelle behov og som gjør livet ditt enklere samtidig som du har det gøy med ASUS-nettbrettet. ASUS Støtte Finn svar fra bland Vanlige spørsmål, eller gi tilbakemeldinger i brukerforumet.
Førstegangsbruk Når du slår på ASUS-nettbrettet første gang, hjelper installasjonsveiviseren deg gjennom installasjonsprosessen. Følg instruksjonene på skjermen for å velge språk, inntastingsmetoder, sette opp mobilnett og Wi-Fi, synkronisere kontoer og konfigurere stedstjenester. Bruk en Google- eller ASUS-konto til å sette opp enheten. Hvis du ikke har en Google-konto eller en ASUS konto, kan du lage en.
Tips for å spare batteri Batteriet er livskraften til ASUS-nettbrettet. Her er noen tips for å spare batteriet, slik at du kan bruke ASUS-nettbrettet lenger. – Lukk alle apper som kjører men som ikke er i bruk – Når enheten ikke er i bruk, kan du trykke på strømknappen for å sette den i dvalemodus. – Aktiver Smart sparing i Strømsparing-appen. – Sett lyden til Smart modus. – Reduser lysstyrken på skjermen. – Hold høyttalervolumet til et lavt nivå. – Deaktiver Wi-Fi-funksjonen.
Bruke berøringsskjermen Bruk disse bevegelsene på berøringsskjermen til å starte apper, få tilgang til enkelte innstillinger og navigere ASUS-nettbrettet. Starte apper eller velge elementer Gjør ett av følgende: • Du starter en app ved å bare trykke på den. • Hvis du vil velge et element, som i File Manager (Filbehandling)-appen, kan du bare trykke på det.
Flytte gjennom sider eller skjermer Gjør ett av følgende: • Sveip fingeren til venstre eller til høyre for å veksle mellom vinduer, eller for å bla gjennom et galleri med bilder. • Rull fingeren opp eller ned for å gå gjennom nettsider eller lister med elementer. Zoome inn Spre to fingre fra hverandre på berøringspanelet for å zoome inn et bilde i Gallery (Galleri) eller Maps (Kart) eller for å zoome inn på en nettside.
Zoome ut Før to fingre sammen på berøringspanelet for å zoome ut fra bilde i Gallery (Galleri) eller Maps (Kart) eller for å zoome ut fra en nettside. ZenMotion Når skjermen er svart, kan du bruke disse enkle og intuitive bevegelser til å starte programmer på ASUS-nettbrettet ved å bare tegne en bokstav.
Kapittel 1: Gjør Zen-en klar!
2 Det er ingen plass som hjemme Det er ingen plass som hjemme 2 TIPS: Faktiske apper vist på skjermen kan variere fra modell til modell. Følgende skjermbilde er bare for referanse. Zen Hjem-funksjoner Hjem-skjermen Få påminnelser om viktige hendelser, app- og systemoppdateringer, værmeldinger og tekstmeldinger fra folk du bryr deg om, direkte fra Hjem-skjermen.
Forstå ikonene Disse ikonene vises på statuslinjen og gir deg informasjon om statusen til ASUS-nettbrettet. Mobilt nettverk (på utvalgte modeller) Viser signalstyrken til mobilnettet. Meldinger Viser at du har en ulest melding. Wi-Fi Dette ikonet viser signalstyrken til Wi-Fi-tilkoblingen. Batterilevetid Dette ikonet viser batteristatusen til ASUS-nettbrettet. MicroSD card Dette ikonet viser at et mikro-SD-kort er satt inn i ASUS-nettbrettet.
Tilpasse startskjermen Legg til din egen personlighet på Hjem-skjermen. Velg et pent bilde som bakgrunnsbilde, legg til snarveier for å få rask tilgang til favoritt-appene dine, og legg til widgeter slik at du kan se informasjon raskt. Du kan også legge til flere sider. Da kan du legge til og raskt få tilgang til eller se gjennom flere apper eller widgeter på Hjem-skjermen. App-snarveier Med app-snarveier får du enkelt og raskt tilgang til apper du bruker ofte eller har satt som favoritt fra startskjermen.
Gruppere app-snarveier i en mappe Du kan lage mapper for å organisere snarveier på startskjermen. 1. På startskjermen kan du trykke på og dra en app over på en annen app for å opprette en mappe. 2. Trykk den nye mappen, og trykk Unnamed Folder (Ikke navngitt mappe) for å gi et navn til denne mappen. Widgeter Du kan plassere widgeter (små dynamiske apper) på startskjermen. Widgeter gir deg rask oversikt over værmeldinger, kalenderhendelser, batteristatus og mer.
Bakgrunnsbilder La apper, ikoner og andre Zen-elementer ligge på et nydelig bakgrunnsbilde. Du kan legge til en gjennomsiktig bakgrunnsfarge på bakgrunnen for å øke lesbarheten og tydeligheten. Du kan også velge en animert bakgrunn for å livne opp skjermen.
Bruke en animert bakgrunn Slik bruker du en animert bakgrunn: 1. Trykk og hold på et tomt område på Hjem-skjermen, og velg Bakgrunner. 2. Velg hvor du vil ha bakgrunnsbildet: bare på Hjem-skjermen eller på både Hjem-skjermen og Låseskjermen. 3. Velg en animert bakgrunn, og trykk på Bruk. TIPS: Du kan også sette opp bakgrunnsbildet fra > Innstillinger > Skjerm.
Legge til snarveier I Enkel modus kan du legge opp til tolv (12) app-snarveier på startskjermen. 1. Sveip til høyre på Hjem-skjermen, og trykk deretter . 2. Velg appen du vil legge til i listen fra Alle apper-skjermen. Fjerne snarveier Gjør følgende: 1. Trykk , og velg appen eller appene du vil fjerne fra listen. 2. Trykk Delete (Slett) for å fjerne appsnarveien.
Sette opp dato og klokkeslett Som standard blir dato og klokkeslett som vises på startskjermen automatisk synkronisert når du er koblet til Internett Slik endrer du innstillinger for dato og klokkeslett: 1. Åpne Innstillinger-skjermen på én av følgende måter: •• Start Hurtiginnstillinger, og velg deretter •• Trykk . > Innstillinger. 2. Bla nedover på Innstillinger-skjermen, og velg Date & time (Dato og klokkeslett). 3. Fjern markeringen ved Automatic date & time (Auto. dato og klokkeslett). 4.
Hurtiginnstillinger Hurtiginnstillinger-varslingspanelet gir deg tilgang til de trådløse funksjonene og innstillingene for ASUS-nettbrettet med ett trykk. Hver av disse funksjonene er representert med en knapp. Sveip ned med to fingre fra toppen av ASUS-nettbrettet for å åpne Hurtiginnstillinger-panelet. TIPS: En blå knapp viser at funksjonen er aktivert, og en grå knapp viser at funksjonen er deaktivert.
Legge til eller fjerne knapper Slik kan du legge knapper til i eller fjerne eksisterende knapper fra ASUS-hurtiginnstillingsvarslings panelet: 1. Åpne Hurtiginnstillinger, og velg . 2. Trykk i boksen ved siden av funksjonen for å legge til eller fjerne den fra ASUS-hurtiginnstilling svarslingspanelet. TIPS: En markert avkryssingsboks viser at knappen til funksjonen er tilgjengelig via ASUS-hurtiginnstilli ngsvarslingspanelet, og en umarkert avkryssingsboks betyr det motsatte. 3.
Låseskjerm Som standard vises låseskjermen når du slår på enheten og når du vekker den opp fra dvalemodus. Fra låseskjermen kan du gå videre til enhetens Android®-system ved å sveipe på berøringsskjermen. Enhetens låseskjerm kan også tilpasses for å styre tilgang til dataene og appene på mobilen. Tilpasse låseskjermen Hvis du vil endre innstillingene for låseskjermen fra standardalternativet, Sveiping, kan du se følgende trinn: 1. Åpne Hurtiginnstillinger, og velg . 2.
Tilpasse hurtigtilgangsknappene Som standard har låseskjermen hurtigtilgangsknapper for disse appene: Meldinger og Kamera. Endre denne standardinnstillingen og tilpass disse knappene for å starte andre apper på låseskjermen ved å gjøre følgende: 1. Åpne Hurtiginnstillinger, og velg . 2. Rull nedover Innstillinger-skjermbildet, og velg Låseskjerm. 3. Trykk Quick Access (Hurtigtilgang). 4. Under skjermen for hurtigtilgang kan du velge hvilken knapp du vil tilpasse. 5.
Talesøk Gi talekommandoer til ASUS-nettbrettet, og se på at det lytter og tar handling ved hjelp av Talesøkappen. Med Talesøk kan du lage talekommandoer for å gjøre følgende: • Søk etter data og informasjon på nettet eller på ASUS-nettbrettet • Start apper på ASUS-nettbrettet • Få veibeskrivelser for hvordan du kommer deg steder VIKTIG! ASUS-nettbrettet må være koblet til Internett for å bruke denne funksjonen. Starte Talesøk 1.
Tilpasse talesøkeresultater fra nettbrettsøkegruppen Hvis du vil sette parametre for hvilke talesøkeresultater som kommer fra Google-kontoen din og dataene på ASUS-nettbrettet, kan du gjøre det på følgende måte: 1. På ASUS-nettbrettets hjem-skjerm, trykker du 2. Trykk 40 > Innstillinger. Kapittel 2: Det er ingen plass som hjemme > Talesøk.
3. Trykk Nettbrettsøk. 4. Kryss av i boksen for søkegrupper som du vil inkludere som kilde når du bruker Talesøk.
Kapittel 2: Det er ingen plass som hjemme
3 Holde kontakten 3 Holde kontakten Ring i stil (kun på utvalgte modeller) Ringe Du kan ringe på mange måter med ASUS-nettbrettet. Ring venner fra kontaktlisten, bruk smartringing for å ringe raskt, eller angi et kortnummer for å ringe kontakter du ringer ofte. TIPS: Organisere kontaktene dine i Kontakter-appen. Du finner mer informasjon under Behandle kontakter. Starte Telefon-appen Fra startskjermen gjør du ett av følgende for å starte Telefon-appen: • Trykk • Trykk . > Phone (Telefon).
Be om bekreftelse av et internnummer Du kan sette inn en bekreftelsesmelding for internnummeret når du har tastet inn hovednummeret. 1. Tast inn hovednummeret fra Telefon-appen. 2. Trykk og hold # for å sette inn en bekreftelsesmelding, som er merket med et semikolon (;). 3. Når du blir spurt, trykker du Yes (Ja) for å bekrefte internnummeret. Automatisk ringe et internnummer Du kan sette inn en kort eller lang pause etter hovednummeret, så ringes internnummeret automatisk. 1.
Ringe kontaktene dine med hurtigtaster Du kan tilordne hurtigtaster for å raskt ringe kontakter du bruker ofte med bare ett trykk i Telefonappen. TIPS: Som standard er tallet 1 reservert for talepostmeldinger. Du kan hente talepostmeldinger ved å trykke på tallet 1 hvis du har abonnert på denne tjenesten med mobiloperatøren. Opprette en hurtigtast Opprett en hurtigtast med sifrene 2 til 9 for kontakter du ringer ofte. 1.
Ringe hjem Når du er på tur i utlandet, kan du aktivere konfigurere innstillinger for hjemringing for å gjøre det enklere for deg å ringe hjem raskt. TIPS: Hvis du bruker en roaming-tjeneste, vil det medføre ekstra kostnader. Ta kontakt med mobiloperatøren før du bruker en roaming-tjeneste. 1. Åpne Innstillinger-skjermen på én av følgende måter: •• Start Hurtiginnstillinger, og velg deretter •• Trykk . > Innstillinger. 2. Trykk Call settings (Anropsinnstillinger) > Home dialing (Ringe hjem). 3.
Motta innkommende anrop Berøringsskjermen på ASUS-nettbrettet lyser opp når det er et innkommende anrop. Hvordan innkommende anrop vises varierer også avhengig av statusen til ASUS-nettbrettet. Besvare anrop Det er to måter du kan besvare et anrop, avhengig av statusen til ASUS-nettbrettet: • Hvis enheten er aktiv, trykker du enten på Answer (Svar), eller Decline (Avslå) hvis du vil avvise anropet. • Hvis enheten er låst, drar du til for å besvare eller for å avvise anropet.
Sperre anrop Du kan legge til numre eller anrop fra anropsloggen i sperrelisten. 1. Fra Telefon-appen trykker du for å vise anropsloggen. 2. Velg nummeret som du vil sperre, trykk > Add to block list (Legg til sperrelisten), og trykk OK. Lagre anropsnummer i Kontakter Du kan legge til et anropsnummer fra anropsloggene til kontaktlisten. 1. Fra Telefon-appen trykker du for å vise anropsloggen. 2. Trykk og hold et anrop fra anropsloggen, og trykk Add to contacts (Legg til i kontakter). 3.
Andre alternativer for anrop Under et aktivt anrop trykker du pågår. og trykker på et av anropsalternativene for når et anrop Mikrofon Slår mikrofonen for det aktive anropet på eller av. Når mikrofonen er slått av eller i dempemodus, kan du høre den som ringer, men den andre personen kan ikke høre deg. Høyttalertelefon Skrur høyttalertelefonen av eller på. Anrop på vent Setter et aktivt anrop på vent.
Styre flere anrop ASUS-nettbrettet har den praktiske funksjonen at du kan gjøre eller ta to anrop. Du kan også sette opp en telefonkonferanse som passer for forretningsmøter, delelinjer og andre gruppeanrop. Besvare et annet anrop Mens du snakker på ASUS-nettbrettet, kan du høre en pipelyd som indikerer et annet innkommende anrop. Trykk Answer (Svar) på berøringsskjermen for å motta et innkommende anrop under et aktivt anrop.
Sette opp en telefonkonferanse ASUS-nettbrettet, sammen med GSM-funksjonen, kan sette opp en telefonkonferanse med inntil fem (5) personer. Under et anrop kan du legge til flere kontakter og slå sammen alle anropene til en telefonkonferanse. 1. Ringe en kontakt eller slå et nummer. Vent til den andre linjen svarer på anropet. 2. Når anropet er besvart, trykker du , så kan du trykke på en kontakt eller ringe et nummer som du vil inkludere i telefonkonferansen. 3. Trykk 4.
Administrere en telefonkonferanse Under telefonkonferansen kan du skille kontakten fra konferansegruppen for å snakke privat, eller så kan du koble en kontakt fra telefonkonferansen. 1. Fra Telefonkonferanse-skjermen trykker du Manage conference call (Administrer telefonkonferanse) for å åpne en liste over kontakter i telefonkonferansen. 2. Hvis du vil fjerne en kontakt fra telefonkonferansen, trykker du kontakt fra telefonkonferansen, trykker du 3. 52 Trykk .
Ta opp anrop ASUS-nettbrettet kan spille inn et anrop for fremtidig referanse eller informasjon. 1. Ringe en kontakt eller slå et nummer. 2. Trykk for å avslutte anropet. VIKTIG! Før du tar opp et anrop, må du be om tillatelse fra den andre parten eller de andre partene. 3. Trykk for å stoppe opptaket. Ikonet vises på varslingssystemlinjen. 4. Sveip ned øverst i venstre hjørne av skjermen, og trykk på meldingen Call recording saved (Anropsopptak lagret) for å se anropet som er spilt inn.
Håndtere kontakter Organiser kontaktene dine og hold kontakten med dem enkelt via anrop (kun på utvalgte modeller), tekstmeldinger (kun på utvalgte modeller), e-post eller sosiale nettverk. Grupper kontaktene dine som Favoritter for å raskt komme i kontakt med dem, eller grupper dem som VIPer å få beskjed om eventuelle kommende hendelser, tapte anrop og uleste meldinger.
Trykk for å vise profilinfoen din Legge til kontakter Legg til kontakter fra kontoen til enheten, jobben, Google eller andre e-postkontoer, og fyll inn i mer viktig kontaktinformasjon som kontaktnummer, e-postadresser, spesielle hendelser for VIP-er og mer. 1. Start Kontakter-appen, og trykk 2. Velg Device (Enhet). . TIPS: • Du kan også lagre kontakten på SIM-kortet (på bestemte modeller) eller en e-postkonto. • Hvis du ikke har en e-postkonto, kan du trykke Legg til ny konto og lage en. 3.
Legge til et internnummer på et kontaktnummer Du kan legge til et internnummer for et kontaktnummer. 1. Fyll inn de nødvendige feltene på skjermen for å legge til en kontakt. 2. Trykk på Telefon-feltet, skriv inn hovedlinjen, og trykk eller for å legge til internnummeret. TIPS: 3. 56 • Bruk , som en separator mellom hovedlinjen og internnummeret hvis du vil hoppe over sentralbordet.
Tilpasse kontaktens profil Rediger kontaktens informasjon, legg til et bilde, velg en ringetone eller ta et bilde for kontaktens profil. 1. Start Kontakter-appen, og velg kontakten som har informasjonen eller profilen du vil redigere eller tilpasse. 2. Gjør endringene på kontaktens profilside.
Sette opp VIP-er på Grupper-skjermen Slik setter du opp VIP-er på Grupper-skjermen: 1. Start Kontakter-appen. 2. Trykk 3. Når du er på VIP-skjermen, trykker du 4. Velg kontakten eller kontaktene du vil gruppere som VIP-er, og velg deretter Add (Legg til). Kontakten eller kontaktene blir lagt til i VIP-listen. 58 > VIP. Kapittel 3: Holde kontakten .
Sett opp VIP-er på VIP-skjermen Slik setter du opp VIP-er på VIP-skjermen: 1. Start Kontakter-appen. 2. Trykk 3. Når du er på VIP-skjermen, trykker du 4. Velg kontakten eller kontaktene du vil gruppere som VIP-er, og velg deretter Add (Legg til). Kontakten eller kontaktene blir lagt til i VIP-listen. . Legge til en hendelse til en VIP-kontakt Du kan legge til en hendelse til en VIP-kontakt, for eksempel jubileum, bursdag og andre viktige hendelser. 1.
Markere favorittkontakter Sett dine ofte brukte kontakter som favoritter for å kunne finne dem raskt fra Kontakter-appen. 1. Start Kontakter-appen på én av følgende måter: a. Fra startskjermen trykker du ASUS > Contacts (Kontakter)-appen. b. Åpne All Apps (Alle apper)-skjermen, og trykk Contacts (Kontakter). 2. Når du er i Kontakter-appen, trykker du og deretter . 3. Kryss av ved kontaktene du vil legge til som favoritter. 4. Når du er ferdig, trykker du Add (Legg til).
Importing contacts Importer kontakter med data fra en kontaktkilde til ASUS-nettbrettet, en e-postkonto eller et mikro-SIM-kort. 1. Trykk Asus > Contacts (Kontakter), > Manage contacts (Administrer kontakter). 2. Trykk Importer/eksporter, og velg blant følgende importalternativer: a. Importere fra SIM-kort (kun på utvalgte modeller) b. Import from storage (Importer fra lagring) 3. Trykk på kontoen du vil importere kontaktene dine til: a. E-postkonto b. Enhet c. SIM-kort (kun på utvalgte modeller) 4.
Administrere sperrelisten Sperre kontakter eller numre Opprett en liste over sperrede kontakter eller numre for å unngå å motta uønskede anrop eller meldinger. Sperrede anrop og meldinger lagres i sperrelistearkivet. 1. Trykk Asus > Contacts (Kontakter), > Manage contacts (Administrer kontakter) > Blocked list (Sperreliste). 2. Trykk , og gjør ett av følgende: •• Hvis du vil sperre en kontakt, trykker du Choose from contacts (Velg fra kontakter) og velger kontakten du vil sperre fra kontaktlisten.
Synkronisere den sosiale nettverkskontoen Synkroniser dine sosiale nettverkskontoer for å legge til de sosiale nettverkskontoene til kontaktene dine på ASUS-nettbrettet. 1. Åpne Innstillinger-skjermen på én av følgende måter: •• Start Hurtiginnstillinger, og velg deretter •• Trykk . > Innstillinger. 2. Fra Innstillinger-skjermen trykker du på den sosiale nettverkskontoen under Kontoer-delen. 3. Kryss av ved Contacts (Kontakter) for å synkronisere de sosiale nettverkskontoene med kontaktene dine. 4.
Anropsinnstillinger (kun på utvalgte modeller) Konfigurer innstillingene for innkommende eller utgående anrop, nummersperring, ringe hjem og mer. 1. Åpne Innstillinger-skjermen på én av følgende måter: •• Start Hurtiginnstillinger, og velg deretter •• Trykk 2. . > Innstillinger. Trykk Call settings (Anropsinnstillinger), og velg noen av innstillingene som du vil sette opp. Innstillinger for innkommende anrop Phone ringtone (Telefonringetone) Sett opp ringetonen for SIM-kortet.
Send meldinger og mer Meldinger (kun på utvalgte modeller) Med Meldinger kan du sende, svare umiddelbart, eller svare senere på viktige meldinger fra kontaktene dine med et av SIM-kortene du har satt inn i enheten. Du kan også sende meldingstråder eller samtaler til andre. Starte Meldinger-appen Fra startskjermen gjør du ett av følgende for å starte Meldinger-appen: • Trykk • Trykk > Messaging (Meldinger) Sende meldinger 1. Start Meldinger-appen, og trykk . 2.
Videresende en meldingstråd (kun på utvalgte modeller) Du kan videresende meldingstråder eller samtaler til andre, og stille inn en varsling, slik at du kan svare på en viktig melding på et passende tidspunkt. 1. Gå til Home screen (startskjermen), og trykk 2. Trykk på meldingstråden, og trykk > Forward SMS conversation (Videresend SMSsamtale). 3. Trykk Marker alle eller en av meldingene fra tråden, og trykk Videresend. 4. I Til-feltet trykker du 5.
Knytte sammen kontakters info Når du legger til sosiale nettverk eller e-postkontoer, synkroniseres data fra disse kontoene automatisk med kontaktprogrammet. I noen tilfeller kan kontaktinfo vises på flere steder eller under forskjellige navn eller kallenavn i Kontakter-appen. Du kan manuelt knytte sammen og samle all denne informasjonen og sette den under ett sted eller én profil. 1. Åpne Kontakter-appen, trykk og hold kontakten med informasjonen du vil knytte sammen, og velg Link contact (Koble kontakt).
Omlet Chat Omlet Chat er en åpen app for meldinger og mobil deling app som lar deg chatte med venner på stedet. Den lar deg også administrere dataene ved å lagre dem sikkert på dine private nettskykontoer. TIPS: • Omlet Chat-appen kan bare være tilgjengelig i enkelte land. • Til å begynne med må du gå til Play-butikken for å oppdatere Omlet Chat. Du må ha en Googlekonto for å oppdatere Omlet Chat.
Ved hjelp av en Google™-konto Slik registrerer du deg ved hjelp av en Google™-konto: , og trykk Omlet Chat-appen. 1. Trykk 2. Når du er på registreringsskjermen trykker du Connect a different account here (Tilknytte en annen konto her) og deretter Google. 3. Trykk OK for å bruke Google-kontoen som du registrerte på enheten. 4. Tast inn navn, og trykk på Get Started (Kom i gang). 5.
Ved hjelp av en Facebook®-konto Slik registrerer du deg ved hjelp av en Facebook-konto: , og trykk Omlet Chat-appen. 1. Trykk 2. Når du er på registreringsskjermen trykker du Connect a different account here (Tilknytte en annen konto her) og deretter Facebook. Omlet Chat-appen tar deg videre til Facebook for å logge på Facebook-kontoen din. 3. Logg på Facebook-kontoen, og velg OK. 4. Tast inn navn, og trykk på Get Started (Kom i gang). 5.
Bruke Omlet Chat Send tekst- og multimediemeldinger for å ha en morsom, kreativ og interaktiv samtale. Slik starter du en samtale: for å vise Omlet Chat-menyen, og trykk Contacts 1. Gå til Omlet Chat-skjermen, trykk (Kontakter). 2. Trykk på kontakten du vil prate med, og trykk . Sende en chat-melding Du sender en chat-melding ved å skrive inn meldingen i feltet What's up (Hva skjer) og trykke . Sende en talemelding Hvis du vil sende en talemelding, trykker og holder du sende. og begynner å snakke.
Bruke skuff-apper Omlet Chat har noen flotte skuff-apper som lar deg at dele multimediemeldinger for å gi et morsomt og personlig preg. Hvis du vil bruke disse skuff-appene, trykker du fra samtaletråden og velger en app fra skuffapplisten for å sende en bestemt multimediemelding. Trykk for å sende et bilde fra ASUS-nettbrettet. Trykk for å sende din nåværende adresse med et kartutklipp Trykk for å lage et klistremerke fra et lagret bilde.
Ser delte bilder i Galleri-appen Bildene som du og dine venner har delt i chatterommene i Omlet Chat-appen blir umiddelbart lagret på enheten. Du kan se de delte bildene i Galleri-appen. Slik ser du de delte bildene: 1. Start Galleri-appen på én av følgende måter: a. Fra startskjermen trykker du ASUS > Gallery (Galleri)-appen. b. Åpne Alle apper-skjermen, og trykk på Gallery (Galleri)-appen. 2. Fra hovedskjermen til Galleri trykker du og velger mellom følgende alternativer: a. Alle delte bilder b.
Se alle delte bilder Trykk All shared photos (Alle delte bilder) for å se alle bildene som har blitt delt av deg og Omlet Chat-kontaktene. Se delte bilder etter chatterom Trykk Chat room (Chatterom) for å se på bilder delt i et chatterom eller sosialt punkt.
Se delte bilder etter deler Trykk Sharer (Deler) for å se bildene som er delt av en bestemt Omlet Chat-kontakt. Se Omlet-kontakter fra Kontakter-appen Bortsett fra det å koble deg til Omlet-kontaktene i Omlet Chat-appen, kan du også se og prate med Omlet-kontaktene dine ved hjelp av Kontakter-appen. Når Omlet-kontaktene dine er integrert med Kontakter-appen, blir det enklere for deg å finne og prate med Omlet-kontaktene dine selv uten å starte Omlet Chat-appen.
2. Trykk Contacts to display (Kontakter som skal vises) for å vise nedtrekkslisten for å vise kontaktgrupper. 3. Opphev markeringen av alle kontaktgrupper unntatt Omlet Chat, og trykk hvor som helst. Kontakter-skjermen viser alle Omlet-kontaktene. 4. Trykk på en Omlet-kontakt for å velge og vise kontaktdetaljene eller prate direkte med den kontakten.
Synkronisere Omlet Chat med en nettsky Hvis du har en Dropbox®-, Box®-, eller Baidu PCS Cloud-konto, kan Omlet Chat-appen laste opp dine private anrop og samtalelogger raskt og sikkert. Før Omlet Chat-appen laster opp dataene dine, må du først synkronisere nettskykontoen med Omlet Chat-appen. Slik gjør du det: 1. Åpne Omlet Chat-menyen, og velg Innstillinger. 2. Trykk Cloud Storage (Nettskylagring), og velg deretter blant følgende nettskytjenester: a. Dropbox b. Box c. Baidu PCS d. OneDrive e.
Kapittel 3: Holde kontakten
4 Dine dyrebare øyeblikk Dine dyrebare øyeblikk 4 TIPS: Følgende skjermbilde er bare for referanse. Fang hvert eneste øyeblikk Starte Kamera-appen Ta bilder og spill inn videoer ved hjelp av Kamera-appen på ASUS-nettbrettet. Se noen av trinnene nedenfor for å åpne Kamera-appen. Fra låseskjermen Dra ned til Kamera-appen har startet. Fra Hjem-skjermen Trykk .
Bruke kameraet for første gang Når du starter kameraet for første gang, vises to funksjoner som vil hjelpe deg med å komme i gang: Veiledning og Image Locations (Bildesteder). Veiledning Hvis det er første gang du bruker kameraet på ASUS-nettbrettet, vil du se den følgende veiledningsskjermen når du starter Kamera-appen. Se følgende trinn for å gå videre fra dette skjermbildet. 1.
Hjemskjerm for kamera ASUS-nettbrettet har et kamera med funksjoner for automatisk scenesporing og bildestabilisering. Den har også en videostabiliseringsfunksjon som bidrar til å hindre skjelving under videoopptak. Trykk på ikonene for å begynne å bruke kameraet og utforske bilde- og videofunksjonene på ASUSnettbrettet.
Bildeinnstillinger Juster utseendet til bildene du tar ved å konfigurere kameraets innstillinger ved hjelp av trinnene nedenfor. VIKTIG! Bruk innstillingene før du tar bilder. 1. På startskjermen til kameraet trykker du > . 2. Rull ned og konfigurer de tilgjengelige alternativene. Bilde Konfigurer bildekvaliteten med disse alternativene.
Videoinnstillinger Juster utseendet til videoene du tar ved å konfigurere kameraets innstillinger ved hjelp av trinnene nedenfor. VIKTIG! Bruk innstillingene før du tar bilder. 1. På startskjermen til kameraet trykker du > . 2. Rull ned og konfigurer de tilgjengelige alternativene. Bilde Konfigurer videokvaliteten med disse alternativene. Focus & exposure (Fokus og eksponering) Aktiver Berør autoeksponering under dette alternativet.
Avanserte kamerafunksjoner Finn nye måter å ta bilder eller videoer på, og gjøre øyeblikkene du fanger ekstra spesielle med de avanserte kamerafunksjonene på ASUS-nettbrettet. VIKTIG! Bruk innstillingene før du tar bilder. Tilgjengelige funksjoner kan variere fra modell til modell. HDR Funksjonen for høyt dynamisk område (HDR) gjør at du kan ta mer detaljerte bilder der det er lite lys og høy kontrast.
Lavt lys (kun på utvalgte modeller) Takket være PixelMaster blir kameraets lysfølsomhet økt med opp til 400 % for å forbedre støyreduksjon, og fargekontrast blir økt med opp til 200 %. Bruk denne modusen til å gjøre alle motiver om til flotte bilder eller videoer – enten det er rikelig med naturlig lys eller ikke. Ta bilder med lavt lys 1. Trykk > Low light (Lavt lys) fra startskjermen til Kamera-appen. 2. Trykk for å begynne å ta bilder. Ta videoer med lavt lys 1. Trykk 2.
Effekt Ta bilder med forskjellige effekter som Pikseliser, Tegneserie, Vintage, LOMO eller andre effekter. TIPS: Effekten må velges før du tar bildet. Ta bilder med effekter 1. Når du er på kameraskjermen, trykker du 2. Trykk 3. Trykk > Effect (Effekt) , og velg en effekt du vil bruke på bildet. for å begynne å ta bilder. Bruke effekter på fotografier 1. Trykk miniatyrbildet for å forhåndsvise bildet. 2. Trykk bildet, trykk for å velge ønsket effekt, og trykk for å lagre bildet.
GIF-animasjon Lag GIF-animasjoner (Graphics Interchange Format) rett fra ASUS-nettbrettets kamera med GIFanimasjonsfunksjonen. Ta bilder med GIF-animasjon > GIF-animasjon fra kameraets startskjerm. 1. Trykk 2. Hold inne 3. Still inn justeringer for GIF-animasjonen. 4. Trykk på for å begynne å lage serieopptak for GIF-animasjon. når du er ferdig. Panorama Ta bilder fra flere vinkler ved hjelp av Panorama. Bilder tatt med et vidvinkelperspektiv blir automatisk sydd sammen med denne funksjonen.
Spol tilbake i tid Når du har valgt Spol tilbake i tid, begynner lukkeren å ta seriebilder fra to sekunder før du faktisk trykket på lukkerknappen. Du får en tidslinje med bilder, og du kan velge det beste bildet for å lagre i Galleriet. TIPS: Funksjonen Spol tilbake i tid kan bare brukes med det bakre kameraet. Ta bilder med Spol tilbake i tid > Spol tilbake i tid fra kameraets startskjerm. 1. Trykk 2. Trykk 3. Juster tiden (i sekunder) som du vil at bildet skal spilles av i revers eller bakover.
Alle smiler Fang det perfekte smilet eller det sprøeste ansiktsuttrykket fra en rekke bilder med funksjonen Alle smiler. Denne funksjonen lar deg ta fem bilder etter hverandre når du har trykket på utløserknappen. Ansikter på bildet registreres automatisk slik at du kan sammenligne dem. Ta bilder med funksjonen Alle smiler > Alle smiler fra kameraets startskjerm. 1. Trykk 2. Trykk 3. Trykk motivets ansikt, og velg det beste ansiktsuttrykket. 4.
Bruke Galleriet Se bilder og filmer på ASUS-nettbrett med Galleri-appen. Med denne appen kan du også redigere, dele eller slette bilde- og videofiler lagret i ASUS-nettbrett-brettet. Bruk Galleri til å vise bildene i en bildevisning eller trykk for å velge ønsket bilde- eller videofil. For å starte Galleri trykker du > Galleri. Se filer fra sosiale nettverk eller nettskylagring Som standard viser Galleri alle filene på ASUS-nettbrettet i henhold til albummappene.
Se bildelokalitet Aktiver lokalitetstilgang på ASUS-nettbrettet, og få lokalitetsdetaljer på bildene dine. Informasjon om bildenes lokalitet inkluderer området hvor bildene er tatt, samt et kart over stedet via Google Maps eller Baidu (kun i Kina). Slik kan du se detaljene for et bilde: > Innstillinger > Location (Lokalitet). 1. Slå på lokalitetstilgang fra > 2. Sørg for at du har delt lokaliteten din med Google Maps eller Baidu. 3. Start Galleri-appen, og velg bildet du vil se detaljene til. 4.
Dele filer fra galleriet 1. Fra Galleriskjermen trykker du på mappen som har filene du vil dele. 2. Når du har åpnet mappen, trykker du 3. Trykk på filene du vil dele. En hake vises over bildene du har valgt. 4. Trykk for å aktivere filvalg. og velg fra listen hvor du vil dele bildene. Slette filer fra galleriet 1. Fra Galleriskjermen trykker du på mappen hvor filene du vil slette ligger. 2. Når du har åpnet mappen, trykker du 3. Trykk på filene du vil slette.
Legge inn bilder på Kalenderhendelse-veggen Hvis du aktiverer denne funksjonen i Galleri, kan du se bilder rett i kalenderhendelser. På denne måten kan du umiddelbart gruppere bilder du har tatt etter det bestemte hendelsesnavnet. 1. Ta bilder med ASUS-nettbrettet, og start Gallery (Galleri). 2. Trykk 3. Trykk Tap here to enter name (Trykk her for å skrive inn navn), og skriv inn navnet på hendelsen som du anga i Kalender-appen. 4.
Bruke MiniMovie (MiniFilm) Gjør bilder om til en kreativ bildeserie ved hjelp av MiniMovie (MiniFilm)-funksjonen i Galleri. MiniMovie (MiniFilm) inneholder et tema for bildeserier som du umiddelbart kan bruke på bilder du har valgt. Slik lager du en MiniMovie (MiniFilm) fra en bildemappe: 1. Start Galleri, og trykk for å velge plasseringen til bildemappen. 2. Velg bildemappen, og trykk > Auto MiniMovie (MiniFilm). 3. Velg MiniMovie (MiniFilm)-temaet du vil bruke på bildeserien.
Slik lager du en MiniMovie (MiniFilm) fra et utvalg av bilder: 1. Start Galleri, og trykk for å velge plasseringen til bildene. 2. Trykk 3. Når du har valgt bildene dine, trykker du MiniMovie (MiniFilm). 4. Velg MiniMovie (MiniFilm)-temaet du vil bruke på bildeserien. for å aktivere filvalg. Trykk på et av disse temaene for å se en forhåndsvisning. 5. Når du har valgt et tema, trykker du for å lagre bildeserien.
Kapittel 4: Dine dyrebare øyeblikk
5 Jobb hardt, spill hardere 5 Jobb hardt, spill hardere Nettleser Nettleseren er basert på den toppmoderne Chromium-baserte motoren, og lar deg surfe på Internett med rask lasting. Det rene og intuitive Zen-grensesnittet er drevet av teknologi for dynamisk tilpasning av tekst og optimaliserer web-innhold slik at det passer skjermen på ASUSnettbrettet bedre.
Dele en side Del interessante sider fra ASUS-nettbrettet med andre via en e-postkonto, nettskylagringskonto, Bluetooth eller andre apper på ASUS-nettbrettet. 1. Start nettleseren. 2. Når du har funnet en nettside, trykker du > Share page (Del side). 3. Trykk på kontoen eller appen som du vil bruke som medium for å dele siden. Lese sider senere Når du finner interessant informasjon på nettet, men du ikke har tid til å lese det, kan du markere den som en Les senere-oppgave.
Les smart på nettet ASUS-nettbrettet aktiverer automatisk Smart Reader-modus på sider som inneholder mange elementer som kan være unødvendige eller distraherende, som bannerannonser, ikoner eller menyelementer. Du kan fjerne disse elementene og bare lese det viktigste innholdet på siden. TIPS: Smart Reader-modus støttes på nettstedene Wikipedia, CNN, ESPN, BCC og NY Times.
Tømme nettleserens buffer Tøm nettleserens buffer for å slette midlertidige Internettfiler, nettsteder og informasjonskapsler som er midlertidig lagret på ASUS-nettbrettet. Dette bidrar til å forbedre lasteytelsen til nettleseren. 1. Start nettleseren. 2. Velg > Innstillinger > Privacy & security (Personvern og sikkerhet) > Clear cache (Tøm buffer). 3. Klikk OK når du ser bekreftelsesmeldingen. E-post Legg til kontoer for Exchange, Gmail, Yahoo! Mail, Outlook.
Legge til e-postkontoer Hvis du ikke har en eksisterende e-postkonto, kan du opprette en slik at du kan motta, lese og sende e-post direkte fra ASUS-nettbrettet. 1. Trykk på E-post på Hjem-skjermen for å starte e-postprogrammet. 2. Trykk > Innstillinger, og legg til en e-postkonto. 3. Trykk på e-postleverandøren du vil sette opp. 4. Følg disse instruksjonene for å sette opp en ny e-postkonto. TIPS: Du kan også se trinn 3 til 5 i Sette opp en e-postkonto i denne håndboken for å fullføre oppsettet.
Kalender Kalender-appen gjør det mulig å holde oversikt over viktige hendelser med ASUS-nettbrettet. Du kan opprette hendelser, angi påminnelser eller lage et nedtellingsvarsel for å sikre at du ikke glemmer disse viktige anledningene. Den lagrer også hendelser som bursdager og jubileer, som du har satt opp for VIP-kontakter. Opprette hendelser Slik oppretter du en hendelse: 1. Trykk ASUS >Kalender. 2. Trykk 3. Skriv inn de nødvendige detaljene for hendelsen på skjermbildet for ny hendelse. 4.
Opprette en hendelse fra kontoen din Når du har lagt til nettkontoer som du vil synkronisere med kalenderen, kan du bruke ASUSnettbrettet til å lage varsler for nettbasert kontoer på følgende måte: 1. Trykk ASUS >Kalender. 2. Trykk Ny hendelse for å opprette en hendelse. 3. På skjermbildet for ny hendelse trykker du Min kalender for å vise alle kontoene som er synkronisert med kalenderen. 4. Trykk på kontoen du vil opprette en ny hendelse i. 5.
What’s Next Få med deg viktige hendelser, ha det gøy ute i solen, og få meldinger/e-poster/anrop (på bestemte modeller) fra VIP-kontakter. Sett opp innstillinger for hendelseskalender, favoritt- og VIP-grupper, eller værvarsler for å få varsler og påminnelser om hva som skjer. Vis What’s Next-varsler fra låseskjermen, systemvarslingspanelet og What’s Next-widgeten eller -appen.
Godta eller avslå invitasjoner til hendelser Sett opp e-postkontoen din i e-post-appen for å sende eller motta e-poster som invitasjoner til hendelser. Når du godtar e-postinvitasjoner, vil hendelsene bli synkronisert med Kalender-appen. TIPS: Du finner mer informasjon under E-post og Kalender. VIKTIG! ASUS-nettbrettet må være koblet til Wi-Fi for å få e-postinvitasjoner eller hendelsesrelaterte varsler. Du finner mer informasjon under Holde deg tilkoblet. Slik kan du godta eller avslå en invitasjon: 1.
Få hendelsesrelaterte varsler Når du godtar en invitasjon til en hendelse, vil du få påminnelser om eventuelle endringer til hendelsen som utsettelser, avlysninger, endringer av sted eller endringer i timeplanen. Disse hendelsesrelaterte varslene vil vises på låseskjermen, systemvarslingspanelet og What's Nextwidgeten eller -appen. Varsling når hendelse begynner Et par minutter før hendelsen begynner, vil du få en påminnelse om at hendelsen er i ferd med å begynne.
Varsling om ny timeplan for hendelse Du får et varsel om hendelsen har blitt utsatt, eller flyttet til et annet tidspunkt eller sted. Få værmeldinger Få AccuWeather®-oppdateringer i sanntid hver time eller opp til hver 12. time – for der du befinner deg eller for andre deler av verden. Du kan legge planer for opptil sju (7) dager med 7-dagers værvarsel eller kle deg etter været basert på AccuWeather RealFeel®-temperaturen.
Gjør det senere Hold styr over selv småsakene i en travel hverdag. Når du er for opptatt, kan du vente med e-poster, tekstmeldinger (på bestemte modeller), anrop (på bestemte modeller), nyheter på nettet eller andre viktige gjøremål til det passer bedre. Marker uleste meldinger eller e-poster, interessante nettsider og ubesvarte anrop somSvar Senere, Les Senere, eller Ring senere (på bestemte modeller).
Ringe tilbake nå (kun på utvalgte modeller) Når du har satt et viktig anrop som en Ring senere-oppgave, kan du hente det og ringe tilbake når du har tid til det fra Gjør det senere-appen. 1. Gå til startskjermen, og trykk Asus > Do It Later (Gjør det senere). 2. Velg anropet du vil ringe tilbake, og trykk Call now (Ring nå).
SuperNote Gjør det morsomt og kreativt å opprette notater ved hjelp av SuperNote. Denne intuitive appen lar deg lage notater organisert etter notatbok ved å direkte skrive eller tegne på berøringsskjermen. Når du lager notater, kan du også legge til multimediefiler fra andre apper og dele dem via sosiale nettverk eller nettskylagringskontoer.
Opprette en ny notatbok Når du vil opprette nye filer i Supernote kan du se følgende trinn: 1. Trykk ASUS > SuperNote, og trykk 2. Velg en mal, og begynn å skrive notater. . Dele en notatbok på nettskyen Du kan dele notatbøker på nettskyen på følgende måte: 1. Trykk og hold på notatboken du vil dele på startskjermen til Supernote. 2. På skjermen som vises trykker du Aktiver skysynkronisering. 3.
Filbehandling Du kan bruke filbehandling til å enkelt finne og behandle data på internlageret til ASUSnettbrettets tilkoblede eksterne lagringsenheter. Tilgang til internlageret Slik får du tilgang til internlageret: > Filbehandling. 1. Trykk 2. Trykk > Intern oppbevaring for å se innholdet på ASUS-nettbrettet. Trykk på et element for å velge det. Tilgang til den eksterne lagringsenheten Slik oppnås tilgang til den eksterne lagringsenheten: 1. Sett microSD-kortet inn i ASUS-nettbrettet. 2.
Nettskyen Sikkerhetskopier data, synkroniser filer mellom ulike enheter og del filer sikkert og privat via en nettskykonto som ASUS WebStorage, Drive, OneDrive eller Dropbox. ASUS WebStorage Logg på ASUS WebStorage, eller lag en ny konto og få gratis nettskylagring. Automatisk last opp bilder du har tatt for umiddelbar deling, synkroniser filer mellom ulike enheter, eller del filer via ASUS WebStorage-kontoen.
Dataoverføring Overfør data som kontakter og kalenderoppføringer fra den gamle mobilenheten din til ASUSnettbrettet via Bluetooth-teknologi. Slik bruker du dataoverføring: 1. Parkoble den gamle mobilenhet med ASUS-nettbrettet via Bluetooth. TIPS: Du finner mer informasjon om parkobling av enheter under Pare ASUS-nettbrettet med en Bluetooth®-enhet. 2. Åpne Alle apper-skjermen, og trykk Data transfer (Dataoverføring). 3.
ASUS Støtte Finn svar fra Vanlige spørsmål, eller snakk direkte med andre ZenUI-brukere for å finne og dele løsninger om ZenUI 2.0-apper. Slik får du tilgang til ZenUI-hjelp: > ASUS Support (ASUS Støtte). 1. Trykk 2. Trykk ZenUI Apps (ZenUI-apper), og velg appen du vil finne svar for.
Kapittel 5: Jobb hardt, spill hardere
6 Moro og underholdning 6 Moro og underholdning Bruke hodesett Ha friheten til å gjøre andre ting mens du er i et anrop eller lytter til favorittmusikken din ved hjelp av et hodesett. Koble til lydkontakt Sett 3,5 mm-hodesettkontakten til lydporten på enheten. ADVARSEL! • Ikke sett inn andre gjenstander inn i lydporten. • Ikke sett kabler med elektrisk effekt inn i lydporten. • Hvis du lytter til høy lyd over lange perioder, kan det skade hørselen din.
Play Games Få de nyeste spillene på nettet, og del dem med dine kontoer på sosiale medier ved hjelp av Play Games-appen. Du kan også bli med i flerspillerspill og sjekke ut topplistene for å få litt konkurranse inn i bildet. VIKTIG! Logg på Google-kontoen din for å maksimere funksjonene til Play Games. Bruke Play Games Slik bruker du Play Games: 1. Trykk Google > Play Games. 2. Trykk på alternativet du vil bruke. Trykk for å se en oversikt over hvordan du spiller.
Musikk Musikk-appen søker automatisk etter musikkfiler fra intern og ekstern lagring på ASUS-nettbrettet. Du kan organisere disse musikkfilene i en spilleliste, eller legge dem i en kø for å spille dem i rekkefølge. Du kan også strømme musikk fra nettskykontoer som ASUS WebStorage, Dropbox, OneDrive og Drive. VIKTIG! Før du strømmer musikk fra en nettskykonto, må du sørge for at ASUS-nettbrettet er koblet til Wi-Fi eller mobilt nettverk. Du finner mer informasjon under Holde deg tilkoblet.
Add to playlist (Legg til i spilleliste) PlayTo Trykk for å legge til sangen i en eksisterende spilleliste eller lage en ny en for å legge til sangen der. Trykk for å søke etter andre enheter i nærheten og spille av sangen der. TIPS: Du finner mer informasjon under PlayTo med andre enheter. Share (Del) Trykk for å dele sangen via apper eller nettskykontoer. Edit info (Rediger informasjon) Trykk her for å legge til detaljer om sangen.
Strømme musikk fra nettskyen Slik strømmer du musikk fra nettskykontoen. 1. Trykk på startskjermen til Musikk. 2. Under Cloud Music (Nettskymusikk) trykker du på nettskykontoen du vil strømme musikk fra. 3. Velg sangen, og trykk for å spille den av Opprette en spilleliste Hent favorittsangene dine fra ulike kilder som intern lagring, ekstern lagring eller en nettskykonto, og organiser dem i en spilleliste. 1. Trykk på startskjermen til Musikk. 2.
PlayTo med andre enheter Bruk PlayTo-funksjonen til å strømme musikk fra ASUS-nettbrettet til andre Miracast- eller DLNAkompatible enheter i nærheten. Slik bruker du PlayTo: 1. Når en sang som spilles, trykker du > PlayTo. 2. Trykk på enheten du vil koble til. Musikk fra ASUS-nettbrettet vil spille eller strømme på den andre enheten. 3.
7 Holde deg tilkoblet 7 Holde deg tilkoblet Wi-Fi Wi-Fi-teknologien på ASUS-nettbrettet kobler deg opp mot den trådløse verden. Oppdater kontoene dine på sosiale medier, surf på Internett eller utveksle data og meldinger trådløst med ASUS-nettbrettet. Aktivere Wi-Fi 1. Åpne Innstillinger-skjermen på én av følgende måter: •• Start Hurtiginnstillinger, og velg deretter •• Trykk 2. . > Innstillinger. Skyv Wi-Fi-bryteren til høyre for å slå på Wi-Fi.
Deaktivere Wi-Fi Slik deaktiverer du Wi-Fi: 1. Åpne Innstillinger-skjermen på én av følgende måter: •• Start Hurtiginnstillinger, og velg deretter •• Trykk 2. . > Innstillinger. Skyv Wi-Fi-bryteren mot venstre for å slå av Wi-Fi. TIPS: Du kan også deaktivere Wi-Fi fra Hurtiginnstillinger-skjermen. Se delen Hurtiginnstillinger for å se hvordan du åpner Hurtiginnstillinger-skjermen.
Pare ASUS-nettbrettet med en Bluetooth®-enhet Når du skal bruke Bluetooth-funksjonen på ASUS-nettbrettet, må du pare den med en Bluetoothenhet. ASUS-nettbrettet lagrer automatisk paringen til Bluetooth-enheter du kobler til. 1. Åpne Innstillinger-skjermen og trykk Bluetooth for å vise alle tilgjengelige enheter. VIKTIG! • Hvis enheten du vil pare med ikke er i listen, må du sørge for at enheten har Bluetooth-funksjonen aktivert og at den er synlig.
Internettdeling Når en Wi-Fi-tjeneste ikke er tilgjengelig, kan du bruke ASUS-nettbrettet som et modem eller gjøre det om til et Wi-Fi-tilgangspunkt for å få tilgang til Internett fra bærbare maskiner, nettbrett og andre mobile enheter. VIKTIG! De fleste mobiltjenesteleverandører krever at du har et dataabonnement for å kunne bruke Internettdeling. Ta kontakt med mobiloperatøren for å finne ut mer om dataabonnementet. TIPS: • Internettdeling kan være tregere enn en vanlig Wi-Fi- eller mobilforbindelse.
4. På skjermen for Internettdeling velger du Wi-Fi hotspot (Wi-Fi-tilgangspunkt) for å slå på WiFi-tilgangspunkt på ASUS-nettbrettet. 5. Koble andre enheter til ASUS-nettbrettets tilgangspunkt på samme måte som du kobler til et Wi-Fi-nettverk. Bluetooth Tethering (Internettdeling via Bluetooth) Aktiver Bluetooth på ASUS-nettbrettet, og bruk den til å koble til andre enheter via Share Link eller til å koble til en skriver. 1. Aktiver Bluetooth på ASUS-nettbrettet og den andre enheten. 2.
PlayTo PlayTo-appen lar deg sende skjermen fra ASUS-nettbrettet til en skjerm som støtter streaming. På denne måten kan en ekstern skjerm fungere som en ekstra skjerm for ASUS-nettbrettet. VIKTIG! Den eksterne skjermen må ha Miracast™/ eller DLNA®-teknologi for å støtte PlayTo-appen. Starte PlayTo Du kan bruke PlayTo med ASUS-nettbrettet på to måter: Fra Hurtiginnstillinger 1. Konfigurer streaming-skjermen du vil bruke med ASUS-nettbrettet. 2.
8 Reise og kart Reise og kart 8 Vær Få værvarsler rett fra ASUS-nettbrettet med hjelp av vær-appen. I vær-appen kan du også se informasjon om været rundt om i verden. Starte Vær-appen Gå til startskjermen, og start Vær-appen på én av følgende måter: •• Trykk > Vær. •• Trykk på værikonet på startskjermen til ASUS-nettbrettet.
Startskjerm for vær Sett opp dette for å få væroppdateringer om stedet du befinner deg samt andre deler av verden. Du kan få se væroppdateringer eller daglig værmelding på What's Next-widgeten eller appen og på Kalender-appen. TIPS: Du finner mer informasjon under: Få værmeldinger Trykk her for å søke etter værinfo for en by Trykk for å få områdets nåværende værinfo, oppdatere værinfo, redigere plasseringslisten eller konfigurere værinnstillinger Sveip opp for å se annen værinformasjon.
Klokke Tilpass tidssoneinnstillingene for ASUS-nettbrettet, still inn alarmer, og bruk ASUS-nettbrettet som en stoppeklokke ved hjelp av klokkeappen. Starte klokken Du kan starte klokken på følgende måter: • Trykk på den digitale klokken på hjem-skjermen på ASUS-nettbrettet. • Trykk > Klokke. Verdensklokke Trykk for å stille inn verdensklokken på ASUS-nettbrettet. Trykk på denne for å legge til en ny by på verdensklokkekartet. Trykk denne for å stille klokken til nattmodus.
Alarmklokke Trykk for å stille inn alarmklokken på ASUS-nettbrettet. Trykk på denne for å slette alarmer du har stilt inn. Trykk på denne for å angi en ny alarmtid. Trykk på denne for å få tilgang til innstillingene for alarmklokken. Stoppeklokke Trykk for å bruke ASUS-nettbrettet som en stoppeklokke. Trykk på denne knappen for å starte stoppeklokkefunksjonen.
Nedtelling Du kan lage flere instanser for nedtelling på ASUS-nettbrettet. Følg trinnene nedenfor for å gjøre dette: Stille inn nedtelling 1. Trykk for å stille inn nedtelling på ASUS-nettbrettet. talltastatur 2. Bruk talltastaturet til å legge inn tiden, og trykk start for å starte nedtellingen.
Kapittel 8: Reise og kart
9 ZenLink ZenLink 9 Bli kjent med ZenLink Hold deg tilkoblet med ASUS’ eksklusive ZenLink for å maksimere produktiviteten. Med disse ZenLink-appene kan du koble til andre enheter for å dele og motta filer. ZenLink består av følgende apper: Share Link, PC Link og Remote Link TIPS: Noen av disse ZenLink-appene kan være utilgjengelig på ASUS-nettbrettet.
Share Link Del og motta filer, apper eller medieinnhold med mobile Android-enheter ved hjelp av Share Link-appen (for mobile ASUS-enheter) eller SHAREit-appen (for andre mobile enheter) via et Wi-Fitilgangspunkt. Med denne appen kan du sende eller motta filer som er større enn 100 MB, og du kan dele eller motta flere filer samtidig. Med Share Link-appen kan du sende og motta filer raskere enn om du bruker Bluetooth. Dele filer 1. Trykk ZenLink på startskjermen, og trykk deretter Share Link. 2.
Motta filer Slik mottar du filer: på startskjermen, og trykk deretter Share Link. 1. Trykk 2. Trykk Receive file (Motta fil) for å motta filene fra avsenderen. PC Link Du kan bruke datamaskinen til å få tilgang til og kontrollere ASUS-nettbrettet og appene på den via PC Link. Den lar deg kontrollere ASUS-nettbrettet hjelp av datamaskinens tastatur og mus. TIPS: Før du bruker PC Link, må du installere PC Link på datamaskinen. Gå til http://pclink.asus.com for å laste ned og installere PC Link.
Forstå PC Link-innstillinger Klikk på dette ikonet for å rotere den speilede skjermen til ASUS-nettbrettet på dataskjermen. Klikk på dette ikonet for å minimere eller maksimere lydstyrken. Klikk på dette ikonet for å ta et skjermbilde. Klikk på dette ikonet for å vekke ASUS-nettbrettet eller sette det i dvale. Klikk på dette ikonet for å se etter oppdateringer til PC Link og velge en bane for skjermbildene.
Remote Link Gjør ASUS-nettbrettet til en trådløs inngangsenhet og et presentasjonsverktøy. Med denne appen kan du bruke ASUS-nettbrettet som en styreflate, berøringsskjerm, laserpeker for presentasjoner og Windows® Media Player-kontroller når det er koblet til datamaskinen via Bluetooth eller Wi-Fi. TIPS: • Før du bruker Remote Link, må du installere Remote Link på datamaskinen. Gå til http://remotelink.asus.com for å laste ned PC Link og installere det på datamaskinen.
Remote Link-presentasjonskontroller Trykk for å kontrollere presentasjoner på datamaskinen. Trykk og hold denne knappen for å aktivere laserpekeren Trykk på denne knappen for å gå til neste lysbilde. Trykk på denne knappen for å gå tilbake til forrige lysbilde. Remote Link Windows® Media Player-kontroller Trykk for å kontrollere Windows® Media Player. Trykk på denne knappen for å gå tilbake til forrige sang/ musikkfil. Trykk på denne knappen for å gå til neste sang/musikkfil.
Bruke Remote Link-tastaturet Trykk for å bruke tastaturet. Du kan også bruke mikrofonen som taleinndata. Trykk på denne knappen for å skrive en melding via taleinndata. Trykk på denne knappen for å sende meldingen til datamaskinen. Tast inn en melding i dette feltet.
Kapittel 9: ZenLink
10 Zen overalt 10 Zen overalt Spesielle Zen-verktøy Kalkulator Et sveip og et trykk er alt som trengs for å starte kalkulatoren. Når du åpne hurtiginnstillingspanelet, er kalkulatorikonet synlig på toppen av listen. Trykk på denne for å begynne å regne. Trykk på denne for å aktivere kalkulatoren.
Kalkulatorskjerm 144 Kapittel 10: Zen overalt
Hurtignotat Hurtignotat er et verktøy for å ta notater som gir deg frihet til å enten skrible eller taste inn viktige notater du må huske. Når du har laget notater, kan du dele dem via Share Link og sosiale nettverk eller gjøre dem til en oppgave i Gjør det senere. Opprette en klistrelapp Du kan gjøre Hurtignotater om til klistrelapper slik at du kan vise dem hvor som helst på ASUSnettbrettet.
Lydopptaker Spill lydfiler ved hjelp ASUS-nettbrettet ved å aktivere Lydopptaker-appen. Starte Lydopptaker For å starte lydopptakeren trykker du > Lydopptak. Trykk på denne for å tilpasse innstillingene til lydopptakeren. Trykk på denne for å begynne å ta opp lyd.
Midlertidig stoppe et opptak Under et opptak som er midlertidig stoppet kan du velge å fortsette, slette eller lagre opptaket. Trykk for å slette opptaket Trykk for å fortsette opptaket Trykk for å lagre opptaket Opptaksliste Fra opptakslisten kan du spille av, endre navn, dele eller slette et lagret lydopptak. Du kan se opptakslisten på bunnen av hovedskjermen til Lydopptaker.
AudioWizard AudioWizard lar deg tilpasse ASUS-nettbretts lydmoduser for å gi klarere lyd som er tilpasset virkelige scenarioer hvor de brukes. Bruke AudioWizard Slik brukes AudioWizard: 1. Trykk ASUS > AudioWizard. 2. Velg lydmodusen du ønsker å aktivere i AudioWizard-vinduet, og trykk Ferdig for å lagre og avslutte.
Splendid ASUS Splendid lar deg justere skjerminnstillingene enkelt. Dette beriker fargen på skjermen med forhåndsinnstilte fargemoduser. Bruke Splendid Slik bruker du Splendid: 1. Når du er på Hjem-skjermen, trykker du ASUS > Splendid. 2. Velg en av disse modusene for skjermfarge: Balance (Balanse), Reading (Lesing), Vivid (Livlig)Og Customized (Tilpasset). Balansert modus Denne modusen gir en balansert visning av farger på ASUS-nettbrettet.
Lesemodus Denne modusen gir en mild papir-lignende skjerm som reduserer belastningen på øynene og gir en mer komfortabel leseopplevelse på ASUS-nettbrettet. Trykk for lesemodus med bilde og tekst Trykk for lesemodus med bare tekst Livlig modus Denne modusen gir en finjustert fargeinnstilling som forbedrer skjermens farger på ASUSnettbrettet.
Tilpasset modus Denne modusen lar deg justere skjermen basert på ønsket fargetemperatur, fargetone og metning. Flytt for å justere fargetemperaturen Flytt for å justere fargetone Trykk for å stille til fabrikkinnstillinger Flytt for å justere fargemetningen TIPS: Du kan også raskt stille inn Splendid-skjermmodus fra Hurtiginnstillingspanelet.
Strømsparing Maksimere eller utvid kraften til ASUS-nettbrettet selv når den ikke er i bruk, eller når den er koblet til nettverket. Vær smart og tilpass strøminnstillingene til de aktivitetene du gjør oftest, som å lese e-post eller se på videoer. Sette opp strømsparing Maksimer, optimaliser eller tilpass kraften til ASUS-nettbrettet med noen smarte strømsparealternativer. 1.
Tilpasse strømsparing Still inn lysstyrkenivået for dine hyppige aktiviteter som å lese e-post eller bøker, se videoer, surfe nettsider eller lytte til musikk. Du kan også aktivere strømsparingsfunksjonen for noen apper eller aktivere automatisk frakobling fra nettverk når ASUS-nettbrettet er i dvale. Slik tilpasser du strømsparing: 1. Åpne Strømsparing, merk av for Tilpasset modus, og trykk 2. Merk av for en aktivitet, og still inn lysstyrken i prosent. 3.
Kapittel 10: Zen overalt
11 Vedlikeholde Zen 11 Vedlikeholde Zen Holde enheten oppdatert Hold ASUS-nettbrettet oppdatert med Android-systemoppdateringer og oppgraderte apper og funksjoner. Oppdatere systemet og trykk deretter Innstillinger. 1. Trykk 2. På skjermbildet med innstillinger skyver du ned for å vise andre elementer og trykker Om. 3. Trykk Systemoppdatering og deretter på Se etter oppdatering.
Sikre ASUS-nettbrettet Bruk sikkerhetsfunksjonene på ASUS-nettbrettet for å hindre at uvedkommende får tilgang til informasjon. Låse opp skjermen ASUS-nettbrettet tilbyr ulike sikre alternativer for å låse opp skjermen når den er låst. , Innstillinger > Låseskjerm. 1. Trykk 2. Trykk Skjermlås og velg et alternativ for å låse opp ASUS-nettbrettet. TIPS: • Se delen Metoder for å låse opp skjermen for mer informasjon.
Personlig kode Tast inn minst fire tall for å angi en PIN-kode. VIKTIG! Sørg for at du ikke glemmer PIN-koden som du opprettet for å låse opp enheten. Mønster Skyv fingeren over prikkene og lag et mønster. VIKTIG! Mønsteret skal ha minst fire prikker. Sørg for at du husker mønsteret som du opprettet for å låse opp enheten.
Passord Tast inn minst fire tegn for å opprette et passord. VIKTIG! Sørg for at ikke glemmer passordet som du opprettet for å låse opp enheten. Konfigurere andre skjermsikkerhetsfunksjoner I tillegg til modus for skjermlåsen kan du også gjøre følgende på skjermsikkerhetsvinduet: • Hurtigtilgang: Skyv hurtigtilgangsbryteren til På for å kunne starte apper fra låseskjermen.
Sette opp identiteten til ASUS-nettbrettet Gjør deg kjent med identiteten til ASUS-nettbrettet, deriblant serienummer, IMEI (International Mobile Equipment Identity)-nummer og modellnummer. Dette er viktig om du skulle miste ASUS-nettbrettet; du kan da ta kontakt med mobiloperatøren og gi informasjonen slik at ASUS-nettbrettet kan svartelistes og uautorisert bruk kan forhindres. Slik ser du identiteten til ASUS-nettbrettet: 1. Trykk Alle apper (Alle apper), og trykk deretter Innstillinger. 2.
Kapittel 11: Holde Zen ved like
Tillegg Tillegg Merknader For modell P022 Informasjon om RF-eksponering (SAR) Denne enheten møter myndighetenes krav for eksponering for radiobølger. Denne enheten er designet og produsert slik at den ikke overstiger utstrålingsgrensene for eksponering for radiofrekvensenergi (RF) satt av Federal Communications Commission til myndighetene i USA. Eksponeringsstandarden bruker en måleenhet kjent som Specific Absorption Rate, eller SAR. SARgrensen satt av FCC er 1,6 W/kg.
Advarsel fra IC Det kan forekomme at enheten avslutter overføring automatisk ved manglende informasjon om å sende eller ved driftsforstyrrelser. Vær oppmerksom på at hensikten ikke er å hindre overføring av kontroll- eller signalinformasjon eller bruk av gjentakende koder når dette kreves av teknologien. Denne enheten inkludert antenne(r) må ikke plasseres eller brukes sammen med andre antenner eller sendere, unntatt testet innebygd radio.
Ansvarsbegrensning Forhold kan dukke opp hvor grunnet en feil fra ASUS sin side eller annet ansvar fra dem du kan ha rett på å få dekket skader fra ASUS.
Unngå hørselstap For å forhindre mulig hørselsskade, ikke lytt ved høye lydnivåer for lengre perioder. For Frankrike, er denne enhetens hode/øretelefoner i samsvar med kravet til lydtrykknivå utlagt i gjeldende standard EN 50332-1:2013 og/eller EN50332-2:2013 som forlangt i den franske Article L. 5232-1. CE-merking CE-merking for enheter med trådløst LAN / Bluetooth Dette utstyret overholder kravene til direktivet 1999 /5/EC fra det europeiske parlamentet og kommisjonen fra .
Sikkerhetskrav til strøm Produkter med elektriskespenninger rangert opp til 6A og som veier mer enn 3 kilo må bruke godkjente strømledninger større enn eller lik: H05VV-F, 3G, 0.75mm2 eller H05VV-F, 2G, 0.75mm2. ASUS-resirkulering/tilbakeleveringstjenester ASUSs resirkulering og returprogrammer er et resultat av vårt engasjement til de høyeste standardene for miljøvern. Vi tror på å levere løsninger til deg slik at du kan ansvarlig resirkulere våre produkter, batterier, andre komponenter samt emballasjen.
Riktig deponering Fare for eksplosjon hvis batteriet erstattes med en feil type. Kast brukte batterier i henhold til instruksjonene. La batterie présente un risque d’incendie si celle-ci est remplacée par une batterie de type incorrect. La batterie doit être recyclée de façon appropriée. IKKE kast batteriet sammen med vanlig husholdningsavfall. Symbolet med en utkrysset søppelkasse betyr at batteriet ikke bør kastes sammen med vanlig husholdningsavfall. IKKE kast ASUS-nettbrett som husholdningsavfall.
For modell P024 EC-samsvarserklæring Dette produktet er i samsvar med forskriftene i R&TTE-direktiv 1999/5/EC. Samsvarserklæringen kan nedlastes fra https://www.asus.com/support/ Ansvarsbegrensning Forhold kan dukke opp hvor grunnet en feil fra ASUS sin side eller annet ansvar fra dem du kan ha rett på å få dekket skader fra ASUS.
Unngå hørselstap For å forhindre mulig hørselsskade, ikke lytt ved høye lydnivåer for lengre perioder. For Frankrike, er denne enhetens hode/øretelefoner i samsvar med kravet til lydtrykknivå utlagt i gjeldende standard EN 50332-1:2013 og/eller EN50332-2:2013 som forlangt i den franske Article L. 5232-1. CE-merking 0682 CE-merking for enheter med trådløst LAN / Bluetooth Dette utstyret overholder kravene til direktivet 1999 /5/EC fra det europeiske parlamentet og kommisjonen fra .
Sikkerhetskrav til strøm Produkter med elektriskespenninger rangert opp til 6A og som veier mer enn 3 kilo må bruke godkjente strømledninger større enn eller lik: H05VV-F, 3G, 0.75mm2 eller H05VV-F, 2G, 0.75mm2. ASUS-resirkulering/tilbakeleveringstjenester ASUSs resirkulering og returprogrammer er et resultat av vårt engasjement til de høyeste standardene for miljøvern. Vi tror på å levere løsninger til deg slik at du kan ansvarlig resirkulere våre produkter, batterier, andre komponenter samt emballasjen.
Tillegg GERMANY Country: Declaration Date: 06/07/2015 Year to begin affixing CE marking: 2015 CE marking 0682 Signature : __________ Position : CEO Name : Jerry Shen (EC conformity marking) Regulation (EU) No. 617/2013 Regulation (EC) No. 642/2009 2011/65/EU-RoHS Directive Regulation (EC) No. 278/2009 EN 60065:2002 / A12: 2011 EN 301 489-1 V1.9.2 EN 301 489-3 V1.6.1 EN 301 489-4 V1.4.1(2009-05) EN 301 489-7 V1.3.1 EN 301 489-9 V1.4.1(2007-11) EN 301 489-17 V2.2.1 EN 301 489-24 V1.5.
Modellnavn: P022 / P024 Produsent: Adresse: Autorisert representant I Europa: Adresse: ASUSTeK Computer Inc. 4F, No.150, LI-TE RD., PEITOU, TAIPEI 112, TAIWAN ASUS Computer GmbH HARKORT STR.