使用手冊 Motherboard B760M-AYW WIFI
T22921 第一版 2024 年 2 月發行 版權說明 © ASUSTeK Computer Inc. All rights reserved.
目錄 安全性須知........................................................................................................................................ iv 關於這本使用手冊.......................................................................................................................... vi 產品包裝............................................................................................................................................. ix B760M-AYW WIFI 規格列表..............................................................
安全性須知 電氣方面的安全性 • 為避免可能的電擊造成嚴重損害,在搬動電腦主機之前,請先將電腦電源線暫時 從電源插槽中拔掉。 • 當您要加入硬體裝置到系統中時,請務必先連接該裝置的訊號線,然後再連接電 源線。可能的話,在安裝硬體裝置之前先拔掉電腦的電源供應器電源線。 • 當您要從主機板連接或拔除任何的訊號線之前,請確定所有的電源線已事先拔 掉。 • 在使用介面卡或擴充卡之前,我們建議您可以先尋求專業人士的協助。這些裝置 有可能會干擾接地的迴路。 • 請確定電源供應器的電壓設定已調整到本國/本區域所使用的電壓標準值。若您不 確定您所屬區域的供應電壓值為何,請就近詢問當地的電力公司人員。 • 如果電源供應器已損壞,請不要嘗試自行修復。請將之交給專業技術服務人員或 經銷商來處理。 操作方面的安全性 • 在您安裝主機板以及加入硬體裝置之前,請務必詳加閱讀本手冊所提供的相關資 訊。 • 在使用產品之前,請確定所有的排線、電源線都已正確地連接好。若您發現有任 何重大的瑕疵,請儘速聯絡您的經銷商。 • 為避免發生電氣短路情形,請務必將所有沒用到的螺絲、迴紋針及其他零件收 好,不要遺留在主機板上或電腦主機中。 • 灰塵、濕
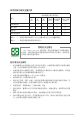
限用物質名稱及含量列表 限用物質及其化學符號 單元 鉛 (Pb) 汞 (Hg) 鎘 (Cd) 六價鉻 多溴聯苯 多溴二苯醚 (Cr+6) (PBB) (PBDE) 印刷電路板 ─ ○ ○ ○ ○ ○ 電子組件 ─ ○ ○ ○ ○ ○ 連接器 ─ ○ ○ ○ ○ ○ 其他及其配件 ─ ○ ○ ○ ○ ○ 備考 1. "○" 係指該項限用物質之百分比含量未超出百分比含量基準值。 備考 2. "─" 係指該項限用物質為排除項目。 鋰電池安全警告 RTC(Real-Time Clock 即時時脈)電池如果更換不正確會有爆炸 的危險,請依照製造商說明書使用相同或同款式的電池,並請依製 造商指示處理用過的電池。 鈕扣電池安全資訊 1. 取出廢舊電池並依據當地法規立即回收或處理,並確保電池放置於兒童無法觸及 之處。切勿焚燒電池或將其丟棄於生活垃圾中。 2. 如果誤食或進入身體任何部位,請致電當地中毒控制中心獲取治療資訊。即使是 使用過的電池也可能導致嚴重的傷害或死亡。 3. 本產品使用額定電壓為 3V 的 CR2032 型電池。 4.
警告 • 攝入危險:本產品包含鈕扣電池。 • 誤食電池可能會導致死亡或嚴重傷害。 • 吞食紐扣電池可能在兩小時內導致體內化學灼 傷。 • 請將新舊電池放置於兒童無法觸及之處。 • 如果懷疑吞食電池或電池進入身體任何部位, 請立即就醫。 ! NCC: Wireless Statement 取得審驗證明之低功率射頻器材,非經核准,公司、商號或使用者均不得擅自變更頻 率、加大功率或變更原設計之特性及功能。低功率射頻器材之使用不得影響飛航安全 及干擾合法通信;經發現有干擾現象時,應立即停用,並改善至無干擾時方得繼續使 用。前述合法通信,指依電信管理法規定作業之無線電通信。低功率射頻器材須忍受 合法通信或工業、科學及醫療用電波輻射性電機設備之干擾。 應避免影響附近雷達系統之操作。 HDMI Trademark Notice The terms HDMI, HDMI High-Definition Multimedia Interface, HDMI Trade dress, and the HDMI Logo are trademarks or registered trademarks of HDMI
關於這本使用手冊 產品使用手冊包含了所有當您在安裝華碩主機板時所需用到的資訊。 使用手冊的編排方式 使用手冊是由下面幾個章節所組成: 第一章:產品介紹 您可以在本章節中發現諸多華碩賦予本主機板的優異特色以及所有能夠應用 在本主機板的新技術。詳細內容有:主機板上的內建開關、跳線選擇區以及連 接埠。 第二章:BIOS 程式設定與 RAID 支援 本章節描述如何進入 BIOS 程式設定、透過 EZ Flash Utility 更新 BIOS 與 RAID 支援。 哪裡可以找到更多資訊 您可以經由下面所提供的管道來獲得您所使用的華碩產品資訊以及軟硬體的升級 資訊等。 1. 華碩網站 您可以到 https://www.asus.com/tw/ 華碩電腦全球資訊網站取得所有關於華碩 軟硬體產品的各項資訊。台灣以外的華碩網址請參考說明書後面的聯絡資訊。 2. 其他文件 在您的產品包裝盒中除了本手冊所列舉的標準配件之外,也有可能會夾帶有 其他的文件,譬如經銷商所附的產品保證單據等。 3.
4. 主機板安裝指南 請至 https://www.asus.com/tw/ 獲得關於主機板安裝指南的更多資訊。 5. 驅動及應用程式的常見問題解答 請至 https://www.asus.com/tw/ 獲得關於為主機板下載安裝驅動及應用程式的 更多資訊。 6. RAID 設定使用手冊 請至 https://www.asus.
請注意! 本產品享有三年產品保固期,倘若自行撕毀或更換原廠保固序號標籤,即取消保 固權益,且不予提供維修服務。 華碩的連絡資訊 華碩電腦股份有限公司 ASUSTeK COMPUTER INC. 地址:112 台北市北投區立德路 15 號 1 樓 ASUS COMPUTER INTERNATIONAL(美國) 地址:48720 Kato Rd.
服務與支援 請造訪 https://www.asus.com/tw/support/ 或直接掃描下方 QR Code 進入華碩技術支援 頁面,或請來電 0800-093-456,由客服人員提供您相關協助。 產品註冊 請掃碼登入並註冊產品以獲得完善的產品支援。 產品包裝 在您拿到本主機板包裝盒之後,請馬上檢查下面所列出的各項標準配件是否齊全。 主機板 1 x B760M-AYW WIFI 主機板 排線 2 x SATA 6Gb/s 排線 其他 1 1 1 1 相關文件 1 x 快速使用指南 x x x x 華碩 Wi-Fi 行動天線 I/O 擋板 M.2 橡膠軟墊包 M.
B760M-AYW WIFI 規格列表 中央處理器 支援採用 LGA1700 插槽的第 14 代與第 13 代 Intel® Core™ 處理器 以及第 12 代 Intel® Core™、Pentium® Gold 及 Celeron® 處理器* 支援 Intel® Turbo Boost 2.0 技術與 Intel® Turbo Boost Max 3.0 技 術** * 請瀏覽華碩網站 https://www.asus.com/tw/ 獲得最新的處理器支援列表。 ** 是否支援 Intel® Turbo Boost Max 3.
B760M-AYW WIFI 規格列表 音效 Realtek 高傳真 7.1 環繞聲道音效編解碼晶片* - 支援音效介面偵測(Jack-Detection)、多音源獨立輸出 (Multi-Streaming)與前面板音效插孔變換(Front Panel Jackretasking)功能 - 最高支援 24-Bit/192kHz 音源播放 音效功能: - 音效區域保護線路 - 優質音效電容 - 聲道專属 PCB 層 * 請使用前面板具備 HD 音效插孔的機殼以支援 7.1 環繞聲道音效輸出。 後側面板裝置連接埠 4 2 1 1 1 3 x x x x x x USB 3.2 Gen 1 連接埠(4 x Type-A) USB 2.0 連接埠(2 x Type-A) HDMI™ 連接埠 Wi-Fi 模組 Realtek 2.5Gb 網路連接埠 音效連接埠 內部 I/O 裝置連接埠 風扇與散熱相關 1 x 4-pin 中央處理器風扇接頭 2 x 4-pin 機殼風扇接頭 電源相關 1 x 24-pin 主電源插槽 1 x 8-pin +12V 電源插槽 儲存相關 2 x M.
B760M-AYW WIFI 規格列表 特殊功能 華碩 5X PROTECTION III - DIGI+ VRM - LANGuard - 超壓保護 - SafeSlot Core+ - 不鏽鋼 I/O 背板 華碩 Q-Design - M.2 Q-Latch - Q-DIMM - Q-LED Core - Q-Slot 華碩散熱方案 - M.
產品介紹 1.
1.2 主機板結構圖 5 6 21.1cm(8.3in) 1 10 4 10 ADD_GEN 2_2 CPU_FAN ADD_GEN 2_1 ATX_12V USB_56 2 DIGI+ VRM LGA1700 CHA_FAN1 4 5 24.4cm(9.6in) LAN_U32G1_910 ATX_PWR U32G1_34 DDR5 DIMM_B (64bit, 288-pin module) DDR5 DIMM_A (64bit, 288-pin module) HDMI AUDIO U32G1_12 M.2_1(SOCKET3) M.2(WIFI) M.2_1(SOCKET3) 2242 2260 2280 8 PCIE SATA 4.0 X4 X M.
3. 擴充插槽 本主機板配備一個 PCIe x16 插槽與兩個 PCIe x1 插槽,可支援 PCIe x1 網路 卡、SCSI 卡與其他與 PCI Express 規格相容的卡。 4. 風扇接頭 將風扇排線連接至風扇與泵接頭以冷卻系統。 GND FAN PWR FAN IN FAN PWM 5. 主機板電源插槽 這些電源插槽可讓您將主機板連接到電源供應器。電源供應器所提供的連接插頭 已經過特別設計,只能以一個特定方向插入主機板上的電源插槽。找到正確的插入方 向後,僅需穩穩地將之套進插槽中即可。 請務必連接 8-pin 電源插頭。 如果您想要安裝其他的硬體裝置,請務必使用較高功率的電源以提供足 夠的裝置用電需求。若電源無法提供裝置足夠的用電需求,則系統將會 變得不穩定或無法開啟。 6. M.2 插槽(Key M) 這些插槽用來安裝 M.2 裝置,如 M.2 固態硬碟。 •Intel® Core™ 處理器(第 14 代、第 13 代與第 12 代): M.2_1 插槽支援 PCIe 4.0 x4 模式 M Key 的 2242/2260/2280 類型儲存 裝置。 •Intel® B760 晶片組: M.
10. 可定址 Gen 2 燈條接頭 這些接頭可用來連接獨立的可定址 RGB WS2812B LED 燈條或基於 WS2812B 的 LED 燈條。 ADD_GEN 2 Ground Data +5V 在您安裝或移除任何元件之前,請確認電源供應器的電源 開關是切換到關閉(OFF)的位置,而最安全的做法是先 暫時拔出電源供應器的電源線,等到安裝/移除工作完成 後再將之接回。如此可避免因仍有電力殘留在系統中而嚴 重損及主機板、周邊裝置、元件等。 PIN 1 •可定址 Gen2 燈條接頭支援 WS2812B 可定址 RGB LED 燈條(5V/Data/ Ground),總輸出電流限制為 3 安培(5 伏特),該主機板上的可定址 接頭最多可支援 500 個 LED。 •實際的亮度與色彩會依 LED 燈條的不同而異。 •若您的 LED 燈條未亮起,請檢查可定址 RGB LED 燈條是否連接在正確 位置、插座(5V)是否與接頭(5V)對齊至主機板上。 •可定址 RGB LED 燈條僅會在系統運作時亮起。 11.
13. 前面板音效連接排針 AAFP 這組排針供您連接到前面板的音效排線,除了讓您 可以輕鬆地透過主機前面板來控制音效輸出 / 輸入等功 能,並且支援 HD Audio 音效標準。將前面板音效輸出 / 輸入模組的排線的一端連接到這個排針上。 SPDIF_OUT 14. 數位音效連接排針 此組排針用於附加的 Sony/Philips (S/PDIF) 數位音效連接埠。將 S/PDIF 音效輸出模組的連接線連接至排針,然後將此模組安裝至系 統機殼後面的插槽中。 SPEAKER 15. 機殼喇叭連接排針(SPEAKER) 這組 4-pin 排針連接到電腦主機機殼中的喇叭。當系統正常開機便可 聽到嗶嗶聲,若開機時發生問題,則會以不同長短的音調來警示。 16. SPI TPM 連接排針 TPM PIN 1 17.
1.2.2 後側面板連接埠 1 3 4 5 2 6 後側面板連接埠 1. Realtek 2.5Gb 網路連接埠* 2. 音效連接埠** 3. USB 2.0 連接埠 5、6 4. HDMI™ 連接埠 5. USB 3.2 Gen 1 Type-A 連接埠 3、4、9、10 6. Wi-Fi 天線連接埠 * 與 **:請參考下表中網路連接埠指示燈與音效連接埠的定義。 強烈建議您將裝置連接到對應傳輸速率的連接埠。如,將 USB 3.2 Gen 1 裝置連接至 USB 3.2 Gen 1 連接埠,才能讓裝置獲得更快更佳效能。 * Realtek 2.5Gb 網路連接埠指示燈說明 1-6 ACT/LINK 指示燈 ACT/LINK 指示燈 速度指示燈 狀態 說明 狀態 說明 關閉 沒有連線 關閉 沒有連線 綠色 已連線 綠色 連線速度 2.
** 2、4、5.1 或 7.1 聲道音效設定 連接埠 2 聲道 4 聲道 5.1 聲道 7.
1.
主機板使用手冊 1-9
1.
安裝記憶體模組 2 1 3 取出記憶體模組 B 主機板使用手冊 A 1-11
1.
BIOS 程式設定與 RAID 支援 2 有關 BIOS 與 RAID 設定的更多詳細資訊,請參閱華碩官網對應產品頁 面「支援」標籤頁中的使用手冊與檔案,或至 https://www.asus.com/tw/ support/ 查詢。 2.
2.2 華碩 EZ Flash 3 華碩 EZ Flash 3 程式讓您能輕鬆地更新 BIOS 程式,可以不必再到作業系統模式 下執行。 請讀取出廠預設值來保持系統的穩定。在 Exit 選單中選擇 Load Optimized Defaults 項目或按下 快速鍵來回復 BIOS 預設設定。 請依照以下步驟更新 BIOS 程式: •本功能僅支援採用 FAT 32/16 格式的單一磁區 USB 隨身碟。 •當進行 BIOS 更新時,請勿關閉或重新啟動系統以免造成系統開機失敗! 2-2 1. 將儲存有最新 BIOS 檔案的 USB 隨身碟插入 USB 連接埠。 2. 進入 BIOS 設定程式的 Advanced Mode,選擇 Tool > ASUS EZ Flash 3 Utility, 接著請按下 鍵。 3. 按左/右方向鍵切換到 Drive 區域。 4. 按上/下方向鍵找到儲存有最新 BIOS 檔案的 USB 隨身碟,然後按下 鍵。 5. 按左/右方向鍵切換到 Folder 區域。 6.
2.3 華碩 CrashFree BIOS 3 華碩最新自行研發的 CrashFree BIOS 3 工具程式,讓您在當 BIOS 程式與資料被 病毒入侵或損毀時,可以輕鬆地從含有最新或原始 BIOS 檔案的 USB 隨身碟中回復 BIOS 程式的資料。 回復 BIOS 程式: 1. 請至 https://www.asus.com/tw/support/ 下載適用於本主機板的最新 BIOS 版本。 2. 請依照以下步驟重新命名檔案: 開啟 BIOSRenamer.exe 程式自動為檔案重新命名。 • • 依據規格列表部分中的 BIOS 檔案名稱,手動為檔案重新命名。 • 手動將檔案重新命名為 asus.cap。 3. 將重命名的檔案複製至您的 USB 儲存裝置。 4. 啟動系統。 5. 將儲存有最新 BIOS 檔案的 USB 隨身碟插入 USB 連接埠。 6. 接著工具程式便會自動檢查裝置中是否存有 BIOS 檔案。當搜尋到 BIOS 檔案 後,工具程式會開始讀取 BIOS 檔案並自動進入 EZ Flash 3 公用程式。 7.
2.