BE209/BE229/BE239/ BE249/BE24A/BE24W/ BE27A sarja LCDnäyttö Käyttöohje
Ensimmäinen painos Kesäkuu 2015 Copyright © 2015 ASUSTeK COMPUTER INC. Kaikki oikeudet pidätetään. Tämän käyttöoppaan osia tai siinä kuvattuja tuotteita ja ohjelmistoja ei saa monistaa, siirtää, jäljentää, tallentaa hakujärjestelmään tai kääntää millekään kielelle missään muodossa tai millään tavalla, lukuun ottamatta dokumentaatiota, jonka ostaja on säilyttänyt varmistustarkoituksessa, ilman ASUSTeK COMPUTER INC:n (” ASUS”) erikseen myöntämää, kirjallista lupaa. (“ASUS”).
Sisältö Sisältö .......................................................................................................... iii Ilmoitus......................................................................................................... iv Turvallisuustiedot....................................................................................... vii Huolto ja puhdistus................................................................................... viii Takeback Services.................................
Ilmoitus Federal Communications Commissionin ilmoitus Tämä laite täyttää FCC-määräysten osan 15 vaatimukset. Laitteen käyttö on seuraavien ehtojen alaista: • Tämä laite ei saa aiheuttaa haitallisia häiriöitä ja • Tämän laitteen on siedettävä muualta tuleva häiriö, myös mahdollisesti asiaankuulumatonta toimintaa aiheuttavat häiriöt. Tämä laite on testattu, ja sen on osoitettu täyttävän FCC-määräysten osassa 15 luokan B digitaalilaitteille asetetut raja-arvot.
HUOMAUTUS: Energy Star EI ole tuettu FreeDOS- ja Linux-pohjaisissa käyttöjärjestelmissä. Kanadan viestintälaitoksen ilmoitus Tämä digitaalinen luokan B -laite ei ylitä digitaalisia laitteita koskevan Kanadan viestintälaitoksen asettaman määräyksen rajoja koskien radiotaajuista kohinaa. Tämä luokan B digitaalilaite on kanadalaisen ICES-003:n mukainen. This Class B digital apparatus meets all requirements of the Canadian Interference - Causing Equipment Regulations.
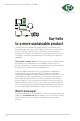
A third-party certification according to ISO 14024 Toward sustainable IT products Say hello to a more sustainable product IT products are associated with a wide range of sustainability risks throughout their life cycle. Human rights violations are common in the factories. Harmful substances are used both in products and their manufacture. Products can often have a short lifespan because of poor ergonomics, low quality and when they are not able to be repaired or upgraded. This product is a better choice.
Turvallisuustiedot • Lue huolellisesti kaikki toimitukseen kuuluvat asiakirjat ennen näytön asettamista • Estääksesi tulipalon tai sähköiskun vaaran älä koskaan altista näyttöä sateelle tai kosteudelle. • Älä koskaan yritä avata näytön koteloa. Näytön sisällä oleva vaarallisen korkea jännite voi johtaa vakavaan fyysiseen vammaan. • Jos virtalähde on rikkoutunut, älä yritä korjata sitä itse. Ota yhteys pätevään huoltoteknikkoon tai jälleenmyyjään.
Huolto ja puhdistus • Ennen kuin nostat tai sijoitat näytön uuteen paikkaan, on parempi irrottaa kaapelit ja virtajohto. Sijoita näyttö uuteen paikkaan oikealla nostotekniikalla. Kun nostat tai kannat näyttöä, pidä kiinni näytön reunoista. Älä nosta näyttöä sen telineestä tai johdosta. • Puhdistus. Sammuta näyttö pois päältä ja irrota virtajohto. Puhdista näytön pinta nukkaamattomalla, hankaamattomalla liinalla. Pinttyneet tahrat voi poistaa miedolla puhdistusaineliuoksella kostutetulla liinalla.
Mistä löydät lisätietoja Katso seuraavista lähteistä lisätietoja sekä tuote- ja ohjelmistopäivityksiä. 1. ASUS:n verkkosivut ASUS-yrityksen maailmanlaajuiset verkkosivustot tarjoavat päivitettyjä tietoja ASUS-laitteisto- ja -ohjelmistotuotteista. Katso: http://www.asus.com. 2. Valinnainen dokumentaatio Tuotteen pakkaus saattaa sisältää jälleenmyyjän lisäämiä valinnaisia asiakirjoja. Nämä asiakirjat eivät sisälly vakiopakkaukseen.
x
1.1 Tervetuloa! Kiitos ASUS® LCD-näytön hankkimisesta! ASUS:n uusin laajakuva-LCD-näyttö tarjoaa leveämmän, kirkkaamman ja kristallinkirkkaan näytön sekä runsaasti ominaisuuksia, jotka parantavat katselukokemustasi. Näillä ominaisuuksilla varustettuna pääset nauttimaan näytön tuomista ilahduttavista visuaalisista elämyksistä! 1.
1.3 Näytön esittely 1.3.1 Etunäkymä BE229/BE239/BE249 simple base BE209/BE229/BE239/BE249/BE24A/ BE24W/BE27A height adjustment base Menu Menu Close Close Quick Fit Quick Fit Brightness Brightness Blue Light Filter Blue Light Filter 7 6 1. 4 3 2 1 Virtapainike/virran merkkivalo • Kytkee näytön päälle/pois. • Virran merkkivaon värimääritelmä on alla olevan taulukon mukainen. 2.
• Tämä on pikanäppäin, jolla aktivoidaan kohdistamiselle suunniteltu QuickFit-toiminto. • QuickFit-toiminto sisältää useita sivuja yleisiä ruudukkokuvioita, paperikokoja ja valokuvakokoja. (Katso kohta 1.3.3 QuickFit-toiminto). 5. Shortcut (Oikopolku) • Paina tätä painiketta näyttääksesi OSD-valikon, kun OSD on pois päältä. • Oletus: Brightness (Kirkkauden) pikanäppäin • Vaihda pikanäppäimen toimintoa menemällä Shortcut (Oikopolku) > Shortcut 1 (Oikopolku 1)-valikkoon. 6.
1.3.
BE24WQLB 1 2 3 7 8 4 11 6 9 10 10 BE27AQLB 1 2 3 5 1 2 3 7 8 11 4 4 5 12 7 8 9 10 10 BE229QLBH/BE239QLBH/ BE249QLBH/BE24AQLBH 11 6 9 10 1. Kensington-lukon aukko. 2. Virtakytkin. Paina painiketta kytkeäksesi virran päälle/pois. 3. AC-IN-portti. Tämä portti liittää virtajohdon. 4. DisplayPort in. Tämä portti on DisplayPort-yhteensopivan laitteen liittämiseen. 5. DVI-portti. Tämä 24-pinninen portti on PC:n DVI-D digitaalisen signaalin liitännälle. 6. VGA-portti.
1.3.3 QuickFit-toiminto QuickFit-toiminto sisältää kolmenlaisia kuvioita: (1) Ruudukkokuviot (2) Paperikoko (3) Valokuvakoko. Paina QuickFit-painiketta kuvioiden aktivoimiseksi. Paina ruudun osoittamia painikkeita haluamasi kuvion valitsemiseksi. Joitakin seuraavista kuvioista ei ole saatavilla. Katso todellisia näytöllä näytettäviä kuvioita. 1.
3. Valokuvakoko Monet todelliset valokuvakoot, jotka näytetään QuickFit-toiminnossa tarjoaa valokuvaajille ja muille käyttäjille tarkan näkymän ja he voivat muokata kuviaan oikeassa koossa ruudulla.
1-8 Kappale 1: Tuotteen esittely
2.1 Näytön varren/jalustan kokoaminen Kokoan näytön jalusta: 1. Laita näytön etuosa pöytää vasten. 2. Liitä jalusta varteen ja varmista, että varren kieleke sopii jalustan uraan. 3. Kiinnitä jalusta varteen kiinnittämällä nippuruuvi. Suosittelemme, että peität pöydän pinnan pehmeällä kankaalla estääksesi näytön vahingoittumisen. BE229/BE239/BE249 yksinkertainen jalusta BE209/BE229/BE239/BE249/BE24A/BE24W/BE27A korkeuden säätö jalusta 2.
BE229/BE239/BE249 yksinkertainen jalusta 1. Laita näytön etuosa pöytää vasten. 2. Poista suojakumit ruuvien neljästä reiästä. (Kuva 1) 3. Poista jalusta (Kuva 2). 4. Käytä ruuvimeisseliä saranan ruuvin irrottamiseksi (Kuva 3), poista sitten sarana. 1 2 (Kuva 1) (Kuva 2) 1 2 (Kuva 3) BE209/BE229/BE239/BE249/BE24A/BE24W/BE27A korkeuden säätö jalusta 1. Laita näytön etuosa pöytää vasten. 2. Paina vapautuspainiketta ja irrota sitten varsi/jalusta näytöstä (Kuva 2).
Suosittelemme, että peität pöydän pinnan pehmeällä kankaalla estääksesi näytön vahingoittumisen. • VESA-seinäkiinnityspaketti (100 x 100 mm) ostetaan erikseen. • Käytä vain UL Listed -seinäkiinnityskannattimia, joiden minimipaino/ kuorma on 22,7 kg (Ruuvikoko: M4 x 10 mm) 2.
2.4 • • • • • Näytön säätäminen Parhaaksi katselukulmaksi suositellaan näytön koko tasoa, säädä sitten näytön kulmaa haluamasi mukaan. Pidä kiinni jalustasta näytön kulmaa säätäessäsi, ettei se putoa. BE229/BE239/BE249 yksinkertainen jalusta: Suositeltu säätökulma on +20˚ - -5˚. BE209/BE229/BE239/BE249/BE24A/BE24W korkeuden säätö jalusta: Voit säätää näytön kulmaa +35˚ - -5˚ ja se mahdollistaa 90˚ nivelletyn säädön joka vasemmalta tai oikealta. Voit myös säätää näytön korkeutta +/- 130 mm.
On normaalia, että näyttö tärisee hieman katselukulmaa säädettäessä. 2.5 Kaapelien kytkeminen Liitä kaapelit ohjeiden mukaisesti: • Yhdistä virtajohto: Liitä virtajohdon toinen pää näytön AC-tuloporttiin, toinen pää virtalähteeseen. • Liitä VGA/DVI/DisplayPort/HDMI/Mini DisplayPort-kaapeli: a. Liitä VGA/DVI/DisplayPort/HDMI/Mini DisplayPort -kaapelin toinen pää näytön VGA/DVI/DisplayPort/HDMI/Mini DisplayPort -liitäntään. b.
• Äänikaapelin liittäminen: Liitä äänikaapelin toinen pää näytön äänituloporttiin, toinen pää tietokoneen äänilähtöporttiin. • Kuulokkeiden käyttö: Yhdistä pistokepää näytön kuulokejakkiin, kun HDMItai DisplayPort-signaali syötetään. • USB 2.0 -porttien käyttö: Ota mukana tuleva USB 2.0 -kaapeli, ja kytke USB:n ylävirran kaapelin pienempi pää (tyyppi B) näytön USB ylävirran porttiin, ja suurempi pää (tyyppi A) tietokoneesi USB 2.0 -porttiin.
3.1 Kuvaruutu (OSD) -valikko 3.1.1 Uudelleenmääritys Splendid Standard Mode ASUS BE229 VGA 1920 x 1080 @ 60Hz Scenery Mode Standard Mode Theater Mode Night View Mode sRGB Mode Reading Mode Darkroom Mode 1. Paina mitä tahansa painiketta (paitsi virtapainiketta) saadaksesi näkyviin OSD-valikon. 2. Paina 3. Paina ruudun osoittamia painikkeita navigoidaksesi toimintojen läpi. Korosta -painiketta sen aktivoimiseksi.
3.1.2 1. Kuvaruutuvalikon johdanto Splendid Tämä toiminto sisältää 7-8 haluamaasi alitoimintoa. Jokaisessa tilassa on Reset (Nollauksen) valinta, jolla voit ylläpitää asetustasi tai palata esiasetuksen tilaan.
• Night View Mode (Yökatselutila): Paras valinta tummasävyisten pelien pelaamiseen, joissa on SplendidPlus Video Enhancement. • sRGB Mode (sRGB-tila): Tämä on paras valinta kuvien ja grafiikan katseluun tietokoneelta. • Reading Mode (Lukutila): Tämä on paras valinta kirjan lukemiseen. • Darkroom Mode (Pimiötila): Tämä on paras valinta heikon ympäröivän valon ympäristöön. 2.
Katso seuraava kohta silmien rasituksen helpottamiseksi: 3. • Käyttäjien tulee pitää taukoja näytön katselusta pitkiä aikoja työskennellessään. On suositeltavaa pitää lyhyitä taukoja (vähintään 5 minuuttia) tunnin tietokoneella työskentelyn jälkeen. Lyhyiden, säännöllisten taukojen pitäminen on tehokkaampaa kuin yhden pidemmän tauon pitäminen. • Silmien rasituksen ja kuivuuden minimoimiseksi käyttäjien tulisi antaa silmien levätä säännöllisesti keskittymällä kauempana oleviin kohteisiin.
4. Image (Kuva) Kuvaan liittyvät asetukset tehdään tästä valikosta. Image Standard Mode ASUS BE229 VGA 1920 x 1080 @ 60Hz Sharpness Trace Free Aspect Control VividPixel ASCR Position Focu s Auto Adjust • Sharpness (Terävyys): Säätöalue on 0-100. • Trace Free: Säätää näytön vasteaikaa. • Aspect Control (Kuvasuhteen hallinta): Säätää kuvasuhteeksi Full (Täysi), 4:3, 1:1 (valinnainen) tai OverScan (valinnainen). 4:3 on saatavilla vain silloin, kun tulolähde on 4:3-formaatissa.
5. Sound (Ääni) Voit säätää kohtia Volume (Äänenvoimakkuus), Mute (Mykistys) ja Source (Lähde) tästä valikosta. Sound Standard Mode ASUS BE229 VGA 1920 x 1080 @ 60Hz Volume Mute Source 6. • Volume (Äänenvoimakkuus): Säätöalue on 0-100. • Mute (Mykistys): Vaihtelee näytön ääntä päälle ja pois. • Source (Lähde): Päättää, mistä lähteestä näytön ääni tulee. Input Select (Tulon valinta) Tässä toiminnossa voit valita halutun tulolähteen.
Input Select Standard Mode ASUS BE209TLB VGA 1920 x 1080 @ 60Hz VGA DVI 7. System Setup (Järjestelmän asetukset) Voit tehdä muutoksia järjestelmään. System Setup Standard Mode ASUS BE229 VGA 1920 x 1080 @ 60Hz Splendid Demo Mode ECO Mode USB Charging OSD Setup Language Key Lock Information More • Splendid Demo Mode: Jakaa ruudun kahteen osaan Splendid-tilojen vertailua varten. (vain Scenery Mode (Näkymätila)) • ECO Mode: Vähentää virrankulutusta.
• USB-lataus (vain BE24WQLB): * “On” (Päällä) antaa USB downstream -porttien tuottaa 5 V / 2 A - tai 5 V / 900 mA -lähdön, kun näyttö on kytketty päälle tai se on valmiustilassa. Alla oleva taulukko osoittaa, voidaanko USB downstream -portteja käyttää ulkoisen laitteen lataamiseen erilaisissa tilanteissa. Downstreamportti -portti -portti * -portti -portti 3-8 Kun upstream-porttia EI ole yhdistetty tietokoneeseen...
• Power Indicator (Virran merkkivalo): Kytkee virran LED-merkkivalon päälle/pois päältä. • Human Sensor (Liiketunnistin) (vain BE239QLBR): kytkee Human Sensor (Liiketunnistin) -toiminnon päälle/pois ja säätää sen herkkyyttä. Toiminta-alue on 50-70 cm. Oletuksena se on “Off” (Pois). * Low (Matala): Anturin etäisyys on n. 50 cm. * Medium (Keski): Anturin etäisyys on n. 60 cm. * High (Korkea): Anturin etäisyys on n. 70 cm.
3.2 Teknisten tietojen yhteenveto BE229/BE239/BE249 yksinkertainen jalusta Paneelityyppi Paneelin koko Max.resoluutio Pikselien korkeus Kirkkaus (tyypillinen) Kontrastisuhde (tyypillinen) Kontrastisuhde (Max.) Katselukulma (V/P) CR>10 Näyttövärit Vastausaika SplendidPlus Video Enhancement SplendidPlus-valinta Automaattinen säätö Värilämpötilan valinta Analoginen tulo Digitaalinen tulo Kuulokejakki Äänitulo Kaiutin (sisäänrakennettu) USB 2.0 -portti USB 3.
Tehonkulutus Lämpötila (käyttö) BE229QB/BE229Q/BE229QBH/BE229QH: Virta päällä: < 21,09 W** (tyyp.), Valmiustila: < 0,5 W (tyyp.), virta pois: 0 W (Sammutettu) BE239QB/BE239Q: Virta päällä: < 22 W** (tyyp.), Valmiustila: < 0,5 W (tyyp.), virta pois: 0 W (Sammutettu) BE249QB/BE249Q: Virta päällä: < 22,97 W** (tyyp.), Valmiustila: < 0,5 W (tyyp.
BE209/BE229/BE239/BE249/BE24A/BE24W korkeuden säätö jalusta Paneelityyppi Paneelin koko Max.resoluutio Pikselien korkeus Kirkkaus (tyypillinen) Kontrastisuhde (tyypillinen) Kontrastisuhde (Max.
Äänitulo Kaiutin (sisäänrakennettu) USB 2.0 -portti Lämpötila (käyttö) Kyllä 2 W x 2 Stereo, RMS BE209QLB/BE229QLB/BE239QLB/BE239QLBR/ BE249QLB/BE24AQLB: Ylävirtaan x 1, alavirtaan x 2 (vain ) BE229QLBH/BE239QLBH/BE249QLBH/ BE24AQLBH: Ylävirtaan x 1, alavirtaan x 2 BE24WQLB: Ylävirtaan x 1, alavirtaan x 4 Musta/Harmaa Valkoinen (päällä)/oranssi (valmiustila) +35˚~ -5˚ +90˚~ -90˚ +90˚~ -90˚ 130 mm Kyllä AC: 100~240 V BE209QLB/BE209QL: Virta päällä: < 15,74 W** (tyyp.), Valmiustila: < 0,5 W (tyyp.
Mitat (W x H x D) jalustalla Paino (arv.
BE27A Paneelityyppi Paneelin koko TFT LCD 27" (16:9, 68,47 cm) laajakuva Max.resoluutio Pikselien korkeus Kirkkaus (tyypillinen) Kontrastisuhde (tyypillinen) Kontrastisuhde (Max.) Katselukulma (V/P) CR>10 Näyttövärit Vastausaika SplendidPlus Video Enhancement SplendidPlus-valinta Automaattinen säätö Värilämpötilan valinta Analoginen tulo Digitaalinen tulo 2560 x 1440 0,2331 mm x 0,2331 mm 350 cd/m2 1000:1 100.000.
Lisävarusteet Vaatimustenmukaisuus ja standardit Virtajohto, DVI-kaapeli (valinnainen), HDMI-kaapeli, DisplayPort-kaapeli (valinnainen), DisplayPortkaapeli (Mini-DP - DP), äänikaapeli, USB-kaapeli, pikaopas, takuukortti UL/cUL, FCC, ICES-3, CB, CE, ErP, WEEE, TUVGS, TUV-Ergo, ISO 9241-307, UkrSEPRO, CU, CCC, CEL, BSMI, RCM, MEPS, VCCI, PSE, PC Recycle, J-MOSS, KC, KCC, e-Standby, Energy Star®, RoHs, Windows 7/8.
BE209TL/BE209TLB Paneelityyppi Paneelin koko Max.resoluutio Pikselien korkeus Kirkkaus (tyypillinen) Kontrastisuhde (tyypillinen) Kontrastisuhde (Max.) Katselukulma (V/P) CR>10 Näyttövärit Vastausaika SplendidPlus Video Enhancement SplendidPlus-valinta Automaattinen säätö Värilämpötilan valinta Analoginen tulo Digitaalinen tulo Kuulokejakki Äänitulo Kaiutin (sisäänrakennettu) USB 2.
Vaatimustenmukaisuus ja standardit UL/cUL, CB, CE, ErP, FCC, ISO9241-307, RCM, VCCI, RoHS, Windows 7 & 8 WHQL, Energy Star®, Flicker Free, Low blue Light, TUV-GS, TUV-Ergo, CU, PSE, WEEE, EMC DoC, UkrSEPRO, MEPS, NFPA99 *Kaikki tiedot voivat muuttua ilman erillistä ilmoitusta. **Mittaa ruudun kirkkautta 200 cd/m2 ääni/USB/kortinlukija-liitännästä.
3.3 Vianetsintä (FAQ) Ongelma Mahdollinen ratkaisu Virran LED-valo ei pala • Paina -painiketta tarkistaaksesi, onko näyttö Päällä -tilassa. • Tarkista, onko virtajohto liitetty oikein näyttöön ja pistorasiaan. • Tarkista, onko virtapainike PÄÄLLÄ. Virran LED palaa oranssina, eikä näytössä näy kuvaa • Tarkista ovatko näyttö ja tietokone päällä. • Varmista, että signaalikaapeli liitetty tiukasti näyttöön ja tietokoneeseen. • Tarkista signaalikaapeli ja varmista, ettei yksikään nasta ole taipunut.
3.
BE229/BE239/BE249 Resoluutiotaajuus Vaakataajuus (KHz) 640x480 640x480 640x480 640x480 720x400 800x600 800x600 800x600 800x600 832X624 1024x768 1024x768 1024x768 1152x864 1280x720 1280x768 1280x800 1280x960 1280x1024 1280x1024 1360x768 1366x768 1440x900 1600x1200 1680x1050 1920x1080 31,47(N) 35,00(N) 37,87(N) 37,5(N) 31,47(N) 35,16(P) 37,88(P) 48,08(P) 46,86(P) 49,72(P/N) 48,36(N) 56,476(N) 60,02(N) 67,5(P/N) 45,00(P) 47,78(P) 49,7(P) 60,00(P) 63,98(P) 79,98(P) 47,712(P) 47,712(P) 55,94(N) 75,00(P) 65,29
Ajoitustila: Kun näyttö toimii videotilassa (eli ei näytä tietoja) HDMI-liitäntää käyttäen, seuraavia teräväpiirtotiloja tuetaan vakiopiirtoterävyyden lisäksi.
2 720p60 1280 x 720 45 60 74,25 720p-60Hz 3 576p 720 x 576 31,25 50 27 576p-50Hz 4 720p50 1280 x 720 37,5 50 74,25 720p-50Hz 5 1080p60 1920 x 1080 67,5 60 148,5 1080p60Hz 6 1080p50 1920 x 1080 56,25 50 148,5 1080p50Hz BE27A Resoluutiotaajuus Vaakataajuus (KHz) 640x480 640x480 640x480 640x480 720x400 800x600 800x600 800x600 1024x768 1024x768 1024x768 1152x864 1280x720 1280x768 1280x800 1280x960 1280x1024 1280x1024 1366x768 1440x900 1600x1200 1680x1050 1920x1080 1920x1200
1920x1200 2048x1152 (Vähentää sammutusta) 2560x1080 2560x1440 74,556(N) 59,885(P) 193,25 70,99(P) 59,9(N) 156,75 66,636(P) 88,787(P) 59,978(N) 59,951(N) 181,25 241,5 * “P”, “N” on lyhenne sanoista “positiivinen”, “negatiivinen” tulevan H/V-synkronoinnin napaisuus (tuloajastus). Kun näyttö toimii videotilassa (eli ei näytä tietoja), seuraavia teräväpiirtotiloja tuetaan vakiopiirtoterävyyden lisäksi.
1280x768 1280x800 1280x960 1280x1024 1280x1024* 1366x768 1440x900 1600x1200 1680x1050 1920x1080 1920x1200 (Vähentää sammutusta) Ajastuksen nimi 47,78(P) 49,7(P) 60,00(P) 63,98(P) 79,98(P) 47,712(P) 55,94(N) 75,00(P) 65,29(N) 67,5(P) 60,00(N) 60,00(N) 60,00(N) 60,02(P) 75,02(P) 59,79(P) 59,89(P) 60,00(P) 60,00(P) 60,00(P) 79,5 83,5 108 108 135 85,5 106,5 162 146,25 148,5 74,038(P) 59,95(N) 154 Pikseliformaatti Vaakataajuus (kHz) Pystytaajuus (Hz) Pikselitaajuus (MHz) 480p 720 x 480 31,469 60 2