
User guide
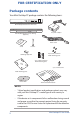


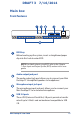

Table Of Contents
- Package contents
- About this user guide
- Safety precautions
- Chapter 1: Mini Desktop PC parts and features
- Chapter 2: Hardware setup
- Chapter 3: Using your Mini Desktop PC
- Chapter 4: Supported operating systems
- Working with Windows® 7
- Microsoft’s Windows® 8.1 Downgrade Notices
- Working with Windows® 8.1
- Starting for the first time
- Windows® UI
- Start button
- Customizing your Start screen
- Working with Windows® apps
- Customizing apps
- Accessing the Apps screen
- Other keyboard shortcuts
- Connecting to the Internet
- Turning your Mini Desktop PC off
- Putting your Mini Desktop PC on sleep mode
- Windows® 8.1 lock screen
- Customizing your lock screen
- Chapter 5: ASUS Business Manager
- Chapter 7: Basic Input and Output System (BIOS)
- Troubleshooting
- Appendix
- ASUS Recycling/Takeback Services
- REACH
- Lithium Battery Warning
- RF Exposure Warning
- Federal Communications Commission Statement
- IC: Canadian Compliance Statement
- Canadian Department of Communications Statement
- VCCI: Japan Compliance Statement
- KC: Korea Warning Statement
- RF Equipment Notices
- Optical Drive Safety Information
- ASUS Contact Information
Mini Desktop PC User Guide
17
Mini Desktop PC User Guide
17
DRAFT 3 7/16/2014
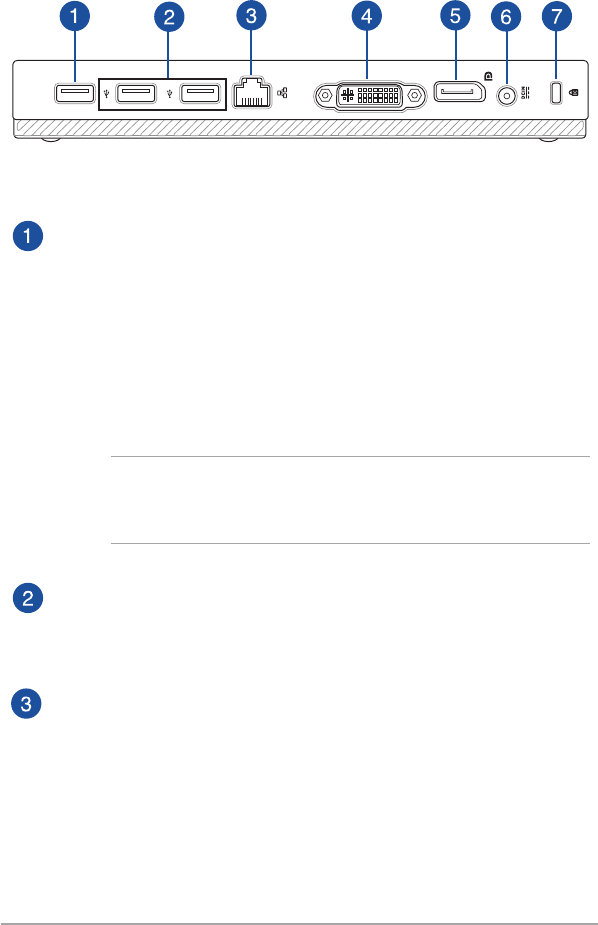
Rear features
DVI-I
USB 2.0 port
The USB 2.0 (Universal Serial Bus 2.0) port is compatible with
USB 2.0 or USB 1.1 devices.
USB 2.0 port for the USB bridge*
This USB 2.0 port is exclusive for use with the USB bridge.
Insert the USB bridge into this port to connect the main box
with the docking of your Mini Desktop PC.
NOTE: For more details about using this exclusively with
the USB bridge, refer to the Setting up your Mini Desktop PC
section in this user guide.
USB 2.0 ports
The USB 2.0 (Universal Serial Bus 2.0) port is compatible with
USB 2.0 or USB 1.1 devices.
LAN port
Insert the network cable into this port to connect to a local
area network.
* on selected models only