Eee PC Software Manual Eee PC 701SD Series July 2008
Table of Contents Chapter 1: Introducing the Eee PC About This User’s Manual............................................................................. 1-2 Notes for This Manual.................................................................................... 1-3 Safety Precautions.......................................................................................... 1-4 Chapter 2: Using the Eee PC Internet..........................................................................................
Video Manager.............................................................................................2-35 Webcam .........................................................................................................2-36 Sound Recorder...........................................................................................2-36 Games .........................................................................................................2-36 Picasa ...................................................
Contact ........................................................................................................... 4-6 Other information......................................................................................... 4-6 Appendix Trademark Statements..................................................................................A-2 GNU General Public License........................................................................A-3 Copyright Information..........................................
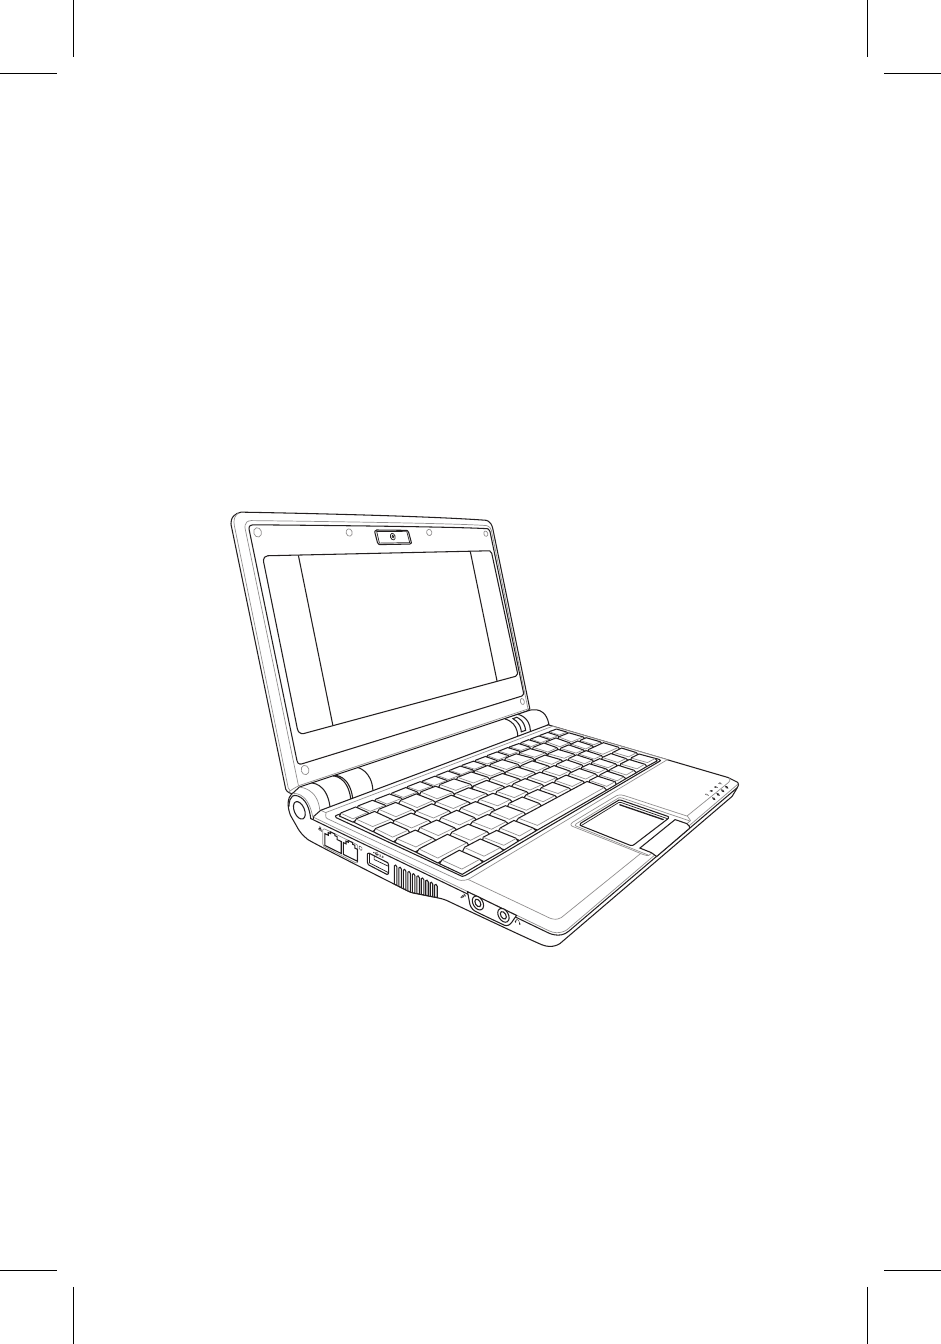
About This User’s Manual Notes for This Manual Safety Precautions 1 Introducing the Eee PC
About This User’s Manual You are reading the Eee PC User’s Manual. This User’s Manual provides information about how to use Eee PC. The following are major sections of this User’s Manual: 1. Using the Eee PC Provides information on using the Eee PC’s utilities. 2. System Recovery Gives you information on system recovery. 3. Installing Windows® XP Gives you information on how to install Windows® XP on your Eee PC and the content of the support CD. 4. Appendix Provides you safety statements.
Notes for This Manual A few notes and warnings are used throughout this guide, allowing you to complete certain tasks safely and effectively. These notes have different degrees of importance as follows: WARNING! Important information that must be followed for safe operation. IMPORTANT! Vital information that must be followed to prevent damage to data, components, or persons. TIP: Tips for completing tasks. NOTE: Information for special situations.
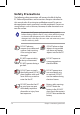
Safety Precautions The following safety precautions will increase the life of the Eee PC. Follow all precautions and instructions. Except as described in this manual, refer all servicing to qualified personnel. Do not use damaged power cords, accessories, or other peripherals. Do not use strong solvents such as thinners, benzene, or other chemicals on or near the surface. Disconnect the AC power and remove the battery pack(s) before cleaning.
SAFE TEMP: This Eee PC should only be used in environments with ambient temperatures between 5°C (41°F) and 35°C (95°F) INPUT RATING: Refer to the rating label on the bottom of the Eee PC and be sure that your power adapter complies with the rating. DO NOT carry or cover a Eee PC that is powered ON with any materials that will reduce air circulation such as a carrying bag. Incorrect installation of battery may cause explosion and damage the Eee PC. DO NOT throw the Eee PC in municipal waste.
1-6 Chapter 1: Introducing the Eee PC
Internet Work Learn Play Settings Favorites 2 Using the Eee PC
Internet Configuring a wireless network connection 1. Press + ( + ) to activate the wireless LAN function. 2. Click Wireless Networks from Internet tab. 3. Select the wireless access point you want to connect to from the list and click Connect to build the connection. Ensure that the box before Enable wireless is checked. 2-2 4. When connecting, you may have to enter a password. 5. After a connection has been established, the connection is shown on the list.
6. You can see the wireless signal strength bars in the Notification area. In Windows XP environment, the wireless connection icon disappears when you disable the wireless LAN by pressing + ( + ). Activate the wireless LAN function before configuring a wireless network connection. Right-click the wireless signal bar in the Notification area to quickly Connect to another network, Create new connection, or browse All Network Connections.
Configuring a network connection If you want to obtain network access, connect the network cable, with RJ-45 connectors on each end, to the network port on the Eee PC and the other end to a hub or switch. The illustration below is the example of your Eee PC connected to a network hub or switch for use with the built-in Ethernet controller. Connect to network before enjoying all the network services and functions in Eee PC.
2. Click Create to create a network connection. 3. Select the type of connection you are using and click Next. 4. Select the hardware that you want to use to make your connection and click Next. 5. Toggle the first option Dynamic IP address (DHCP) and click Next. 6. Enter a name for this connection and click Next.
7. Click Finish to apply the settings or click Back to make changes. Click the box before Connect automatically at system startup or before the box Start this connection when finished based on your needs. Using a static IP: 1. Repeat the step 1–4 of Using a dynamic IP to start the static IP network configuration. 2. Toggle the second option Static IP address and click Next. 3. Enter the IP address, Subnet mask and Gateway from your service provider.
4. There is no need to enter the DNS and WINS address unless you want to override the server provided DNS server address. If so, enter the preferred DNS Server address, alternative address and WINS address of your service provider. 5. Enter the DNS domain name for your network or click Next to proceed directly. 6. Enter a name for this connection and click Next. 7. Click Finish to apply the settings or click Back to make changes.
Point-to-Point Protocol over Ethernet (PPPoE) 1. 2. 2-8 Repeat the step 1–2 of Using a static IP to start the PPPoE network configuration. Select the type of connection you are using and click Next. 3. Select the hardware that you want to use to make your connection and click Next. 4. Enter your user name and password and click Next. 5. Enter a name for this connection and click Next.
6. Click Finish to apply the settings or click Back to make changes. Select Connect automatically at system startup or Start this connection when finished based on your individual configuration. Wireless Point-to-Point Protocol over Ethernet 1. 2. Repeat the step 1–2 of Using a static IP to start the wireless PPPoE network configuration. Select the type of connection you are using and click Next. 3. Select the hardware that you want to use to make your connection and click Next. 4.
2-10 5. Enter the wireless channel information from your service provider and click Next. 6. Set the encryption information for the wireless connection and click Next. 7. Enter your user name and password and click Next. 8. Enter a name for this connection and click Next. 9. Click Finish to apply the settings or click Back to make changes.
Dial-up (on selected models) The telephone wire used to connect the Eee PC’s internal modem should have either two or four wires (only two wires (telephone line #1) is used by the modem) and should have an RJ-11 connector on both ends. Connect one end to the modem port and the other to an analog telephone wall socket (as found in residential buildings). Telephone connector is the smaller of the two.
1. 2. 2-12 Repeat the step 1–2 of Using a static IP to start the Dial-up network configuration. Select the type of connection you are using and click Next. 3. Select the hardware that you want to use to make your connection and click Next. 4. Enter the phone number required to connect to your internet service provider and click Next. 5. Enter your user name and password and click Next.
6. Enter a name for this connection and click Next. 7. Click Finish to apply the settings or click Back to make changes.
Browsing web pages After you finish the network setup, click Web from the Internet tab to launch the Mozilla Firefox web browser and start enjoying net surfing. Launches the Mozilla Firefox web browser Visit our Eee PC homepage (http://eeepc.asus.com) to obtain the latest information and register at http://vip.asus.com for full service of your Eee PC. If you think the browser font size too small to read, go to View > Text Size to adjust.
Accessing E-mail Select Web Mail to display the webmail accesses, including Gmail, Hotmail, Yahoo Mail, and AOL Mail. Select your e-mail service provider and click it to link to the webmail homepage. If you do not use any of the displayed e-mail provider, click the Back to Internet tab button and select Web to log onto your own e-mail account. Opens the built-in webmail list.
Controlling your Eee PC afar Eee Connect allows you to control one Eee PC with another Eee PC remotely. To start using Eee Connect Ensure that both Eee PCs are connected to the Internet. 1. Click Eee Connect from the Internet tab and enter your e-mail to activate your account. 2. Your Eee PC Assist account is shown on the screen. Click Close to leave 3. Click Eee Connect from the Internet tab again. Click Accept from to set up the Eee PC you want to connect. 4.
5. 6. 7. The Eee Connect icon appears in the Notification area. Repeat the step 1–2 on another Eee PC to generate another account and click Connect to. Enter the account you want to connect and the authentication code, then click Connect. If you click the Ask whenever receives connection request box on the other Eee PC, you would need to wait for the permission. 8. When the connection is successfully built, you can control the other Eee PC from the Localhost Remote Desktop connection screen.
Using Web Storage Eee PC users can enjoy free online space. With Internet connection, you can access and share any files whenever you want and wherever you are. The content of the free service provided to you is subject to Eee Storage Web Hard Drive Service Agreement on Eee Storage official website. Eee Storage reserves the rights to modify or discontinue the provided web storage service with or without further notice. Visit the official website for details. To use Eee Storage 1.
2. You can easily drag and drop to upload files onto your free online space. Double-click Setup Account.sh to apply an account and setup a password if you need to use more advanced functions such as Group Share. This set of account and password is also indispensable when you use Eee Storage service with other computer.
Using Eee Download Eee Download offers various software applications, and multimedia enjoyment online. Visit Eee Download website (http://eeedownload. asus.com) for more details. Connects to Eee Download website. Preview is unavailable. You need to download the software applications or multimedia files before enjoying them.
Chatting with friends 1. Select Messenger from the Internet tab and the Welcome to Pidgin screen displays. Press the Add button to configure your instant messaging account. 2. Select an instant messaging service you are using from the drop-down list and fill out your password along with other necessary information to login your account. If you do not have an IM account, apply one from the service providers.
Work Office applications Documents/Spreadsheets/Presentations/PDF Reader The Work tab includes several office software items like Documents, Spreadsheets, Presentations, and PDF Reader. Some applications may require setup before use. Follow the steps as provided by the respective wizard to finish the initialization and get your jobs done more efficiently. Starts Adobe® PDF reader. Starts the application to create, and share presentations.
Accessing files The following example describes how to locate and open your document from the connected external storage device: 1. 2. Double-click Documents to start OpenOffice.org Writer. On the File menu, click Open, or press + . 3. At the prompt, click My Home on the left and double-click D: to enter.
4. Double-click the folder to display the files within. Select the desired file, and click OK to open. 5. After the file is opened, you can start editing your document and doing your job. For other office applications, follow the general steps above to access files.
Mail The Mozilla Thunderbird e-mail client allows to import preferences, account settings, address books, and other data from an existing account in your original personal computer or notebook. Follow the Account Wizard for new account setup. Starts the Mozilla Thunderbird e-mail client. Contact your service provider If you do not know the incoming and outgoing server address of your e-mail account. Notes Notes allows you to write down important messages as a reminder. You can have several memos at a time.
Management software Your Eee PC includes two management-related applications. I. File Manager provides an overview of all your files and enables easy management of data. Starts File Manager. Eee PC supports file compression in a zip and tgz file format only, and file extraction from zip, gz, tar, and rar formats. To locate and open your file: 1. Connect your USB flash memory disk or USB portable hard disk drive containing desired data to your Eee PC. 2.
3. All the files and folders in your USB external storage device are shown in the right pane. Locate the desired file and double-click it to open. • • II. Use the directory tree in the left pane to locate files more quickly if numerous folders are listed. To remove your connecting the USB device, right click the USB icon in the Notification area and select Safely remove. PIM (Personal Information Manager) helps manage personal information like appointments, to-do items and contacts.
Accessories & Dictionary The bundled accessories, Calculator and Screen Capture, are convenient and easy to use; the built-in Dictionary prevents you from being lost in translation. Calculator and Screen Capture Click Accessories to start using the following applications. Opens the calculator. Runs the Screen capture application. Press + ( + ) to initiate the screen capture tool directly and capture the full screen. Dictionary (in selected territories) Starts the Dictionary.
World Clock To check the world clock 1. 2. Select World Clock to start the KDE world clock software. Major cities and territories are marked on the map in black. When you move the pointer over the map, the screen automatically displays the city name and its local time wherever you leave the pointer.
Learn Science After entering Science, you will find the options of the interactive Periodic Table and Planetarium. Move the pointer over and start your science learning. 1. 2. Periodic Table provides miscellaneous information, including picture, energy information, chemical data, and atom model for all elements. Click any wanted element and know more. Planetarium projects and simulates the motions of the heavenly bodies, and marks constellations with latitude and longitude.
Language Several English learning games are included in Language, providing entertaining exercises for English typing and spelling. Starts the typing practice tool. Starts the vocabulary spelling game. Starts the Hangman game. Math Study fractions with your personal tutor in Eee PC. Fraction Tutorial clearly demonstrates and teaches you fractions. TuxMath teaches math more fun, teaching math by incorporating a shooting game. The Geometry tool allows drawing objects like points, lines, polygons, etc.
Paint Paint includes an image editing program (Paint) and a drawing program (Tux Paint). Starts mtPaint. Starts Tux Paint. Web Learn This is a shortcut to Skoool. Double-click the item to link to Skoool interactive learning site (www.skoool.com). Click your own country or the country you would like to visit and enter. Mebook Starts the MeReader for e-books reading. Kids Game Learn through games. Go Chinese It will not be all Chinese to you anymore.
Play Media Player Enjoy your music and movies with Media Player. The Eee PC package does not include an external optical disk drive. Purchase an optional optical disk drive based on your needs. Move the pointer over the items on the user interface, and the pop out message would show the function of the button or the slider.
Music Manager The built-in music manager helps you arrange your multi-media data in a well-organized fashion. Starts Music Manager. Connect your iPod to your Eee PC and click the Media Device tab to show the playlists in your iPod. You can drag and drop the desired files to create your playlist in the right pane. • • 2-34 Closing the main window only minimizes the music manager in the Notification area. Quit the music manager by clicking Actions > Quit.
Photo Manager Manage, view, and edit image files with the Photo Manager. Photo Manager supports image files in PNG, JPG, TIF, TIFF, GIF, BMP, XPM, PPM, PNM, XCT, PCX format. Video Manager Starts Photo Manager. ASUS Eee PC supports video and audio files in the following format: MPEG1, Xvid, mp3, wav, PCM format. The actual supported codecs vary depending on model.
Webcam Click Webcam and start video recording or image capture. Activates Webcam. Sound Recorder Picasa Allows you to record a sound clip. Allows you to manage and upload your photos easily. Initiates Sound Recorder. Starts Picasa2. Games Select an available game and have fun.
Settings Desktop Mode The Desktop Mode allows you to select the display mode and adjust your Eee PC display resolution. You can use both external and internal displays, external display only or internal display only. If an external display is not connected, the first two options will be grayed out. You can also manually adjust the display resolution or set it automatically adjust. Click to adjust the display resolution.
Anti-Virus From the Settings tab, select Anti-Virus and perform virus scanning to protect your Eee PC. Click to start the anti-virus application. Volume Click the speakers icon to open the control panel. Adjust the system volume and balance by moving the sliders. Click to adjust the volume.
Instant Shutdown Click Instant Shutdown and select an action from the dialog box shown below. You can activate the task manager, put the system in standby, restart, or shut down the system. Printers To setup your printer, double-click Printers and press Add to add a new printer. The installed printers display in the window. Visit our website for the latest qualified vendor for the printers.
System Info This option displays the system information of your Eee PC. The displayed system information differs depending on model. Date & Time Adjusts the system date and time of your Eee PC.
Personalization Select Personalization to renew your information or change your preferences. Add/Remove Software You can download and install software from our server with network access. Follow the instructions below to install software. You can remove the software you install from our server later when they are no longer needed. Removing the pre-installed software is not allowed. To install new software or update the existing software: 1. 2. 3. 4. Ensure that you have connected to network.
2-42 5. Click OK to confirm the installation. 6. Your Eee PC starts the download and installs/updates the selected software from the server.
BIOS update To update the BIOS: DO NOT shut down or reset the system or unplug the power cord while updating the BIOS! Doing so would cause the system boot failure! 1. 2. 3. 4. Ensure you are connected to a network. Go to Settings > Add/Remove Software. Click the Settings tab on the top to switch the category. Click the Open button in BIOS Updates 3 5. 4 Locate the latest BIOS and click the Install button to update the BIOS.
6. Click OK to reboot and update the BIOS. Easy Software Updates A software update icon in the Notification area functions as a reminder. It will check for updates, download and install updates depending on your preferences. Check for Updates Right-click the Software Updates icon in the Notification area and select Check for Updates to manually search for the latest available updates.
Touchpad Edit your touchpad preferences by clicking Touchpad. You can adjust all touchpad settings. Disk Utility Selecting Disk Utility allows you to check your Eee PC disk condition including total disk space, the used space, and the remaining space. Click the tabs to switch the displayed disk drive. • • ASUS Eee PC Extra Drive may not be available for all Eee PC models. The disk space varies depending on model.
Diagnostic Tools The Diagnostic Tool helps you with easy trouble-shooting. System Info. Click the System Info. button on the left to display the system information. Click the Details button on the top to switch between system information summary and details The system information varies depending on model. System Test Click the System Test button on the left to start the system checkup. Select the item you want to test and follow the wizard to complete the test.
Contact us If you can't find a solution to your problem after the system test, you can visit our support website or click Send Feedback with System Log to send the test log to ASUS support team. Our technical personnel would help you with the problems. Before you send the log, remember to set up your e-mail account in the Mozilla Thunderbird client first. Refer to page 4-20 for details.
Add/Remove Keyboard To switch to the keyboard you use 2-48 1. Click Settings and click Add/Remove Keyboard 2. The keyboard in the right pane is the current keyboard definition in use. Select your preferred keyboard in the left pane and click Add to add.
3. Select the newly-added keyboard in the right pane and click Set as Default to set it as your default keyboard definition. 4. 5. Click OK to complete the configuration. After you have customized the keyboard settings, the keyboard definition is switched to the newly-added language keyboard. Click the flag icon in the Notification area to quickly switch the keyboard if needed.
Task Manager The Task Manager displays the application processes. Tweak your Eee PC up if it is running slow by killing the application with Task Manager. Follow the instructions below to terminate applications: 1. Double click the SOS icon the running applications. Or, press 2. + in the Notification area to display ( + ) directly to launch Task Manager. Select an unnecessary application that uses the system resources and click Kill to terminate the process.
Favorites Click to link to ASUS VIP and give suggestions. Click to link to ASUS website for the latest product information. Customize Customize your favorites on the Favorites tab. Click Customize and start to add or remove your favorites. From the available favorites list in the left pane, select a desired item to include in your favorites, and click Add. To remove a favorite from your current favorites list, select an item from the right pane and click Remove.
2-52 Chapter 2: Using the Eee PC
System Recovery 3 System Recovery
System Recovery There are three ways to perform the system recovery. Refer to the following sections for details. The OS image file bundled in the Recovery DVD may be not the latest version. After the system recovery, use the Add/Remove Software in the Settings tab to update your OS. You will lose all your data during the system recovery. Ensure to back up your important data before recovering your system. Using Hidden Partition 1. Hold during bootup (requires a Recovery Partition).
Using the Recovery DVD 1. 2. Connect an external DVD optical drive to your Eee PC and insert the Recovery DVD into the optical drive (System needs to be powered ON). Restart the system and press on bootup and the Please select boot device screen appears. Select USB:XXXXXX (may be labeled as the ODD brand name) to boot from the optical drive. Please select boot device: HDD:SM-ASUS-PHISON SSD USB:XXXXXXXX ↑ and ↓ to move selection ENTER to select boot device 3.
Using USB Flash Disk You need another PC and a USB flash disk (larger than 2GB) for Eee PC system recovery. You will lose all your data on the USB flash disk. Back up important data before using the USB disk as a recovery disk. To use your USB flash disk to perform system recovery: 1. 2. 3. Connect your USB flash disk (size larger than 2GB) to another PC/NB (bundled with Windows XP or later version) and insert the Support CD to that PC/NB at the same time.
4. 5. Eject the Support CD, insert the Recovery DVD, and click Run. Click Yes to continue. The system starts formatting your USB flash disk. 6. A dialog box appears. Follow the instructions to eject the USB disk and replug it to your PC/NB. Click Retry to continue. 7. Click OK to complete the process.
8. 9. Connect the USB flash disk to your Eee PC. Restart the system and press on bootup and the Please select boot device screen appears. Select USB:XXXXXX (may be labeled as the USB flash brand name) to boot from the USB flash disk drive. Please select boot device: HDD:SM-ASUS-PHISON SSD USB:XXXXXXXX ↑ and ↓ to move selection ENTER to select boot device 10. Key in yes and press to continue the system recovery. ISOLINUX 3.11 2005-09-02 Copyright (C) 1994-2005 H. Peter Anvin .
Reformatting the USB flash disk To use the USB disk on your Windows operating system normally, follow the instructions below to reformat your USB disk. 1. 2. 3. 4. Connect your USB flash disk to another PC/NB and insert the Support CD to that PC/NB at the same time. Click Utilities on the left and select ASUS Linux USB Flash Utility. Select Format the USB flash disk back to Windows format (FAT16) and click Run. Click OK to complete the disk formatting.
3-8 Chapter 3: System Recovery
Preparing to Install Windows® XP Installing Windows® XP Support CD Information 4 Installing Windows® XP
Preparing to install Windows® XP Before installing Windows® XP operating system to your Eee PC, you need the following items. • • • • A USB 2.0 DVD-ROM The official Windows® XP Service Pack 2 disc from Microsoft® A USB flash disk (size larger than 1GB) or external hard disk drive ASUS Eee PC support CD • The older version of Windows® OS does not support USB DVDROM. Ensure the disc you have is Windows® XP Service Pack 2. • Your Eee PC might not be able to detect all the USB flash disks.
4. After the Windows® XP installation screen appears. Delete any existing partitions. You will lose all your data after deleting all existing disk partitions. Ensure to back up your important data before installing Windows® XP to your Eee PC. 5. 6. 7. Press and select Format the partition using the NTFS file system to start the Windows® XP OS setup. Follow the on-screen instructions to complete the installation process.
Support CD information The support CD that comes with the Eee PC package contains the drivers, software applications, and utilities that you can install to avail all the features. All the following screens appear only in the Windows® XP SP2 environment. Running the support CD Insert the support CD in the external optical drive. The CD automatically displays the Drivers menu if Autorun is enabled in your computer.
Click to go to the previous page Utilities menu The Utilities menu shows the applications that the Eee PC supports.
Contact Click the Contact tab to display the ASUS contact information. Other information The icons on the top right corner of the screen provide additional information on the Eee PC and the contents of the support CD. Click an icon to display the specified information.
Trademark Statements GNU General Public License Copyright Information Limitation of Liability Service and Support A Appendix
Trademark Statements Google Talk service and its logos are trademarks of Google Inc.. GroupWise service and its logos are trademarks of Novell Inc.. MSN service and its logos are trademarks of Microsoft Corporation. QQ service and its logos are trademarks of Tencent Inc.. Yahoo! service and its logos are trademarks of Yahoo! Inc.. All other services and logos are either trademarks or registered trademarks of their respective owners.
GNU General Public License Licensing Information This product includes copyrighted third-party software licensed under the terms of the GNU General Public License. See The GNU General Public License for the exact terms and conditions of this license.
GNU GENERAL PUBLIC LICENSE Version 2, June 1991 Copyright (C) 1989, 1991 Free Software Foundation, Inc., 51 Franklin Street, Fifth Floor, Boston, MA 02110-1301 USA Everyone is permitted to copy and distribute verbatim copies of this license document, but changing it is not allowed. Preamble The licenses for most software are designed to take away your freedom to share and change it.
We protect your rights with two steps: (1) copyright the software, and (2) offer you this license which gives you legal permission to copy, distribute and/or modify the software. Also, for each author's protection and ours, we want to make certain that everyone understands that there is no warranty for this free software.
1. You may copy and distribute verbatim copies of the Program's source code as you receive it, in any medium, provided that you conspicuously and appropriately publish on each copy an appropriate copyright notice and disclaimer of warranty; keep intact all the notices that refer to this License and to the absence of any warranty; and give any other recipients of the Program a copy of this License along with the Program.
These requirements apply to the modified work as a whole. If identifiable sections of that work are not derived from the Program, and can be reasonably considered independent and separate works in themselves, then this License, and its terms, do not apply to those sections when you distribute them as separate works.
c) Accompany it with the information you received as to the offer to distribute corresponding source code. (This alternative is allowed only for noncommercial distribution and only if you received the program in object code or executable form with such an offer, in accord with Subsection b above.) The source code for a work means the preferred form of the work for making modifications to it.
6. Each time you redistribute the Program (or any work based on the Program), the recipient automatically receives a license from the original licensor to copy, distribute or modify the Program subject to these terms and conditions. You may not impose any further restrictions on the recipients' exercise of the rights granted herein. You are not responsible for enforcing compliance by third parties to this License. 7.
This section is intended to make thoroughly clear what is believed to be a consequence of the rest of this License. 8. If the distribution and/or use of the Program is restricted in certain countries either by patents or by copyrighted interfaces, the original copyright holder who places the Program under this License may add an explicit geographical distribution limitation excluding those countries, so that distribution is permitted only in or among countries not thus excluded.
NO WARRANTY 11. BECAUSE THE PROGRAM IS LICENSED FREE OF CHARGE, THERE IS NO WARRANTY FOR THE PROGRAM, TO THE EXTENT PERMITTED BY APPLICABLE LAW. EXCEPT WHEN OTHERWISE STATED IN WRITING THE COPYRIGHT HOLDERS AND/OR OTHER PARTIES PROVIDE THE PROGRAM "AS IS" WITHOUT WARRANTY OF ANY KIND, EITHER EXPRESSED OR IMPLIED, INCLUDING, BUT NOT LIMITED TO, THE IMPLIED WARRANTIES OF MERCHANTABILITY AND FITNESS FOR A PARTICULAR PURPOSE. THE ENTIRE RISK AS TO THE QUALITY AND PERFORMANCE OF THE PROGRAM IS WITH YOU.
END OF TERMS AND CONDITIONS How to Apply These Terms to Your New Programs If you develop a new program, and you want it to be of the greatest possible use to the public, the best way to achieve this is to make it free software which everyone can redistribute and change under these terms. To do so, attach the following notices to the program.
The hypothetical commands `show w' and `show c' should show the appropriate parts of the General Public License. Of course, the commands you use may be called something other than `show w' and `show c'; they could even be mouse-clicks or menu items-whatever suits your program. You should also get your employer (if you work as a programmer) or your school, if any, to sign a "copyright disclaimer" for the program, if necessary. Here is a sample; alter the names: Yoyodyne, Inc.
Copyright Information No part of this manual, including the products and software described in it, may be reproduced, transmitted, transcribed, stored in a retrieval system, or translated into any language in any form or by any means, except documentation kept by the purchaser for backup purposes, without the express written permission of ASUSTeK COMPUTER INC. (“ASUS”).
Limitation of Liability Circumstances may arise where because of a default on ASUS’ part or other liability, you are entitled to recover damages from ASUS.
A-16 Appendix