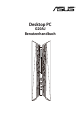
Desktop PC G20AJ Benutzerhandbuch
G9351 Erste Ausgabe Mai 2014 Copyright © 2014 ASUSTeK Computer Inc. Alle Rechte vorbehalten. Kein Teil dieses Handbuchs, einschließlich der darin beschriebenen Produkte und Software, darf ohne ausdrückliche, schriftliche Genehmigung von ASUSTeK COMPUTER INC. (“ASUS”) in irgendeiner Form, ganz gleich auf welche Weise, vervielfältigt, übertragen, abgeschrieben, in einem Wiedergewinnungssystem gespeichert oder in eine andere Sprache übersetzt werden. (“ .
Inhaltsangabe Hinweise............................................................................................................................................... 5 Sicherheitsinformationen.............................................................................................................. 9 Darstellungssystematik.................................................................................................................10 Weitere Informationsquellen..........................................
Inhaltsangabe BIOS-Setup aufrufen......................................................................................................................60 Systemwiederherstellung............................................................................................................61 ASUS Kontaktinformationen ASUS Kontaktinformationen.......................................................................................................
Hinweise Rücknahmeservices Das ASUS-Wiederverwertungs- und Rücknahmeprogramm basiert auf den Bestrebungen, die höchsten Standards zum Schutz der Umwelt anzuwenden. Wir glauben, dass die Bereitstellung einer Lösung für unsere Kunden die Möglichkeit schafft, unsere Produkte, Batterien, andere Komponenten und ebenfalls das Verpackungsmaterial Verantwortungsbewusst der Wiederverwertung zuzuführen. Besuchen Sie bitte die Webseite unter http://csr.asus.com/ english/Takeback.
Avertissement relatif aux batteries Lithium-Ion MISE EN GARDE: Danger d’explosion si la pile n’est pas remplacée correctement. Remplacer uniquement avec une pile de type semblable ou équivalent, recommandée par le fabricant. Mettez au rebut les batteries usagées conformément aux instructions du fabricant. IC: Konformitätshinweis – Kanada Erfüllt die kanadischen ICES-003-Spezifikationen, Klasse B. Dieses Gerät erfüllt die RSS 210-Vorgaben der Industry Canada.
VCCI: Hinweis zur Konformität in Japan Hinweis zu VCCI, Klasse B Das is ein Produkt von Klasse B basiert auf dem Standard des VCCI Council. Wenn es in der Nähe eines Radio- oder Fernsehempfängers verwendet wird, kann es Funkstörungen verursachen. Installieren und verwenden Sie dieses Gerät gemäß dieser Anleitung. Dieses Gerät wird auf der Grundlage der Bestätigung von Messgeräten, am Installationsort des Benutzers, registriert.
BSMI: Taiwan – Hinweise zu Funkgeräten Japan – Hinweise zu HF-Geräten KC (HF-Geräte) ENERGY STAR ist ein gemeinsames Programm der USUmweltschutzbehörde und der US-Energiebehörde, welches helfen soll, Geld zu sparen und die Umwelt durch Energieeffiziente Produkte und Technologien zu schützen. Alle ASUS-Produkte mit dem ENERGY STAR-Logo erfüllen den ENERGY STAR-Standard und die Energieverwaltungsfunktion ist standardmäßig aktiviert.
Sicherheitsinformationen Bevor Sie das Gerät reinigen, trennen Sie es von der Stromversorgung. Wischen Sie den DesktopPC mit einem weichen Tuch oder einem Fensterleder ab, das Sie mit einer Lösung aus einem nicht scheuernden Reinigungsmittel und einigen Tropfen warmem Wasser angefeuchtet haben. Wischen Sie verbleibende Feuchtigkeit mit einem trockenen Tuch ab. • NICHT auf ungerade oder instabile Oberflächen aufstellen. Bei Beschädigung des Gehäuses den Kundendienst aufsuchen.
Darstellungssystematik Um sicherzustellen, dass Sie bestimmte Aufgaben richtig ausführen, beachten Sie bitte die folgenden Symbole und Schriftformate, die in diesem Handbuch verwendet werden. GEFAHR/WARNUNG:: Informationen zum Vermeiden von Verletzungen beim Ausführen einer Aufgabe. VORSICHT: Informationen zum Vermeiden von Schäden an den Komponenten beim Ausführen einer Aufgabe. WICHTIG: Anweisungen, die Sie beim Ausführen einer Aufgabe befolgen müssen.
Verpackungsinhalt Desktop PC G20AJ Tastatur x1 Maus x1 Netzteil x1 Zweites Netzkabel x1 (nur bei bestimmten Modellen) Netzteil x1 Zweites Netzkabel x1 (nur bei bestimmten Modellen) Garantiekarte x1 Installation Guide Installationshilfe x1 • Sollten o.g. Artikel beschädigt oder nicht vorhanden sein, wenden Sie sich bitte an Ihren Händler. • Die oberhalb illustrierten Artikel sind nur als eine Referenz gedacht. Die tatsächlichen Produktspezifikationen können sich je nach Modell unterscheiden.
Kapitel 1 Erste Schritte Willkommen! Thank you for purchasing the ASUS Desktop PC! Der ASUS Desktop PC liefert topaktuelle Leistung, unvergleichliche Zuverlässigkeit und benutzerorientierte Anwendungen. All diese Eigenschaften wurden in diesem verblüffend futuristischen und eleganten Systemgehäuse vereint. Lesen Sie die ASUS Garantiekarte sorgfältig durch, bevor Sie Ihren ASUS Desktop-PC in Betrieb nehmen. Kennenlernen des Computers Abbildungen werden nur zu Ihrer Referenz bereitgestellt.
Vorderseite Deutsch Stromschalter. Drücken Sie diese Taste, um Ihren Computer einzuschalten. Schacht für optisches Laufwerk. In diesem Laufwerksfach befindet sich ein optisches Laufwerk. Auswurftaste für optisches Laufwerk. Drücken Sie diese Taste, um die Laufwerksschublade auszuwerfen. USB 3.0-Anschluss. Diese Universal Serial Bus 3.0 (USB 3.0)-Anschlüsse nehmen USB 3.0-Geräte wie Maus, Drucker, Kamera, PDA und andere Geräte auf.
Deutsch Rückseite USB 2.0-Anschluss. Diese Universal Serial Bus 2.0 (USB 2.0)-Anschlüsse nehmen USB 2.0-Geräte wie Maus, Drucker, Scanner, Kamera, PDA und andere Geräte auf. USB 3.0-Anschluss. Diese Universal Serial Bus 3.0 (USB 3.0)-Anschlüsse nehmen USB 3.0-Geräte wie Maus, Drucker, Kamera, PDA und andere Geräte auf. • Bei der Installation eines Windows® -Betriebssystems verbinden Sie KEINE Tastatur /Maus mit den USB 3.0-Anschlüssen. • Der Beschränkungen des USB 3.0-Controllers wegen, können USB 3.
Deutsch LAN (RJ-45)-Anschluss. Dieser Anschluss ermöglicht Gigabit-Verbindungen zu einem Local Area Network (LAN) mittels eines Netzwerk-Hubs. Aktivitäts-/Verbindungs- LED Geschwindigkeits-LED Status Beschreibung Status Beschreibung Aus Nicht verbunden Aus 100Mbps-Verbindung ORANGE Verbunden ORANGE 100Mbps-Verbindung BLINKEND Datenaktivität GRÜN 1Gbps-Verbindung LEDAnzeigen am LANAnschluss GeschwindigkeitsLED LAN-Anschluss Seitenlautsprecherausgang (grau). Dieser Anschluss verbindet 7.
Deutsch ASUS-Grafikkarten. Die Anzeigeausgänge dieser nur bei bestimmten Modellenen ASUS-Grafikkarte variieren je nach Modell. HDMI-Anschluss. Dies ist High-Definition Multimedia Interface (HDMI)-Anschluss und ist kompatibel mit HDCP, um die Wiedergabe von HD DVD, Blu-Ray und anderen geschützten Inhalten zu ermöglichen. Stromanschluss 1. Dieser Anschluss verbindet sich mit einem 180W-Adpater (Dualadapter erforderlich bei bestimmen Modellen).
Einrichten Ihres Computers Deutsch Dieser Abschnitt führt Sie durch das Anschließen üblicher Hardware-Geräte externen Monitor, Tastatur, Maus und Stromkabel an Ihren Computer. Anschließen eines externen Monitors Verbinden Sie Ihren Monitor mit dem Onboard-HDMI-Ausgang, um den Eco Energy Mode zu genießen. So verbinden Sie mit einem externen Monitor: 1. Verbinden Sie einen HDMI-Monitor mit dem HDMI-Anschluss auf der Rückseite Ihres Computers. 2. Schließen Sie den Monitor an die Stromversorgung an.
Einschalten Ihres Computers Deutsch Dieser Abschnitt beschreibt, wie Sie den Computer nach dem Einrichten Ein. Einschalten Ihres Computers So schalten Sie den Computer ein: 1. Schalten Sie den Monitor ein. 2. Drücken Sie die Einschalttaste Ihres Computers. Stromschalter 3. Warten Sie, bis das Betriebssystem automatisch startet. Für weitere Details zum Herunterfahren Ihres Desktop-PCs beziehen Sie sich auf Windows® 8.1-Benutzerhandbuch in diesem Benutzerhandbuch.
Deutsch 20 Kapitel 1: Erste Schritte
Kapitel 2 Deutsch Anschließen von Geräten an Ihren Computer Anschließen eines USB-Datenträgers Dieser Desktop-PC enthält USB 2.0/1.1- und USB 3.0-Anschlüsse auf der Vorder- sowie Rückseite. Die USB-Anschlüsse ermöglichen Ihnen das Anschließen von USB-Geräten wie z.B. USB-Datenträger. So schließen Sie einen USB-Datenträger an: • Stecken Sie den USB-Datenträger in Ihren Computer ein.
Anschließen von Mikrofon und Lautsprechern Deutsch Dieser Desktop-PC enthält Mikrofon- und Lautsprecheranschlüsse auf der Vorder- sowie Rückseite. Die auf der Rückseite gelegenen Audio E/A-Anschlüsse ermöglichen Ihnen den Anschluss von 2.1-Kanal, 4.1-Kanal, 5.1-Kanal, und 7.1-Kanal Stereolautsprechern. Anschluss von Kopfhörer und Mikrofon Anschluss von 2.
Deutsch Anschluss von 4.1-Kanal Lautsprechern Anschluss von 5.
Anschluss von 7.
Anschließen von mehreren externen Anzeigegeräten Deutsch Ihr Desktop-PC enthält evtl. VGA-, HDMI- und DVI-Anschlüsse/Ausgänge und ermöglicht Ihnen das Verbinden von mehreren externen Anzeigegeräten. Ist eine Grafikkarte in Ihrem Computer installiert, verbinden Sie die Monitore mit den Monitoren der Grafikkarte. Einrichten mehrerer Anzeigegeräte Wenn Sie mehrere Monitore verwenden, können Sie die Anzeigemodi selbst bestimmen.
Deutsch 3. Schalten Sie Ihren Computer ein. 4. Folgen Sei einer nachstehenden Vorgehensweisen, um das Einstellungsfenster Bildschirmauflösung (Screen Resolution) zu öffnen: Im Startbildschirm a) Rufen Sie den Alle Apps-Bildschirm auf, heften Sie die Systemsteuerung an den Startbildschirm. Details dazu finden Sie unter Apps im Startbildschirm anheften im Abschnitt mit Windows®-Apps arbeiten. b) Klicken Sie mit der rechten Maustaste auf eine freie Stelle im Desktop-Modus-Bildschirm.
Anschließen eines HDTV Deutsch Verbinden Sie ein High-Definition TV (HDTV) mit dem HDMI-Anschluss Ihres Computers. • Sie benötigen ein HDMI-Kabel, um ein HDTV mit dem Computer zu verbinden. Das HDMIKabel muss separat erworben werden. • Um die beste Anzeigeleistung zu erhalten, sollte das HDMI-Kabel kürzer als 15 Meter sein.
Deutsch 28 Kapitel 2: Anschließen von Geräten an Ihren Computer
Kapitel 3 Deutsch Computer verwenden Richtige Sitzhaltung beim Verwenden des Desktop-PCs Beim Verwenden des Desktop-PCs ist die Einhaltung der richtigen Sitzhaltung erforderlich, um Verspannungen Ihrer Handgelenke, Hände und anderer Gelenke oder Muskeln zu vermeiden. Dieser Abschnitt bietet Ihnen Tipps zum Vermeiden von physischen Beschwerden und möglichen Verletzungen beim Verwenden und Erfreuen Ihres Desktop-PCs.
Optisches Laufwerk verwenden Deutsch Ein optisches Medium einlegen So legen Sie einen optischen Datenträger ein: 1. Drücken Sie beim eingeschalteten System die Auswurftaste, um das Laufwerk zu öffnen. 2. Legen Sie den Datenträger in das Laufwerk, mit der bedruckten Seite nach außen, wenn der Desktop PC vertikal aufgestellt worden ist oder mit der bedruckten Seite nach oben, wenn das Gerät horizontal aufgestellt worden ist. 3. Drücken Sie auf das Laufwerksfach, um es zu schließen. 4.
Kapitel 4 Deutsch Einrichten der Internetverbindung Kabelverbindung Für eine Verbindung zwischen Ihrem Computer und DSL-/Kabelmodem oder Lokales Netzwerk (Local Area Network / LAN) verwenden Sie ein RJ-45-Kabel. Über DSL-/Kabelmodem verbinden So verbinden Sie via DSL-/Kabelmodem: 1. Richten Sie das DSL-/Kabelmodem ein. Beziehen Sie sich auf die Dokumentation, die mit Ihrem DSL-/Kabelmodem geliefert wurde. 2.
Über ein lokales Netzwerk (LAN) verbinden Deutsch So verbinden Sie sich via LAN: 1. Verbinden Sie ein Ende des RJ-45-Kabels mit dem LAN (RJ-45)-Anschluss auf der Rückseite Ihres Computers und das andere Ende mit dem (Internet) LAN. RJ-45 cable LAN 2. Schalten Sie Ihren Computer ein. 3. Konfigurieren Sie die nötigen Einstellungen für die Internetverbindung. • Für Details und Hilfestellung zur Einrichtung einer Internetverbindung wenden Sie sich an Ihren Internetdienstanbieter (ISP).
Eine dynamische IP/PPPoE-Netzwerkverbindung konfigurieren 1. Klicken Sie zum Wechseln in den Desktop-Modus im Startbildschirm auf Desktop. 2. In der Windows®-Taskleiste klicken Sie mit der rechten Maustaste auf das Netzwerksymbol , anschließend klicken Sie auf Open Network and Sharing Center (Netzwerk- und Freigabecenter öffnen). 3. Im Netzwerk- und Freigabecenter klicken Sie auf Change Adapter settings (Adaptereinstellungen ändern). 4.
6. Deutsch Klicken Sie auf Obtain an IP address automatically (IP-Adresse automatisch beziehen), anschließend klicken Sie auf OK. Fahren Sie mit den nächsten Schritten fort, wenn Sie eine PPPoE-Verbindung nutzen. 34 7. Kehren Sie zum Network and Sharing Center (Netzwerkund Freigabecenter) zurück, klicken Sie dann auf Set up a new connection or network (Neue Verbindung oder neues Netzwerk einrichten). 8.
Wählen Sie Broadband (PPPoE) (Breitband (PPPoE), klicken Sie dann auf Next (Weiter). 10. Geben Sie Benutzernamen, Kennwort und Verbindungsname ein. Klicken Sie auf Connect (Verbinden). 11. Klicken Sie zum Abschluss der Konfiguration auf Close (Schließen). 12. Klicken Sie auf das Netzwerksymbol in der Taskleiste, klicken Sie dann die soeben erstellte Verbindung an. 13. Geben Sie Benutzernamen und Kennwort ein. Klicken Sie zur Verbindung mit dem Internet auf Connect (Verbinden). Deutsch 9.
Drahtlosverbindung (nur bei bestimmten Modellen) Verbinden Sie den Computer durch eine Drahtlosverbindung mit dem Internet. Deutsch Um eine Drahtlosverbindung herzustellen, müssen Sie sich mit einem drahtlosen Zugriffspunkt (AP) verbinden. Wireless AP Modem Um die Reichweite und Empfindlichkeit des drahtlosen Funksignals zu erhöhen, verbinden Sie die externen Antennen mit dem Antennenanschluss Ihrer ASUS WLAN-Karte.
Drahtlosverbindung Mit einem WLAN-Netzwerk verbinden: 1. Deutsch So verbinden Sie sich mit einem WLAN-Netzwerk: Führen Sie folgende Schritte zum Aufrufen der Charms-Leiste aus der Startbildschirm oder aus einer beliebigen Anwendung aus: a) Setzen Sie den Mauszeiger in die obere oder untere rechte Bildschirmecke. b) Drücken Sie die Tastenkombination + . Charms-Leiste 2. Klicken Sie in der Charms-Leiste auf Settings (Einstellungen), klicken Sie dann auf das Netzwerksymbol . 3.
Deutsch 38 Kapitel 4: Mit dem Internet verbinden
Kapitel 5 Deutsch Problembehandlung Problembehandlung Dieses Kapitel stellt einige Probleme vor, mit denen Sie konfrontiert werden könnten und bietet Lösungsansätze. ? ? ? ? Mein Computer kann nicht eingeschaltet werden und die Betriebs-LED auf der Vorderseite leuchtet nicht. • Prüfen Sie, ob Ihr Computer richtig angeschlossen ist. • Prüfen Sie, ob die (Strom)Steckdose betriebsbereit ist. • Prüfen Sie, ob das Netzteil eingeschaltet ist.
? Deutsch ? ? ? Keine Anzeige auf dem Monotor. • Prüfen Sie, ob der Monitor eingeschaltet ist. • Prüfen Sie, ob der Monitor richtig mit dem Videoausgang Ihres Computers verbunden ist. • Falls Ihr Computer eine aufgesetzte Grafikkarte aufweist, sollten Sie den Monitor mit dem Videoausgang der aufgesetzten Karte verbinden. • Prüfen Sie, dass keine Pole am Videostecker verbogen sind. Falls Sie verbogene Pole entdecken, ersetzen Sie das Videoverbindungskabel für den Monitor.
Das HDTV-Bild ist verzerrt. • Dies wird durch unterschiedliche Auflösungen Ihres Monitors und HDTVs verursacht. Passen Sie die Bildschirmauflösung Ihres HDTVs an. So ändern Sie die Bildschirmauflösung: Deutsch ? Folgen Sie einer Vorgehensweise, um das Einstellungsfenster Bildschirmauflösung (Screen Resolution) aufzurufen: Im Startbildschirm a) Rufen Sie den Alle Apps-Bildschirm auf, heften Sie die Systemsteuerung an den Startbildschirm.
? Der Auswurfsknopf des DVD-Laufwerks reagiert nicht. Deutsch 1. Klicken Sie mit der rechten Maustaste auf das Start-Symbol in der linken unteren Ecke des Windows®-Desktops. Im nun geöffneten Kontextmenü klicken Sie auf Datei-Explorer; der Computer-Bildschirm öffnet sich. 2. Klicken Sie mit der rechten Maustaste auf , dann auf Auswerfen (Eject) im Kontextmenü. Strom Problem Mögliche Ursachen Falsche Betriebsspannung Kein Strom (Die Betriebs-anzeige ist aus) Ihr Computer ist nicht eingeschaltet.
Anzeigen Mögliche Ursachen Keine Anzeige, nachdem der Computer eingeschaltet wurde (Schwarzes Bildschirm) Das Signalkabel ist nicht mit dem richtigen VGAAnschluss Ihres Computers verbunden. Aktion Probleme mit dem Signalkabel • Verbinden Sie das Signalkabel mit dem richtigen Anschluss für die Anzeige (Anschluss der integrierten VGA oder aufgesetzten VGA). • Wenn Sie eine aufgesetzte VGA verwenden, verbinden Sie das Signalkabel mit dem Anschluss der aufgesetzten VGA.
Audio Deutsch Problem Mögliche Ursachen Lautsprecher oder Kopfhörer funktionieren nicht sachgemäß. Kein Audio Lautsprecher oder Kopfhörer funktionieren nicht sachgemäß. Die Anschlüsse (Buchsen) auf der Vorder-/Rückseite funktionieren nicht sachgemäß. Probleme mit Treibern Aktion • Beziehen Sie sich für die richtigen Anschlusspositionen auf das Benutzerhandbuch. • Trennen und Verbinden Sie den Lautsprecher mit Ihrem Computer. Versuchen Sie einen anderen Lautsprecher oder Kopfhörer zu verwenden.
CPU Mögliche Ursachen Ihr Computer wird hochgefahren. Hoher Geräuschpegel nach Computerstart. Die BIOS-Einstellungen haben sich geändert. Alte BIOS-Version Hoher Geräuschpegel beim Computerbetrieb. Aktion Dies ist Normal. Beim Computerstart läuft der Lüfter mit voller Geschwindigkeit. Der Lüfter verlangsamt sich, nachdem das Betriebssystem geladen wurde. Stellen Sie die BIOS-Standardeinstellungen wieder her. Aktualisieren Sie das BIOS zur neuesten Version.
Deutsch 46 Kapitel 5: Problembehandlung
ASUS Desktop PC Windows 8.1 Benutzerhandbuch Anhang Windows® 8.1-Benutzerhandbuch G8607 Erste Ausgabe September 2013 Copyright © ASUSTeK Computer Inc.
Erste Inbetriebnahme DEUTSCH Wenn Sie Ihren Computer das erste Mal starten, erscheint eine Reihe von Bildschirmen, die Sie durch die Konfiguration der Grundeinstellungen Ihres Windows® 8.1-Betriebssystems führen. So starten Sie Ihren Desktop PC das erste Mal: 1. Drücken Sie die Ein-/Austaste an Ihrem Desktop PC. Warten Sie einige Minuten, bis der Einrichtungsbildschirm erscheint. 2. Wählen Sie am Einrichtungsbildschirm die Sprache zur Nutzung an Ihrem Desktop PC.
Windows®-Benutzeroberfläche verwenden DEUTSCH Das Windows®-User-Interface (UI = Benutzerschnittstelle) basiert auf den in Windows® 8.1 verwendeten Kacheln. Es bietet Ihnen folgende Funktionen, die Sie bei der Arbeit mit Ihrem Desktop-PC verwenden können. Start-Bildschirm Der Startbildschirm erscheint, nachdem Sie sich erfolgreich angemeldet haben. Dieser hilft Ihnen bei der Verwaltung Ihrer Programme und Anwendungen, die Sie an einem Ort benötigen. Mit der Windows-Taste aufrufen.
Hotspots DEUTSCH Mit Bildschirm-Hotspots können Sie unter anderem Programme starten und die Einstellungen Ihres Desktop-PCs aufrufen.Die Funktionen in diesen Hotspots können über das Touchpad aktiviert werden. Hotspots an einer gestarteten App Hotspots auf dem Startbildschirm Hinweise zu den Hotspot-Funktionen finden Sie auf der nächsten Seite.
Hotspot DEUTSCH obere linke Ecke Aktion Halten Sie den Mauszeiger hierüber und klicken Sie auf die Vorschau der kürzlich geöffneten Apps, um zur gewünschten App zurückzukehren. Wenn Sie mehr als eine App gestartet haben, gleiten Sie nach unten, um alle gestarteten Apps anzuzeigen. untere linke Ecke Vom Bildschirm einer laufenden App: Bewegen Sie Ihren Mauszeiger nach links unten, tippen Sie auf ; dadurch kehren Sie zum Startbildschirm zurück.
Mit Windows® Apps arbeiten DEUTSCH Zum Starten und Anpassen Ihrer Apps arbeiten Sie mit Tastatur oder Maus. Apps starten • Positionieren Sie den Mauszeiger über die App und linksklicken oder tippen Sie einmal, um sie zu starten. • Drücken Sie zweimal auf Tab und benutzen Sie dann die Pfeiltasten, um durch die Apps zu navigieren. Drücken Sie die Eingabetaste, um die gewählte App zu starten.
Zugriff auf alle Apps DEUTSCH Im Alle Apps-Bildschirm können Sie App-Einstellungen konfigurieren oder Apps an den Startbildschirm oder die Taskleiste (im Desktop-Modus) anheften. Apps-Bildschirm einblenden • • Klicken Sie am Startbildschirm auf die -Schaltfläche. Drücken Sie am Startbildschirm , dann die Eingabetaste auf Ihrer Tastatur. Alle-Apps-Bildschirm aufrufen 54 1. Öffnen Sie den Alle Apps-Bildschirm. 2.
Charms-Leiste DEUTSCH Die Charms-Leiste ist eine Werkzeugleiste die auf der rechten Seite Ihres Bildschirms angezeigt werden kann. Sie besteht aus mehreren Werkzeugen, mit denen Sie Anwendungen teilen und schnell auf verschiedene Einstellungen Ihres Desktop-PCs zugreifen können. Charms-Leiste Die Charms-Leiste starten Wenn die Charms-Leiste nicht aufgerufen ist, werden in der Charms-Leiste nur weiße Symbole dargestellt.
DEUTSCH Die Charms-Bar Suchen Hier können Sie nach Dateien, Anwendungen oder Programmen in Ihrem Desktop PC suchen. Teilen Hier können Sie Anwendungen über soziale Netzwerke oder E-Mails freigeben. Start Hier können Sie den Starbildschirm aufrufen. Vom Startbildschirm aus können Sie zum vorher angezeigten Bildschirm wechseln. Geräte Hier können Sie auf am Desktop PC angeschlossene Geräte (z. B. externe Anzeigegeräte, Drucker) zugreifen und Dateien freigeben.
Einrasten-Funktion DEUTSCH Die Einrasten-Funktion zeigt zwei Apps nebeneinander an; zum parallelen Bearbeiten oder zum Umschalten zwischen Apps. Stellen Sie vor Einsatz der Snap-Funktion sicher, dass die Bildschirmauflösung Ihres Desktop PCs auf 1366 x 768 Pixel oder höher eingestellt ist. Einrasten-Leiste Einrasten verwenden So nutzen Sie die Einrasten-Funktion: 1. Einrasten mit Maus oder Tastatur verwenden. Mit der Maus a) Klicken Sie auf eine App, um diese zu starten.
Weitere Tastenkombinationen DEUTSCH Die folgenden Tastenkombinationen helfen Ihnen beim Starten von Anwendungen und allgemein bei der Bedienung von Windows® 8.1. Schaltet zwischen Startbildschirm und der zuletzt ausgeführten App um. + + + + + + + + + + + + + + 58 Ruft den Desktop auf. Öffnet das Computer-Fenster auf dem Desktop. Öffnet das Dateisuche-Feld. Öffnet das Freigabe-Feld. Öffnet das Einstellungen-Feld. Öffnet das Geräte-Feld.
+ <-> + Startet die Lupe und vergrößert die Bilddarstellung. DEUTSCH + <+> Verkleinert die Bilddarstellung. Startet die Sprachausgabe-Einstellungen. Desktop-PC abschalten So schalten Sie Ihren Desktop-PC ab: Zum Herunterfahren Ihres Desktop-PCs stehen Ihnen folgende Möglichkeiten zur Verfügung: • In der Charms-Leiste: Klicken Sie zum regulären Herunterfahren auf Settings (Einstellungen) > Power (Ein/Aus) > Shut down (Herunterfahren).
BIOS-Setup aufrufen DEUTSCH Das BIOS (Basic Input and Output System) speichert Systemhardwareeinstellungen, die zum Systemstart des Desktop-PCs erforderlich sind. Unter normalen Umständen sorgen die BIOS-Standardeinstellungen in den meisten Fällen für optimale Leistung. Ändern Sie die BIOS-Standardeinstellungen nicht, falls nicht folgende Situationen eintreten: • Eine Fehlermeldung erscheint beim Systemstart auf dem Bildschirm und fordert Sie zum Starten des BIOS-Setups auf.
Systemwiederherstellung DEUTSCH PC auf die Werkseinstellungen zurücksetzen Die Option Reset your PC (PC auf Werkseinstellungen zurücksetzen) stellt den Auslieferungszustand Ihres PCs wieder her. Sichern Sie zuvor sämtliche Daten, bevor Sie diese Funktion benutzen. So setzen Sie Ihren PC auf die Werkseinstellungen zurück: 1. Drücken Sie beim Systemstart die -Taste. 2. Im anschließend erscheinenden Bildschirm klicken Sie auf Troubleshoot (Problemlösung). 3.
DEUTSCH 62 3. Klicken Sie auf Recovery (Wiederherstellung) > Create a recovery drive (Wiederherstellungsdatenträger anlegen). 4. Klicken Sie auf Copy the recovery partition from the PC to the recovery drive (Wiederherstellungspartition vom PC zum Wiederherstellungslaufwerk kopieren), klicken Sie dann auf Next (Weiter). 5. Wählen Sie den USBDatenträger, auf den die Wiederherstellungsdateien kopiert werden sollen. 6. Klicken Sie auf Next (Weiter). 7. Klicken Sie auf Create (Erstellen).
Alles entfernen und Windows neu installieren DEUTSCH Wählen Sie Ihren PC auf die ursprünglichen Werkseinstellungen zurücksetzen möchten, können Sie dies über die Option „Alles entfernen und neu installieren“ in den PCEinstellungen erledigen. Mit den folgenden Schritten können Sie diese Möglichkeit nutzen. Sichern Sie zuvor sämtliche Daten, bevor Sie diese Funktion benutzen. Diese Aktion kann einige Zeit dauern. 1. Rufen Sie die Charms-Leiste auf. 2.
ASUS Kontaktinformationen DEUTSCH ASUS Kontaktinformationen ASUSTeK COMPUTER INC. Adresse Telefon Fax E-Mail Webseite Technische Unterstützung Telefon Online-Support 15 Li-Te Road, Peitou, Taipei, Taiwan 11259 +886-2-2894-3447 +886-2-2890-7798 info@asus.com.tw www.asus.com.tw +86-21-38429911 support.asus.