User Guide
Manuals
Brands
Asus Manuals
Server Motherboards
P10S-M
121
122
123
124
125
126
127
128
129
130
Table Of Contents
Notices
Federal Communications Commission Statement
REACH
Australia statement notice
Safety information
Electrical safety
Operation safety
P10S-M Specifications Summary
Chapter 1: Product Introduction
1.1 Welcome!
1.2 Package contents
1.3 Serial number label
1.4 Special features
1.4.1 Product highlights
1.4.2 Innovative ASUS features
Chapter 2: Hardware Information
2.1 Before you proceed
2.2 Motherboard overview
2.2.1 Placement direction
2.2.2 Screw holes
2.2.3 Motherboard layout
2.2.4 Layout contents
2.3 Central Processing Unit (CPU)
2.3.1 Installing the CPU
2.3.2 Installing the CPU heatsink
2.3.3 Uninstalling the CPU heatsink and fan
2.3.4 Installing the CPU heatsink in rack
2.4 System memory
2.4.1 Overview
2.4.2 Memory configurations
2.4.3 Installing a DIMM on a single clip DIMM socket
2.5 Expansion slots
2.5.1 Installing an expansion card
2.5.2 Configuring an expansion card
2.5.3 Interrupt assignments
2.5.4 PCI Express x8 slot (x8 link)
2.5.5 PCI Express x16 slot (x8 link)
2.5.6 PCI Express x8 slot (x4 link)
2.5.7 PCI Express x8 slot (x4 link)
2.5.8 Installing the Baseboard Management Card
2.6 Onboard LEDs
2.7 Jumpers
2.8 Connectors
2.8.1 Rear panel connectors
2.8.2 Internal connectors
Chapter 3: Powering Up
3.1 Starting up for the first time
3.2 Powering off the computer
3.2.1 Using the OS shut down function
3.2.2 Using the dual function power switch
Chapter 4: BIOS Setup
4.1 Managing and updating your BIOS
4.1.1 ASUS CrashFree BIOS 3 utility
4.1.2 ASUS EzFlash Utility
4.1.3 BUPDATER utility
4.2 BIOS setup program
4.2.1 BIOS menu screen
4.2.2 Menu bar
4.2.3 Menu items
4.2.4 Submenu items
4.2.5 Navigation keys
4.2.6 General help
4.2.7 Configuration fields
4.2.8 Pop-up window
4.2.9 Scroll bar
4.3 Main menu
4.3.1 System Date [Day xx/xx/xxxx]
4.3.2 System Time [xx:xx:xx]
4.4 Advanced menu
4.4.1 Trusted Computing
4.4.2 Chipset Configuration
4.4.3 Platform Configuration
4.4.4 CPU Configuration
4.4.5 SATA Configuration
4.4.6 Network Stack Configuration
4.4.7 CSM Configuration
4.4.8 iSCSI Configuration
4.5 Security Menu
4.6 Boot Menu
4.7 Monitor Menu
4.8 Tool menu
4.9 Save & Exit menu
4.10 Server Mgmt menu
4.11 Event Logs menu
Chapter 5: RAID Configuration
5.1 Setting up RAID
5.1.1 RAID definitions
5.1.2 Installing hard disk drives
5.1.3 Setting the RAID mode in BIOS
5.1.4 RAID configuration utilities
5.2 Intel® Rapid Storage Technology enterprise SATA Option ROM Utility
5.2.1 Creating a RAID set
5.2.2 Deleting a RAID set
5.2.3 Resetting disks to Non-RAID
5.2.4 Exiting the Intel® Rapid Storage Technology enterprise SATA Option ROM utility
5.2.5 Rebuilding the RAID
5.2.6 Setting the Boot array in the BIOS Setup Utility
5.3 Intel® Rapid Storage Technology enterprise (Windows)
5.3.1 Creating a RAID set
5.3.2 Changing a Volume Type
5.3.3 Deleting a volume
5.3.4 Preferences
Chapter 6: Driver Installation
6.1 RAID driver installation
6.1.1 Creating a USB flash drive with RAID driver
6.1.2 Installing the RAID controller driver
6.2 Management applications and utilities installation
6.3 Running the Support DVD
6.3.1 Drivers menu tab
6.3.2 Utilities menu tab
6.3.3 Manual menu
6.3.4 Contact information menu
6.4 Installing the Intel® Chipset device Software driver
6.5 Installing the Intel® I210 Gigabit Adapters driver
6.6 Installing the VGA driver
Appendix
P10S-M block diagram
Simplified EU Declaration of Conformity
ASUS contact information
6-4
Chapter 6: Driver Installation
8.
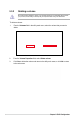
Follow succeeding screen instructions to continue.
7.
When the system nishes loading the RAID driver,
•
Replace the motherboard Support DVD with the Windows Server installation disc.
•
Remove the USB ash drive.
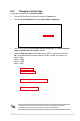
Select the drive to install Windows and click Next.
1
...
...
126
127
128
129
130
...
...
146