LED-projector E-handleiding P2 Serie
DU9477 Juni 2014 Tweede editie COPYRIGHT EN GARANTIE-INFORMATIE Geen enkel deel van deze handleiding, met inbegrip van de producten en de software die hierin is beschreven, mag zonder de uitdrukkelijke schriftelijke toestemming van ASUSTeK COMPUTER INC. (“ASUS”) worden gereproduceerd, verzonden, getranscribeerd, opgeslagen in een retrievalsysteem of in enige taal worden vertaald in enige vorm of door enig middel, behalve documentatie die door de koper wordt gebruikt voor back-updoeleinden.
Inhoudsopgave Over deze handleiding...................................................................................... 5 In deze handleiding gebruikte conventies.............................................. 6 Typografie............................................................................................................ 6 Meertalige versies............................................................................................. 6 Veiligheidsmaatregelen.........................................
Hoofdstuk 3: Het OSD-menu gebruiken Programma's starten vanaf het OSD-menu.............................................34 Raster bedieningspaneel..............................................................................35 De LED-projector voor de eerste keer gebruiken..................................36 De instellingen van uw LED-projector openen......................................38 De demomodus gebruiken...........................................................................
Over deze handleiding Deze handleiding biedt informatie over de hardware- en softwarefuncties van uw LED-projector, geordend in de volgende hoofdstukken: Hoofdstuk 1: Kennismaken met uw LED-projector Dit hoofdstuk beschrijft de onderdelen van uw LED-projector en de bijgeleverde afstandsbediening. Hoofdstuk 2: Instelling Dit hoofdstuk toont u hoe u uw LED-projector kunt installeren en de onderdelen ervan kunt gebruiken voor het aansluiten op invoerapparaten.
In deze handleiding gebruikte conventies Om belangrijke informatie in deze handleiding te markeren, worden berichten als volgt voorgesteld: BELANGRIJK! Dit bericht bevat essentiële informatie die moet worden opgevolgd om een taak te voltooien. OPMERKING: dit bericht bevat aanvullende informatie en tips die kunnen helpen bij het voltooien van taken.
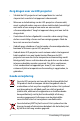
Veiligheidsmaatregelen Uw LED-projector gebruiken • Raadpleeg de handleiding en houd rekening met de veiligheidsinstructies voordat u uw LED-projector gebruikt. • Volg de opmerkingen en waarschuwingen die in de handleiding zijn vermeld. • Plaats uw LED-projector niet op een oneffen of onstabiel oppervlak. • Gebruik de LED-projector niet in een rokerige omgeving. Er kunnen rookresten worden opgestapeld op kritieke onderdelen en de LED-projector beschadigen of de prestaties negatief beïnvloeden.
Zorg dragen voor uw LED-projector • Schakel de LED-projector uit en koppel deze los van het stopcontact voordat u het apparaat schoonmaakt. • Wanneer u de behuizing van de LED-projector schoonmaakt, moet u gebruik maken van een schone zachte doek, bevochtigd met water of een mengsel van water en een neutraal schoonmaakproduct. Veeg het apparaat droog met een zachte droge doek. • Controleer of de lens afgekoeld is voordat u deze reinigt. Veeg de lens voorzichtig schoon met lensreinigingspapier.
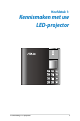
Hoofdstuk 1: Kennismaken met uw LED-projector E-handleiding LED-projector
Eigenschappen Bovenaanzicht OPMERKING: het werkelijke uiterlijk kan verschillen afhankelijk van het model. Scherpstelring Met de scherpstelring kunt u de beeldfocus van uw LEDprojector aanpassen.
Bedieningspaneelknoppen Via de knoppen op het bedieningspaneel kunt u navigeren door het OSD-menu. Deze knoppen komen individueel ook overeen met een specifieke LED-projectorinstelling, zoals hieronder aangeduid.
Vooraanzicht Lens De lens projecteert video- of afbeeldingsbestanden op het scherm vanaf uw invoerapparaat. HDMI/MHL WAARSCHUWING! Raak de lens niet aan met uw handen of een scherp object. Ventilatieopeningen Dankzij de ventilatieopeningen kan er koele lucht in en warme lucht uit de LED-projector stromen. WAARSCHUWING! Zorg ervoor dat de ventilatieopeningen niet geblokkeerd worden door papier, boeken, kleding, kabels of andere objecten, anders kan het apparaat oververhitten.
Achteraanzicht P2B/P2M HDMI/MHL P2E HDMI/MHL Infraroodsensor (IR) 9° De IR-sensor detecteert het signaal van de afstandsbediening 12° van uw LED-projector. Hierdoor kunt u van op een afstand tot 10 meter en een ontvangsthoek van 15 graden toegang tot het bedieningspaneel van uw LED-projector.
Gelijkstroomingang (DC) Sluit de bijgeleverde voedingsadapter aan op deze poort om uw batterijdoos op te laden en uw LED-projector van stroom te voorzien. WAARSCHUWING! De adapter kan warm tot heet worden tijdens het gebruik. Zorg ervoor dat u de adapter niet afdekt en houd deze weg van uw lichaam terwijl de adapter is aangesloten op een stroombron. Micro SD-kaartlezer Deze ingebouwde geheugenkaartlezer ondersteunt microSDen microSDHC-kaartformaten. USB 2.0-poort De USB 2.0-poort (Universal Serial Bus 2.
HDMI/MHL-poort Deze poort is voor de HDMI-aansluiting (High-Definition Multimedia Interface) en biedt ook ondersteuning voor MHLcompatibele (Mobile HI-Definition Link) apparaten. Deze poort is HDCP-compatibel voor weergave van HD DVD, Blu-ray en andere beschermde inhoud. Ventilatieopeningen Dankzij de ventilatieopeningen kan er koele lucht in en warme lucht uit de LED-projector stromen.
HDMI/MHL Linkerkant Ventilatieopeningen Dankzij de ventilatieopeningen kan er koele lucht in en warme lucht uit de LED-projector stromen. 9° 12° WAARSCHUWING! Zorg ervoor dat de ventilatieopeningen niet geblokkeerd worden door papier, boeken, kleding, kabels of andere objecten, anders kan het apparaat oververhitten. Kensington®-beveiligingssleuf Met de Kensington®-beveiligingssleuf kunt u uw LEDprojector beveiligen met behulp van Kensington®-compatibele beveiligingsproducten.
Rechterkant 9° 12° Ventilatieopeningen Dankzij de ventilatieopeningen kan er koele lucht in en warme lucht uit de LED-projector stromen. WAARSCHUWING! Zorg ervoor dat de ventilatieopeningen niet geblokkeerd worden door papier, boeken, kleding, kabels of andere objecten, anders kan het apparaat oververhitten.
Onderaanzicht Ingebouwde voet Deze LED-projector is voorzien van een ingebouwde voet waarmee u de hoogte van de projector kunt afstellen met 9 of 12 graden. Statiefbevestiging Sluit de LED-projector aan op een statief met deze voet.
Afstandsbediening LED-projector OPMERKING: het werkelijke uiterlijk kan verschillen afhankelijk van het model. Bedieningspaneelknoppen Via de knoppen op het bedieningspaneel kunt u navigeren door het OSD-menu. Deze knoppen komen individueel ook overeen met een specifieke LED-projectorinstelling. OPMERKING: raadpleeg het hoofdstuk Het OSD-menu gebruiken in deze handleiding voor meer informatie over het gebruik van de knoppen op het bedieningspaneel.
Knoppen afstandsbediening Via deze extra knoppen kunt u de LED-projector gebruiken van op een afstand tot 10 meter. Terug - Druk op deze knop om terug te keren naar het vorige scherm. Home - Druk op deze knop om terug te keren naar het startscherm. Laseraanwijzer - Druk op deze knop om de laseraanwijzer van de afstandsbediening te activeren. Terugspoelen - Druk op deze knop om uw audio- of videobestand terug te spoelen.
De batterij vervangen A. Schuif het veerslot van het batterijvak naar rechts om de batterijhouder te ontgrendelen. B. Trek de batterijhouder omlaag en verwijder deze volledig uit het batterijvak.
C. Verwijder de oude batterij en plaats vervolgens de nieuwe lithium-celbatterij in de batterijhouder met de positieve zijde (+) omhoog gericht. D. Schuif de batterijhouder terug in het batterijvak. Duw deze helemaal naar binnen tot u een zachte klik hoort waarmee wordt aangegeven dat het batterijvak terug op zijn plaats is vergrendeld.
Hoofdstuk 2: Instelling HDMI/MHL E-handleiding LED-projector 23
Uw LED-projector bedienen Deze draagbare LED-projector biedt u de plug&play-functie voor het aansluiten van apparaten zodat u gemakkelijk multimediabestanden kunt openen. Voor uw veiligheid en om de kwaliteit van dit toestel te behouden, dient u de volgende stappen te volgen bij het bedienen van uw LEDprojector. 1. De LED-projector aansluiten op de voedingsadapter. A. Sluit het AC/DC-kabel aan op de voedingsadapter. B. Sluit de wisselstroomkabel aan op een voedingsbron. C.
WAARSCHUWING! Lees de volgende voorzorgsmaatregelen voor de batterijdoos van uw LED-projector. • Alleen door ASUS erkende technici mogen de batterij uit het apparaat verwijderen. • De batterij die in het apparaat wordt gebruikt, kan een risico op brand of chemische brandwonden betekenen als deze uit het apparaat worden verwijderd of wordt gedemonteerd. • Volg de waarschuwingslabels voor uw persoonlijke veiligheid. • Explosiegevaar als de batterij wordt vervangen door een onjuist type.
Vereisten voor de voedingskabel Gebruik de juiste wisselstroomstekker volgens uw huidige locatie. BELANGRIJK! Neem contact op met uw verkoper als de wisselstroomkabel die bij uw LED-projector is geleverd, niet overeenkomt met uw lokale voedingsbron. OPMERKING: Wij raden u sterk aan een videobron te gebruiken die ook is uitgerust met een stekker met aarding om signaalstoringen door spanningsschommelingen te voorkomen. 26 voor Australië en het vasteland van China voor de V.S.
2. De LED-projector aansluiten op uw apparaat. HD MicroSD-kaart M I/ MH L Audio-uitgang HD USB 2.
3. De hoogte van de LED-projector aanpassen. Uw LED-projector wordt geleverd met een ingebouwde voet waarmee u de beeldhoogte op het scherm kunt aanpassen. WAARSCHUWING! • Dit apparaat kan gevaarlijke optische straling afgeven. Kijk niet direct in de bedrijfslamp. Kan schadelijk zijn voor de ogen. • Zorg ervoor dat de ingebouwde voet volledig is ingetrokken voordat u de LED-projector in de projectortas stopt. OPMERKINGEN: • Plaats de LED-projector op een stabiel, effen oppervlak.
Tabel met schermgrootten en projectieafstand Stel de afstand van de LED-projector tot het scherm in volgens de onderstaande tabel.
4. Druk op de voedingsknop. OPMERKING: Omwille van veiligheidsredenen moet u bij sommige modellen de voedingsknop ongeveer 2 seconden ingedrukt houden om uw LED-projector in te schakelen.
5. Pas de beeldfocus aan. Verplaats de scherpstelring naar links of rechts om de beeldfocus aan te passen. OPMERKING: Gebruik een stilstaand beeld wanneer u de weergave op het scherm aanpast.
E-handleiding LED-projector
Hoofdstuk 3: Het OSD-menu gebruiken E-handleiding LED-projector 33
Programma's starten vanaf het OSD-menu OPMERKING: De volgende schermopnamen zijn uitsluitend bedoeld als referentie en kunnen worden bijgewerkt zonder voorafgaande kennisgeving. Schermopnamen ������������������������������������������������� kunnen ook verschillen afhankelijk afhankelijk van het model van de LED-projector. Het OSD-menu bevat een reeks programma's en instellingen, ontworpen om uw gebruik van de LED-projector te maximaliseren.
Raster bedieningspaneel Het raster van het bedieningspaneel begeleidt u bij het gebruik van de knoppen op het bedieningspaneel om actieve opties in uw OSDmenu te starten. VGA HDMI Het raster van het bedieningspaneel stelt 8 knoppen voor die rond de knop op het bedieningspaneel staan.
De LED-projector voor de eerste keer gebruiken Raadpleeg de volgende stappen wanneer u uw LED-projector voor de eerste keer gebruikt. 1. ��������������������������������������������������������� Stel uw LED-projector in en druk dan op de voedingsknop.� Het ASUS-welkomstscherm verschijnt om aan te geven dat de LED-projector nu is ingeschakeld. 2. Selecteer de taal die u wilt gebruiken in uw LED-projector met de knoppen op het bedieningspaneel. 3.
Uit- Deze optie schakelt het bekijken van demovideo's op uw LED-projector uit en gaat verder met het zoeken van aangesloten invoerapparaten. BELANGRIJK! Deze optie deactiveert het raster van het bedieningspaneel in de demomodus en start in plaats daarvan het raster van het invoerbedieningspaneel wanneer u de LED-projector inschakelt. OPMERKING: Raadpleeg het hoofdstuk De demomodus gebruiken in deze handleiding voor meer informatie over de functies van de demomodus. 4.
De instellingen van uw LED-projector openen Naast het gebruik van de knoppen op het bedieningspaneel om door het OSD-menu te navigeren, kunt u ook elk van deze knoppen gebruiken om de volgende LED-projectorinstellingen te starten: BELANGRIJK! Druk op Projectorinstelling op het raster van het bedieningspaneel om deze functies te gebruiken in het mediacentrum. VGA Voeding HDMI VGA HDMI Druk op deze knop om de LED-projector in of uit te schakelen.
Contrast Druk op deze knop om het verschil in te stellen tussen het helderder of donkerder maken van uw projectie op het scherm. Mediacentrum* VGA HDMI Druk op deze knop om het mediacentrum te starten. OPMERKING: Raadpleeg het hoofdstuk Het mediacentrum gebruiken in deze handleiding voor meer details. VGA HDMI VGA* Druk op deze knop om de verbinding met uw invoerapparaat via de mini-VGA-poort te starten.
Ingang* ������� VGA HDMI Druk op deze knop om de apparaten die op uw LED-projector zijn aangesloten, te zoeken.
Splendid Druk op deze knop om een van de volgende weergavemodi te activeren: Standaard, Zwart bord, Wit bord, Dynamisch, sRGB, Bioscoop, Landschap.
VGA HDMI Beeldinstelling Druk op deze knop om toegang te krijgen tot de volgende beeldinstellingen: OPMERKING: deze functie werkt alleen wanneer u de HDMI-poort gebruikt. • Scherpte - Met deze optie kunt u het uiterlijk van het geprojecteerde beeld verscherpen of verzachten. • Verzadig - Met deze optie kunt u de tint van het geprojecteerde beeld verbeteren.
VGA HDMI Beeld-positie Druk op deze knop om toegang te krijgen tot de volgende instellingen voor de beeldpositie: • • • • • • • Auto Keystone - Met deze optie kunt u de uitlijning van uw beeld automatisch afstellen. Horizontale positie - Met deze optie kunt u de positie van het beeld horizontaal verschuiven. Projector positie - Met deze optie kunt u de positie van het geprojecteerde beeld aanpassen op basis van de locatie van uw LED-projector.
Setup Druk op deze knop om toegang te krijgen tot de volgende instellingen van de LED-projector: • Info - Deze optie toont u de volgende informatie over uw LED-projector: de momenteel gebruikte ingangspoort, de modelnaam van de LED-projector, en de momenteel gebruikte Splendid-modus. • All Reset (Alles opnieuw instellen) - Met deze optie kunt u alle instellingen die u momenteel hebt ingesteld voor uw LEDprojector, opnieuw instellen.
• Taal - Met deze optie kunt u de taal selecteren die u wilt gebruiken in het OSD-menu van de LED-projector. • Time-out voeding - Met deze optie kunt u het aantal seconden instellen voordat uw LED-projector automatisch uitschakelt wanneer deze niet in gebruik is. • Demomodus - Deze optie schakelt de functies van de demovideo van uw LED-projector in of uit. OPMERKING: Raadpleeg het hoofdstuk De demomodus gebruiken in deze handleiding voor meer details. • e-Handl.
De demomodus gebruiken Geef de interne demovideo die bij uw LED-projector is geleverd of uw eigen demovideo's weer met de demomodus. De demomodus wordt automatisch ingeschakeld op uw LEDprojector als u Aan hebt gekozen op het ogenblik waarop u het apparaat voor de eerste keer hebt ingeschakeld. Als u echter Uit kiest, wordt deze functie uitgeschakeld. In dit geval kunt u deze functie inschakelen met de volgende stappen. De demomodus inschakelen 1. Start het raster Setup van het bedieningspaneel. 2.
Uw eigen demovideo maken en afspelen Met uw LED-projector kunt u eenvoudige demovideo's maken met een reeks foto's, voorgesteld als een diavoorstelling. U kunt ook achtergrondmuziek toevoegen aan de diavoorstelling terwijl deze op het scherm wordt weergegeven. Maak uw eigen demovideo en speel deze af op uw LED-projector met de volgende stappen: 1. Maak een map met de naam ASUS in uw SD-kaart of USBstation. 2. Selecteer de foto's die u wilt opnemen in uw demovideo en een muziekbestand (optioneel).
Het mediacentrum gebruiken Geef foto's weer, speel video's af, beluister muziek en bekijk documenten via het Mediacentrum van uw LED-projector. Via het mediacentrum kunt u ook een verbinding maken met USBinvoerapparaten en microSD-kaarten. Het mediacentrum starten Het mediacentrum wordt automatisch gestart nadat de LEDprojector een microSD-kaart of extern station heeft gedetecteerd. U kunt het mediacentrum ook handmatig starten door op het bedieningspaneel op te drukken.
Bestanden openen vanaf de SD-kaart of het USBstation Foto Ondersteunde beeldbestandsindelingen: • JPG • JPEG • BMP (bitmap) Een beeldbestand openen: 1. Sluit uw invoerapparaat aan op de LED-projector. 2. Schakel de LED-projector in om het OSD-menu van het mediacentrum te starten. 3. Selecteer Foto. 4. Raadpleeg het raster van het bedieningspaneel om u te helpen bij het zoeken en selecteren van het bestand vanaf uw invoerapparaat. VGA HDMI VGA 5.
Video Bestandstype Videocodec Resolutie Beeldsnelheid Audiocodec AVI H.264 BP, MP, HP @ L4.1 MPEG-4 ASP @ L5 MPEG-4 SP Divx High Definition Xvid H.263 Profile 3 Level 70 MPEG-1 MPEG-2 MP@HL MJPEG Baseline 4:4:4 1080P 30 fps MPEG-1 L1-3 HE-AACv1 PCM / G.711 MOV H.264 BP, MP, HP @ L4.1 MPEG-4 ASP @ L5 MPEG-4 SP Divx High Definition Xvid H.263 Profile 3 Level 70 MPEG-1 MPEG-2 MP@HL MJPEG Baseline 4:4:4 1080P 30 fps MPEG-1 L1-3 HE-AACv1 AMR-NB AMR-WB PCM / G.711 MP4 H.264 BP, MP, HP @ L4.
Bestandstype Videocodec Resolutie Beeldsnelheid Audiocodec WMV ASF MPEG-4 SP Divx High Definition Xvid VC-1/WMV9 1080P 30 fps WMA8/9 MKV H.264 BP, MP, HP @ L4.1 1080P 30 fps MPEG-1 L1-3 HE-AACv1 PCM / G.711 AC3 VOB MPEG-2 MP@HL 1080P 30 fps MPEG-1 L1-3 AC3 DTS DAT MPEG-1 1080P 30 fps MPEG-1 L1-3 TS MPEG-2 MP@HL 1080P 30 fps MPEG-1 L1-3 M4V MPEG-4 ASP @ L5 MPEG-4 SP 1080P 30 fps N/A FLV Sorenson Spark 1080P 30 fps MPEG-1 L1-3 PCM / G.
Een videobestand afspelen: 1. Sluit uw invoerapparaat aan op de LED-projector. 2. Schakel de LED-projector in om het OSD-menu van het mediacentrum te starten. 3. Selecteer het invoerapparaat waarvoor u toegang wenst. 4. Selecteer Video. 5. Raadpleeg het raster van het bedieningspaneel om u te helpen bij het zoeken en selecteren van het bestand vanaf uw invoerapparaat. VGA 6. Druk op HDMI om de geselecteerde map of het geselecteerde VGA HDMI bestand te openen. 7.
Audio Bestandstype Bemonsteringsfrequentie (KHz) Bitsnelheid (Kbps) MP1/ MP2/ MP3 8-48 8—320 WMA 22-48 5—320 OGG ADPCM-WAV PCM-WAV AAC 8-48 8-48 8-48 8-48 64—320 32—384 128—1536 8—256 Om audiobestanden af te spelen, gaat u als volgt te werk: 1. Sluit uw apparaat aan op de LED-projector. 2. Schakel de LED-projector in om het OSD-menu van het mediacentrum te starten. 3. Selecteer Muziek. 4.
Document Bestandstype Ondersteuningsversie Beperking pagina's/lijnen Groottebeperking Opmerking Adobe PDF PDF 1.0 PDF 1.1 PDF 1.2 PDF 1.3 PDF 1.4 Up to 100 pages (One File) Up to 75 MB - Microsoft® Office Word Microsoft® Office Word 1995, Microsoft® Office Word 1997, Microsoft ® Office Word 2000, Microsoft® Office Word 2002, Microsoft® Office Word 2003 Because the office viewer does not load all pages of a Microsoft® Word file at the same time, there are no obvious page or line limitations.
Om bestanden weer te geven, gaat u als volgt te werk: 1. Sluit uw apparaat aan op de LED-projector. 2. Schakel de LED-projector in om het OSD-menu van het mediacentrum te starten. 3. Selecteer het invoerapparaat waarvoor u toegang wenst. 4. Selecteer Document. 5. Raadpleeg het raster van het bedieningspaneel om u te helpen bij het zoeken en selecteren van het bestand vanaf uw invoerapparaat. Indrukken VGA 6. Druk op HDMI om de geselecteerde map of het geselecteerde VGA HDMI bestand te openen. 7.
Meertalige versies Download andere taalversies van deze E-handleiding via deze website: http://support.asus.
Bijlagen E-handleiding LED-projector 57
FCC-verklaring (Federal Communications Commission) Dit apparaat werd getest en voldoet aan de beperkingen voor een klasse B digitaal apparaat, in naleving van deel 15 van de FCC-voorschriften. Deze limieten zijn vastgesteld om een redelijke beveiliging te bieden tegen schadelijke storingen in een thuis installatie.
Verklaring Canadees Ministerie voor Communicatie Dit digitaal apparaat overschrijdt de limieten niet van Klasse B voor zendruisemissies van digitale apparaten , zoals vastgesteld in de voorschriften met betrekking tot radiostoring van het Canadese ministerie voor Communicatie. Dit digitaal apparaat van Klasse B voldoet aan de Canadese ICES-003.
Ondersteuning van PC-timings HDMI (PC) Resolutie Modus Vernieuwingsfrequentie (Hz) H. frequentie (kHz) Klok (MHz) 640 x 480 VGA_60 59.940 31.469 25.175 800 x 600 SVGA_60 60.317 37.879 40.000 1024 x 768 XGA_60 60.004 48.363 65.000 1280 x 800 WXGA_60 59.810 49.702 83.500 1280 x 960 1280 x 960_60 60.000 60.000 108 1360 x 768 1360 x 768_60 60.015 47.712 85.500 1440 x 900 WXGA+_60 59.887 55.935 106.500 HDMI (video) Timing Verticaal frequentie (Hz) Resolutie H.
Specificaties voor P2 LED-projector P2B P2M P2E Beeldschermtechnologie 0.45” DLP® Lichtbron R/G/B LED Levensduur lichtbron 30,000 hours (max) Ware resolutie (oorspronkelijk) WXGA 1280x800 Lichtuitgang 350 lumen ����� Contrastverhouding 3500:1 DCR Kleurverzadiging (NTSC) 100% Schermkleuren 16.7 M Throw-factor 1.1 (42” @1m) Projectiebereik 0.
Voeding� Lawaai Ingang/ Uitgang P2B P2M P2E Inschakelmodus 30W 50W 27W Stand-bymodus <0.
P2B Mechanisch design Knoppen op machine P2M P2E Mediacentrum, Invoer, VGA, HDMI, Voeding, Voeding, Beeldpositie, Beeldpositie, Helderheid, Helderheid, Beeldkwaliteit, Beeldkwaliteit, Beeldinstelling, Enter, Beeldinstelling, Enter, Volume, Splendid, Contrast, Volume, Splendid, Contrast, Setup Setup Beveiliging Kensington-slot Ja Afmetingen Fysische afmetingen 142,4mm x 130mm x 34,6mm Doosafmeting 235mm x 179mm x 113mm Netto gewicht 666g 532g 502g (bij benadering) Brutogewicht 1.
E-handleiding LED-projector