LED-Projektor E-Handbuch P2 Serie
G9477 Juli 2014 Bearbeitete Ausgabe 2 Urheberrechts- und Garantieinformationen Kein Teil dieses Handbuchs, einschließlich der darin beschriebenen Produkte und Software, darf ohne ausdrückliche schriftliche Genehmigung von ASUSTeK COMPUTER INC. (“ASUS”) mit jeglichen Mitteln in jeglicher Form reproduziert, übertragen, transkribiert, in Wiederaufrufsystemen gespeichert oder in jegliche Sprache übersetzt werden, abgesehen von vom Käufer als Sicherungskopie angelegter Dokumentation.
Inhaltsverzeichnis Über diese Anleitung......................................................................................... 5 Anmerkungen zu diesem Handbuch......................................................... 6 Typographie........................................................................................................ 6 Mehrsprachige Versionen............................................................................... 6 Sicherheitsmaßnahmen...............................................
Kapitel 3: OSD-Menü verwenden Programme über das OSD-Menü starten.................................................34 Bedienfeld..........................................................................................................35 Ihren LED-Projektor zum ersten Mal nutzen...........................................36 Auf die Einstellungen Ihres LED-Projektors zugreifen.........................38 Demomodus verwenden...............................................................................
Über diese Anleitung Diese Anleitung liefert Informationen über die Hardware- und Softwaremerkmale Ihres LED-Projektors durch folgende Kapitel: Kapitel 1: Ihren LED-Projektor kennenlernen Dieses Kapitel beschreibt die Teile Ihres LED-Projektors und der mitgelieferten Fernbedienung. Kapitel 2: Einrichten Dieses Kapitel zeigt Ihnen, wie Sie Ihren LED-Projektor einrichten und seine Teile zur Verbindung von Eingangsgeräten nutzen.
Anmerkungen zu diesem Handbuch Zum Hervorheben wichtiger Informationen sind manche Textabschnitte in diesem Handbuch wie folgt gekennzeichnet: WICHTIG! Diese Nachricht enthält wichtige Informationen, die für die Fertigstellung einer Aufgabe befolgt werden müssen. HINWEIS: Diese Nachricht enthält zusätzliche Informationen und Tipps, die bei der Fertigstellung einer Aufgabe helfen.
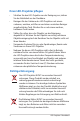
Sicherheitsmaßnahmen Ihren LED-Projektor nutzen • • • • • • • Halten Sie sich an die Anleitung und beachten Sie vor Inbetriebnahme Ihres LED-Projektors die Sicherheitsanweisungen. Befolgen Sie die in der Bedienungsanleitung angegebenen Hinweise und Warnungen. Stellen Sie Ihren LED-Projektor nicht auf einen unebenen oder instabilen Untergrund. Verwenden Sie den LED-Projektor nicht in rauchigen Umgebungen.
Ihren LED-Projektor pflegen • • • • • Schalten Sie den LED-Projektor vor der Reinigung aus, ziehen Sie das Netzkabel aus der Steckdose. Reinigen SIe das Gehäuse des LED-Projektors mit einem sauberen, weichen, mit Wasser und etwas neutralem Reiniger angefeuchteten Tuch. Wischen Sie es mit einem weichen, trockenen Tuch trocken. Stellen Sie sicher, dass das Objektiv vor der Reinigung abgekühlt ist. Wischen Sie das Objektiv vorsichtig mit einem Objektivreinigungstuch ab.
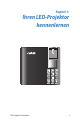
Kapitel 1: Ihren LED-Projektor kennenlernen Kapitel 1: LED-Projektor kennenlernen LED-Projektor E-Handbuch 9
Merkmale Ansicht von oben HINWEIS: Das tatsächliche Aussehen kann je nach Modell variieren. Fokusring Über den Fokusring können Sie den Bildfokus Ihres LEDProjektors anpassen.
Bedienfeldtasten Über die Bedienfeldtasten können Sie das OSD-Menü navigieren. Die einzelnen Tasten entsprechen wie nachstehend gezeigt auch spezifischen LED-Projektoreinstellungen.
Ansicht von vorne Objektiv Das Objektiv projiziert Video- oder Bilddateien von Ihrem Eingangsgeräte auf die Leinwand. HDMI/MHL WARNUNG! Berühren Sie das Objektiv nicht mit Ihren Händen oder scharfen Gegenständen. Luftöffnungen Über die Belüftungsöffnungen gelangt kühle Luft in das Gerät, warme Luft wird abgeleitet.
Ansicht von hinten P2B/P2M HDMI/MHL P2E HDMI/MHL Infrarot- (IR) Sensor Der IR-Sensor erkennt Signale von der Fernbedienung Ihres 9° von bis zu 10 LED-Projektors, wodurch Sie aus einer Entfernung 12° Metern und einem Winkel von 15 Grad auf das Bedienfeld des LED-Projektors zugreifen können.
Netzeingang (Gleichspannung) Hier schließen Sie das mitgelieferte Netzteil an, das den Akku auflädt und Ihren LED-Projektor mit Energie versorgt. WARNUNG! Das Netzteil kann sich im Betrieb erwärmen. Sie dürfen das Netzteil nicht abdecken und nicht in die Nähe Ihres Körpers bringen, wenn es an eine Stromquelle angeschlossen ist. microSD-Kartenleser: Dieser integrierte Speicherkartenleser unterstützt microSDund microSDHC-Kartenformate. USB 2.0-Anschluss Der USB 2.0- (Universal Serial Bus 2.
HDMI/MHL-Port Dieser Port eignet sich für HDMI- (High-Definition Multimedia Interface) Stecker und unterstützt auch MHL- (Mobile HIDefinition Link) kompatible Geräte. Dieser Port ist für HD-DVD-, Blu-ray- und die Wiedergabe anderer geschützter Inhalten HDCP-konform. Luftöffnungen Über die Belüftungsöffnungen gelangt kühle Luft in das Gerät, warme Luft wird abgeleitet.
HDMI/MHL Linke Seite Luftöffnungen Über die Belüftungsöffnungen gelangt kühle Luft in das Gerät, warme Luft wird abgeleitet. WARNUNG! Achten Sie unbedingt darauf, dass 9° die 12° Belüftungsöffnungen nicht durch Papier, Bücher, Kleidung, Kabel oder andere Gegenstände blockiert werden; andernfalls kann es zu Überhitzung kommen. Kensington®-Sicherheitsschlitz Über den Kensington®-Sicherheitsschlitz können Sie Ihren LEDProjektor mit Kensington®-kompatiblen Sicherheitsprodukten absichern.
9° Rechte Seite 12° Luftöffnungen Über die Belüftungsöffnungen gelangt kühle Luft in das Gerät, warme Luft wird abgeleitet. WARNUNG! Achten Sie unbedingt darauf, dass die Belüftungsöffnungen nicht durch Papier, Bücher, Kleidung, Kabel oder andere Gegenstände blockiert werden; andernfalls kann es zu Überhitzung kommen.
Ansicht von unten Integrierter Ständer Dieser LED-Projektor verfügt über einen integrierten Ständer, der Ihnen die Anpassung der Projektorhöhe um 9 oder 12 Grad ermöglicht. Stativanschluss Verbinden Sie den LED-Projektor über diesen Anschluss mit einem Stativ.
Fernbedienung des LED-Projektors HINWEIS: Das tatsächliche Aussehen kann je nach Modell variieren. Bedienfeldtasten Über die Bedienfeldtasten können Sie das OSD-Menü navigieren. Diese Tasten entsprechen auch spezifischen LEDProjektoreinstellungen. HINWEIS: Weitere Einzelheiten zur Nutzung der Bedienfeldtasten finden Sie im Abschnitt OSD-Menü verwenden in dieser Anleitung.
Fernbedienungstasten Diese zusätzlichen Tasten ermöglicht Ihnen die Nutzung des LED-Projektors auf eine Entfernung von bis zu 10 Metern. Zurück – Mit dieser Taste kehren Sie zur vorherigen Anzeige zurück. Startseite – Mit dieser Taste kehren Sie zum Startbild zurück. Laserpointer – Mit dieser Taste aktivieren Sie den Laserpointer der Fernbedienung. Rücklauf – Mit dieser Taste aktivieren Sie den Rücklauf Ihrer Audio- oder Videodatei.
Batterie auswechseln A. Bewegen Sie den Riegel des Batteriefachs zur Freigabe der Batteriehalterung nach rechts. B. Ziehen Sie die Batteriehalterung nach unten und entfernen Sie sie vollständig aus dem Batteriefach.
C. Entnehmen Sie die alte Batterie, setzen Sie dann eine neue Lithium-Knopfzelle mit dem Pluspol nach oben (+) in die Batteriehalterung ein. D. Schieben Sie die Batteriehalterung zurück ins Batteriefach. Schieben Sie sie vollständig hinein, bis sie mit einem leisen Klickgeräusch im Batteriefach einrastet.
Kapitel 2: Einrichten HDMI/MHL Kapitel 2: Einrichten LED-Projektor E-Handbuch 23
Ihren LED-Projektor bedienen Dieser tragbare LED-Projektor ermöglicht Ihnen das Anschließen und Wiedergeben Ihrer Geräte, sodass Sie Multimedia-Dateien problemlos öffnen können. Zu Ihrer Sicherheit und zur Wahrung der Qualität dieses Gerätes sollten Sie bei der Bedienung Ihres LED-Projektors folgende Schritte beachten. 1. Verbinden Sie den LED-Projektor mit dem Netzteil. A. B. C. Schließen Sie das Netzkabel am Netzteil an. Verbinden Sie das Netzkabel mit einer Steckdose.
WARNUNG! Lesen Sie folgende Vorsichtsmaßnahmen zum Akku Ihres LEDProjektors. • Der Akku darf ausschließlich von autorisierten ASUS-Technikern aus dem Gerät entfernt werden. • Der in diesem Gerät eingesetzte Akku kann bei Entfernen oder Demontage die Gefahr von Brand oder chemischen Verbrennungen bergen. • Befolgen Sie zu Ihrer persönlichen Sicherheit die Warnetiketten. • Falls der Akku durch einen falschen Typ ersetzt wird, besteht Explosionsgefahr. • Nicht durch Verbrennen entsorgen.
Netzkabelanforderungen Verwenden Sie den richtigen Netzstecker entsprechend Ihrer Region. WICHTIG! Wenden Sie sich an Ihren Händler, falls das mit Ihrem LED-Projektor gelieferte Netzkabel nicht mit Ihrer örtlichen Stromversorgung übereinstimmt. HINWEIS: Zur Vermeidung von Signalstörungen aufgrund von Spannungsschwankungen empfehlen wir Ihnen dringend, ein Videoeingangsgerät zu verwenden, dass einen Erdungsstecker nutzt.
2. Schließen Sie den LED-Projektor an Ihr Gerät an. HD microSD-Karte M I/ MH L Audioausgangsbuchse HD USB 2.
3. Passen Sie die Höhe des LED-Projektors an. Ihr LED-Projektor verfügt über einen integrierten Ständer, mit dem Sie die Bildhöhe anpassen können. WARNUNG! • • Dieses Produkt kann mögliche gefährliche optische Strahlung ausgeben. Blicken Sie nicht in die laufende Lampe. Dies kann Ihren Augen schaden. Stellen Sie sicher, dass der integrierte Ständer vollständig eingezogen ist, bevor Sie den LED-Projektor in die Projektortasche legen.
Tabelle zu Leinwandgröße und Projektionsabstand Passen Sie den Abstand des LED-Projektors von der Projektionsfläche über die nachstehende Tabelle an. Leinwandgröße LED-Projektor Projektionsabstand Leinwandgröße – 16:10 Projektionsabstand (Zoll) (Millimeter) (Meter) 30 762 0.71 40 1016 0.95 60 1524 1.42 80 2032 1.90 100 2540 2.37 120 3048 2.84 140 3556 3.32 160 4064 3.
4. Drücken Sie die Ein-/Austaste. Hinweis: Aus Sicherheitsgründen muss die Ein-/Austaste bei einigen Modellen zum Einschalten Ihres LED-Projektors etwa 2 Sekunden gedrückt werden.
5. Passen Sie den Bildfokus an. Verschieben Sie den Fokusring zum Anpassen des Bildfokus nach links oder rechts. HINWEIS: Passen Sie die Anzeige über ein Standbild an.
LED-Projektor E-Handbuch
Kapitel 3: OSD-Menü verwenden Kapitel 3: OSD-Menü verwenden LED-Projektor E-Handbuch 33
Programme über das OSD-Menü starten HINWEIS: Folgende Anzeigen dienen nur der Veranschaulichung und können ohne Vorankündigung aktualisiert werden. Screenshots können je nach Modell des LED-Projektors variieren. Das OSD-Menü enthält eine Auswahl an Programmen und Einstellungen, die der Maximierung der Nutzbarkeit Ihres LEDProjektors dienen. Sie können über die Bedienfeldtasten Ihres LEDProjektors oder die mitgelieferte Fernbedienung durch das OSDMenü navigieren.
Bedienfeld Das Bedienfeld erklärt die Benutzung der Bedienfeldtasten zum Starten aktiver Optionen in Ihrem OSD-Menü. Das Bedienfeld repräsentiert die 8 Tasten rund um die Bedienfeld.
Ihren LED-Projektor zum ersten Mal nutzen Beachten Sie bei der ersten Inbetriebnahme Ihres LED-Projektors die nachstehenden Schritte. 1. Stellen Sie Ihren LED-Projektor auf, drücken Sie dann die Ein-/ Austaste. Das ASUS-Willkommensbild erscheint und zeigt an, dass der LED-Projektor nun eingeschaltet ist. 2. Wählen Sie über die Bedienfeldtasten die gewünschte Sprache zur Nutzung in Ihrem LED-Projektor. 3.
Aus - Diese Option deaktiviert die Anzeige von DemoVideos an Ihrem LED-Projektor und fährt mit der Suche nach angeschlossenen Eingangsgeräten fort. WICHTIG! Diese Option deaktiviert das Bedienfeld des Demomodus und zeigt stattdessen das Quelle-Bedienfeld an, sobald Sie Ihren LEDProjektor einschalten. HINWEIS: Weitere Informationen über die Funktionen des Demomodus finden Sie im Abschnitt Demomodus nutzen in dieser Anleitung. 4.
Auf die Einstellungen Ihres LED-Projektors zugreifen Neben der Nutzung der Bedienfeldtasten zur Navigation durch die OSD-Menüs können Sie mit den einzelnen Tasten auch folgende Einstellungen des LED-Projektors aufrufen: WICHTIG! Drücken Sie zur Nutzung der Funktionen im Mediencenter Projektoreinstellung im Bedienfeld. BetriebVGA HDMI VGA HDMI Drücken Sie diese Taste zum Ein-/Ausschalten des LED-Projektors. VGA HDMI Helligkeit Drücken Sie diese Taste zum Anpassen der Projektionshelligkeit..
Kontrast Mit dieser Taste stellen Sie den Unterschied zwischen hellen und dunklen Bereichen Ihrer Projektionsanzeige ein. Mediencenter* VGA HDMI Drücken Sie diese Taste zum Starten des Mediencenters. HINWEIS: Weitere Einzelheiten finden Sie im Abschnitt Mediencenter verwenden in dieser Anleitung. VGA HDMI VGA* Drücken Sie zum Starten der Verbindung mit Ihrem Eingabegerät per Mini-VGA-Port diese Taste.
Eingang* VGA HDMI Mit dieser Taste können Sie nach mit Ihrem LED-Projektor verbundenen Geräten suchen.
Splendid Drücken Sie diese Taste zum Aktivieren eines der folgenden Anzeigemodi: Standard, Schwarze Tafel, Weiße Tafel, Dynamisch, sRGB, Theater, Landschaft.
VGA HDMI Bildeinstellungen Drücken Sie diese Taste zum Zugreifen auf folgende Bildeinstellungen: HINWEIS: Diese Funktion funktioniert nur bei Verwendung des HDMIPorts. • Schärfe - Über diese Option können Sie das projizierte Bild schärfer oder weicher zeichnen. • Farbsätt. - Über diese Option können Sie den Farbton des projizierten Bildes anpassen.
VGA HDMI Bildposition Drücken Sie diese Taste zum Zugreifen auf folgende Bildpositionseinstellungen: • • • • • • • Auto Trapez - Über diese Option können Sie die Ausrichtung Ihres Bildes automatisch anpassen. Horizontalposition - Über diese Option können Sie die Bildposition horizontal verschieben. Projektorposition - Über diese Option können Sie die Position des projizierten Bildes basierend auf dem Standort Ihres LEDProjektors anpassen.
Einstl. Drücken Sie diese Taste zum Zugreifen auf folgende LEDProjektoreinstellungen: • Info - Diese Option zeigt folgende Informationen über Ihren LED-Projektor: Aktuell verwendeter Eingangsport, Modellname des LED-Projektors und aktuell verwendeter Splendid-Modus. • Alles zurücksetzen - Mit dieser Option können Sie alle aktuell vorgenommenen Einstellungen Ihres LED-Projektors zurücksetzen.
• Sprache - Über diese Option können Sie die Sprache des OSDMenüs Ihres LED-Projektors wählen. • Ausschalt Timer - Über diese Option können Sie die Anzahl Sekunden einstellen, nach der sich der LED-Projektor bei Nichtbenutzung automatisch abschaltet. • Demomodus - Diese Option ermöglicht die Ein-/Abschaltung der Demo-Videofunktionen Ihres LED-Projektors. HINWEIS: Weitere Einzelheiten finden Sie im Abschnitt Demomodus verwenden in dieser Anleitung.
Demomodus verwenden Betrachten Sie über den Demomodus das interne Demo-Video Ihres LED-Projektors oder Ihre eigenen Demo-Videos. Der Demomodus ist an Ihrem LED-Projektor automatisch aktiviert, wenn Sie beim erstmaligen Einschalten des Gerätes Ein wählen. Durch Auswahl von Aus wird diese Funktion hingegen deaktiviert. In diesem Fall können Sie die Funktion anhand folgender Schritte aktivieren. Demomodus aktivieren 1. Starten Sie das Einstl.-Bedienfeld. 2. Wählen Sie Demomodus > Ein.
Ihr eigenes Demo-Video erstellen und wiedergeben Über Ihren LED-Projektor können Sie Demo-Videos einfach über eine Reihe von als Diaschau präsentierten Fotos erstellen. Zudem können Sie Hintergrundmusik zur Diaschauwiedergabe hinzufügen. Anhand folgender Schritte erstellen Sie Ihr eigenes Demo-Video und geben es an Ihrem LED-Projektor wieder: 1. Erstellen Sie einen Ordner mit dem Namen ASUS auf Ihrer SDKarte bzw. Ihrem USB-Laufwerk. 2.
Mediencenter verwenden Über das Mediencenter Ihres LED-Projektors können Sie Fotos anzeigen, Videos wiedergeben, Musik hören und Dokumente betrachten. Durch das Mediencenter können Sie auch USB-fähige Eingangsgeräte und microSD-Karten bedienen. Mediencenter starten Das Media Center (Mediencenter) startet automatisch, sobald der LED-Projektor eine microSD-Karte oder ein externes Laufwerk erkennt. Sie können das Mediencenter auch manuell durch Betätigung der -Taste am Bedienfeld starten.
Dateien von SD-Karte bzw. USB-Laufwerk öffnen Foto Unterstützte Bilddateiformate: • JPG • JPEG • BMP (Bitmap) So öffnen Sie eine Bilddatei: 1. Schließen Sie Ihr Eingangsgerät an den LED-Projektor an. 2. Schalten Sie den LED-Projektor ein; das OSD-Menü des Mediencenters wird eingeblendet. 3. Wählen Sie Foto. 4. Beachten Sie das Bedienfeld zum Durchsuchen und Auswählen der gewünschten Datei vom Eingangsgerät. VGA HDMI VGA 5. Drücken Sie zum Öffnen des ausgewählten Ordners bzw. der Datei HDMI . 6.
Video Dateityp Videocodec Auflösung Bildwiederholfrequenz Audio Codec AVI H.264 BP, MP, HP @ L4.1 MPEG-4 ASP @ L5 MPEG-4 SP Divx High Definition Xvid H.263 Profile 3 Level 70 MPEG-1 MPEG-2 MP@HL MJPEG Baseline 4:4:4 1080P 30 Bilder/s MPEG-1 L1-3 HE-AACv1 PCM / G.711 MOV H.264 BP, MP, HP @ L4.1 MPEG-4 ASP @ L5 MPEG-4 SP Divx High Definition Xvid H.263 Profile 3 Level 70 MPEG-1 MPEG-2 MP@HL MJPEG Baseline 4:4:4 1080P 30 Bilder/s MPEG-1 L1-3 HE-AACv1 AMR-NB AMR-WB PCM / G.711 MP4 H.
Dateityp Videocodec Auflösung Bildwiederholfrequenz Audio Codec WMV ASF MPEG-4 SP Divx High Definition Xvid VC-1/WMV9 1080P 30 Bilder/s WMA8/9 MKV H.264 BP, MP, HP @ L4.1 1080P 30 Bilder/s MPEG-1 L1-3 HE-AACv1 PCM / G.
So öffnen Sie eine Videodatei: 1. Schließen Sie Ihr Eingangsgerät an den LED-Projektor an. 2. Schalten Sie den LED-Projektor ein; das OSD-Menü des Mediencenters wird eingeblendet. 3. Wählen Sie das Eingangsgerät, auf das Sie zugreifen möchten. 4. Wählen Sie Video. 5. Beachten Sie das Bedienfeld zum Durchsuchen und Auswählen der gewünschten Datei vom Eingangsgerät. VGA HDMI 6. Drücken Sie zum Öffnen des ausgewählten Ordners bzw. VGA der Datei HDMI . 7.
Audio Dateityp Abtastrate (kHz) Bitrate (kb/s) MP1/ MP2/ MP3 8-48 8—320 WMA 22-48 5—320 64—320 OGG 8-48 ADPCM-WAV 8-48 32—384 PCM-WAV 8-48 128—1536 AAC 8-48 8—256 Beachten Sie zur Wiedergabe von Audiodateien folgende Schritte: 1. Schließen Sie Ihr Gerät an den LED-Projektor an. 2. Schalten Sie den LED-Projektor ein; das OSD-Menü des Mediencenters wird eingeblendet. 3. Wählen Sie Musik. 4. Beachten Sie das Bedienfeld zum Durchsuchen und Auswählen der gewünschten Datei vom Eingangsgerät.
Dokument Dateityp Unterstützte Version Adobe PDF PDF 1,0 PDF 1,1 PDF 1,2 PDF 1,3 PDF 1.4 Microsoft® Microsoft® Office Word 1995, Office Word Microsoft® Office Word 1997, Microsoft® Office Word 2000, Microsoft® Office Word 2002, Microsoft® Office Word 2003 Seiten-/Zeilenbeschränkung Bis zu 100 Seiten (pro Datei) Da der Max. 100 MB Dokumentenbetrachter nicht alle Seiten einer Microsoft® Word-Datei gleichzeitig lädt, gibt es keine offensichtlichen Seiten- oder Zeilenbeschränkungen.
Beachten Sie zur Betrachtung von Dokumenten folgende Schritte: 1. Schließen Sie Ihr Gerät an den LED-Projektor an. 2. Schalten Sie den LED-Projektor ein; das OSD-Menü des Mediencenters wird eingeblendet. 3. Wählen Sie das Eingangsgerät, auf das Sie zugreifen möchten. 4. Wählen Sie Dokument. 5. Beachten Sie das Bedienfeld zum Durchsuchen und Auswählen der gewünschten Datei vom Eingangsgerät. Drücken Sie VGA HDMI 6. Drücken Sie zum Öffnen des ausgewählten Ordners bzw. VGA der Datei HDMI . 7.
Mehrsprachige Versionen Laden Sie andere Sprachversionen dieser elektronischen Anleitung über folgende Webseite herunter: http://support.asus.com.
Anhänge Appendices Anhänge LED-Projektor E-Handbuch 57
Aussagen zur FCC-Erklärung Dieses Gerät wurde geprüft und entspricht den Grenzwerten für digitale Geräte der Klasse B gemäß Teil 15 der FCC-Vorschriften. Diese Vorschriften wurden für ausreichenden Schutz gegen Radiofrequenzenergie in Wohngegenden aufgestellt. Dieses Gerät erzeugt und verwendet Radiofrequenzenergie und kann diese ausstrahlen. Wenn es nicht entsprechend der Bedienungsanleitung installiert und verwendet wird, kann es Störungen von Funkübertragungen verursachen.
Canadian Department of Communications-Erklärung Diese digitale Ausrüstung überschreitet nicht die Klasse B-Grenzwerte für Funkemissionen für digitale Geräte, die von der kanadischen Behörde für Kommunikation in den Regelungen für Funkinterferenzen festgelegt wurden. Dieses digitale Klasse B-Gerät erfüllt die kanadischen Bestimmungen ICES-003.
Unterstützte PC-Timings HDMI (PC) Auflösung H-Frequenz (kHz) Takt (MHz) Modus Bildwiederholfrequenz (Hz) 640 x 480 VGA_60 59.940 31.469 25.175 800 x 600 SVGA_60 60.317 37.879 40.000 1024 x 768 XGA_60 60.004 48.363 65.000 1280 x 800 WXGA_60 59.810 49.702 83.500 1280 x 960 1280 x 960_60 60.000 60.000 108 1360 x 768 1360 x 768_60 60.015 47.712 85.500 1440 x 900 WXGA+_60 59.887 55.935 106.500 HDMI (Video) 480p 720 x 480 59.94 31.
Technische Daten zum P2 LED Projector-Serie Anzeige Anzeigetechnologie Lichtquelle Lebensdauer der Lichtquelle Echte Auflösung (nativ) Lichtausgabe P2B P2M P2E 0.45” DLP® R/G/B LED 30,000 Stunden (max.) Kontrastverhältnis WXGA 1280x800 350 500 Lumens Lumen 3500:1 DCR Farbsättigung (NTSC) Darstellbare Farben 100 % 16.
P2B P2M P2E Stromver- Betriebsmodus 30W sorgung 50W 27W Bereitschaftsmodus Rauschen Akustisches Rauschen <0.
P2B Mechanisches Design Tasten am Gerät P2M Mediencenter, Eingang, Ein/ Aus, Bildposition, Helligkeit, Bildeinstellungen, Trapezkorrektur, Enter, Lautstärke, Splendid, Kontrast, Einstellungen P2E VGA, HDMI, Ein/ Aus,Bildposition, Helligkeit, Bildqualität, Bildeinstellungen, Trapezkorrektur, Enter, Lautstärke, Splendid, Kontrast, Einstellungen Sicherheit KensingtonJa Schloss Abmessun- Physikalische 142.4mm x 130mm x 34.
LED-Projektor E-Handbuch