Wydanie pierwsze Kwiecień 2021 Copyright © 2021 ASUSTeK COMPUTER INC. Wszelkie prawa zastrzeżone.
Zawartość Uwagi............................................................................................................ iv Informacje dotyczące bezpieczeństwa....................................................... v Obsługa i czyszczenie................................................................................. vi Takeback Services...................................................................................... vii Informacje o produkcie na potrzeby etykiety EU Energy Label.............
Uwagi Oświadczenie FCC (Federalnej komisji łączności) To urządzenie jest zgodne z sekcją 15 przepisów FCC. Urządzenie można obsługiwać w przypadku spełnienia dwóch następujących warunków: • Niniejsze urządzenie nie może wywoływać szkodliwych zakłóceń, oraz • Niniejsze urządzenie musi działać w warunkach wszelkich zakłóceń zewnętrznych, w tym takich, które mogą powodować niepożądane działanie.
Cet appareil numérique de la classe B respecte toutes les exigences du Réglement sur le matériel brouiller du Canada. Informacje dotyczące bezpieczeństwa • Przed skonfigurowaniem monitora należy dokładnie przeczytać całą, znajdującą się w opakowaniu dokumentację. • Aby nie dopuścić do zagrożenia pożarem lub porażenia prądem elektrycznym, nigdy nie należy narażać monitora na działanie deszczu lub wilgoci. • Nigdy nie należy otwierać obudowy monitora.
• Ustawienie kontrolki głośności oraz korektora na ustawienie inne niż środkowe może spowodować wzrost napięcia wyjściowego do słuchawek i zwiększenie poziomu ciśnienia akustycznego. • Ten zasilacz jest przeznaczony wyłącznie do użytku z niniejszym monitorem, nie należy go używać w innym celu. To urządzenie korzysta z jednego z poniższych źródeł zasilania: - Producent: Delta Electronics Inc.
Oznaczenia stosowane w niniejszym podręczniku PRZESTROGA: Informacje mające na celu zapobieganie obrażeniom użytkownika podczas próby wykonania zadania. OSTRZEŻENIE: Informacje mające na celu zapobieganie uszkodzeniom elementów urządzenia podczas próby wykonania zadania. WAŻNE: Informacje, których NALEŻY przestrzegać w celu wykonania zadania. UWAGA: Wskazówki i dodatkowe informacje, mające na celu pomoc w wykonaniu zadania.
viii
1.1 Witamy! Dziękujemy za zakup monitora LCD ASUS®! Najnowszy szerokoekranowy monitor LCD firmy ASUS zapewnia szerszy, jaśniejszy i krystalicznie czysty wyświetlacz oraz szereg funkcji podnoszących komfort oglądania obrazu. Dzięki tym funkcjom można cieszyć się komfortowym i przyjemnym wrażeniem wizualnym, które zapewnia monitor! 1.
1.3 Opis monitora 1.3.1 Widok z przodu/boku 6 1 2 3 4 5 1. Przycisk ( 5-kierunkowy) • Włącza menu OSD. Włącza wybraną pozycję menu OSD. • Zwiększa/zmniejsza wartości lub przesuwa wybór w górę/w dół/w lewo/w prawo. • Włącza menu OSD po przejściu monitora w tryb gotowości lub wyświetleniu komunikatu „BRAK SYGNAŁU”. 2. Przycisk • Wychodzi z pozycji menu OSD. • Naciśnięcie i przytrzymanie przez 5 sekund powoduje włączenie lub wyłączenie blokady klawiszy.
4. Przycisk • Domyślnie: GameVisual. • Aby zmienić funkcję klawisza skrótu, przejdź do menu Skrót > Skrót 2. • Włącza menu OSD po przejściu monitora w tryb gotowości lub wyświetleniu komunikatu „BRAK SYGNAŁU”. 5. Przycisk/wskaźnik zasilania • Włącza/wyłącza monitor. • Wyjaśnienie kolorów wskaźnika zasilania zostało przedstawione w poniższej tabeli. 6. Stan Opis Biały WŁ. WYŁ. WYŁ.
8. Port pobierania danych USB 3.0 (czerwony) z NVIDIA Reflex Latency Analyzer. Port ten służy do podłączania urządzeń USB, np. klawiatury/myszy USB, dysku USB flash itd. Port ten jest przeznaczony zwłaszcza do połączeń z myszą przewodową lub bezprzewodową, aby móc korzystać z NVIDIA Reflex Latency Analyzer. 9. Porty pobierania danych USB 3.0. Porty te służą do podłączania urządzeń USB, np. klawiatury/myszy USB, napędu Flash USB itd. 10. Gniazdo słuchawek.
Menu główne GamePlus GamePlus — Celownik GamePlus — Timer GamePlus — Licznik FPS GamePlus GamePlus GamePlus GamePlus FPS Celownik (Tryb ćwiczenia) Timer Stoper FPS Licznik FPS Wyrównanie obrazu wyświetlacza NEXT 1.3.4 BACK/EXIT NEXT BACK/EXIT NEXT BACK/EXIT NEXT BACK/EXIT Funkcja GameVisual Funkcja GameVisual umożliwia wygodny sposób wyboru jednego spośród wielu różnych trybów obrazu. Aby włączyć funkcję GameVisual: 1. Naciśnij przycisk skrótu GameVisual. 2.
1.3.5 • W trybie wyścigów użytkownik nie może konfigurować poniższych funkcji: Sześcioosiowe nasycenie. • W trybie sRGB użytkownik nie może konfigurować poniższych funkcji: Temp. barwowa, Jasność, Kontrast, Gamma, Sześcioosiowe nasycenie. • W Trybie Sceneria/kinowy użytkownik nie może konfigurować poniższych funkcji: Gamma, Wzmocnienie ciemnych kolorów. G-SYNC HDR Monitor obsługuje format HDR.
Monitor LCD ASUS serii PG279QM 1-7
1-8 Rozdział 1: Wprowadzenie do produktu
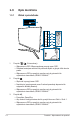
2.1 Montaż ramienia/podstawy monitora 1. Włóż podstawę do ramienia. 2. Przymocuj podstawę do ramienia, dokręcając dołączoną do zestawu śrubę. Aby zapobiec uszkodzeniu monitora, zalecamy położenie na stole miękkiej szmatki. Rozmiar śruby podstawy: M6 x 15 mm. 2.2 Zarządzanie przewodami Przewody można uporządkować za pomocą pokrywy portu wejścia/wyjścia. • Porządkowanie przewodów • Korzystanie z pokrywy portu wejściu/wyjścia. Pokrywę można zamontować lub zdemontować.
2.3 Ustawianie monitora • Aby uzyskać optymalną jakość oglądania, zalecamy spojrzenie na monitor całościowo, a następnie ustawienie monitora pod najbardziej komfortowym kątem. • Przytrzymaj stojak, aby zapobiec spadnięciu monitora podczas zmiany jego kąta nachylenia. • Zalecana regulacja kąta to: +20˚ do -5˚ (w przypadku wychylenia)/+25˚ do -25˚ (w przypadku obrotu) / +100 mm (w przypadku regulacji wysokości).
2.4 Demontaż ramienia (do montażu ściennego VESA) Odłączane ramię tego monitora zostało specjalnie zaprojektowane do montażu ściennego VESA. Aby zdemontować ramię: 1. Połóż monitor na stole ekranem do dołu. 2. Użyj śrubokręta, aby zdjąć osłony w miejscu, w którym monitor i ramię dotykają się. 3. Poluzuj cztery śruby z tyłu monitora i zdejmij ramię/podstawę. 1 2 3 4 Aby zapobiec uszkodzeniu monitora, zalecamy położenie na stole miękkiej szmatki.
2.5 Podłączanie przewodów Podłącz przewody zgodnie z poniższymi instrukcjami: Przeznaczony wyłącznie do celów serwisowych • • 2-4 Aby podłączyć przewód zasilania: a. Podłącz zasilacz odpowiednio do wejścia prądu stałego monitora (DC IN). b. Podłącz jeden koniec przewodu zasilania do zasilacza, a drugi koniec do gniazda zasilania. Aby podłączyć przewód DisplayPort/HDMI: a. Podłącz jeden koniec przewodu DisplayPort/HDMI do portu DisplayPort/ HDMI monitora. b.
2.6 Włączanie monitora Naciśnij przycisk zasilania. Na stronach 1-3 można znaleźć informacje o lokalizacji przycisku zasilania. Wskaźnik zasilania zaświeci się na biało, co będzie oznaczać, że monitor jest WŁĄCZONY.
2-6 Rozdział 2: Konfiguracja
3.1 Menu OSD (ang. On-Screen Display) 3.1.1 Ponowna konfiguracja Tryb G-SYNC Wyłącz HDR DisplayPort ® ® G-SYNC Processor 2560x1440@240 Hz Tryb wyścigów G-SYNC Processor Analyzer Inactive ROG Swift 240Hz PG279QM NVIDIA Reflex Latency Analyzer Gry Obraz Kolor Wybór wejścia Skrót Efekt oświetlenia Ustawienia systemu MOVE/ENTER ( BACK EXIT 1. Naciśnij przycisk 2. Przesuń przycisk ( ) w górę/w dół, aby przechodzić pomiędzy funkcjami.
3.1.2 1. Informacje o funkcjach menu OSD G-SYNC® Processor Tryb G-SYNC Wyłącz HDR DisplayPort 2560x1440@240 Hz Tryb wyścigów ® G-SYNC Processor ® G-SYNC Processor Analyzer Inactive ROG Swift 240Hz PG279QM NVIDIA Reflex Latency Analyzer Gry Obraz Kolor Wybór wejścia Skrót Efekt oświetlenia Ustawienia systemu MOVE/ENTER • BACK EXIT NVIDIA Reflex Latency Analyzer „Prostokąt monitorowania” należy ustawić w miejscu, w którym występuje niemal niezwłoczna zmiana jasności. Im szybsza, tym lepiej.
* Monitoring Rectangle Location: Pozwala na ręczne ustawienie lokalizacji prostokąta monitorowania przy użyciu przycisku ( 5-kierunkowego). * Monitoring Rectangle Size: Pozwala na ręczne ustawienie rozmiaru prostokąta monitorowania przy użyciu przycisku ( 5-kierunkowego). Można także pobrać i zainstalować aplikację GeForce Experience, aby w pełni korzystać z analizy opóźnień systemu. Poniżej przedstawiono kolejne czynności w celu konfiguracji aplikacji GeForce Experience: a. b. c. d. e. f. g. h. i. j. 2.
• GameVisual: Aby uzyskać szczegółowe informacje, zobacz część 1.3.4 Funkcja GameVisual. • Wzmocnienie ciemnych kolorów: Funkcja poprawy ciemnego koloru umożliwia dostosowanie krzywej gamma monitora, aby pogłębić ciemne odcienie na obrazie, aby ciemne sceny i obiekty były bardziej zauważalne. 3.
Aby zmniejszyć przemęczenie oczu, należy stosować się do poniższych wskazówek: • 4. • Użytkownicy pracujący przez długie godziny przed wyświetlaczem powinni robić przerwy. Zaleca się krótkie przerwy (co najmniej 5 minut) po około godzinie ciągłej pracy przy komputerze. Krótkie i częste przerwy są bardziej efektywne niż jedna dłuższa przerwa. • Aby zminimalizować przemęczenie oczu, użytkownicy powinni czasami odrywać wzrok od wyświetlacza, skupiając go na przedmiotach położonych w dużej odległości.
5. Wybór wejścia W tej funkcji można wybrać żądane źródło wejściowe i przełączać funkcję automatycznego przełączania wejść między włączaniem i wyłączaniem. Tryb G-SYNC Wyłącz HDR DisplayPort 2560x1440@240 Hz Tryb wyścigów ® G-SYNC Processor ® G-SYNC Processor DisaplyPort Gry HDMI-1 Obraz HDMI-2 Kolor HDMI-3 Wybór wejścia Autom. przeł. wejścia Analyzer Inactive ROG Swift 240Hz PG279QM Skrót Efekt oświetlenia Ustawienia systemu BACK MOVE/ENTER 6.
• 8. Aura RGB: Ta funkcja umożliwia wybór efektu świetlnego Aura RGB dla monitora oraz zmianę ustawień efektu świetlnego. Aby wyłączyć efekt świetlny Aura RGB, wybierz opcję „WYŁ.”. • Gdy funkcja Aura Sync jest ustawiona na WŁ., Aura RGB nie jest dostępne. • W rozdziale „3.2 Aura” znajdują się informacje na temat personalizacji efektów świetlnych Aura z komputera. Ustawienia systemu Umożliwia konfigurację ustawień systemu.
Jeśli monitor nie może się obudzić po wejściu w stan głębokiego uśpienia, wykonaj jedną z następujących czynności: - Naciśnij dowolny przycisk (z wyjątkiem przycisku zasilania) na monitorze, aby go obudzić. - Wyłącz funkcję Głębokie uśpienie. 3-8 • Blokada klawiszy: służy do wyłączania klawiszy wszystkich funkcji. Naciśnij przycisk i przytrzymaj przez ponad 5 sekund, aby anulować funkcję blokady klawiszy.
3.2 Aura Armoury Crate to program sterujący kolorowymi diodami LED na obsługiwanych urządzeniach, takich jak monitory, płyty główne, karty graficzne, komputery stacjonarne itp. Oprogramowanie Aura umożliwia ustawienie koloru diod RGB na tych urządzeniach i wybór różnych efektów świetlnych. Kolor diod można także skorygować i dostosować poprzez ich kalibrację. Aby aktywować oprogramowanie Aura: 1. Ustaw Aura Sync na WŁ. w menu OSD. 2. Połącz port nadrzędny USB 3.0 monitora z portem USB komputera. 3.
3.3 3-10 Podsumowanie specyfikacji Typ panelu Wyświetlacz LCD TFT Rozmiar panelu Ekran panoramiczny o szerokości 27" (16:9, 68,5 cm) Maks. rozdzielczość 2560 x 1440 Rozstaw pikseli 0,2331 mm x 0,2331 mm Jasność (typowa) 350 cd/m2 Współczynnik kontrastu (typowy) 1000:1 Kąt widzenia (poz./pion.) CR>10 178˚/178˚ Kolory wyświetlacza 16,7 M Czas odpowiedzi 1 ms (szary do szarego) Wybór temperatury barwowej 8 temperatury barwowe Wejście analogowe Nie Wejście cyfrowe DisplayPort v1.
Wiele języków 20 języków (angielski, francuski, niemiecki, włoski, hiszpański, holenderski, portugalski, rosyjski, czeski, chorwacki, polski, rumuński, węgierski, turecki, uproszczony chiński, tradycyjny chiński, japoński, koreański, tajski i indonezyjski) Akcesoria Skrócona instrukcja obsługi, karta gwarancyjna, zasilacz, przewód zasilania, przewód DP, przewód HDMI, przewód USB, pokrywa portu wejścia/wyjścia, raport testu kalibracji kolorów, karta powitalna ROG z kopertą, naklejka ROG Zgodność i normy
3.4 Wymiary zewnętrzne ASUS PG279QM Outline Dimension *Unit: mm(inch) Pivot: +90 Degree 90 20 5 133.98 [5.3] 175.43 [6.9] 8.48 [0.3] 167.83 [6.6] 306.86 [12.1] 613.7 [24.2] 596.74 [23.5]-Active Area 560.48 [22.1] 7.95 [0.3] 22.63 [0.9] 335.66 [13.2]- Active area 367.21 [14.5] 140.02 [5.5] 254.96 [10.0] 25 507.22 [20.0] 88.72 [3.5] 22.26 [0.9] 31.71 [1.2] Swivel: +/-25 Degree 231.44 [9.1] 100 [3.9] 396.52 [15.6] 140.02 [5.5] 25 84.01 [3.3] 117 [4.6] 100 [3.
3.5 Rozwiązywanie problemów (Często zadawane pytania) Problem Możliwe rozwiązanie Dioda zasilania LED nie jest WŁĄCZONA • Naciśnij przycisk zasilania, aby sprawdzić, czy monitor znajduje się w trybie WŁ. • Sprawdź, czy przewód zasilania jest odpowiednio podłączony do monitora i do gniazda zasilania. Dioda zasilania LED świeci się na biało a na ekranie brak obrazu • Sprawdź, czy monitor i komputer znajdują się w trybie WŁ.
3.6 Obsługiwany tryb operacyjny Wejście HDMI Rozdzielczość Częstotliwość 640 x 480 800 x 600 1024 x 768 1920 x 1080 P 1920 x 1080 P 1920 x 1080 P 1280 x 720 P 1280 x 720 P 720 x 480 P 720 x 576 P 640 x 480 P 1920 x 1080 P Częstotliwość klatek 60 Hz 60 Hz 60 Hz 60 Hz 50 Hz 24 Hz 60 Hz 50 Hz 60 Hz 50 Hz 60 Hz 120 Hz Uwagi 2560 x 1440 60 Hz 2560 x 1440 120 Hz Obsługiwane tylko wtedy, gdy format koloru to RGB/YUV444 w 8-bitowej i YUV422 w 12-bitowej głębi kolorów.
Wejście DisplayPort Rozdzielczość Częstotliwość 640 x 480 800 x 600 1024 x 768 2560 x 1440 2560 x 1440 2560 x 1440 2560 x 1440 Częstotliwość klatek 60 Hz 60 Hz 60 Hz 60 Hz 100 Hz 120 Hz 144 Hz Uwagi 2560 x 1440 200 Hz Obsługiwane tylko wtedy, gdy format koloru to RGB/YUV444 w 8-bitowej i YUV422 w 8-bitowej głębi kolorów 2560 x 1440 240 Hz Obsługiwane tylko wtedy, gdy format koloru to RGB/YUV444 w 8-bitowej i YUV422 w 8-bitowej głębi kolorów Uwaga: Nie obsługuje przeplotu.
3-16 Rozdział 3: Instrukcje ogólne
Monitor LCD ASUS serii PG279QM 3-17