Benutzerhandbuch V241EA/EP
G18777a Überarbeitete Ausgabe v3 September 2021 URHEBERRECHTSINFORMATION Kein Teil dieses Handbuchs, einschließlich der darin beschriebenen Produkte und Software, darf ohne ausdrückliche schriftliche Genehmigung von ASUSTeK COMPUTER INC. (“ASUS”) mit jeglichen Mitteln in jeglicher Form reproduziert, übertragen, transkribiert, in Wiederaufrufsystemen gespeichert oder in jegliche Sprache übersetzt werden, abgesehen von vom Käufer als Sicherungskopie angelegter Dokumentation.
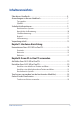
Inhaltsverzeichnis Über dieses Handbuch...................................................................................................6 Anmerkungen zu diesem Handbuch.......................................................................7 Typographie..............................................................................................................................7 Symbole...........................................................................................................................
Kapitel 3: Mit Windows arbeiten Erste Inbetriebnahme.....................................................................................................27 Startmenü...........................................................................................................................28 Startmenü einblenden.........................................................................................................29 Programme über das Startmenü öffnen..........................................................
Anhang Hinweise...............................................................................................................................41 Aussagen zur FCC-Erklärung.............................................................................................41 Strahlenbelastungswarnung.............................................................................................42 Beschichtungshinweis........................................................................................................
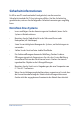
Über dieses Handbuch Diese Anleitung liefert Informationen über die Hardware- und Softwaremerkmale Ihres All-in-One PCs, geordnet in folgenden Kapiteln: Kapitel 1: Hardware-Einrichtung Dieses Kapitel beschreibt die Hardware-Komponenten Ihres All-in-One PCs. Kapitel 2: Ihren All-in-One PC verwenden Dieses Kapitel liefert Informationen zur Nutzung Ihres ASUS All-in-One PCs. Kapitel 3: Mit Windows arbeiten Dieses Kapitel bietet einen Überblick über die Verwendung von Windows auf Ihrem ASUS All-in-One PC.
Anmerkungen zu diesem Handbuch Zum Hervorheben wichtiger Informationen sind manche Textabschnitte in diesem Handbuch wie folgt gekennzeichnet: WICHTIG! Diese Meldung enthält wichtige Informationen, denen Sie folgen müssen, um die Aufgabe fertigzustellen. HINWEIS: Diese Meldung enthält zusätzliche Informationen und Tipps, die Ihnen bei der Fertigstellung einer Aufgabe helfen können.
Symbole Die nachstehenden Symbole zeigen die Geräte an, die Sie zum Abschließen einer Reihe von Aufgaben oder Verfahren auf Ihrem ASUS All-in-One PC nutzen können. = Touchscreen verwenden (bei bestimmten Modellen). = (optional) Verwenden Sie die kabelgebundene/kabellose Maus. = (optional) Verwenden Sie die kabelgebundene/kabellose Tastatur. Alle Abbildungen und Bildschirmfotos in diesem Handbuch dienen nur der Veranschaulichung.
Sicherheitsinformationen Ihr All-in-one PC wurde entwickelt und getestet, um die neuesten Sicherheitsstandards für IT-Ausrüstung zu erfüllen. Um Ihre Sicherheit zu gewährleisten, müssen Sie die folgenden Sicherheitsanweisungen sorgfältig lesen. Einrichten Ihres Systems • Lesen und folgen Sie den Anweisungen im Handbuch, bevor Sie Ihr System in Betrieb nehmen. • Benutzen Sie das Produkt nicht in der Nähe von Wasser oder Heizquellen (z.B. Heizkörper).
Umsicht bei der Benutzung • Wenn das System ausgeschaltet ist, verbleibt trotzdem noch ein kleiner elektrischer Strom im Gerät. Bevor Sie das System reinigen, trennen Sie immer den Netzstecker, die Modem- und Netzwerkkabel von der Stromversorgung. • Der Touchscreen bedarf regelmäßiger Reinigung, um seine Berührungsempfindlichkeit zu gewährleisten. Halten Sie den Bildschirm frei von Fremdkörpern und starken Staubablagerungen.
Schalldruckwarnung Übermäßiger Schalldruck von Ohrhörern oder Kopfhörern kann zu Gehörverlust oder dauerhaften Gehörschäden führen. Eine Erhöhung der Lautstärke und des Equalizers über die Standardeinstellungen erhöht die Ausgangsspannung und den Schalldruck der Ohrhörer oder Kopfhörer. Netzteil 1. Netzteilspezifikationen Eingangsspannung: 100–240V Wechselspannung Eingangsfrequenz: 50–60Hz Ausgangsspannung: 19V Gleichspannung 2.
Verpackungsinhalt ASUS All-in-One PC Netzteil Netzkabel Garantiekarte Tastatur (optional) Maus (optional) KBM-USB-Empfänger-Dongle (optional) Optisches Laufwerk (optional) Quick User Guid e Schnellstartanleitung HINWEIS: 12 • Wenden Sie sich an Ihren Händler, falls etwas fehlen oder beschädigt sein sollte. • Die Abbildungen der Tastatur, der Maus und des Netzteils dienen nur der Veranschaulichung. Die vorliegenden Produktspezifikationen können sich in verschiedenen Regionen unterscheiden.
Kapitel 1: Hardware-Einrichtung Kennenlernen Ihres ASUS All-in-One PCs Frontseite LCD-Bildschirm Das LCD-Display besitzt ausgezeichnete Wiedergabemerkmale für Fotos, Videos und andere Multimediadateien. Bei ausgewählten Modellen wird Multi-Touch unterstützt. Sie können Ihren All-in-One PC mittels Berührungsgesten bedienen.
Betriebsanzeige Die LED-Betriebsanzeige leuchtet, wenn Ihr ASUS All-in-One PC eingeschaltet ist. Mikrofon Das eingebaute Mikrofon kann bei Videokonferenzen, Sprachnachrichten, Audioaufnahmen und MultimediaAnwendungen eingesetzt werden. Kamera Die integrierte Kamera ermöglicht Bild- und Videoaufnahmen mit Ihrem ASUS All-in-One PC. Kameraanzeige Die Kameraanzeige leuchtet, wenn die integrierte Kamera verwendet wird.
Unterseite Lautsprecher Mit den integrierten Lautsprechern können Sie Ton direkt vom ASUS All-in-One PC ausgeben. Die Audiofunktionen sind softwaregesteuert. Modus-Taste Tippen Sie hier, um die Signalquelle für das Display zu wechseln. Wenn HDMI gewählt wurde, kann der All-in-One-PC als StandardLCD-Monitor genutzt werden. Kensington® Schlossanschluss Mit dem Kensington® Schlossanschluss kann Ihr ASUS All-in-One PC mit einem Kensington®-kompatiblen Sicherheitsprodukt gesichert werden.
Kopfhörer-/Headset-/Mikrofonbuchse Über diesen Anschluss können Sie Ihren NotebookPC an aktive Lautsprecher oder Kopfhörer anschließen. Zusätzlich können Sie hier ein Headset oder ein externes Mikrofon anschließen. USB 2.0-Anschluss Dieser USB (Universal Serial Bus)-Anschluss ist mit USB 2.0- oder USB 1.1-Geräten kompatibel, z. B. Tastaturen, Zeigegeräten, Flash-Laufwerken, externen Festplatten, Lautsprechern, Kameras und Druckern.
Rückseite Ein-/Austaste Drücken Sie diese Taste, um Ihren ASUS All-in-One PC einzuschalten. HDMI-Eingang Dieser Anschluss ist für einen High-Definition Multimedia Interface (HDMI)-Stecker und ist HDCP-konform für die Wiedergabe von HD DVD, Blu-Ray und anderen geschützten Inhalten.
USB 3.2 (Gen1)-Anschluss Dieser USB (Universal Serial Bus) 3.2 (Gen1)-Anschluss bietet Datenübertragungsraten bis zu 5 Gbit/s und ist abwärtskompatibel mit USB 2.0. HDMI-Ausgang Hier können Sie Geräte mit HDMI-kompatibelem Gerät zur Freigabe der Dateien oder zur Erweiterung des Bildschirms anschließen. LAN-Port Der 8-polige RJ-45 LAN-Anschluss unterstützt ein Standardnetzwerkkabel zur Verbindung mit einem lokalen Netzwerk.
Kapitel 2: Ihren All-in-One PC verwenden Aufstellen Ihres ASUS All-in-One PCs -5O 20O 1. Stellen Sie Ihren ASUS All-in-One PC auf einen flachen Untergrund, wie einen Tisch oder Schreibtisch. 2. Kippen Sie den Bildschirm in einem Winkel zwischen -5° und 20°. WICHTIG! • Benutzen Sie beide Hände, wenn Sie Ihren All-in-One PC aufstellen. • Vermeiden Sie es, das Display in einem Winkel über den empfohlenen Werten einzustellen oder Sie riskieren Schäden an Ihrem ASUS All-in-One PC.
Einrichten Ihres ASUS All-in-One PCs Anschluss einer kabellosen Tastatur und Maus 1. Legen Sie Batterien in die kabellose Tastatur und Maus ein. 2. Schließen Sie den kabellosen Dongle für Tastatur und Maus an einen USB-Anschluss an, um beide Geräte mit Ihrem ASUS All-in-One PC automatisch zu koppeln. 3. Nun können Sie die kabellose Tastatur und Maus nutzen.
HINWEIS: Verbinden Sie die kabellose Tastatur und Maus erneut mit dem Wireless-Dongle, falls die Verbindung verlorengegangen ist. Vermeiden Sie die Verwendung der Geräte zusammen mit anderen kabellosen Geräten. Platzieren Sie die Maus und die Tastatur mindestens 20 cm entfernt von anderer kabelloser Hardware, um Störungen zu verhindern. Anschluss einer kabelgebundenen Tastatur und Maus Verbinden Sie die Tastatur und Maus mit den USB-Anschlüssen an der Geräterückseite.
Einschalten des Systems A. Verbinden Sie das Netzkabel mit dem Netzteil. B. Schließen Sie den kleinen Netzteilstecker an den Stromanschluss (DC) Ihres All-in-One PCs an. C. Verbinden Sie den Netzstecker des Netzteils mit einer Steckdose (100 – 240 V Wechselspannung). D. Drücken Sie die Ein-/Austaste.
HINWEIS: Einzelheiten zum Ausschalten Ihres ASUS All-in-One PCs finden Sie im Abschnitt Ihren ASUS All-in-One PC ausschalten unter Mit Windows arbeiten.
Touchscreen verwenden (nur bei bestimmten Modellen) Der Touchscreen Ihres All-in-One PCs besitzt ausgezeichnete Wiedergabemerkmale für Fotos, Videos und andere Multimediadateien auf Ihrem PC. Er unterstützt außerdem die 10-Punkt-Multi-Touch-Funktion, welche flüssigere und genauere Touch-Gesten ermöglicht, sodass Sie Ihren ASUS All-in-One PC schneller und einfacher bedienen können.
Gesten für den Touchscreen Die Gesten ermöglichen Ihnen das Ausführen von Programmen und Zugreifen auf Einstellungen Ihres ASUS All-in-One PCs. Beachten Sie beim Einsatz von Gesten auf Ihrem Touchscreen folgende Abbildungen. HINWEIS: Die folgenden Bildschirmaufnahmen dienen nur der Veranschaulichung. Das Aussehen des Touchscreens kann je nach Modell variieren.
Vergrößern Verkleinern Ziehen Sie zwei Finger auf dem Touchscreen auseinander. Führen Sie zwei Finger auf dem Touchscreen zusammen. Mit dem Finger streichen Ziehen Mit dem Finger können Sie den Bildschirm nach oben, unten, links und rechts verschieben. • Zum Erstellen eines Auswahlkästchens rund um mehrere Elemente ziehen. • Ein Element zum Verschieben an eine neue Position ziehen und ablegen.
Kapitel 3: Mit Windows arbeiten Erste Inbetriebnahme Wenn Sie Ihren ASUS All-in-One PC das erste Mal starten, erscheint eine Reihe von Bildschirmen, die Sie durch die Konfiguration Ihres WindowsBetriebssystems führen. Befolgen Sie die Bildschirmanweisungen zur Konfiguration folgender grundlegender Einstellungen: • Personalisieren • Online gehen • Einstellungen • Ihr Konto Nach der Konfiguration der grundlegenden Elemente fährt Windows fort, Ihre Apps und bevorzugten Einstellungen zu installieren.
Startmenü Das Startmenü ist der Hauptzugang zu den Programmen, Windows®-Apps, Ordnern und Einstellungen Ihres ASUS All-in-One PCs.
Startmenü einblenden Tippen Sie auf Ihrem Desktop auf das Startsymbol. Positionieren Sie Ihren Mauszeiger auf dem Startsymbol in Ihrem Desktop und klicken Sie es an. Drücken Sie die Windows-Taste auf Ihrer Tastatur. Programme über das Startmenü öffnen Einer der Hauptnutzen des Startmenüs ist das Öffnen von auf Ihrem ASUS Allin-One PC installierten Programmen. Tippen Sie zum Starten auf das gewünschte Programm. Positionieren Sie Ihren Mauszeiger auf dem Programm, klicken Sie es zum Ausführen an.
Windows® Apps HINWEIS: Bei einigen Windows®-Apps müssen Sie sich an Ihrem MicrosoftKonto anmelden, wenn Sie den vollen Funktionsumfang nutzen möchten. Windows®-Apps über das Startmenü ausführen Tippen Sie zum Starten auf die gewünschte App. Positionieren Sie Ihren Mauszeiger auf der App, klicken Sie sie zum Ausführen an. Durchsuchen Sie die Apps mit den Pfeiltasten. Drücken Sie , um eine App zu starten.
Mit drahtlosen Netzwerken verbinden WLAN Verwenden Sie die WLAN-Verbindung Ihres ASUS All-in-One PCs, um E-Mails zu schreiben, im Internet zu surfen und Anwendungen in sozialen Netzwerken freizugeben. WLAN-Verbindung Verbinden Sie Ihren ASUS All-in-One PC anhand folgender Schritte mit einem WLAN: 1. Klicken/Tippen Sie auf das WLAN-Symbol in der Taskleiste, um das WLAN zu aktivieren. 2. Wählen Sie einen Zugriffspunkt aus der Liste verfügbarer WLAN-Verbindungen. 3.
Bluetooth Verwenden Sie Bluetooth zur Erleichterung von drahtlosen Datentransfers mit anderen Bluetooth-fähigen Geräten. Mit anderen Bluetooth-fähigen Geräten koppeln Zur Aktivierung von Datentransfers müssen Sie Ihren ASUS All-in-One PC mit anderen Bluetooth-fähigen Geräten koppeln. Verbinden Sie Ihre Geräte anhand der folgenden Schritte: 1. Öffnen Sie Settings (Einstellungen) aus dem Startmenü. 2. Wählen Sie Devices (Geräte) > Bluetooth, um nach Bluetooth-fähigen Geräten zu suchen.
Mit kabelgebundenen Netzwerken verbinden Über den LAN-Port des ASUS All-in-One PCs können Sie sich auch mit kabelgebundenen Netzwerken, wie lokalen Netzwerken (LAN) oder Breitbandinternetverbindungen, verbinden. HINWEIS: Einzelheiten erfahren Sie bei Ihrem Internetanbieter; wenden Sie sich alternativ zur Einrichtung Ihrer Internetverbindung an Ihren Netzwerkadministrator.
Ihren ASUS All-in-One PC ausschalten Sie können Ihren ASUS All-in-One PC über eines der folgenden Verfahren ausschalten: oder • Blenden Sie das Startmenü ein, wählen Sie dann zum Durchführen einer normalen Abschaltung das Ausschaltsymbol und dann Shut down (Herunterfahren). • Wählen Sie im Anmeldebildschirm das Ausschaltsymbol und dann Shut down (Herunterfahren). • Drücken Sie zum Einblenden von Shut Down • Wählen Sie Herunterfahren aus der Auswahlliste und anschließend OK.
Ihren ASUS All-in-One-PC in den Ruhezustand versetzen So versetzen Sie Ihren All-in-One PC in den Ruhezustand: oder • Blenden Sie das Startmenü ein, versetzen Sie Ihren ASUS All-in-One PC dann durch Auswahl des Ausschaltsymbols und Sleep (Ruhezustand) in den Ruhezustand. • Wählen Sie im Anmeldebildschirm das Ausschaltsymbol und dann Sleep (Ruhezustand). Drücken Sie zum Einblenden von Shut Down Windows (Windows herunterfahren) . Wählen Sie Sleep (Ruhezustand) aus der Auswahlliste und anschließend OK.
ASUS All-in-One PC
Kapitel 4: Ihr System wiederherstellen BIOS-Setup aufrufen BIOS (Basic Input and Output System) speichert Systemhardwareeinstellungen, die zum Systemstart im All-in-One PC benötigt werden. Unter normalen Umständen eignen sich die Standard-BIOS-Einstellungen zur Erzielung optimaler Leistung. Ändern Sie die Standard-BIOS-Einstellungen nur unter folgenden Umständen: • Eine Fehlermeldung erscheint auf dem Bildschirm während des Systemstarts, die Sie auffordert, die BIOS-Einstellungen aufzurufen.
Ihr System wiederherstellen Mit den Wiederherstellungsoptionen Ihres ASUS All-in-One PCs können Sie das System auf seinen Originalzustand zurücksetzen oder einfach seine Einstellungen zur Leistungssteigerung aktualisieren. WICHTIG! • Sichern Sie all Ihre Daten, bevor Sie eine Wiederherstellungsoption an Ihrem ASUS All-in-One PC ausführen. • Notieren Sie wichtige angepasste Einstellungen, wie Netzwerkeinstellungen, Benutzernamen und Kennwörter, zur Vermeidung von Datenverlust.
• Erweiterter Start - Mit dieser Option können Sie weitere erweiterte Wiederherstellungsoptionen an Ihrem ASUS All-in-One PC ausführen, wie: - Verwenden Sie ein USB-Laufwerk, eine Netzwerkverbindung oder die Windows-Wiederherstellungs-DVD zum Starten Ihres ASUS All-in-One PCs.
ASUS All-in-One PC
Anhang Hinweise Aussagen zur FCC-Erklärung Dieses Gerät wurde geprüft und entspricht den Grenzwerten für digitale Geräte der Klasse B gemäß Teil 15 der FCC-Vorschriften. Diese Grenzwerte wurden für ausreichenden Schutz gegen Radiofrequenzenergie in Wohngegenden aufgestellt. Dieses Gerät erzeugt und verwendet Radiofrequenzenergie und kann diese ausstrahlen. Wenn es nicht entsprechend der Bedienungsanleitung installiert und verwendet wird, kann es Störungen von Funkübertragungen verursachen.
FCC Warnung: Änderungen oder Modifizierungen dieses Geräts, die nicht ausdrücklich von der für Übereinstimmung verantwortlichen Partei genehmigt sind, können das Recht des Benutzers, dieses Gerät zu betreiben, annullieren. Dieses Gerät entspricht Teil 15 der FCC-Vorschriften.
– Der Anschluss erfolgt mittels eines Netzkabels, das mit einer geerdeten Steckdose verbunden wird. – Die Entsorgung des Akkus durch Verbrennen, z. B.
Das Symbol der durchgestrichenen Mülltonne weist darauf hin, dass dieses Produkt (elektrische, elektronische, sowie quecksilberhaltige Batterien) nicht im normalen Hausmüll entsorgt werden darf. Erkundigen Sie sich bei Ihren lokalen Behörden über die ordnungsgemäße Entsorgung elektronischer Produkte. Die Batterien NICHT im normalen Hausmüll entsorgen. Das Symbol der durchgestrichenen Mülltonne zeigt an, dass Batterien nicht im normalen Hausmüll entsorgt werden dürfen.
Vermeidung von Hörverlust Setzen Sie sich zur Vermeidung von Hörschäden nicht über einen längeren Zeitraum hohen Lautstärken aus.
Erklärung zur Erfüllung der Umweltschutzbestimmungen für das Produkt ASUS folgt dem Green-Design-Konzept, um unsere Produkte zu entwickeln und zu produzieren und versichert, dass jede Stufe des ASUS-Produktkreislaufs die weltweiten Umweltschutzbestimmungen erfüllt. Zusätzlich veröffentlicht ASUS die relevanten und auf den Bestimmungsanforderungen basierenden Informationen. Bitte beziehen Sie sich auf http://csr.asus.com/Compliance.
ASUS Recycling/Rücknahmeservices Das ASUS-Wiederverwertungs- und Rücknahmeprogramm basiert auf den Bestrebungen, die höchsten Standards zum Schutz der Umwelt anzuwenden. Wir glauben, dass die Bereitstellung einer Lösung für unsere Kunden die Möglichkeit schafft, unsere Produkte, Batterien, andere Komponenten und ebenfalls das Verpackungsmaterial verantwortungsbewußt der Wiederverwertung zuzuführen. Besuchen Sie bitte die Webseite http://csr.asus.com/english/Takeback.
Für ENERGY STAR qualifiziertes Produkt ENERGY STAR ist ein gemeinsames Programm der USUmweltschutzbehörde und der US-Energiebehörde, welches helfen soll, Geld zu sparen und die Umwelt durch energieeffiziente Produkte und Technologien zu schützen. Alle ASUS-Produkte mit dem ENERGY STAR-Logo erfüllen den ENERGY STARStandard und die Energieverwaltungsfunktion ist standardmäßig aktiviert.
Vereinfachte EU-Konformitätserklärung ASUSTeK Computer Inc. erklärt hiermit, dass dieses Gerät mit den wesentlichen Anforderungen und anderen relevanten Bestimmungen der Richtlinie 2014/53/EU übereinstimmt. Der gesamte Text der EUKonformitätserklärung ist verfügbar unter: https://www.asus.com/support/.
Hersteller ASUSTek COMPUTER INC. Adresse 1F., No. 15, Lide Rd., Beitou Dist.