Руководство пользователя V241EA/EP
R16592 Первое издание Август 2020 Информация об авторских правах Любая часть этого руководства, включая оборудование и программное обеспечение, описанные в нем, не может быть дублирована, передана, преобразована, сохранена в системе поиска или переведена на другой язык в любой форме или любыми средствами, кроме документации, хранящейся покупателем с целью резервирования, без специального письменного разрешения ASUSTeK COMPUTER INC. (“ASUS”).
Содержание О руководстве..................................................................................................................6 Обозначения, используемые в руководстве...................................................7 Типографские обозначения............................................................................................7 Иконки.......................................................................................................................................
Использование жестов на сенсорном экране в Windows 10.........................25 Глава 3: Работа с Windows 10 Первое включение........................................................................................................29 Меню 'Пуск'........................................................................................................................30 Открытие меню Пуск..........................................................................................................
Приложение Уведомления....................................................................................................................53 Федеральная комиссия по средствам связи: Положение о воздействии помех................................................................................53 Требования по воздействию радиочастоты...........................................................54 Информация о воздействии радиочастоты (RF)..................................................56 Уведомление о покрытии.
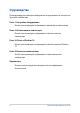
О руководстве В этом руководстве приведена информация о программных и аппаратных функциях компьютера Глава 1: Настройка оборудования В этой главе приведена информация о компонентах компьютера. Глава 2: Использование компьютера В этой главе приведена информация по использованию компьютера. Глава 3: Работа с Windows 10 В этой главе приведена информация по использованию Windows 10. Глава 4: Восстановление системы В этой главе приведена информация по восстановлению компьютера.
Обозначения, используемые в руководстве Для выделения ключевой информации используются следующие сообщения: ВАЖНО! Информация, которой Вы должны следовать при выполнении задач. ПРИМЕЧАНИЕ: Советы и полезная информация, которая поможет при выполнении задач. ВНИМАНИЕ! Информация о действиях, которые могут привести к повреждению оборудования, потере данных или бытовым травмам. Типографские обозначения Жирный =Означает меню или выбранный элемент. Курсив = Указывает разделы в этом руководстве.
Иконки Иконки, отображенные ниже, указывают на устройство, используемое для выполнения действий. = Использование сенсорного экрана (для некоторых моделей). = (дополнительно) Использование беспроводной мыши. = (дополнительно) Использование проводной / беспроводной клавиатуры. Иллюстрации в этом руководстве приведены в ознакомительных целях. Спецификации продукта и изображения с примерами программного обеспечения могут отличаться в зависимости от территории.
Информация о правилах безопасности Моноблочный компьютер спроектирован и протестирован в соответствии с последними стандартами безопасности оборудования. Тем не менее, для безопасного использования продукта важно выполнять инструкции, приведенные в этом документе. Установка системы • Перед эксплуатацией устройства прочитайте все нижеследующие инструкции. • Не используйте устройство поблизости от воды или источника тепла, например радиатора.
Эксплуатация • Даже если система выключена, там остается напряжение. Перед чисткой системы всегда отключайте все кабели. • Экран требует периодической чистки. Сохраняйте экран устройства в чистоте и не допускайте чрезмерного скопления пыли. Для очистки экрана выполните следующее: - Выключите устройство и отключите питание. - Распылите небольшое количество очистителя на ткань и осторожно протрите поверхность экрана. - Не распыляйте очиститель прямо на экран.
Предупреждение о звуковом давлении Высокий уровень громкости в наушниках может вызвать повреждение или потерю слуха. Установка громкости выше центрального положения увеличит выходную мощность наушников и, следовательно, уровень громкости. Блок питания 1. Спецификация блока питания Входное напряжение: 100~240 В Частота: 50-60 Гц Выходное напряжение: 19 В пост. тока 2. Розетка должна находится в непосредственной близости от моноблочного компьютера.
Комплект поставки Моноблочный компьютер ASUS Блок питания Шнур питания Гарантийный талон Клавиатура (опционально) Мышь (опционально) KBM USB приемник (опционально) Оптический привод (опционально) Quick User Guid e Краткое руководство ПРИМЕЧАНИЕ: 12 • Если какие-либо элементы комплекта поставки отсутствуют или повреждены, обратитесь к продавцу. • Изображения клавиатуры, мыши, блока питания предназначены только для справки. Спецификация продукта может зависеть от территории.
Глава 1: Настройка оборудования Знакомство с моноблочным компьютером Вид спереди LCD дисплей LCD дисплей обеспечивает превосходное изображение при просмотре фотографий, видео и других мультимедийных файлов. На отдельных моделях поддерживается функция multi-touch. Можно управлять устройством, используя жесты.
Индикатор питания Индикатор питания загорается, показывая, что устройство включено. Микрофон Встроенный микрофон можно использовать для аудио-/ видеоконференций. Камера Встроенная камера позволяет делать фотоснимки и записывать видео. Индикатор камеры Индикатор включен, когда встроенная камера работает.
Нижняя панель Стереодинамики Встроенные динамики позволяют воспроизводить звук без дополнительных устройств. Аудиофункции управляются программно. Кнопка режим Нажмите для переключения источника сигнала для дисплея. При переключении на HDMI моноблочный компьютер можно использовать как стандартный настольный LCD монитор. Порт для замка Kensington Порт для замка Kensington позволяет закреплять устройство с помощью совместимых со стандартом Kensington средств обеспечения безопасности.
Разъем для наушников/гарнитуры/микрофона Этот разъем используется для передачи звуковых сигналов планшета на колонки с усилителем или в наушники. Этот разъем также можно использовать для подключения внешнего микрофона. Разъем USB 2.0 Универсальная последовательная шина совместима с устройствами USB 2.0 или USB 1.1, например, клавиатурами, устройствами ввода, камерами, устройствами хранения.
Вид сзади Кнопка питания Нажмите эту кнопку для включения компьютера. HDMI вход Этот порт предназначен для подключения к HDMIмонитору, что позволяет воспроизводить содержимое HD DVD и Blu-Ray.
Разъем USB 3.2 Gen1 Порт универсальной последовательной шины (USB 3.2 Gen1) обеспечивает скорость передачи данных до 5 Гбит/сек и обратно совместим с USB 2.0. HDMI выход К этому порту можно подключить другой HDMIмонитор. LAN-порт Этот 8-контактный сетевой порт RJ-45 предназначен для подключения к локальной сети. Разъем питания Входящий в комплект поставки блок питания преобразует стандартное напряжение электросети в необходимое для устройства, к которому он подключается через этот разъем.
Глава 2: Использование компьютера Размещение моноблочного компьютера -5O 20O 1. Поместите моноблочный компьютер на ровную устойчивую поверхность, например на стол. 2. Установите дисплей под углом от -5° до 20°. ВАЖНО! • Устанавливайте моноблочный компьютер двумя руками. • Во избежание повреждения устройства используйте только рекомендуемые значения.
Подготовка моноблочного компьютера к работе Подключение беспроводной клавиатуры и мыши 1. Установите элементы питания в беспроводную клавиатуру и мышь. 2. Подключите приемник для клавиатуры и мыши к порту USB для автоматического сопряжения обеих устройств с моноблоком. 3. Беспроводная клавиатура и мышь готовы к использованию.
ПРИМЕЧАНИЕ: При потере подключения снова подключите беспроводную клавиатуру и мышь к беспроводному приемнику. Избегайте использования устройств рядом с другими беспроводными устройствами. Во избежание помех поместите мышь и клавиатуру на расстоянии не менее 20 см от другого беспроводного оборудования. Подключение проводной клавиатуры и мыши Подключите клавиатуру и мышь к USB портам на задней панели. ПРИМЕЧАНИЕ: Иллюстрации представлены только для справки.
Включение системы A. Подключите шнур питания к блоку питания. B. Подключите шнур от блока питания к разъему питания (DC) компьютера. C. Подключите блок питания к розетке (100В-240В). D. Нажмите кнопку питания.
ПРИМЕЧАНИЕ: Подробную информацию по выключению моноблочного компьютера смотрите в разделе Выключение моноблочного компьютера.
Использование сенсорного экрана (для некоторых моделей) Сенсорный экран обеспечивает превосходное изображение при просмотре фотографий, видео и других мультимедийных файлов. Он также поддерживает функцию MultiTouch, позволяя использовать до десяти пальцев одновременно для управления компьютером проще и быстрее. ВАЖНО: Во избежание повреждения сенсорного экрана не касайтесь его острыми предметами, например ножницами или шариковой ручкой.
Жесты для сенсорного экрана Жесты позволяют запускать программы и получать доступ к настройкам компьютера. Использование жестов на сенсорном экране смотрите на следующих иллюстрациях. ПРИМЕЧАНИЕ: Следующие изображения предназначены только для справки. Сенсорный кран может отличаться в зависимости от модели. Использование жестов на сенсорном экране в Windows 10 Жесты позволяют запускать программы и получать доступ к настройкам. Функции можно активировать с помощью жестов на экране.
Нажатие/Двойное нажатие Нажмите и удерживайте • Нажмите приложение для его выбора. • Дважды нажмите приложение для его запуска. Нажмите и удерживайте для отображения контекстного меню. Увеличить Уменьшить Разведите два пальца на сенсорном экране. Сведите два пальца на сенсорном экране.
Скольжение пальцем Перетащите Проведите пальцем вверх/вниз или влево/вправо для прокрутки экрана. • Перетащите для создания окна выбора вокруг нескольких элементов. • Перетащите элемент на новое место.
Моноблочный компьютер ASUS
Глава 3: Работа с Windows 10 Первое включение При первом включении появится несколько экранов, помогающих сконфигурировать операционную систему Windows 10. При включении устройства в первый выполните следующее: 1. Нажмите кнопку питания на компьютере. Дождитесь появления экрана настройки. 2. На экране настройки выберите свой регион и язык. 3. Прочитайте лицензионное соглашение. Выберите Я принимаю. 4.
Меню 'Пуск' Меню Пуск является основным шлюзом для программ, приложений, папок и настроек.
Открытие меню Пуск Нажмите кнопку Пуск рабочего стола. в нижнем левом углу Наведите указатель мыши на кнопку Пуск в левом нижнем углу рабочего стола и щелкните по нему. Нажмите на клавиатуре клавишу с логотипом Windows . Запуск программ из меню Пуск Наиболее распространенный способ запуска программ на вашем компьютере через меню Пуск. Нажмите на программу для ее запуска. Наведите указатель мыши на программу и щелкните по ней. Используйте клавиши со стрелками для выбора для запуска. программы.
Приложения Windows Это приложения закреплены на правой панели меню 'Пуск' и в виде плиток. ПРИМЕЧАНИЕ: Перед запуском некоторых приложений необходимо войти в учетную запись Microsoft.
Работа с приложениями Windows Для запуска и настройки приложений можно использовать сенсорный экран, мышь или клавиатуру. Запуск приложений из меню 'Пуск' Нажмите на приложение для его запуска. Наведите указатель мыши на программу и щелкните по ней. Используйте клавиши со стрелками для выбора для запуска приложения. приложений.
Изменение размера Нажмите и удерживайте приложение, затем нажмите и выберите размер плитки приложения. Наведите указатель мыши на приложение щелкните по нему правой кнопкой, выберите Размер и установите размер плитки приложения. Используйте стрелки для выбора приложения. Нажмите , выберите размер и установите размер плитки приложения. Удаление приложений Нажмите и удерживайте приложение, затем нажмите иконку .
Закрепление приложений на панели задач Нажмите и удерживайте приложение, а затем нажмите Закрепить на панели задач. Наведите указатель мыши на приложение, щелкните по нему правой кнопкой и выберите Закрепить на панели задач. Используйте стрелки для выбора приложения. Нажмите и выберите Закрепить на панели задач. Закрепление приложений в меню Пуск На экране Все приложения выберите приложение, которое нужно добавить в меню Пуск и выберите Закрепить в меню Пуск.
Представление задач Используйте функцию представления задач для быстрого переключения между открытыми приложениями, программами и рабочими столами. Запуск функции Представление задач Нажмите иконку на панели задач или пр. Нажмите иконку в панели задач. Нажмите 36 на клавиатуре.
Функция Snap Функция Snap отображает два приложения одновременно, позволяя переключаться между ними. Привязка горячих точек Можно перетащить приложения на эти горячие точки для прикрепления их.
Использование Snap или 38 1. Запустите первое приложение. 2. Перетащите приложение на край экрана для его прикрепления. 3. Запустите другое приложение и повторите описанные выше шаги для его прикрепления. 1. Запустите первое приложение. 2. Нажмите и удерживайте клавишу , затем используйте клавиши со стрелками для прикрепления приложения. 3. Запустите другое приложение и повторите описанные выше шаги для его прикрепления.
Центр поддержки Центр поддержки собирает уведомления от приложений в одном месте. В нижней части расположен полезный раздел с рекомендуемыми действиями. Запуск центра поддержки Нажмите иконку на панели задач или проведите пальцем от правого края экрана влево. Нажмите иконку Нажмите Моноблочный компьютер ASUS в панели задач. на клавиатуре.
Другие сочетания клавиш Используя сочетания клавиш на клавиатуре можно запускать приложения и управлять функциями Windows 10.
Запуск Поиск Открытие панели Проект Открытие окна Выполнить Открытие центра специальных возможностей Открытие контекстное меню кнопки Пуск Запуск лупы и масштабирование экрана Уменьшение экрана Открытие настроек Экранного диктора Моноблочный компьютер ASUS 41
Подключение к беспроводным сетям Wi-Fi Доступ к электронной почте и интернету возможен при использовании Wi-Fi подключения. Подключение Wi-Fi Подключите компьютер к сети Wi-Fi следуя следующим инструкциям: или 1. Нажмите иконку в панели задач. 2. Нажмите иконку 3. Выберите точку доступа из списка доступных подключений. 4. Нажмите Подключить для подключения. для включения Wi-Fi. ПРИМЕЧАНИЕ: Возможно, будет предложено ввести ключ безопасности.
Bluetooth Используйте Bluetooth для подключения других Bluetooth-совместимых устройств. Сопряжение с устройствами Bluetooth Для передачи данных необходимо выполнить сопряжение компьютера с устройством Bluetooth. Подключите ваши устройства, выполнив следующие действия: или 1. В меню Пуск откройте Настройки. 2. Выберите Устройства, затем выберите Bluetooth для поиска устройств Bluetooth. 3. Выберите устройство из списка. Сравните код на компьютере с кодом, отправленным на выбранное устройство.
Подключение к проводным сетям Компьютер можно подключить к локальной сети или широкополосному доступу в Интернет, используя сетевой порт. ПРИМЕЧАНИЕ: Для получения подробной информации или помощи в создании подключения к интернету обратитесь к Вашему сетевому администратору или Вашему провайдеру (ISP). Для конфигурации параметров, обратитесь к следующим процедурам. ВАЖНО! Перед выполнением следующих действий убедитесь, что компьютер подключен к локальной сети.
7. Вернитесь в Центр управления сетями и общим доступом, затем нажмите Настройка нового подключения или сети. 8. Выберите Подключиться к Интернету и нажмите Далее. 9. Выберите Высокоскоростное(PPPoE). 10. Введите имя пользователя, пароль и название подключения, затем нажмите Подключить. 11. Нажмите Закрыть для завершения конфигурации. 12. Нажмите в панели задач и выберите только что созданное подключение. 13.
Отключение моноблочного компьютера Вы можете выключить компьютер, выполнив следующие инструкции: или 46 • Откройте меню Пуск и выберите > Выключение для нормального завершения работы. • На экране входа нажмите • Нажмите для открытия окна завершение работы. В меню выберите Выключение и нажмите ОК. • Если моноблочный компьютер перестает отвечать на запросы, нажмите и удерживайте кнопку питания в течение 4 секунд. > Выключение.
Перевод компьютера в спящий режим Для перевода компьютера в спящий режим: или • Откройте меню Пуск и выберите > Сон для перевода компьютера в спящий режим. • На экране входа нажмите > Сон. Нажмите для открытия окна завершение работы. В меню выберите Сон и нажмите ОК. ПРИМЕЧАНИЕ: Компьютер также можно перевести в спящий режим, нажав кнопку питания.
Моноблочный компьютер ASUS
Глава 4: Восстановление системы Вход в BIOS Setup BIOS (основная система ввода-вывода) хранит настройки оборудования, необходимые для работы компьютера. При обычных обстоятельствах, настройки BIOS по умолчанию применяются в большинстве случаев, обеспечивая оптимальную производительность. Не изменяйте настройки BIOS по умолчанию, за исключением следующих случаев: • При тестировании системы на экране появляется сообщение и просьбой войти в настройки BIOS.
Восстановление системы Использование опции восстановления предоставляет возможность быстрого восстановления программного обеспечения на компьютере в его оригинальное рабочее состояние для повышения производительности. ВАЖНО! • Перед восстановлением системы сохраните все Ваши данные на внешний носитель. • Во избежание потери данных запишите важные настройки, например сетевые параметры, имена пользователей и пароли. • EПеред сбросом системы подключите блок питания.
• Выполнить откат к более ранней сборке - Эта опция позволяет вернуться к более ранней сборке. Используйте эту опцию, если эта сборка не работает. • Особые варианты загрузки - Использование этой опции позволяет использовать дополнительные опции восстановления, например: - Использование для загрузки USB-накопителя, сетевого подключения или диска восстановления.
2. В окне Обновление и безопасность выберите Восстановление, а затем желаемую опцию.
Приложение Уведомления Федеральная комиссия по средствам связи: Положение о воздействии помех Данное оборудование было протестировано и сочтено соответствующим ограничениям по цифровым устройствам класса В, в соответствии с частью 15 правил FCC. Эти ограничения рассчитаны на обеспечение защиты в разумных пределах от вредоносных воздействий при установке в жилом помещении.
Предостережение FCC: Любые изменения или модификация, не одобренные стороной, ответственной за совместимость, аннулируют право пользователя пользоваться этим оборудованием. Данное устройство соответствует части 15 Правил FCC. Эксплуатация оборудования допустима при соблюдении следующих условий: (1) Данное устройство не должно создавать помех (2) На работу устройства могут оказывать влияние внешние помехи, включая те, которые могут вызвать нежелательные режимы его работы.
Декларация соответствия Министерства инноваций, науки и экономического развития Канады (ISED) Данное устройство соответствует требованиям нелицензированной спецификации радиостандартов (RSS), установленным Министерством инноваций, науки и экономического развития Канады.
Информация о воздействии радиочастоты (RF) Выходная излучаемая мощность этого устройства значительно ниже предельных значений облучения радиочастотной энергией, установленных Министерством промышленности Канады (IC). Устройство должно использоваться таким образом, чтобы длительность контакта с человеком во время нормальной работы сводилась к минимуму.
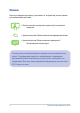
Символ перечеркнутого мусорного бака означает, что этот продукт(электрическое, электронное оборудование и содержащий ртуть аккумулятор) не следует утилизировать с бытовым мусором. Ознакомьтесь с правилами утилизации таких продуктов. Не выбрасывайте аккумулятор вместе с бытовым мусором. Символ перечеркнутого мусорного бака означает, что аккумулятор нельзя выбрасывать вместе с бытовым мусором.
Предупреждение потери слуха Для предотвращения возможной потери слуха не слушайте звук на высокой громкости в течение длительного времени.
Декларация о соответствии продукции экологическим нормам В соответствии с международными нормами по защите окружающей среды компания ASUS предоставляет всю необходимую информацию и тщательно проверяет все продукты на стадии проектирования и производства, чтобы гарантировать безопасность окружающей среды при эксплуатации продуктов ASUS. Кроме того, ASUS предоставляет всю релевантную информацию относительно данных требований. На сайте http://csr.asus.com/Compliance.
Утилизация и переработка Компания ASUS берет на себя обязательства по утилизации старого оборудования, исходя из принципов всесторонней защиты окружающей среды. Мы предоставляем решения нашим клиентам для переработки наших продуктов, аккумуляторов и других компонентов, а также упаковки. Для получения подробной информации об утилизации и переработке в различных регионах посетите http://csr.asus.com/english/Takeback.htm.
Совместимость со стандартом ENERGY STAR ENERGY STAR – это совместная программа Министерства энергетики и Агентства по охране окружающей среды США, помогающая предприятиям и гражданам защищать окружающую среду и экономить энергию благодаря использованию энергосберегающих продуктов и технологий. Все продукты ASUS с логотипом ENERGY STAR соответствуют стандарту ENERGY STAR и оснащены функциями управления питанием, которые включены по умолчанию.
Упрощенное заявление о соответствии европейской директиве Настоящим, ASUSTeK COMPUTER INC, заявляет, что устройство соответствует основным требованиям и другим соответствующим условиям директивы 2014/53/EU. Полный текст декларации соответствия ЕС доступен на https://www.asus.com/support/.
FCC COMPLIANCE INFORMATION Per FCC Part 2 Section 2.1077 Responsible Party: Address: Phone/Fax No: Asus Computer International 48720 Kato Rd., Fremont, CA 94538 (510)739-3777/(510)608-4555 hereby declares that the product Product Name : Model Number : ASUS All-in-One PC/Vivo AiO V241E, A6521 compliance statement: This device complies with part 15 of the FCC Rules.
Производитель ASUSTek COMPUTER INC. Адрес 1F., No. 15, Lide Rd., Beitou Dist.