SB14061 Prvo izdanje / April 2018 E-priručnik
INFORMACIJE O AUTORSKIM PRAVIMA Nijedan deo ovog uputstva, uključujući proizvode i softver koji su u njemu opisani, ne sme se reprodukovati, preneti, transkribovati, uskladištiti u sistemu za pronalaženje ili prevesti na bilo koji jezik ili na bilo koji način, osim dokumentacije koju kupac zadržava kao rezervnu kopiju, a bez prethodne pisane dozvole kompanije ASUSTeK COMPUTER INC. (“ASUS”).
Sadržaj O ovom priručniku.....................................................................................................7 Konvencije korišćene u ovom priručniku............................................................... 8 Ikone..................................................................................................................................... 8 Tipografija..........................................................................................................................
Poglavlje 3: Rad sa operativnim sistemom Windows® 10 Prvo pokretanje...........................................................................................................46 „Start“ meni..................................................................................................................47 Windows® aplikacije..................................................................................................49 Rad sa Windows® aplikacijama.........................................................
Saveti i najčešća pitanja Korisni saveti u vezi laptopa...................................................................................78 Najčešća pitanja u vezi sa hardverom.................................................................79 Najčešća pitanja u vezi sa softverom...................................................................82 Dodaci Informacije o DVD-ROM drajvu.................................................................................. 86 Informacije o Blu-ray ROM drajvu ......
Obaveštenje o proizvodu Macrovision korporacije............................................ 95 Sprečavanje oštećivanja sluha.................................................................................... 95 Nordic Lithium Cautions (for lithium-ion batteries)............................................ 96 CTR 21 odobrenje (za laptop PC-je sa ugrađenim modemom)...................... 97 ENERGY STAR proizvod koji ispunjava zahteve....................................................
O ovom priručniku Ovaj priručnik pruža informacije o hardverskim i softverskim funkcijama vašeg notebook računara, organizovane kroz sledeća poglavlja: Poglavlje 1: Podešavanje hardvera Ovo poglavlje sadrži detaljne informacije o hardverskim komponentama vašeg notebook računara. Poglavlje 2: Korišćenje Laptopa Ovo poglavlje prikazuje kako da koristite različite delove svog notebook računara.
Konvencije korišćene u ovom priručniku Kako bismo istakli bitne informacije u okviru ovog priručnika, poruke smo predstavili na sledeći način: VAŽNO! Ova poruka sadrži informacije od vitalnog značaja koje morate pratiti kako biste obavili određeni posao. NAPOMENA: Ova poruka sadrži dodatne informacije i savete koji vam mogu pomoći pri obavljanju poslova.
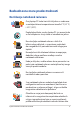
Bezbednosne mere predostrožnosti Korišćenje notebook računara Ovaj laptop PC treba koristiti isključivo u sredinama sa ambijentalnom temperaturom između 5°C (41°F) i 35°C (95°F). Pogledajte etiketu na dnu laptop PC-ja i proverite da se vaš adapter za struju slaže sa oznakom za jačinu. Ne ostavljajte notebook računar u krilu ili u blizini nekog dela tela, u suprotnom može doći do neugodnosti ili povreda izazvanih izlaganjem toploti.
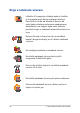
Briga o notebook računaru Isključite AC napajanje i uklonite bateriju (ukoliko je to moguće) pre čišćenja notebook računara. Koristite čist sunđer od celuloze ili tkaninu od meke kože navlaženu mešavinom neabrazivnog deterdženta i par kapljica tople vode. Uklonite preostalu vlagu sa notebook računara koristeći suvu krpu. Ne koristite jake rastvore, kao što su razređivač, benzol i druge hemikalije, na ili u blizini notebook računara. Ne stavljajte predmete na notebook računar.
Pravilno odlaganje NE bacajte laptop PC kao običan otpad. Ovaj proizvod je dizajniran tako da omogući ispravno ponovno korišćenje delova i može da se reciklira. Simbol sa precrtanom kantom sa točkićima znači da proizvod (električna, elektronska oprema i dugme ćelije baterije koje sadrži đivu) ne treba odlagati kao obično smeće. Proverite lokalne regulative vezane za uklanjanje elektronskih proizvoda. Ne bacajte bateriju kao obično smeće.
E-priručnik za notebook računar
Poglavlje 1: Podešavanje hardvera E-priručnik za notebook računar 13
Upoznavanje sa vašim prenosnim računarom Prikaz sa gornje strane NAPOMENA: Raspored tastera na tastaturi može da se razlikuje u zavisnosti od regiona ili zemlje. Izgled prenosnog računara takođe može da se razlikuje u zavisnosti od modela.
Kamera Ugrađena kamera omogućava snimanje fotografija ili videosnimaka pomoću prenosnog računara. Ekran osetljiv na dodir koji se može podesiti u rasponu od 360º Ekran osetljiv na dodir vašeg prenosnog računara možete podesiti pod uglom u rasponu od 360º. Zahvaljujući ovoj funkciji, prenosni računar možete brzo pretvoriti u tablet računar koji podržava funkciju dodira.
Tastatura Ova QWERTY tastatura u punoj veličini ima optimalan hod za kucanje. Na ovoj tastaturi možete koristiti i funkcijske tastere, brzo pristupiti operativnom sistemu Windows® i kontrolisati druge multimedijalne funkcije. NAPOMENA: Raspored tastera na tastaturi se razlikuje prema modelu ili teritoriji. Dodirna tabla Dodirna tabla podržava korišćenje različitih pokreta za navigaciju na ekranu – na taj način se obezbeđuje intuitivan korisnički doživljaj. Takođe podržava funkcije standardnog miša.
Donja strana NAPOMENA: Izgled donje strane može da se razlikuje u zavisnosti od modela. UPOZORENJE! Donja strana prenosnog računara može da postane topla, pa čak i vrela tokom korišćenja računara ili punjenja baterije. Kada koristite prenosni računar, nemojte ga stavljati na površine koje blokiraju ventilaciju. VAŽNO! • Trajanje baterije zavisi od načina korišćenja i specifikacija za ovaj prenosni računar. Baterija ne može da se rasklopi.
Zvučnici Ugrađeni zvučnici omogućavaju emitovanje zvuka direktno sa računara. Opcije zvuka se kontrolišu pomoću softvera.
Desna strana Konektor za microSD karticu Ovaj ugrađeni čitač memorijskih kartica podržava microMMC, microSD, microSDHC i microSDXC kartice. USB 3.1 Gen 1 Type-CTM priključak Port USB 3.1 (Universal Serial Bus 3.1 – univerzalna serijska magistrala 3.1) Gen 1 Type-C™ omogućava brzinu prenosa do 5 Gbit/s i kompatibilan je sa prethodnom verzijom USB 2.0. NAPOMENA: Brzina prenosa putem ovog porta može se razlikovati u zavisnosti od modela. Port USB 3.1 Gen 1 Port USB 3.1 (Universal Serial Bus 3.
HDMI priključak Ovaj priključak se koristi za HDMI (High-Definition Multimedia Interface) konektor i poseduje HDCP zaštitu za reprodukciju HD DVD, Blu-ray i drugog zaštićenog sadržaja. Ulazni priključak za napajanje (jednosmerna struja) Uključite isporučeni adapter u ovaj priključak za punjenje baterije i napajanje prenosnog računara. UPOZORENJE! Adapter može postati topao ili vreo tokom korišćenja. Nemojte da prekrivate adapter niti da ga ostavljate blizu tela kada je priključen na napajanje.
Leva strana Port USB 3.1 Gen 1 Port USB 3.1 (Universal Serial Bus 3.1 – univerzalna serijska magistrala 3.1) Gen 1 omogućava brzinu prenosa i do 5 Gbit/s i kompatibilan je sa prethodnom verzijom USB 2.0. Priključak za slušalice, slušalice sa mikrofonom i mikrofon Preko ovog priključka možete da povežete zvučnike sa pojačalom ili slušalice. Takođe, preko ovog priključka možete da povežete slušalice sa mikrofonom ili spoljni mikrofon.
Dugme za jačinu zvuka Pomoću ovog dugmeta možete da pojačate ili smanjite jačinu zvuka na prenosnom računaru. Dugme za napajanje Pritisnite dugme za napajanje da biste uključili/isključili prenosni računar. Takođe, dugme za napajanje možete koristiti za prelazak u režim spavanja ili hibernacije, odnosno za izlazak iz ovih režima. Ukoliko se prenosni računar ne odaziva, pritisnite i zadržite dugme za napajanje najmanje četiri (4) sekunde dok se prenosni računar ne isključi.
ASUS olovka (na pojedinim modelima) Klik desnim tasterom Možete da koristite ovo dugme da biste omogućili funkciju klika desnim tasterom. Dugme brisača Možete da koristite ovo dugme da biste omogućili funkciju brisača. Ubacivanje baterije 1. Uklonite gornju polovinu olovke. 2. Uklonite nalepnicu i ubacite bateriju, s pravilno postavljenim polaritetom. 3. Vratite gornju polovinu olovke na njeno mesto.
E-priručnik za notebook računar
Poglavlje 2: Korišćenje Laptopa E-priručnik za notebook računar 25
Prvi koraci Punjenje notebook računara A. Priključite DC priključak za napajanje u ulaz za (DC) napajanje notebook računara. B. Priključite AC adapter za napajanje u utičnicu koja obezbeđuje struju napona 100 V ~ 240 V. Punite notebook računar 3 sata pre korišćenja po prvi put. NAPOMENA: Izgled adaptera za napajanje se može razlikovati, u zavisnosti od modela i regiona.
VAŽNO! • Pronađite etiketu sa ulaznom/izlaznom specifikacijom na notebook računaru i uverite se da se slaže sa informacijama o ulaznoj/izlaznoj specifikaciji na adapteru za napajanje. Neki modeli notebook računara možda imaju više specifikacija izlazne struje, na osnovu dostupnog SKU-a. • Uverite se da je vaš notebook računar povezan sa adapterom za napajanje pre nego što ga prvi put uključite.
Podignite da biste otvorili poklopac ekrana Pritisnite dugme za napajanje 28 E-priručnik za notebook računar
Pokreti za dodirni ekran i tačped Pokreti vam omogućavaju da pokrećete programe i pristupate podešavanjima notebook računara. Pogledajte sledeće ilustracije prilikom korišćenja pokreta rukom na dodirnom ekranu i tačpedu. NAPOMENA: Sledeći snimci ekrana su priloženi samo kao reference. Izgled dodirnog ekrana se može razlikovati u zavisnosti od modela. Korišćenje pokreta na dodirnom ekranu Pokreti vam omogućavaju da pokrećete programe i pristupate podešavanjima laptopa.
Tapnuti/dvaput tapnuti Tapnuti i zadržati • Dodirnite aplikaciju da biste je izabrali. Pritisnite i držite da biste otvorili meni desnog klika miša. • Dodirnite aplikaciju dvaput da biste je pokrenuli. Uvećanje Umanjenje Raširite dva prsta na panelu dodirnog ekrana. Sastavite dva prsta na panelu dodirnog ekrana.
Prevlačenje prstom Prevlačenje Prevucite prstom da biste pomerali nagore i nadole i takođe da biste pomerali ekran nalevo ili nadesno. • Prevucite da biste kreirali okvir za izbor oko više stavki. • Prevucite i otpustite stavku da biste je premestili na novu lokaciju.
Korišćenje tačpeda Pomeranje pokazivača Dodirnite bilo koje područje tačpeda da biste aktivirali njegov pokazivač, zatim prevucite prstom po tačpedu da biste pomerili pokazivač na ekranu.
Pokreti s jednim prstom Tapnuti/dvaput tapnuti • Dodirnite aplikaciju da biste je izabrali. • Dodirnite aplikaciju dvaput da biste je pokrenuli. Prevuci i otpusti Dvaput tapnite na stavku, zatim prevucite istim prstom bez njegovog podizanja sa tačpeda. Da biste otpustili stavku na novu lokaciju, podignite prst sa tačpeda.
Levi klik Desni klik • Kliknite na aplikaciju da biste Pritisnite ovo dugme da biste je izabrali. otvorili meni desnog klika miša. • Kliknite dvaput na aplikaciju da biste je pokrenuli. NAPOMENA: Područja unutar tačkaste linije predstavljaju lokacije levog i desnog tastera miša na tačpedu. Pokreti sa dva prsta Tapnuti Dodirnite dodirnu površinu s dva prsta da biste simulirali funkciju desnog klika.
Pomeranje sa dva prsta (gore/dole) Pomeranje sa dva prsta (levo/desno) Prevucite dva prsta da biste pomerali nagore ili nadole. Prevucite dva prsta da biste pomerali nalevo ili nadesno. Udaljivanje zuma Približavanje zuma Sastavite dva prsta na tačpedu. Raširite dva prsta na tačpedu.
Prevuci i otpusti Odaberite stavku i zatim pritisnite i držite dugme za levi klik. Koristeći drugi prst, prevucite na dodirnoj tabli da biste prevukli stavku, a podignite prst s dugmeta da biste otpustili stavku. Potezi pomoću tri prsta Tapnuti Dodirnite dodirnu površinu s tri prsta da biste pozvali funkciju Cortana.
Prevlačenje nalevo/nadesno Ako ste otvorili više aplikacija, prevucite s tri prsta nalevo ili nadesno da biste prebacivali između tih aplikacija. Prevlačenje nagore Prevlačenje nadole Prevucite nagore da biste pogledali Prevucite nadole da biste prikazali pregled svih trenutno otvorenih radnu površinu. aplikacija.
Pokreti sa četiri prsta Tapnuti Dodirnite dodirnu površinu sa četiri prsta da biste pokrenuli Action Center. Prilagođavanje dodirne površine 1. Pokrenite All settings (Sva podešavanja) iz funkcije Action Center. 2. Izaberite Devices (Uređaji), a zatim izaberite Mouse & touchpad (Miš i dodirna površina). 3. Izvršite podešavanje u skladu s vašim željenim opcijama.
Podešavanje vašeg naloga otiska prsta 1. Pokrenite „Start“ meni. 2. Kliknite/dodirnite Settings (Podešavanja) i izaberite Accounts (Nalozi). 3. Izaberite karticu Sign-in options (Opcije prijavljivanja) na levoj strani i kliknite/dodirnite Set up (Podešavanje) u okviru funkcije Otisak prsta komponente Windows Hello. VAŽNO! • Morate dodati lozinku pre nego što možete da koristite druge opcije prijavljivanja. • Morate da podesite PIN kod pre prijavljivanja u komponentu Windows Hello. 4.
Korišćenje tastature Funkcijski tasteri Funkcijski tasteri na tastaturi notebook računara mogu da pokreću sledeće komande: postavlja notebook računar u Sleep mode (Režim spavanja) uključuje ili isključuje Airplane mode (Avionski režim) NAPOMENA: Kada je uključen, Airplane mode (Avionski režim) onemogućava korišćenje bežičnog umrežavanja.
Omogućuje ili onemogućuje tačped Uključuje ili isključuje zvučnik Smanjuje jačinu zvuka na zvučniku Povećava jačinu zvuka na zvučniku Windows®10 tasteri Na tastaturi vašeg notebook računara postoje dva specijalna Windows® tastera koja se koriste na sledeći način: Pokreće „Start“ meni Prikazuje padajući meni E-priručnik za notebook računar 41
Rotiranje ekrana Panel za prikaz vašeg notebook računara se može prilagođavati do 360 stepeni. Možete da prilagodite panel za prikaz kao što je prikazano u nastavku.
Uspravni režim Režim šatora režim tableta NAPOMENA: Rotiranje ekrana u režim stajanja, šatora i tableta onemogućiće tastaturu i dodirnu tablu.
E-priručnik za notebook računar
Poglavlje 3: Rad sa operativnim sistemom Windows® 10 Poglavlje 3: Rad sa operativnim sistemom Windows® 10 E-priručnik za notebook računar 45
Prvo pokretanje Kada pokrenete računar po prvi put, serija ekrana će se pojaviti kako bi vas provela kroz konfigurisanje osnovnih podešavanja operativnog sistema Windows® 10. Da biste pokrenuli notebook računar po prvi put: 1. Pritisnite taster za napajanje na notebook računaru. Sačekajte nekoliko minuta dok se ekran za podešavanje ne pojavi. 2. Na ekranu za podešavanje, izaberite region i jezik koji želite da koristite na notebook računaru. 3. Pažljivo pročitajte Uslove licenciranja.
„Start“ meni „Start“ meni je polazna tačka za programe, Windows® aplikacije, fascikle i podešavanja vašeg notebook računara.
Pokretanje „Start“ menija Dodirnite dugme Start u donjem levom uglu vaše radne površine. Postavite pokazivač miša iznad dugmeta Start u donjem levom uglu radne površine i zatim kliknite na njega. Pritisnite taster sa Windows logotipom na tastaturi. Otvaranje programa sa „Start“ menija Jedna od najčešćih upotreba „Start“ meni je otvaranje programa koji su instalirani na vašem notebook računaru. Dodirnite program da biste ga pokrenuli.
Windows® aplikacije Ovo su aplikacije koje su zakačene na desnu tablu „Start“ menija i prikazane u vidu pločica radi lakšeg pristupa. NAPOMENA: Pojedine Windows® aplikacije zahtevaju prijavljivanje na Microsoft nalog pre potpunog pokretanja.
Rad sa Windows® aplikacijama Koristite dodirni ekran, tačped ili tastaturu notebook računara da biste pokretali, prilagođavali i zatvarali aplikacije. Pokretanje Windows® aplikacija sa „Start“ menija Dodirnite aplikaciju da biste je pokrenuli. Postavite pokazivač miša iznad aplikacije i zatim kliknite da biste je pokrenuli. Koristite tastere sa strelicom da biste se kretali kroz aplikacije. Pritisnite da biste pokrenuli aplikaciju.
Promena veličine aplikacija Pritisnite i držite aplikaciju, zatim dodirnite i izaberite veličinu pločice aplikacije. Postavite pokazivač miša iznad aplikacije i kliknite desnim tasterom na nju, a zatim kliknite na Resize (Promeni veličinu). Koristite tastere sa strelicom da biste se kretali kroz aplikacije. Pritisnite ili (na pojedinim modelima), a zatim izaberite Resize (Promeni veličinu) i izaberite veličinu pločice aplikacije.
Dodavanje aplikacija na traku zadataka Pritisnite i zadržite aplikaciju, a zatim dodirnite Pin to taskbar (Zakači na traku zadataka). Postavite pokazivač miša iznad aplikacije i zatim kliknite desnim tasterom na nju i zatim kliknite na Pin to taskbar (Zakači na traku zadataka). Koristite tastere sa strelicom da biste se kretali kroz aplikacije.
Prikaz zadatka Brzo prebacujte između otvorenih aplikacija i programa pomoću funkcije prikaza zadatka, a takođe možete da koristite prikaz zadatka za prebacivanje između radnih površina. Pokretanje prikaza zadatka Dodirnite ikonu na traci zadataka ili prevucite s leve ivice ekrana. Postavite pokazivač miša iznad ikone na traci zadataka i kliknite na nju. Pritisnite E-priručnik za notebook računar na tastaturi.
Funkcija kačenja Funkcija kačenja prikazuje aplikacije sa obe strane, omogućavajući vam da radite ili prebacujete između aplikacija. Vruće tačke kačenja Možete da prevučete i otpustite aplikacije na ove vruće tačke da biste ih prikačili na mesto.
Korišćenje kačenja ili 1. Pokrenite aplikaciju koju želite da kačite. 2. Prevucite naslovnu traku vaše aplikacije i ispustite aplikaciju na ivicu ekrana da bi se zakačila. 3. Pokrenite drugu aplikaciju i ponovite gorenavedene korake za kačenje još jedne aplikacije. 1. Pokrenite aplikaciju koju želite da kačite. 2. Pritisnite i držite taster , a zatim koristite tastere sa strelicom za kačenje aplikacije. 3.
Centar za aktivnosti Centar za aktivnosti konsoliduje obaveštenja od aplikacija i predstavlja centralno mesto za interakciju s njima. Takođe ima na dnu veoma korisnu funkciju Quick Actions (Brze aktivnosti). Pokretanje Centra za aktivnosti Kliknite na ikonu na traci zadataka ili prevucite s desne ivice ekrana. Postavite pokazivač miša iznad ikone na traci zadataka i kliknite na nju. Pritisnite 56 na tastaturi.
Druge tasterske prečice Takođe možete da koristite sledeće prečice na tastaturi koje će vam pomoći prilikom pokretanja aplikacija i kretanja kroz Windows®10. \ Pokreće „Start“ meni Pokreće Action Center (Centar za aktivnosti) Pokreće radnu površinu Pokreće aplikaciju File Explorer (Istraživač datoteka) Otvara tablu Share (Deli) Pokreće Settings (Podešavanja) Pokreće tablu Connect (Poveži se) Aktivira ekran za otključavanje Umanjuje trenutno aktivni prozor E-priručnik za notebook računar 57
Pokreće Search (Pretragu) Pokreće tablu Project (Projektuj).
Povezivanje sa bežičnim mrežama Wi-Fi Pristupajte e-pošti, pregledajte Internet i delite aplikacije putem društvenih mreža pomoću Wi-Fi veze notebook računara. VAŽNO! Airplane mode (Režim rada u avionu) onemogućava ovu funkciju. Uverite se da je Airplane mode (Režim rada u avionu) isključen pre omogućavanja Wi-Fi veze. Povezivanje Wi-Fi-ja Povežite vaš notebook računar sa Wi-Fi mrežom pomoću sledećih koraka: ili 1. Izaberite ikonu sa trake zadataka. 2. Izaberite ikonu 3.
Bluetooth Koristite Bluetooth da biste olakšali bežični prenos podataka između vašeg i drugih uređaja na kojima je Bluetooth funkcija omogućena. VAŽNO! Airplane mode (Režim rada u avionu) onemogućava ovu funkciju. Uverite se da je Airplane mode (Režim rada u avionu) isključen pre omogućavanja Bluetooth veze.
Avionski režim Airplane mode (Avionski režim) onemogućava bežičnu komunikaciju i na taj način vam omogućava da bezbedno koristite notebook računar prilikom leta. NAPOMENA: Obratite se svojoj avio kompaniji da biste se informisali o mogućnostima upotrebe određenih usluga i ograničenjima koja se moraju poštovati prilikom korišćenja notebook računara tokom leta. Uključivanje avionskog režima ili 1. Pokrenite Action Center (Centar za aktivnosti) sa trake zadataka. 2. Izaberite ikonu avionu.
Isključivanje notebook računara Notebook računar možete da isključite na neki od sledećih načina: • Pokrenite „Start“ meni i zatim izaberite > Shut down (Isključi) da biste isključili na standardni način. • Sa ekrana za prijavljivanje, izaberite down (Isključi). • Pritisnite ili > Shut da biste pokrenuli Shut Down Windows (Isključivanje operativnog sistema Windows). Izaberite Shut Down (Isključivanje) sa padajuće liste, a zatim izaberite OK (U redu).
Postavljanje notebook računara u režim spavanja Da biste postavili notebook računar u režim spavanja: ili • Pokrenite „Start“ meni, a zatim izaberite > Sleep (Stanje spavanja) da biste postavili notebook računar u stanje spavanja. • Sa ekrana za prijavljivanje, izaberite (Stanje spavanja). Pritisnite > Sleep da biste pokrenuli Shut Down Windows (Isključivanje operativnog sistema Windows). Izaberite Sleep (Stanje spavanja) sa padajuće liste, a zatim izaberite OK (U redu).
E-priručnik za notebook računar
Poglavlje 4: Samoispitivanje po uključenju (POST test) E-priručnik za notebook računar 65
Samoispitivanje po uključenju (POST test) Samoispitivanje po uključenju (POST test) predstavlja seriju softverski kontrolisanih dijagnostičkih testova koji se pokreću prilikom uključivanja ili ponovnog pokretanja notebook računara. Softver koji kontroliše POST test je instaliran kao stalni deo arhitekture notebook računara.
• Ponovo pokrenite notebook računar i zatim pritisnite tokom POST testa. • Pokrenite meni „Start“ i izaberite Settings (Podešavanja) > Update & security (Ažuriranje i bezbednost) > Recovery (Oporavak), zatim izaberite Restart now (Ponovo pokreni) u okviru opcija Napredno pokretanje. Kada uđete na ekran naprednog pokretanja, izaberite Troubleshoot (Rešavanje problema) > Advanced options (Napredne opcije) > UEFI Firmware Settings (Podešavanja UEFI firmvera) > Restart (Ponovo pokreni).
Boot (Podizanje sistema) Ovaj meni vam omogućava da podesite prioritete opcija za podizanje sistema. Prilikom podešavanja prioriteta za podizanje sistema, vodite se sledećom procedurom. 1. Na ekranu Boot (pokretanje), odaberite Boot Option #1 (Opciju za pokretanje #1). 2. Pritisnite i odaberite uređaj kao Boot Option #1 (Opciju za pokretanje #1).
Security (Bezbednost) Ovaj meni vam omogućava da podesite administratorsku i korisničku lozinku za notebook računar. Takođe vam omogućava da kontrolišete pristup disk jedinici notebook računara, ulazno-izlaznom (I/O) interfejsu i USB interfejsu. NAPOMENA: • Ako podesite opciju User Password (Korisnička lozinka), od vas će biti zatraženo da unesete lozinku pre pristupa operativnom sistemu notebook računara.
Da podesite lozinku: 1. Na ekranu Security (Bezbednost), odaberite Setup Administrator Password (lozinku za administratora podešavanja) ili User Password (korisničku lozinku). 2. Ukucajte lozinku i pritisnite 3. Ponovo unesite da biste potvrdili lozinku i zatim izaberite OK (U redu). . Da bi obrisali lozinku: 1. Na ekranu Security (Bezbednost), odaberite Setup Administrator Password (lozinku za administratora podešavanja) ili User Password (korisničku lozinku). 2.
Save & Exit (Sačuvaj i izađi) Da biste zadržali obavljena podešavanja, izaberite opciju Save Changes and Exit (Sačuvaj promene i izađi) pre napuštanja BIOS-a.
Ažuriranje BIOS-a: 1. Proverite tačan model notebook računara i potom sa web sajta kompanije ASUS preuzmite najnoviju BIOS datoteku za vaš model. 2. Sačuvajte kopiju preuzete BIOS datoteke na jedinicu fleš diska. 3. Povežite jedinicu fleš diska sa notebook računarom. 4. Ponovo pokrenite svoj notebook računar, a zatim pristupite podešavanjima BIOS-a. 5. U meniju BIOS-a izaberite Advanced (Napredno) > ASUS EZ Flash 3 Utility i zatim pritisnite 72 .
6. Pronađite preuzetu BIOS datoteku na jedinici fleš diska i potom pritisnite . Pratite uputstva na ekranu da biste dovršili ažuriranje. 7. Nakon ažuriranja BIOS-a, kliknite na Save & Exit (Sačuvaj i izađi) > Restore Defaults (Vrati na podrazumevane vrednosti) kako biste vratili sistem na podrazumevana podešavanja.
Oporavak vašeg sistema Upotreba opcija za oporavak na vašem notebook računaru omogućava vam da vratite sistem u njegovo prvobitno stanje ili samo da osvežite podešavanja sistema kako biste poboljšali performanse. VAŽNO! • Napravite rezervnu kopiju svih datoteka sa podacima pre nego što upotrebite bilo koju opciju za oporavak na notebook računaru. • Zapišite važna prilagođena podešavanja kao što su postavke mreže, korisnička imena i lozinke kako biste izbegli gubitak podataka.
• Advanced startup (Napredno pokretanje) - Pomoću ove opcije možete da izvršite druge napredne opcije oporavka na svom notebook računaru kao što su: - Using a USB drive, network connection or Windows recovery DVD (Upotreba USB diska, mrežne veze ili DVD-a za oporavak operativnog sistema Windows) za pokretanje notebook računara.
2. U okviru opcije Update and security (Ažuriranje i bezbednost), izaberite Recovery (Oporavak) , a zatim izaberite opciju oporavka koju želite da izvršite.
Saveti i najčešća pitanja E-priručnik za notebook računar 77
Korisni saveti u vezi laptopa Kako biste maksimalno iskoristili vaš laptop, održali performanse njegovog sistema i osigurali bezbednost svih podataka, poslušajte neke korisne savete: • Ažurirajte Windows® s vremena na vreme kako biste osigurali da aplikacije imaju najnovija bezbednosna podešavanja. • Koristite antivirusni softver kako biste zaštitili podatke i održavajte ga ažurnim. • Osim kada je apsolutno neophodno, nemojte da isključujte laptop prisilnim isključivanjem.
Najčešća pitanja u vezi sa hardverom 1. Crna tačka ili ponekad obojena tačka se pojavljuje na ekranu kada uključim laptop. Šta treba da uradim? Iako se te tačke redovno pojavljuju na ekranu, one neće uticati na sistem. Ako to nastavi da se dešava i počne da utiče na rad sistema, obratite se ovlašćenom ASUS servisnom centru. 2. Boja i osvetljenost ekrana su nejednaki. Kako to da rešim? Na boju i osvetljenost ekrana mogu da utiču ugao i trenutni položaj laptopa.
4. 5. LED indikator za bateriju se ne pali. Šta nije u redu? • Proverite da li je adapter za napajanje ili baterija pravilno spojena. Možete i da iskopčate adapter za napajanje ili bateriju, sačekate minut, a zatim ih ponovo povežete sa strujnom utičnicom i laptopom. • Ako je problem i dalje prisutan, obratite se za pomoć lokalnom ASUS servisnom centru. Zašto tačped ne radi? Pritisnite 6. da biste uključili tačped.
8. Laptop ne reaguje dobro na pritiske na tastere jer se pokazivač stalno pomera. Šta treba da uradim? Proverite da li nešto slučajno dodiruje ili pritiska tačped dok kucate na tastaturi. Možete da isključite tačped pritiskom na . 9. Umesto prikazivanja slova, pritisak na tastere „U”, „I” i „O” na tastaturi prikazuje brojeve. Kako to da promenim? Pritisnite taster ili (na pojedinim modelima) na laptopu da biste isključili ovu funkciju i koristili pomenute tastere za unošenje slova.
Najčešća pitanja u vezi sa softverom 1. Kada uključim laptop, indikator napajanja se upali ali ne i indikator aktivnosti na disku. Takođe, ne dolazi do podizanja sistema. Šta mogu da uradim da to rešim? Možete da probate sa nekim od sledećih predloga: 2. • Prinudno isključite notebook računar tako što ćete pritisnuti taster za napajanje i zadržati ga najmanje četiri (4) sekunde. Proverite da li su adapter za napajanje i baterija pravilno priključeni, a zatim uključite laptop.
4. Sistem laptopa se ne podiže. Kako to da rešim? Možete da probate sa nekim od sledećih predloga: 5. • Uklonite sve uređaje povezane sa laptopom, a zatim ponovo pokrenite sistem. • Ako je problem i dalje prisutan, obratite se za pomoć lokalnom ASUS servisnom centru. Zašto ne mogu da probudim laptop iz režima spavanja ili hibernacije? • Treba da pritisnete taster za napajanje da biste nastavili iz poslednjeg radnog stanja. • Sistem je možda potpuno iskoristio snagu baterije.
E-priručnik za notebook računar
Dodaci E-priručnik za notebook računar 85
Informacije o DVD-ROM drajvu DVD-ROM uređaj vam omogućava da pregledate i napravite sopstvene CD i DVD diskove. Možete da kupite opcioni softver za pregledanje DVD diskova radi gledanja DVD naslova. NAPOMENA: DVD-ROM uređaj je dostupan na pojedinim modelima. Informacije o regionalnoj reprodukciji Reprodukcija DVD filmova uključuje dekodiranje MPEG2 videa, digitalnog AC# audija i dekripciju CSS zaštićenog sadržaja.
Regionalne Definicije Region 1 Kanada, SAD, Teritorije SAD Region 2 Češka, Egipat, Finska, Francuska, Nemačka, Zalivske države, Mađarska, Island, Iran, Irak, Irska, Italija, Japan, Holandija, Norveška, Poljska, Portugal, Saudiska Arabija, Škotska, Južna Afrika, Španija, Švedska, Švajcarska, Sirija, Turska, UK, Grčka, Bivše Jugoslovenske republike, Slovačka Region 3 Burma, Indonezija, Južna Koreja, Malezija, Filipini, Singapur, Tajvan, Tajland, Vijetnam Region 4 Australija, Karibi (Osim teritorije SAD), Cent
Informacije o Blu-ray ROM drajvu Blu-ray ROM jedinica vam omogućava da gledate video zapise visoke definicije (HD) i diskove sa drugim formatima datoteka kao što su DVD i CD diskovi. NAPOMENA: Blu-ray ROM uređaj je dostupan na pojedinim modelima. Definicije regiona Region A Severnoameričke, centralnoameričke i južnoameričke države i njihove teritorije, Tajvan, Hong Kong, Makao, Japan, Koreja (Južna I Severna), jugoistočne azijske države i njihove teritorije.
Pregled 4. avgusta 1998, odluka Evropskog saveta u vezi sa CTR 21 je objavljena u Zvaničnom žurnalu EC. CTR 21 se primenjuje na svu terminalnu opremu bez glasa sa DTMS pozivanjem, koja planirano treba da bude povezana za analognu PSTN (javnu telefonsku mrežu). CTR 21 (Common Technical Regulation, tj.
Sledeća tabela prikazuje države koje su trenutno pod CTR 21 standardom.
Ove informacije kopirane su iz CETECOM-a i daju se bez preuzimanja odgovornosti. Za ažuriranu tabelu, pogledajte http://www.cetecom.de/technologies/ctr_21. html. 1 Nacionalni zahtevi primenjuju se samo ukoliko oprema može da koristi pulsno biranje (proizvođači mogu da izjave u uputstvu za korišćenje da je oprema namenjena samo za DTMF signaliziranje, što čini bilo kakvo dodatno testiranje besmislenim). U Holandiji, dodatno testiranje je potrebno za funkcije serijskog povezivanja i ID pozivaoca.
• Povežite opremu u električnu priključnicu koja je povezana na električno kolo različito od onog na koje je povezan resiver. • Konsultujte se sa prodavcem ili iskusnim radio/TV električarem. UPOZORENJE! Korišćenje kabla za struju zaštićenog tipa je potrebno da bi se ispunila FCC ograničenja emisija i sprečilo ometanje obližnjih radio i televizijskih prijema.Od ključne je važnosti da se koristi iskljuivo dobijeni kabl za struju. Koristite isključivo zaštićene kablove da povežete I/O uređaj za ovu opremu.
FCC Izjava o oprezu prilikom izloženosti radio frekvenciji (RF) UPOZORENJE! Upozoravamo vas da promene i modifikacije koje strana odgovorna za saglasnost nije eksplicitno odobrila mogu da ukinu vaše pravo da koristite opremu. «Proizvođač izjavljuje da je ovaj uređaj ograničen na Kanale 1 do 13 pri frekvenciji od 2,4GHz, od strane određenog firmvera konstrolisanog u SAD. » Ova oprema u saglasnosti je sa FCC RF ograničenjima za izloženost određenih za nekontrolisanu sredinu.
UL bezbednosna obaveštenja Potrebno za UL 1459 koji pokriva telekomunikacijsku (telefonsku) opremu koju treba elekrtično povezati za telekomunikacijsku mrežu koja ima operativni napon do uzemljenja koji ne prevazilazi vrh od 200V, 300V vrh-do-vrha i 105V rms, i instalira se i koristi u skladu sa Nacionalnim električnim kodom (NFPA 70).
Zahtev za električnu bezbednost Proizvodi sa oznakama za električnu struju od do 6A i koji teže više od 3Kg moraju da koriste odgovarajuće, odobrene kablove za struju, jače od ili jednake: H05VV-F, 3G, 0,75mm2 ili H05VV-F, 2G, 0,75mm2. Obaveštenja TV tjunera Beleška za CATV instalator sistema—Sistem za distribuciju kablova treba da bude uzemljen u skladu sa ANSI/NFPA 70, Nacionalnim električnim kodom (NEC), a posebno sa Odeljkom 820.
Nordic Lithium Cautions (for lithium-ion batteries) CAUTION! Danger of explosion if battery is incorrectly replaced. Replace only with the same or equivalent type recommended by the manufacturer. Dispose of used batteries according to the manufacturer’s instructions. (English) ATTENZIONE! Rischio di esplosione della batteria se sostituita in modo errato. Sostituire la batteria con un una di tipo uguale o equivalente consigliata dalla fabbrica. Non disperdere le batterie nell’ambiente.
CTR 21 odobrenje (za laptop PC-je sa ugrađenim modemom) Danish Dutch English Finnish French E-priručnik za notebook računar 97
German Greek Italian Portuguese Spanish Swedish 98 E-priručnik za notebook računar
ENERGY STAR proizvod koji ispunjava zahteve ENERGY STAR je zajednički program Agencije za zaštitu životne sredine Sjedinjenih Država i Ministarstva za energetiku Sjedinjenih Država koji svima nama pomaže da uštedimo novac i zaštitimo životnu sredinu tako što ćemo štedeti energiju i koristiti proizvode koji štede energiju. Svi ASUS proizvodi sa logom ENERGY STAR zadovoljavaju standard ENERGY STAR, a karakteristika uštede energije aktivirana je fabrički.
ASUS Recikliranje / Usluge povraćaja ASUS programi za reciklažu i povraćaj rezultat su naše posvećenosti najvišim standardima za zaštitu naše životne sredine. Mi verujemo u obezbeđivanje rešenja kako biste vi mogli da odgovorno reciklirate naše proizvode, baterije, druge komponente, kao i materijal od pakovanja. Molimo idite na http://csr.asus.com/english/Takeback.htm za detaljne informacije o recikliranju u različitim regionima.
Pojednostavljena Deklaracija o usaglašenosti EU ASUSTek Computer Inc. ovim izjavljuje da je ovaj uređaj usaglašen sa osnovnim zahtevima i drugim relevantnim odredbama Direktive 2014/53/EU. Ceo tekst Deklaracije o usaglašenosti EU dostupan je na lokaciji https://www.asus.com/support/.
E-priručnik za notebook računar