VivoMini Σειρά UN Εγχειρίδιο χρήστη
GK9802 Αναθεωρημένη έκδοση Οκτώβριος 2014 Σημείωση περί Δικαιωμάτων Πνευματικής Ιδιοκτησίας Απαγορεύεται η αναπαραγωγή οποιουδήποτε τμήματος του παρόντος εγχειριδίου συμπεριλαμβανομένων των προϊόντων και του λογισμικού που περιγράφονται σε αυτό, καθώς και η μετάδοση, αντιγραφή, αποθήκευση σε σύστημα αποθήκευσης και ανάκτησης, ή μετάφραση σε οποιαδήποτε γλώσσα υπο οποιαδήποτε μορφή και με οποιοδήποτε μέσο, εκτός από την τεκμηρίωση που φυλάσσεται από τον κάτοχο για λόγους εφεδρικούς, χωρίς την έγγραφη άδεια τ
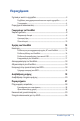
Περιεχόμενα Σχετικά με αυτό το εγχειρίδιο......................................................................... 4 Συμβάσεις που χρησιμοποιούνται στο παρόν εγχειρίδιο................... 4 Τυπογραφία......................................................................................................... 4 Περιεχόμενα συσκευασίας.............................................................................. 5 Γνωριμία με το VivoMini 7 Χαρακτηριστικά.......................................................
Σχετικά με αυτό το εγχειρίδιο Αυτό το εγχειρίδιο παρέχει πληροφορίες για τις δυνατότητες υλικού και λογισμικού του υπολογιστή, οργανωμένες στα ακόλουθα κεφάλαια: Κεφάλαιο 1: Γνωριμία με το VivoMini Στο κεφάλαιο αυτό παρουσιάζονται τα στοιχεία υλικού του VivoMini. Κεφάλαιο 2: Χρήση του VivoMini Στο κεφάλαιο αυτό παρέχονται πληροφορίες για τη χρήση του VivoMini. Κεφάλαιο 3: Αναβάθμιση μνήμης Στο κεφάλαιο αυτό παρέχονται πληροφορίες για το πώς να αναβαθμίσετε τα στοιχεία μνήμης στο VivoMini .
Περιεχόμενα συσκευασίας Η συσκευασία του VivoMini περιέχει τα ακόλουθα στοιχεία: DVD προγραμμάτων οδήγησης** VivoMini Καλώδιο τροφοδοσίας* Τεχνική τεκμηρίωση Μετασχηματιστής ισχύος AC* DisplayPort σε προσαρμογέα VGA** ΣΗΜΕΙΩΣΕΙΣ: • *Οι πραγματικές προδιαγραφές των προϊόντων και τα περιεχόμενα συσκευασίας ενδέχεται να διαφέρουν ανάλογα με το μοντέλο του VivoMini ή με την χώρα και την περιοχή. • **Η διαθεσιμότητα και η ποσότητα αυτών των στοιχείων διαφέρουν ανάλογα με τη συσκευασία του VivoMini.
VivoMini Σειρά UN
Γνωριμία με το VivoMini 1
Χαρακτηριστικά Μπροστινή πλευρά ASUS VivoMini Ένδειξη δραστηριότητας οδηγού Ο δείκτης αυτός ανάβει όταν ο VivoMini σας έχει πρόσβαση στους οδηγούς εσωτερικής μνήμης. Κουμπί τροφοδοσίας Το κουμπί λειτουργίας σάς επιτρέπει την ενεργοποίηση ή απενεργοποίηση του VivoMini. Μπορείτε επίσης να χρησιμοποιήσετε το κουμπί λειτουργίας για να θέσετε το VivoMini σε κατάσταση αδρανοποίησης.
Αριστερή όψη Υποδοχή κλειδαριάς ασφαλείας Kensington Η υποδοχή κλειδαριάς ασφαλείας Kensington σάς επιτρέπει να ασφαλίσετε το VivoMini χρησιμοποιώντας προϊόντα ασφαλείας Kensington®. Αναγνώστης Μνήμης Flash Ο ενσωματωμένος αναγνώστης καρτών μνήμης δίνει τη δυνατότητα ανάγνωσης και εγγραφής δεδομένων από και προς κάρτες SD/SDHC/SDXC/MMC στον Η/Υ. ΣΗΜΕΙΩΣΗ: Η πραγματική ταχύτητα μεταφοράς μπορεί να εξαρτάται από τις προδιαγραφές της κάρτας μνήμης. Θύρα USB 3.0 Η συγκεκριμένη θύρα Universal Serial Bus 3.
Πίσω πλευρά Ανεμιστήρες Οι οπές εξαερισμού επιτρέπουν την έξοδο θερμού αέρα από το περίβλημα του VivoMini που διαθέτετε. ΣΗΜΕΙΩΣΗ: Οι οπές εξαερισμού που βρίσκονται στο κάτω μέρος του VivoMini που διαθέτετε επιτρέπουν την είσοδο κρύου αέρα στη συσκευή σας. Προτείνεται να τοποθετήσετε το VivoMini σε επίπεδη, σταθερή επιφάνεια για βέλτιστο εξαερισμό. ΣΗΜΑΝΤΙΚΟ: Για βέλτιστη αποβολή θερμότητας και εξαερισμό, βεβαιωθείτε ότι δεν υπάρχουν εμπόδια στα ανοίγματα εξαερισμού.
Θύρα HDMI Η θύρα HDMI (High Definition Multimedia Interface) υποστηρίζει συσκευή Full-HD όπως τηλεόραση LCD ή οθόνη ώστε να μπορείτε να βλέπετε σε μεγαλύτερη εξωτερική οθόνη. Θύρα DisplayPort Το DisplayPort στέλνει ψηφιακή έξοδο υψηλής απόδοσης από το VivoMini σας σε συσκευή προβολής όπως μία LCD TV ή μία οθόνη HD. Θύρα USB 3.0 Η συγκεκριμένη θύρα Universal Serial Bus 3.0 (USB 3.0) προσφέρει ρυθμό μεταφοράς έως και 5 Gbit/s και είναι οπίσθια συμβατή με USB 2.0.
VivoMini Σειρά UN
Χρήση του VivoMini 2
Εκκίνηση Σύνδεση του μετασχηματιστή ισχύος AC στο VivoMini Για να συνδέσετε το μετασχηματιστή ισχύος AC στο VivoMini: A. Συνδέστε το καλώδιο τροφοδοσίας AC στον μετατροπέα AC-DC. B. Συνδέστε το τροφοδοτικό AC σε μια πρίζα ρεύματος 100V~240V. C. Εισάγετε τον συνδετήρα ρεύματος DC στην είσοδο ρεύματος (DC) του VivoMini σας. ΣΗΜΕΙΩΣΗ: Ο προσαρμογέας ισχύος ενδέχεται να διαφέρει σε εμφάνιση, ανάλογα με τα μοντέλα και την περιοχή σας.
ΣΗΜΑΝΤΙΚΟ! • Συνιστάται ιδιαιτέρως να χρησιμοποιείτε μόνο το μετασχηματιστή ισχύος AC και το καλώδιο που παρέχονται με το VivoMini. • Συνιστάται ιδιαιτέρως να χρησιμοποιείτε γειωμένη πρίζα τοίχου όταν χρησιμοποιείτε το VivoMini. • Η πρίζα υποδοχής πρέπει να είναι εύκολα προσβάσιμη και κοντά στο VivoMini σας. • Για να αποσυνδέσετε το VivoMini σας από την κύρια παροχή ρεύματός του, βγάλτε το VivoMini από την πρίζα ισχύος.
Σύνδεση οθόνης στο VivoMini Μπορείτε να συνδέσετε μια οθόνη ή έναν προβολέα στο VivoMini που διαθέτει τους ακόλουθους ακροδέκτες: • Ακροδέκτης HDMI • Ακροδέκτης DisplayPort • Ακροδέκτης VGA (χρησιμοποιείστε τον με προσαρμογέα DisplayPort σε VGA ή προσαρμογέα HDMI σε VGA) • Ακροδέκτης DVI (χρησιμοποιείστε τον με προσαρμογέα DisplayPort σε DVI ή προσαρμογέα HDMI σε DVI) ΣΗΜΕΙΩΣΗ: Το DisplayPort σε προσαρμογέα DVI, HDMI σε DVI, DisplayPort σε VGA, ή ο προσαρμογέας HDMI σε VGA πωλείται ξεχωριστά.
Σύνδεση πληκτρολογίου ή ποντικιού USB Μπορείτε να συνδέσετε γενικά οποιοδήποτε πληκτρολόγιο και ποντίκι USB στο VivoMini. Μπορείτε επίσης να συνδέσετε ένα USB dongle για σετ ασύρματου πληκτρολογίου με ποντίκι. Για να συνδέσετε ένα πληκτρολόγιο και ποντίκι στο VivoMini: Συνδέστε το καλώδιο USB από το πληκτρολόγιο και το ποντίκι σε οποιαδήποτε από τις θύρες USB 2.0 στο VivoMini. ΣΗΜΕΙΩΣΗ: Συνιστάται να χρησιμοποιείτε τις θύρες USB στην πίσω πλευρά του VivoMini όταν συνδέετε ενσύρματο πληκτρολόγιο και ποντίκι.
Απενεργοποίηση του VivoMini Αν το VivoMini δεν ανταποκρίνεται, πατήστε και κρατήστε πατημένο το κουμπί λειτουργίας για τουλάχιστον τέσσερα (4) δευτερόλεπτα μέχρι να απενεργοποιηθεί το VivoMini. Αδρανοποίηση του VivoMini Για να θέσετε το VivoMini σε κατάσταση αδρανοποίησης, πατήστε μια φορά το κουμπί λειτουργίας. Εισαγωγή στην εγκατάσταση του BIOS Το BIOS (Basic Input and Output System) αποθηκεύει τις ρυθμίσεις υλικού του συστήματος που είναι απαραίτητες για την εκκίνηση του συστήματος στο VivoMini.
Αναβάθμιση μνήμης 3
Αναβάθμιση στοιχείων μνήμης Το VivoMini παρέχεται με δύο υποδοχές μνήμης SO-DIMM που σας δίνουν τη δυνατότητα να εγκαταστήσετε 2 GB, 4 GB, ή 8 GB μη αποθηκευμένων στην προσωρινή μνήμη με μη-ECC 1,35 V DDR3 SODIMM (204 ακίδες), για μέγιστη μνήμη 16 GB. ΣΗΜΑΝΤΙΚΟ! • Συνίσταται να αντικαταστήσετε τις μονάδες μνήμης υπό επαγγελματική επίβλεψη. Για περαιτέρω βοήθεια επισκεφθείτε το Κέντρο Σέρβις της ASUS. • Ανατρέξτε στη διεύθυνση http://www.asus.com για τον κατάλογο συμβατών DIMM.
3. Χρησιμοποιώντας κατσαβίδι με επίπεδη κεφαλή ή ισιωμένο συνδετήρα, αφαιρέστε το ελαστικό πέλμα από την κάτω πλευρά και κατόπιν βάλτε τα στο πλάι. ΣΗΜΑΝΤΙΚΟ! Σημειώστε τον προσανατολισμό του ελαστικού πέλματος με την οπή στο κάλυμμα και τον αριθμό που έχει εκτυπωθεί κάτω από κάθε ελαστικό πέλμα. Υποδηλώνουν την ακολουθία που πρέπει να τηρήσετε κατά την αφαίρεση του ελαστικού πέλματος από την υποδοχή του. Ανατρέξτε στην ακόλουθη απεικόνιση για λεπτομέρειες.
4. Αφαιρέστε τις τέσσερις βίδες ασφαλίζοντας το κάλυμμα. 5. Πάρτε μία βίδα από αυτές που είχατε αφαιρέσει προηγουμένως και κατόπιν τοποθετήστε την στην οπή. Αφήστε ένα μέρος από την κεφαλή της βίδας το οποίο θα ήταν αρκετό για να το κρατήσετε.
6. Κρατήστε τη βίδα και κατόπιν αφαιρέστε απαλά το κάλυμμα από την κάτω πλευρά του VivoMini. Χρησιμοποιήστε το άλλο ελεύθερο χέρι σας για να κρατήσετε το VivoMini στη θέση του.
7. Ευθυγραμμίστε και εισαγάγετε το στοιχείο μνήμης στην υποδοχή (A) και πιέστε το προς τα κάτω (B), μέχρι να τοποθετηθεί με ασφάλεια στη θέση του. Επαναλάβετε τα ίδια βήματα για να εγκαταστήσετε το άλλο στοιχείο μνήμης. ΣΗΜΑΝΤΙΚΟ! Εγκαθιστάτε πάντα πρώτα στη χαμηλότερη υποδοχή. 8.
9. Συνάψτε ξανά τις βίδες για να τοποθετήσετε με ασφάλεια το κάλυμμα πίσω στην κάτω πλευρά του βασικού πλαισίου. 10. Αντικαταστήστε το ελαστικό πέλμα πίσω σε κάθε οπή βίδας. ΣΗΜΑΝΤΙΚΟ! Σημειώστε τον προσανατολισμό του ελαστικού πέλματος με την οπή στο κάλυμμα και τον αριθμό που έχει εκτυπωθεί κάτω από κάθε ελαστικό πέλμα. Υποδηλώνουν την ακολουθία που πρέπει να τηρήσετε κατά την αντικατάσταση του ελαστικού πέλματος πίσω από κάθε υποδοχή. Ανατρέξτε στην ακόλουθη απεικόνιση για λεπτομέρειες.
VivoMini Σειρά UN
Παραρτήματα
Πληροφορίες ασφαλείας Το VivoMini έχει σχεδιαστεί και δοκιμαστεί ώστε να ικανοποιεί τα πιο εξελιγμένα πρότυπα ασφαλείας εξοπλισμού πληροφορικής. Παρόλα αυτά, για να διασφαλίσετε την ασφάλεια σας, είναι σημαντικό να διαβάσετε τις ακόλουθες οδηγίες. Εγκατάσταση του συστήματος • Διαβάστε και ακολουθήστε όλες τις οδηγίες που περιλαμβάνονται στην παρούσα τεκμηρίωση πριν ξεκινήσετε τη λειτουργία του συστήματός σας. • Μη χρησιμοποιείτε το προϊόν αυτό κοντά σε νερό ή σε πηγή θερμότητας.
Προειδοποίηση μπαταρίας λιθίου μετάλλου (LithiumMetal) ΠΡΟΣΟΧΗ: Κίνδυνος έκρηξης σε περίπτωση εσφαλμένης αντικατάστασης της μπαταρίας. Η μπαταρία πρέπει να αντικαθίσται μόνο με τον ίδιο ή αντίστοιχο τύπο που συνιστάται από τον κατασκευαστή. Να αποθέτετε τις χρησιμοποιημένες μπαταρίες ως απορρίμματα σύμφωνα με τις οδηγίες του κατασκευαστή.
Κανονιστικές γνωστοποιήσεις REACH Σε συμμόρφωση με το κανονιστικό πλαίσιο REACH (Registration, Evaluation, Authorisation, and Restriction of Chemicals Καταχώριση, Αξιολόγηση, Αδειοδότηση και Απαγόρευση χημικών ουσιών), δημοσιεύσαμε τις χημικές ουσίες που υπάρχουν στα προϊόντα μας στον ιστότοπο ASUS REACH στη διεύθυνση http://csr. asus.com/english/REACH.
συγκεκριμένες εγκαταστάσεις. Εάν η συσκευή αυτή προκαλέσει παρεμβολές στο σήμα της τηλεόρασης ή του ραδιόφωνου, γεγονός που μπορεί να διαπιστωθεί ενεργοποιώντας και ύστερα απενεργοποιώντας τον εξοπλισμό, ο χρήστης οφείλει να αποκαταστήσει την παρεμβολή, με κάποιον από τους εξής τρόπους: • Ρυθμίζοντας ή τοποθετώντας την κεραία λήψης σε άλλη θέση. • Αυξάνοντας την απόσταση μεταξύ της συσκευής και του τηλεοπτικού ή ραδιοφωνικού δέκτη.
Ζώνες Ασύρματων Συχνοτήτων μόνο για τη Γαλλία Μερικές περιοχές της Γαλλίας διαθέτουν περιορισμένη ζώνη συχνοτήτων. Η μέγιστη επιτρεπόμενη ισχύς σε εσωτερικό χώρο στη χειρότερη περίπτωση είναι: • 10mW για ολόκληρη τη ζώνη 2,4 GHz (2400 MHz–2483,5 MHz) • 100mW για συχνότητες μεταξύ 2446,5 MHz και 2483,5 MHz ΣΗΜΕΙΩΣΗ: Τα Κανάλια από 10 έως 13 λειτουργούν αποκλειστικά στη ζώνη από 2446,6 MHz έως 2483,5 MHz.
Η απαίτηση αυτή πιθανόν να αλλάζει με την πάροδο του χρόνου, επιτρέποντάς σας τη χρήση της ασύρματης LAN κάρτας σας σε περισσότερες περιοχές της Γαλλίας. Ελέγξτε με το ART για την πιο πρόσφατη πληροφορία (www.art-telecom.fr) ΣΗΜΕΙΩΣΗ: Η κάρτα σας WLAN εκπέμπει λιγότερο από 100mW, αλλά περισσότερο 10mW.
Σήμανση CE Σήμανση CE για συσκευές χωρίς ασύρματο τοπικό δίκτυο/Bluetooth Η έκδοση αυτής της συσκευής που αποστέλλεται από το εργοστάσιο συμμορφώνεται με τις απαιτήσεις των οδηγιών της ΕΕ 2004/108/ΕΚ “Ηλεκτρομαγνητική συμβατότητα” και 2006/95/ΕΚ “Οδηγία χαμηλής τάσης”.
Σύμμορφο προϊόν ENERGY STAR Το ENERGY STAR αποτελεί κοινό πρόγραμμα της Υπηρεσίας Περιβαλλοντικής Προστασίας Η.Π.Α. και της Διεύθυνσης Ενέργειας Η.Π.Α. το ο οποίο μας βοηθά να εξοικονομούμε χρήματα και να προστατεύουμε το περιβάλλον μέσω ενεργειακά αποδοτικών προϊόντων και πρακτικών. Όλα τα προϊόντα ASUS με το λογότυπο ENERGY STAR είναι σύμμορφα με το πρότυπο ENERGY STAR και η ιδιότητα διαχείρισης ισχύος είναι ενεργοποιημένη ως προεπιλογή.
Στοιχεία επικοινωνίας με την ASUS ASUSTeK COMPUTER INC. Διεύθυνση 15 Li-Te Road, Peitou, Taipei, Taiwan 11259 Τηλέφωνο +886-2-2894-3447 Φαξ +886-2-2890-7798 E-mail info@asus.com.tw Τοποθεσία Web http://www.asus.com Τεχνική υποστήριξη Τηλέφωνο +86-21-38429911 Φαξ +86-21-58668722, εσωτ. 9101# Υποστήριξη μέσω διαδικτύου http://support.asus.com/techserv/techserv.
EC Declaration of Conformity We, the undersigned, Manufacturer: ASUSTeK COMPUTER INC. Address: 4F, No. 150, LI-TE Rd., PEITOU, TAIPEI 112, TAIWAN Authorized representative in Europe: ASUS COMPUTER GmbH Address, City: HARKORT STR.
DECLARATION OF CONFORMITY Per FCC Part 2 Section 2. 1077(a) Asus Computer International Responsible Party Name: 800 Corporate Way, Fremont, CA 94539. Address: Phone/Fax No: (510)739-3777/(510)608-4555 hereby declares that the product Product Name : VivoMini Model Number : UN62,UN42 Conforms to the following specifications: FCC Part 15, Subpart B, Unintentional Radiators Supplementary Information: This device complies with part 15 of the FCC Rules.