ASUS Desktop PC Manuale utente M32CD / V32CD / L32CD
I22415 Edizione riveduta e corretta V5 Ottobre 2023 INFORMAZIONI SUL COPYRIGHT Nessuna parte di questo manuale, compresi i prodotti e i software in esso descritti, può essere riprodotta, trasmessa, trascritta, archiviata in un sistema di recupero o tradotta in alcuna lingua, in alcuna forma e in alcun modo, fatta eccezione per la documentazione conservata dall’acquirente a scopi di backup, senza l’espressa autorizzazione scritta di ASUSTeK COMPUTER INC. (“ASUS”).
La Garanzia non è valida per l’assistenza tecnica o il supporto per l’utilizzo del Prodotto in merito all’utilizzo dell’hardware o del software. L’assistenza e il supporto disponibili (se previsti) nonchè le spese e gli altri termini relativi all’assistenza e al supporto (se previsti) verranno specificati nella documentazione destinata al cliente fornita a corredo del prodotto.
Indice Comunicazioni...........................................................................................................................................5 Informazioni sulla sicurezza..................................................................................................................8 Note e messaggi del manuale.............................................................................................................9 Dove trovare ulteriori informazioni..................................
Comunicazioni Servizio di ritiro e riciclaggio ASUS Il programma di ritiro e riciclaggio dei prodotti ASUS deriva dal costante impegno aziendale a raggiungere i più elevati standard di protezione ambientale. ASUS crede, infatti, di poter fornire soluzioni in grado di riciclare in modo responsabile non soltanto i prodotti, le batterie e le altre componenti elettroniche, ma anche i materiali utilizzati per l'imballaggio.
Dichiarazione di conformità IC per il Canada Conforme alle specifiche canadesi ICES-003 Classe B. Il presente dispositivo è conforme allo standard RSS210 Industry Canada. Questo dispositivo Classe B soddisfa tutti i requisiti delle normative canadesi relative ai dispositivi che causano interferenze. Il presente dispositivo è conforme agli standard RSS esenti da licenza di Industry Canada.
Avvisi sulle apparecchiature RF CE: Dichiarazione di conformità CE L'apparecchiatura è conforme ai requisiti di esposizione RF 1999/519/CE, raccomandazioni del Consiglio del 12 luglio 1999, relativi alla limitazione dell'esposizione della popolazione ai campi elettromagnetici (0 - 300 Ghz). Questo dispositivo wireless è conforme alla direttiva R&TTE.
Informazioni sulla sicurezza Scollegate il cavo d'alimentazione prima di effettuare la pulizia del vostro Desktop PC. Utilizzate una spugna pulita, o un panno antistatico, bagnati con una soluzione composta da un detergente non abrasivo e alcune gocce di acqua tiepida, quindi asciugate con un panno asciutto. • • • • • • • • • • • • • NON disponete su superfici stabili o irregolari. Contattate il servizio clienti se lo chassis è stato danneggiato. NON esponete allo sporco o ad ambienti polverosi.
Note e messaggi del manuale Per assicurarvi di portare a termine le varie operazioni nel modo corretto vi consigliamo di prendere nota dei seguenti simboli che saranno usati in questo manuale. ATTENZIONE/PERICOLO: Messaggio contenente informazioni utili per prevenire lesioni a voi stessi durante il completamento di un'operazione. ATTENZIONE: Messaggio contenente informazioni utili per prevenire danni alle componenti durante il completamento di un'operazione.
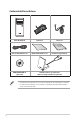
Contenuto della confezione ASUS Desktop PC Tastiera x1 Mouse x1 Installation Guide Cavo di alimentazione x1 DVD/SDVD/RDVD x1 (opzionale) Guida all'installazione x1 Certificato di garanzia x1 Antenna a dipolo x1 (opzionale) / Antenna integrata PIFA x 2 (opzionale) • Contattate il vostro rivenditore nel caso in cui uno di questi articoli sia danneggiato o mancante. • Le componenti sono illustrate a scopo indicativo. Le specifiche reali del prodotto potrebbero variare a seconda del modello.
Capitolo 1 Per iniziare Benvenuti! Vi ringraziamo per aver acquistato l'ASUS Desktop PC! L'ASUS Desktop PC offre prestazioni all'avanguardia, affidabilità senza compromessi e utility a misura d'uomo. Tutti questi valori sono racchiusi in un sistema incredibilmente moderno ed elegante. Leggete il certificato di garanzia ASUS prima di installare il vostro Desktop PC. Conoscete il vostro computer Le immagini hanno scopo puramente illustrativo.
Pannello anteriore ITALIANO Porte USB 3.1 Gen 1. Le porte USB (Universal Serial Bus) 3.1 Gen 1 forniscono connessione con i dispositivi USB 3.1 come mouse, stampanti, scanner, videocamere, PDA e altri dispositivi compatibili. • NON collegate tastiere o mouse alle porte USB 3.1 Gen 1 durante l'installazione del sistema operativo Windows®. • A causa delle limitazioni del controller USB 3.1 Gen 1 i dispositivi USB 3.
ITALIANO Pannello posteriore Interruttore di selezione voltaggio. Agite sull'interruttore per selezionare il voltaggio appropriato in ingresso. Questo interruttore potrebbe essere disponibile solamente su alcuni modelli. Porta di alimentazione. Inserite il cavo di alimentazione in questa porta. VALORI NOMINALI: • 110~120/220~240Vac, 6.0/3.0A, 60/50Hz • 110~120Vac, 6.0A, 60/50Hz • 220~240Vac, 3.0A, 50Hz • 230Vac, 3.0A, 50Hz Porte USB 2.0. Le porte USB (Universal Serial Bus) 2.
ITALIANO • NON collegate tastiere o mouse alle porte USB 3.1 Gen 1 durante l'installazione del sistema operativo Windows®. • A causa delle limitazioni del controller USB 3.1 Gen 1 i dispositivi USB 3.1 Gen 1 possono essere utilizzati soltanto in ambiente Windows® e dopo l'installazione dei driver USB 3.1 Gen 1. • I dispositivi USB 3.1 Gen 1 possono essere utilizzati unicamente per archiviazione dati. • Per ottimizzare le prestazioni collegate i vostri dispositivi USB 3.1 Gen 1 alle porte USB 3.1 Gen 1.
ITALIANO Scheda video ASUS (su modelli selezionati). Le uscite di questa scheda video opzionale ASUS possono variare a seconda del modello. Porta LAN (RJ-45). Questa porta vi permette di stabilire una connessione Gigabit ad una rete locale (LAN) tramite un hub di rete.
Installazione del computer ITALIANO Questa sezione vi guiderà nel collegamento dei principali dispositivi hardware come un monitor esterno, una tastiera, un mouse e il cavo di alimentazione al computer. Collegamento di un display esterno Utilizzare la scheda video ASUS (su modelli selezionati) Collegate il vostro monitor all'uscita video della scheda video ASUS dedicata. Per collegare un monitor esterno tramite la scheda video ASUS: 1. Collegate il vostro monitor all'uscita video della scheda video ASUS.
Utilizzare le uscite della scheda video integrata Collegate il vostro monitor all'uscita della scheda video. ITALIANO Per collegare un monitor esterno alle uscite della scheda video: 1. Collegate un monitor VGA alla porta VGA, oppure un monitor DVI-D alla porta DVI-D o un monitor HDMI™ alla porta HDMI™ del pannello posteriore del vostro computer. 2. Collegate il monitor al vostro Desktop PC.
Collegamento di una tastiera USB e di un mouse USB ITALIANO Collegate una tastiera USB e un mouse USB alle porte USB del pannello posteriore del vostro computer. ` Collegate una tastiera USB e un mouse USB alle porte USB 2.0. Collegamento del cavo di alimentazione Collegate un'estremità del cavo di alimentazione al pannello posteriore e l'altra estremità ad una sorgente di alimentazione.
Accensione del PC ITALIANO Questa sezione indica come accendere il computer dopo aver effettuato una corretta installazione. Accensione del PC Per accendere il computer: 1. Accendete il monitor. 2. Premete il pulsante di accensione/spegnimento. 3. Aspettate fino a quando il sistema operativo non si è caricato completamente.
ITALIANO 20 Capitolo 1: Per iniziare
Capitolo 2 ITALIANO Collegamento di dispositivi al vostro computer Collegamento di un dispositivo di archiviazione USB Questo Desktop PC dispone di porte USB 3.1 Gen 1 nel pannello anteriore e USB 3.1 Gen 1 /2.0 nel pannello posteriore. Le porte USB vi permettono di collegare dispositivi USB, come i dispositivi di archiviazione. Per collegare un dispositivo di archiviazione USB: • Inserite un dispositivo USB nella porta USB del vostro computer.
Collegamento di microfono e altoparlanti ITALIANO Questo Desktop PC è dotato di porte per il microfono e per gli altoparlanti sia sul pannello anteriore, sia sul pannello posteriore. Le porte di uscita audio collocate sul pannello posteriore vi permettono di collegare altoparlanti stereo in configurazione 2.1, 4.1 e 5.1. Collegamento di cuffie e microfono Collegamento di altoparlanti in configurazione 2.
ITALIANO Collegamento di altoparlanti in configurazione 4.1 Collegamento di altoparlanti in configurazione 5.
Collegamento di altoparlanti in configurazione 7.
Collegamento di monitor multipli ITALIANO Il vostro Desktop PC potrebbe essere dotato di porte VGA, HDMI™ o DVI per permettervi di collegare schermi multipli. Collegate i vostri monitor alle uscite della scheda video se una scheda video è installata nel vostro computer. Configurazione schermi multipli Quando usate monitor multipli avete la possibilità di impostare la modalità di visualizzazione.
Collegamento di una TV ad alta definizione ITALIANO Come collegare una TV ad alta definizione (HDTV) alla porta HDMI™ del vostro Desktop PC. • È necessario un cavo HDMI™ per collegare la TV ad alta definizione al computer. Il cavo HDMI™ è acquistabile separatamente. • Per ottenere le migliori prestazioni assicuratevi che la lunghezza del vostro cavo HDMI™ sia inferiore a 15m.
Capitolo 3 ITALIANO Utilizzo del computer Postura corretta durante l'utilizzo del Desktop PC Quando state usando il vostro Desktop PC, se mantenete la posizione corretta, potete evitare di sforzare i vostri polsi, le mani, le articolazioni o i muscoli. Questa sezione vi fornisce consigli su come evitare scomodità fisica e traumi dovuti all'uso, anche intenso, del vostro Desktop PC.
Usare il lettore di memory card ITALIANO Videocamere digitali e altri dispositivi di imaging digitali usano memory card per archiviare fotografie o altri file multimediali. Il lettore di schede di memoria integrato permette al vostro Desktop PC di leggere e scrivere dati sulle schede di memoria di formati diversi. Per usare la memory card: 1. Inserite la memory card nello slot. • Una memory card può essere inserita in un verso solo.
ITALIANO Uso del lettore ottico (opzionale) Inserimento di un disco ottico Per inserire un disco ottico: 1. Quando il sistema è acceso premete il tasto di espulsione elettronica nella parte bassa della cover del drive per aprire il vassoio. 2. Posizionate il disco con l'etichetta rivolta verso la parte opposta al vassoio del lettore ottico. 3. Spingete il vassoio delicatamente per chiudere il lettore ottico. 4. Selezionate un'opzione dalla finestra di AutoPlay per accedere ai vostri file.
ITALIANO 30 Capitolo 3: Utilizzo del computer
Capitolo 4 ITALIANO Connessione a Internet Connessione a reti cablate Usate un cavo di rete (RJ-45) per connettere il vostro PC ad un modem ADSL o ad una rete locale (LAN). Connessione tramite modem ADSL Per connettervi tramite modem ADSL: 1. Impostate correttamente il vostro modem ADSL. Fate riferimento alla documentazione fornita con il vostro modem ADSL. 2. Collegate un'estremità di un cavo RJ-45 alla porta LAN del pannello posteriore del vostro Desktop PC e l'altra estremità al modem ADSL.
Connessione tramite rete locale (LAN) ITALIANO Per connettervi tramite una rete locale (LAN): 1. Collegate un'estremità di un cavo RJ-45 alla porta LAN del pannello posteriore del vostro Desktop PC e l'altra estremità alla rete LAN. LAN RJ-45 cable 2. 3. Accendete il PC. Configurate le impostazioni necessarie per la connessione ad Internet.
Configurazione di una connessione di rete con indirizzo IP dinamico/PPPoE Per configurare una connessione di rete con IP dinamico/PPPoE: 1. Avviate il Centro connessioni di rete e condivisione in uno di questi due modi: ITALIANO Dalla barra delle applicazioni cliccate con il tasto destro su , poi selezionate Apri Centro connessioni di rete e condivisione. b) Dal menu di Start cliccate su Impostazioni > Rete e Internet > Ethernet > Centro connessioni di rete e condivisione.
Tornate alla finestra Centro connessioni di rete e condivisione e selezionate Configura nuova connessione o rete. 8. Selezionate Connessione a Internet e poi Avanti. 9. Selezionate Banda larga (PPPoE) e cliccate su Avanti. Seguite le istruzioni sullo schermo per completare il processo di configurazione. ITALIANO 7. 10. Configurazione di una connessione di rete con indirizzo IP statico Per configurare una connessione di rete con indirizzo IP statico: 1.
Connessione wireless (su modelli selezionati) ITALIANO Connettete il vostro computer ad Internet mediante una connessione senza fili. Per stabilire una connessione wireless è necessario connettersi ad un access point wireless (AP). Wireless AP Modem • Per aumentare la portata e la sensibilità del segnale radio wireless collegate le antenne esterne ai connettori per le antenne sulla scheda ASUS WLAN sul retro del vostro Desktop PC.
ITALIANO 36 Capitolo 4: Connessione a Internet
Capitolo 5 ITALIANO Risoluzione dei problemi Risoluzione dei problemi Questo capitolo presenta alcuni problemi comuni che potreste incontrare e le possibili soluzioni. ? Il mio computer non si accende e il LED di alimentazione non si illumina. • • • ? Il mio computer non risponde. • • ? Controllate che i cavi del vostro computer siano collegati correttamente. Verificate che la presa a muro sia funzionante. Assicuratevi che l'interruttore della PSU (alimentatore) sia posizionato su ON.
? I tasti freccia o il tastierino numerico non funzionano. ITALIANO Assicuratevi che il tasto Bloc Num sia impostato su ON (il LED relativo sulla tastiera è acceso). Quando il tasto Bloc Num è impostato su ON i tasti del tastierino numerico sono usati solamente per l'inserimento di numeri. Impostate il Bloc Num su OFF se volete usare i tasti freccia del tastierino numerico. ? Nessuna immagine visualizzata sul monitor. • • • • • • ? Quando usate monitor multipli solamente uno visualizza le immagini.
? Voglio ripristinare o annullare i cambiamenti alle impostazioni del mio computer senza toccare i miei file personali e i miei dati. ? L'immagine su una TV ad alta definizione (HD) è distorta. • ? • • • • Assicuratevi di aver collegato gli altoparlanti all'uscita line out del pannello frontale o del pannello posteriore. Controllate che i vostri altoparlanti siano collegati ad una fonte di alimentazione e che siano accesi. Regolate il volume dei vostri altoparlanti.
Alimentazione ITALIANO Problema Assenza di alimentazione (l'indicatore di alimentazione è spento) Possibile causa Azione Voltaggio non corretto • Impostate il voltaggio del computer sui valori previsti dall'area in cui vi trovate. • Regolate le impostazioni del voltaggio. Assicuratevi che il cavo di alimentazione sia scollegato dalla presa di corrente. Computer spento. Il cavo di alimentazione non è collegato correttamente.
Problema Possibile causa Azione Il cavo LAN non è collegato. Collegate il cavo LAN al vostro computer. Problemi al cavo LAN Impossibile connettersi a Internet Il vostro computer non è collegato correttamente ad un router o ad un hub. Impostazioni di rete ITALIANO LAN Assicuratevi che il LED LAN sia acceso. Se non è acceso provate con un altro cavo LAN. Se ancora non funziona contattate il centro assistenza ASUS.
Sistema ITALIANO Problema Il sistema è troppo lento Spesso il sistema si blocca o non risponde. 42 Possibile causa Azione Troppi programmi in esecuzione. Chiudete alcuni dei programmi aperti. Attacco di virus •U sate un software anti-virus per rilevare i virus e rimuovere l'infezione. • Reinstallate il sistema operativo. Problema all'hard disk • I nviate l'hard disk danneggiato al centro assistenza ASUS per la riparazione. • Sostituitelo con un nuovo hard disk.
Problema Troppo rumore subito dopo aver acceso il computer. Possibile causa Azione Il computer è in fase di avvio. È normale. Quando si accende il computer la ventola gira alla massima velocità. La velocità della ventola diminuisce dopo aver avviato il sistema operativo. Le impostazioni del BIOS sono state modificate. Ripristinate le impostazioni predefinite del BIOS. Versione del BIOS obsoleta La ventola di raffreddamento della CPU è stata sostituita.
ITALIANO 44 Capitolo 5: Risoluzione dei problemi
ASUS Desktop PC Windows® 10 Manuale utente Appendice Windows® 10 Manuale utente I10435 Prima edizione Maggio 2015 Copyright © ASUSTeK Computer Inc.
ITALIANO
Procedura di inizializzazione ITALIANO Quando avviate il computer per la prima volta apparirà una serie di schermate che vi guideranno nella configurazione delle impostazioni di base del sistema operativo Windows® 10. Per avviare il Desktop PC per la prima volta: 1. Premete il pulsante di accensione/spegnimento del Desktop PC. Attendete alcuni minuti sino alla comparsa della schermata di configurazione. 2.
Usare l'interfaccia utente Windows® 10 ITALIANO L'interfaccia utente Windows® 10 include il menu di Start e la schermata di Start con disposizione a riquadri. Inoltre include le seguenti funzionalità che potete usare mentre state lavorando con il vostro Desktop PC. Cliccate sul vostro profilo per cambiare la foto, disconnettervi o bloccare il Desktop PC.
Schermata di Start ITALIANO La schermata di Start, che appare assieme al menu di Start, aiuta ad organizzare le app che vi servono in un'unica soluzione. Le applicazioni della schermata Start sono visualizzate in una disposizione a riquadri per un comodo accesso. Alcune applicazioni richiedono l'inserimento dell'account Microsoft per lavorare al pieno delle funzionalità.
Barra delle applicazioni ITALIANO Windows® 10 è dotato della barra delle applicazioni standard, che visualizza tutte le tue app correnti, o oggetti, in esecuzione in background. Rimuovere app dalla barra delle applicazioni 1. Dalla schermata di Start, o dalla barra delle applicazioni, cliccate con il tasto destro sull'app che volete rimuovere. 2. Cliccate su Rimuovi da Start o Rimuovi dalla barra delle applicazioni per rimuovere l'app dalla schermata di Start o dalla barra delle applicazioni.
Funzione Snap ITALIANO La funzione Snap visualizza quattro app, o più, sullo schermo, permettendovi di lavorare e passare rapidamente tra di esse. Utilizzo di Snap Per attivare e utilizzare la funzione Snap utilizzate il mouse o la tastiera del vostro Desktop PC. Usando il mouse a) Avviate un'app quindi spostatela su un angolo dello schermo per attivare Snap. b) Fate lo stesso con un'altra app e mettetela in una nuova posizione. Usando la tastiera a) Avviate un'app, premete volete posizionare l'app.
Scorciatoie da tastiera ITALIANO Tramite la tastiera è inoltre possibile usare le seguenti combinazioni di tasti che vi aiuteranno a lanciare applicazioni e a navigare in Windows® 10.
Avvia la lente d'ingrandimento per ingrandire l'immagine sullo schermo. + <+> + ITALIANO Rimpicciolisce l'immagine sullo schermo. + <-> Apre le impostazioni dell'assistente vocale. Rimozione completa e reinstallazione di Windows® 10 Il ripristino del PC alle impostazioni di fabbrica può essere fatto mediante l'opzione Rimuovi tutto nella schermata Reimposta il PC. Per utilizzare questa opzione fate riferimento alle istruzioni qui di seguito.