
Instruction Manual


5-28 Chapter 5: RAID conguration
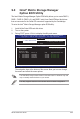
2. Enter a name for the recovery set and press <Enter>.
3. When the
RAID Level
item is selected, press the up/down arrow key to select
Recovery
, and then press <Enter>.
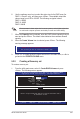
4. When the
Disks
item is selected, press <Enter> to select the hard disk drives
you want to include in the recovery set. The
SELECT DISKS
screen appears.
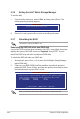
5. Use the up/down arrow key to select a drive, press <TAB> to select a Master
disk, and then press <SPACE> to select a Recovery disk. A small triangle
marks the selected drive. Press <Enter> after completing your selection.
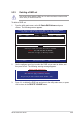
6. When the
Sync
item is selected, use the up/down arrow key to select a sync
option that you want and press <Enter>.
7. When the
Create Volume
item is selected, press <Enter>. The following
warning message appears.
[ SELECT DISKS ]
Port Drive Model Serial # Size Status
0 ST3160812AS 9LS0HJA4 149.0GB Non-RAID Disk
1 ST3160812AS 9LS0F4HL 149.0GB Non-RAID Disk
2 ST3160812AS 3LS0JYL8 149.0GB Non-RAID Disk
3 ST3160812AS 9LS0BJ5H 149.0GB Non-RAID Disk
Select 1 Master and 1 Recovery disk to create volume.
[
↑↓
]-Prev/Next [TAB]-(M)aster [SPACE]-(R)ecovery [ENTER]-Done
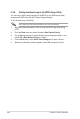
WARNING: ALL DATA ON SELECTED DISKS WILL BE LOST.
Are you sure you want to create this volume? (Y/N):
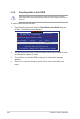
8. Press <Y> to create the recovery set and return to the main menu, or <N> to
go back to the
CREATE VOLUME
menu.
If a recovery set is created, you cannot add more RAID sets even when you
have more non-RAID disks installed in your system.