ZE552KL User Guide
E11530 July 2016 First Edition Care and safety Guidelines Road safety comes first. We strongly recommend not to use your device when driving or operating any type of vehicle. This device should only be used in environments with ambient temperatures between 0°C (32°F) and 35°C (95°F). Turn off your device in restricted areas where the use of mobile devices is prohibited.
Proper disposal Risk of explosion if battery is replaced by an incorrect type. Dispose of used batteries according to the instructions. DO NOT throw the battery in municipal waste. The symbol of the crossed out wheeled bin indicates that the battery should not be placed in municipal waste. DO NOT throw this product in municipal waste. This product has been designed to enable proper reuse of parts and recycling.
Contents 1 Basics Welcome!.................................................................................................................... 7 Get your ASUS Phone ready!.............................................................................................................. 8 Starting for the first time...................................................................................................................16 Using the touchscreen.............................................................
Accessing Cloud Storage...................................................................................................................43 The Cloud.....................................................................................................................44 ASUS WebStorage....................................................................................................44 ZenFone Care...............................................................................................................
7 Staying connected Mobile network............................................................................................................88 Enabling the mobile network.................................................................................88 Wi-Fi..............................................................................................................................88 Enabling Wi-Fi..........................................................................................................
1 Basics Basics 1 Welcome! Explore the intuitive simplicity of ASUS Zen UI 3.0! ASUS Zen UI 3.0 is a charming and intuitive interface exclusively for ASUS Phones. It provides you with special apps, which are integrated in or with other apps, to fit your unique individual needs and make your life easier while letting you have fun with your ASUS Phone. Camera With PixelMaster technology, capture those precious moments in vivid and high-quality photos and videos.
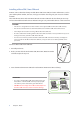
Get your ASUS Phone ready! Parts and features Take a hold of your device and have it running in a jiffy.
Installing a Micro SIM / Nano SIM card A Micro / Nano subscriber identity module (Micro SIM / Nano SIM) card stores information, such as your mobile phone number, contacts, messages and other data that gives you access to a mobile network. Your ASUS Phone comes with one Micro SIM and one Nano SIM card slot that allow you to set up and use two mobile network services without having to carry two mobile devices at the same time.
4. Push the tray to close it. IMPORTANT! Both Micro SIM and Nano SIM card slots support 3G WCDMA/ 4G LTE network band. But only one SIM card can connect to 4G service at a time. CAUTION: Do not use sharp tools or solvent on your device to avoid scratches on it. Removing a Micro SIM / Nano SIM card CAUTION: Be extra careful when handling a Micro SIM / Nano SIM card. ASUS is not responsible for any loss or damage incurred to your Micro SIM / Nano SIM card. To remove a Micro SIM / Nano SIM card: 1.
Installing a memory card Your ASUS Phone supports a MicroSD™ and MicroSDXC ™ memory card with up to 2TB capacity. NOTE: Some memory cards may not be compatible with your ASUS Phone. Ensure that you use only compatible memory cards to prevent loss of data, damage to your device or memory card, or both. CAUTION: Be extra careful when handling a memory card. ASUS is not responsible for any data loss or damage incurred to your memory card. To install a memory card: 1. Turn off your device. 2.
Removing a memory card CAUTION! • Be extra careful when handling a memory card. ASUS is not responsible for any data loss or damage incurred to your memory card. • Eject the memory card properly to safely remove it from device. To eject the memory card, tap > Settings > Storage & USB, then under Portable storage, click beside SD card. To remove a memory card: 1. Turn off your device. 2. Push a pin into the hole on the Micro SIM, Nano SIM / MicroSD combo card slot to eject the tray out. 3.
Charging your ASUS Phone Your ASUS Phone comes partially charged but you must charge it fully before using it for the first time. Read the following important notices and cautions before charging your device. IMPORTANT! • Use only the bundled AC power adapter and USB Type C cable to charge your ASUS Phone. Using a different AC power adapter and cable may damage your device. • Peel off the protective film on the AC power adapter and USB Type C cable before using it with your device.
IMPORTANT! • When using your ASUS Phone while it is plugged to a power outlet, the grounded power outlet must be near to the unit and easily accessible. • When charging your ASUS Phone through your computer, ensure that you plug the USB Type-C cable to your computer’s USB 2.0/ USB 3.0 port. • Avoid charging your ASUS Phone in an environment with ambient temperature of above 35oC (95oF). • Charge your ASUS Phone for eight (8) hours before using it in battery mode for the first time.
Turning your ASUS Phone on or off Turning your device on To turn your device on, press and hold the power button until your device vibrates and starts up. Turning your device off To turn your device off: 1. If your screen is turned off, press the power button to turn it on. If your screen is locked, unlock the device screen. 2. Press and hold the power button, then when prompted, tap Power off then tap OK.
Starting for the first time When you turn your ASUS Phone on for the first time, Setup Wizard will guide you through the setup process. Follow the onscreen instructions to select your language, select input methods, set up your mobile network and Wi-Fi, sync accounts, and configure your location services. Use your Google or ASUS account to set up your device, if you do not have a Google or ASUS account yet, go ahead and create one.
Battery power conservation tips The battery charge is the lifeline of your ASUS Phone. Here are some battery power conservation tips that helps preserve the power of your ASUS Phone battery. 17 – Close all running apps that are not in use. – When not in use, press the power button to put the device in sleep mode. – Activate Smart Saving in Power Saver app. – Set audio to Smart Mode. – Decrease brightness of display. – Keep the speaker volume to a low level. – Disable Wi-Fi feature.
Using the touchscreen Use these gestures on the touchscreen to launch apps, access some settings, and navigate your ASUS Phone. Launching apps or selecting items Do any of the following: • To launch an app, simply tap on it. • To select an item such as in File Manager app, simply tap on it. Moving or deleting items Do any of the following: • To move an app or widget, tap and hold then drag it to the location where you want it to be.
Moving through pages or screens Do any of the following: • Swipe your finger to the left or to the right to switch between screens or to flip through a Gallery of images. • Scroll your finger up or down to go through web pages or list of items. Zooming in Spread apart your two fingers on the touch panel to zoom in an image in Gallery or Maps, or zoom in a web page.
Zooming out Bring together your two fingers on the touch panel to zoom out an image in Gallery or Maps, or zoom out of a web page. NOTE: You may not be able to zoom in/out of some web pages as these pages may have been designed specifically to fit your mobile screen.
2 There’s no place like Home There’s no place like Home 2 Zen Home features Home screen Get reminders of important events, app and system updates, weather forecasts, and text messages from people who really matter to you, right from your Home screen.
Understanding notification icons These icons are shown on the status bar and will guide you of the current status of your ASUS Phone. Mobile network Shows the signal strength of your mobile network. 1 SIM card 1 Shows that a Micro SIM card is inserted in Micro SIM card slot 1. 2 SIM card 2 Shows that a Nano SIM card is inserted in Nano SIM card slot 2. NOTE: If the SIM card icon is displayed in green, it indicates that it is set as the preferred network. Messages Shows that you have an unread message.
Quick settings The Quick settings panel provides a one-tap access to some of the wireless features and settings of your ASUS Phone. Each of these features are represented by a button. To launch the Quick settings panel, swipe down from the upper right corner of your ASUS Phone. NOTE: A blue button indicates that the feature is currently enabled while a gray button indicates a disabled feature.
Adding or removing buttons To add or remove existing buttons from the ASUS Quick Settings notification panel: 1. Launch Quick settings then tap . 2. Tap the box beside the feature to add or remove it from the ASUS Quick Setting Notification Panel. NOTE: A checked box indicates that the feature's button is accessible via the ASUS Quick Settings Notification Panel while an unchecked box means the opposite. 3. Tap to go back and view the current ASUS Quick Settings notification panel.
Personalizing your Home screen Stamp your own personality on your Home screen. Select an attractive design as your wallpaper, add shortcuts for quick access to your favorite apps, and add widgets for a quick review of important info. You can also add more pages so you can add and quickly access or view more apps or widgets on your Home screen. Apps & Widgets App shortcuts make it easier to quickly-access your often-used or favorite apps from your Home screen.
Removing app shortcuts or widgets From your Home screen, tap and hold an app or widget, then drag it to Remove on top of your screen. The app that you’ve removed from your Home screen will remain in the All Apps screen. NOTE: You can also tap on your Home screen to view All Apps and Widgets. Grouping your app shortcuts in a folder Create folders to organize your app shortcuts on your Home screen. 1.
Wallpapers Let your apps, icons, and other Zen elements sit on an attractively designed wallpaper. You can download icon packs and wallpapers from the Internet. You can also select an animated wallpaper to make your screen come alive. Tap to view the online icon packs Tap to view the online wallpapers Tap to add more icon packs and wallpapers to My collection Tap to download the wallpapers or icon packs Tap to select wallpaper Applying wallpaper To apply wallpaper: 1.
Extended Home screen Extending your Home screen You can add more pages to extend your Home screen and put more app shortcuts and widgets on it. 1. Tap and hold an empty area on your Home screen and select Home edit > Edit pages. 2. Tap to add a new page. If you wish to delete an extended Home screen, select then drag and drop it into .
Adding shortcuts In Easy Mode, you can add up to thirty six (36) app shortcuts on the Home screen. 1. Swipe to the right of the Home screen, then tap . 2. From the All apps screen, select the app that you want to add to the list. Removing shortcuts Do the following: 1. Tap at the lower right corner of the screen. 2. Tap the app or apps that you want to remove from the list, then tap Delete.
Setting up the date and time By default, the date and time displayed on your Home screen automatically syncs with your mobile provider’s settings. To change the date and time settings: 1. Launch the Settings screen by doing any of the following: •• Launch Quick settings then tap •• Tap . > Settings. 2. Scroll down the Settings screen and select Date & time. 3. Deselect Automatic date & time and Automatic time zone. 4. Select the time zone and manually set the date and time. 5.
Lock Screen By default, the lock screen appears after turning on your device and while waking it up from sleep mode. From the lock screen, you can proceed to your device’s Android® system by swiping on your touch screen panel. Your device’s lock screen can also be customized to regulate access to your mobile data and apps. Customizing your lock screen If you want to change your lock screen settings from the default Swipe option, refer to the following steps: 1. Launch Quick settings then tap . 2.
Customizing the quick access buttons By default, your lock screen includes quick access buttons for these apps: Phone, Messaging, and Camera. Change this default settings and customize these buttons to launch other apps on the lock screen using the following steps: 1. Launch Quick settings then tap . 2. Scroll down the Settings screen and select Lock screen. 3. Tap Quick Access under Display. 4. Slide the bar from OFF to ON beside Customized quick access to enable this feature. 5.
Fingerprint ID sensor Fingerprint ID sensor prevents others from using your ASUS phone without your permission. You can use your fingerprint to unlock your device, access your phone calls and data. When you set up your fingerprint ID, you also need to set up your screen lock method for device startup. Starting your ASUS phone for the first time To set up your fingerprint ID when using your ASUS Phone for the first time: 1. Ensure that the fingerprint identification module and your finger are clean and dry.
Setting up fingerprint ID from Settings To set up your fingerprint ID from Settings: 1. Ensure that the fingerprint scanner and your finger are clean and dry. 2. Launch the Settings screen by doing any of the following: •• Launch Quick settings then tap •• Tap . > Settings. 3. Scroll down the Settings screen and select Fingerprint. 4. Tap the controls that you want to enable or disable.
5. Tap Manage Fingerprints and select the screen lock option you would like to use, and follow the on-screen instructions to set up the screen lock function. NOTE: For more details, see Securing your ASUS Phone. 6. Click Add a fingerprint. 6. Click NEXT on the Locate finger print scanner page. 7. Repeatedly place-and-lift your finger on the scanner until your fingerprint is captured. 8. Click NEXT to complete the setup.
3 Work hard, play harder Work hard, play harder 3 Chrome Chrome for Android` lets you enjoy the same fast, secure and stable web browsing experience as that on the desktop Chrome. Sign in to your Google account to sync tabs, bookmarks, and browsing history across all your devices. If you don’t have a Google account, register for one. NOTE: For details on creating a Google account, see Gmail.
Adding a new tab Hide the current website and open a new window to continue surfing or browsing another website. 1. From the current page, tap > New tab. 2. Enter the URL address in the URL field and continue enjoying browsing the Internet from your ASUS Phone. 3. If you want to do add another tab, follow step 1 again. NOTES: • Opening many websites in your browser slows down its loading performance. • If Internet connection slows down, try clearing the cache.
Clearing the browsing data Clear the browsing data that are temporarily stored in your ASUS Phone to improve the loading performance of your Chrome browser. The browsing data includes browsing history, cache, cookies/site data, saved passwords, and autofill data. 1. Launch the browser. 2. Tap > Settings > Privacy > CLEAR BROWSING DATA. 3. Select the browsing data that you want to delete. 4. When done, click CLEAR.
Gmail Use Gmail to set up your Google account to get into Google-related services and apps as well as receive, send, and browse emails right from your ASUS Phone. You can also set up other email accounts such as Yahoo or your work email account via Gmail. IMPORTANT! Your ASUS Phone must be connected to a Wi-Fi or mobile network so you can add an email account or send and receive emails from added accounts. For more details, see Staying connected. To set up your Google account: 1.
Google Calendar Bring your schedule to life and keep track of all your important events or reminders. Events that you create or edit will automatically sync with all Google Calendar versions that you’ve logged into. Creating events To create an event: 1. From the Home screen, tap Google > Calendar. 2. Tap then tap Event. 3. Enter your event name, and select the date and time for the event. You may set the event as an all-day or recurring event.
Creating reminders To create a reminder: 1. From the Home screen, Google > Calendar. 2. Tap then tap Reminder. 3. Enter your reminder name and tap DONE. 4. Set the date and time for the reminder. You may set the reminder as an all-day or recurring reminder. • All-day reminder: From the All day field, move the slider to the right. • Recurring reminder: Tap repeat. , then select how often you want the reminder to recur or 5. Once finished, tap SAVE.
Do It Later Get hold of even the most trivial things in your busy life. Even when you’re too busy, reply to your emails or add other important to-do tasks at your convenience. NOTES: • Popular third-party apps that support Do It Later include Google Maps, Google Play, YouTube, and iMDb. • Not all apps can share and add tasks to Do It Later. Calling later You can set a task to call someone at your convenient time from the Do It Later. To call later: 1. From the Home screen, tap ASUS > Do It Later. 2.
Deleting to-do tasks You can delete any completed, overdue, or unnecessary to-do tasks from the Do It Later app. 1. From the Home screen, tap ASUS > Do It Later. 2. Tap and hold the task you want to remove from the list. 3. Tap and tap OK to confirm the deletion. File Manager Using File Manager allows you to easily locate and manage your data on the internal storage of your ASUS Phone and its connected external storage devices. Accessing the internal storage To access the internal storage: 1.
The Cloud Back up your data, sync files among different devices, and share files securely and privately via a Cloud account such as ASUS WebStorage, Drive, OneDrive, and Dropbox. ASUS WebStorage Register for or sign in to ASUS WebStorage and get free cloud storage. Automatically upload newly captured photos for instant sharing, sync files among different devices, or share files via your ASUS WebStorage account.
ZenFone Care Find answers from FAQs (Frequently Asked Questions) or directly interact with other Zen UI users to find and share solutions about ZenUI 3.0 apps. To access ZenFone Care: 1. Tap > ZenFone Care 2. Tap ZenUI FAQs, then select the app that you want to find answers for.
4 Keeping in touch Keeping in touch 4 Call in style Dual SIM feature The dual SIM feature of your ASUS Phone lets you manage the settings of the installed Micro SIM / Nano SIM cards. With this feature, you can enable/disable the Micro SIM / Nano SIM cards, or set one as a preferred network. Renaming your SIM cards Change the names of your Micro SIM / Nano SIM cards on your ASUS Phone so that you can identify them easily.
Assigning a preferred SIM card Assign a SIM card as your preferred SIM for voice calls and data services. SIM card for voice calls When you make a call, your ASUS Phone automatically uses the preferred SIM card to connect the call. To assign a SIM card for voice calls, tap Voice call then tap the SIM that you want to use. IMPORTANT! You can only use this feature if you make a call from your contacts list.
Making calls Your ASUS Phone offers you many ways to make a call. Call your friends from your contacts list, smart dial to quickly place a call, or enter a speed-dial number to call your frequently-called contact. NOTE: Organize your contacts in the Contacts app. For details, see Managing contacts. Launching the Phone app From your Home screen, do any of the following to launch the Phone app: • Tap • Tap . > . Dialing a phone number Use the Phone app to directly dial a phone number. 1.
Auto-dialing an extension number You can insert a short or long pause after dialing the main number, then the extension number is dialed automatically. 1. From the Phone app, enter the main number. 2. To insert a pause, tap and hold * until a comma (,) appears. 3. Enter the extension number. 4. Select from call buttons SIM1 or SIM2 to place the call. 5. Tap to end the call.
Creating a speed dial entry Create speed dial entries from digits 2 to 9 for your frequently-called contacts. 1. From the Phone app, do any of the following: •• Tap and hold any digits from 2 to 9, then tap OK on the Speed Dial confirmation screen. •• Tap > Speed dial to launch the Speed Dial screen. 3. Select a contact from your contacts list. This speed dial entry will be saved on the Speed Dial screen. Deleting a speed dial entry To delete a speed dial entry: 1.
Home dialing When you’re on a trip abroad, enabling and configuring the Home dialing settings make it easier for you to quickly call home. NOTE: Using a roaming service will incur additional charges. Inquire from your mobile service provider before using the roaming service. 1. Launch the Settings screen by doing any of the following: •• Launch Quick settings then tap •• Tap . > Settings. 2. Tap Call settings > Home dialing. 3. Tick Home dialing. 4.
Receiving calls The touch screen of your ASUS Phone lights up when there is an incoming call. The display of the incoming call also varies, depending on the status of your ASUS Phone. Answering calls There are two ways to answer a call depending on the status of your ASUS Phone: • If your device is active, tap Answer or to reject a call, tap Dismiss. • If your device is locked, drag to to answer or to to reject the call.
Blocking calls You can add a number or call from your call log to your block list. 1. From the Phone app, tap to display your call logs. 2. Select the number that you want to block, tap > Add to block list, then tap OK. Saving calls to Contacts You can add a call/number from your call logs to your contacts list. 1. From the Phone app, tap to display your call logs. 2. Tap and hold a call from your call logs, then tap Add to contacts. 3. Tap Create new contact to add a new entry to your contacts list.
Other call options During an active call, tap progress. and tap any of the possible call options for when a call is in Microphone Turns the microphone for the active call on or off. When the microphone is off or in mute mode, you can hear the caller but the caller can’t hear you. Speakerphone Turns the speakerphone on or off. Call on hold Puts an active call on hold.
Managing multiple calls Your ASUS Phone provides you the convenience of making or taking two calls. You can also set up a conference call that suits for business meetings, party lines, and other group calls. Answering another call While you are talking on your ASUS Phone, you can hear a beeping sound, indicating of another incoming call. Tap Answer on the touch screen to receive an incoming call while on an active call.
Setting up a conference call Your ASUS Phone, together with its GSM capability, can set up a conference call of up to five (5) people. During a call, you can add more contacts and merge all calls into one conference call. 1. Call a contact or dial a number. Wait for the other line to answer your call. 2. When your call is answered, tap include in your conference call. 3. Tap then tap a contact or dial a number that you wish to to put the two calls in a conference call. 4.
Managing a conference call During the conference call, you can separate the contact from the conference group for private conversation, or disconnect a contact from the conference call. 1. From the Conference call screen, tap Manage conference call to open a list of contacts in the conference call. 2. To remove a contact from the conference call, tap conference call, tap 3. Tap 57 . to go back to the Conference call screen. Chapter 4: Keeping in touch .
Recording calls Your ASUS Phone allows you to record a conversation for future reference or information. 1. Call a contact or dial a number. 2. Tap to record the call. IMPORTANT! Before recording a call, ensure that you ask for permission from the other party or parties. 3. To stop recording, tap . This icon appears on the system notification bar. 4. Swipe down the upper left corner of the screen, then tap Call recording saved notification to view the recorded conversation.
Managing contacts Organize your contacts and easily stay in touch with them via calls, SMS messages, emails, or social networks. Group your contacts as Favorites to quickly get in touch with them, or group them as VIPs to get notified about any upcoming events, missed calls, or unread messages. You can also sync your contacts with your email or social network accounts, link contacts’ info for easy access in one place, or filter the contacts you want to keep in touch with.
Adding contacts Add contacts to your device, corporate, Google, or other email accounts and fill in more important contact information such as contact numbers, email addresses, special events for VIPs, and more. 1. Launch the Contacts app then tap . 2. Select Device. NOTES: • You can also save the contact to your SIM card or an email account. • If you don't have an email account, tap Add account then create one. 3.
Customizing your contact’s profile Edit your contact’s info, add a photo, set a ringtone, or take a photo as a cover for your contact’s profile. 1. Launch the Contacts app then select the contact whose info or profile you want to edit or customize. 2. Make the changes from the contact’s profile page.
Marking your favorite contacts Set your frequently-called contacts as your favorites to be able to call them quickly from the Phone app. 1. From the Home screen, tap ASUS > Contacts. 2. Select the contact that you want to mark as a favorite. 3. Tap . The contact is added to your Favorites List in the Phone app. NOTES: • To view your Favorites list, tap from the Home screen, then tap . • For more details, refer to the section Calling your favorite contacts.
Exporting contacts Export your contacts to any of the storage accounts in your ASUS Phone. 1. Tap ASUS > Contacts then tap > Manage contacts. 2. Tap Import/export then select from the following exporting options: a. Export to SIM 1 card/Export to SIM 2 card b. Export to storage 3. Tap to select the contacts from the following accounts: a. All contacts b. Email account/s c. Device d. SIM1/SIM2 4. Tick the contacts that you want to export. 5. When done, tap Export.
Unblocking contacts or numbers You may remove a blocked contact or number from your list and receive calls or messages from the contact or number again. 1. Tap ASUS > Contacts then tap > Manage contacts > Block list. 2. Tap and hold on the contact or number that you want to unblock then tap Remove from block list. Social networking with your contacts Integrating the social network accounts of your contacts makes it easier for you to view their profiles, news, and social feeds.
Linking your contacts’ info When you add social network or email accounts, data from these accounts automatically sync with the Contacts app. In some instances, some contact info may appear in several places or under different name variations or nicknames in the Contacts app. You can manually link and unify all these info and put them under one place or profile. 1. From the Contacts app, tap the contact whose info you want to link. 2. From the contact’s profile page, tap > Link > . 3.
Call Settings Configure the settings for your incoming or outgoing calls, call barring, home dialing, and more. 1. Do any of the following to launch the Settings screen: •• Launch Quick settings then tap •• Tap . > Settings. 2. Tap Call settings, then select any of these settings that you want to set up.
Additional settings No background during the call Phone account settings When enabled, a black background is displayed during a call. Configure the SIP account and other phone settings. Send messages and more Google Messenger Google Messenger, an intuitive and delightful app, lets you send/receive SMS/MMS messages, as well as send group texts, photos, or audio messages. You can add emojis or stickers to your messages, share your location, archive your messages, and easily block SMS senders.
5 Fun and entertainment Fun and entertainment 5 Using a headset Have the freedom to do other things while you’re in a call or enjoy listening to your favorite music, using a headset. Connecting the audio jack Insert the 3.5mm headset jack into the audio port of your device. WARNING! • Do not insert other objects into the audio jack port. • Do not insert a cable with electric power output into the audio jack port. • Listening at a high volume for long periods can damage your hearing.
Google Play Music With Google Play Music, you can stream your favorite music, create playlists, or listen to the radio. You can also store up to 50,000 music files to the cloud for free. You can also subscribe to Google Play Music for unlimited and ad-free access to millions of music files that you can add to your own music library. Setting up your Google Play Music Sign in to your Google or Gmail account to be able to use Google Play Music.
FM Radio Listen to your favorite local radio stations using your ASUS Phone. 1. Connect the bundled headset with your ASUS Phone. 2. Tap > FM Radio.
Scanning for local stations To scan for stations in your area, tap to automatically scan for your local radio stations. The available local stations are displayed on the FM Radio screen. Tuning to another frequency Do the following if you want to listen to a specific radio station: 1. From the FM Radio app, tap the current radio station. 2. On the Tune frequency box, enter the channel of your favorite radio station. 3. If you want to add it to your Favorites, tap Add to favorites. 4. When done, tap OK.
6 Your precious moments Your precious moments 6 Capture moments Launching the Camera app Capture images and record videos using your ASUS Phone’s Camera app. Refer to any of the steps below to open the Camera app. From the lock screen Drag down until the camera app is launched. NOTE: Before using th this function , go to Settings > Lock screen > Quick access, slide Customized quick access to ON, and tap a default app to replace with the camera app. From the home screen Tap .
Using Camera for the first time After launching the Camera for the first time, two consecutive features appear to help you get started: Tutorial and Image locations. Tutorial If it is your first time to use your ASUS Phone’s camera, you will encounter the following tutorial screen after launching the Camera app. Refer to the following steps to proceed from this screen. 1. On the Tutorial screen, tap Skip if you want to skip viewing or Start to view the basic tutorial about using Camera. 2.
Camera home screen Your ASUS Phone’s camera is equipped with auto-scene detection and auto-image stabilizer features. It also features a video stabilization function that helps prevent shakiness while video recording. Tap the icons to start using your camera and explore the image and video features of your ASUS Phone.
Image settings Adjust the appearance of your captured images by configuring your camera’s settings using the steps below. IMPORTANT! Apply the settings first before taking images. 1. On the camera’s home screen, tap > . 2. Scroll down and configure the available options. Image Configure the image quality using these options. Shoot mode Set your shutter speed to Timer mode or change the Burst speed under this option. Focus & exposure Enable Touch auto-exposure or Face detection under this option.
Video settings Adjust the appearance of your recorded videos by configuring your camera’s settings using the steps below. IMPORTANT! Apply the settings first before taking images. 1. On the camera’s home screen, tap > . 2. Scroll down and configure the available options. Image Configure the video quality using these options. Focus & exposure Enable Touch auto-exposure under this option.
Advanced camera features Explore new ways of capturing images or videos and make captured extra special moments using the advanced camera features of your ASUS Phone. IMPORTANT! Apply the settings first before taking images. Available features may vary per model. HDR Pro The High-dynamic-range (HDR) feature allows you to take more detailed images for low-light and highly contrasting scenes.
Low light Using PixelMaster, your camera’s light sensitivity is increased by up to 400% to enhance noise reduction and boost color contrast by up to 200%. Use this mode to transform any subject into a great photo or video—with or without ample natural lighting. Capturing Low light photos 1. From the Camera app’s home screen, tap 2. Tap > Low light. to start capturing photos. Capturing Low light videos 1. From the Camera app’s home screen, tap 2. Tap > Low light. to start recording a video.
Selfie Take advantage of your rear camera’s high megapixel specs without worrying about pressing the shutter button. Using face-detection, you can set your ASUS Phone to detect up to four faces using the rear camera then automatically capture your selfie or group selfie. Capturing Selfie photos 1. From the Camera app screen, tap > Selfie. 2. Tap 3. Tap . to choose how many people should be included in the photo. 4.
Miniature Simulate the tilt-shift effect of DSLR lenses via the Miniature feature. Using this feature allows you to focus on specific areas of your subject, adding a bokeh effect that can be used on both photos and video using your ASUS Phone. Capturing Miniature photos 1. From the Camera app screen, tap > Miniature. 2. Tap or to select your focus area, then use your two fingers to adjust the focus area’s size and position. 3. Tap or to increase or decrease the background blur. Tap decrease saturation.
Smart remove Eliminate unwanted details immediately after capturing the image using the Smart remove feature. Capturing Smart remove photos 1. From the Camera app screen, tap 2. Tap > Smart remove. capturing photos that can be edited using Smart remove. 3. On the captured photo, tap the outline around the detected moving object to delete it. 4. Tap to save the photo. All Smiles Capture the perfect smile or the wackiest facial expression from a range of photos using the All Smiles feature.
Using the Gallery View images and play videos on your ASUS Phone using the Gallery app. This app also allows you to edit, share, or delete image and video files stored in your ASUS Phone. From Gallery, you can display images in a slideshow or tap to view the selected image or video file. To launch Gallery, tap ASUS > Gallery. Viewing files from your social network or cloud storage By default, your Gallery displays all the media files on your ASUS Phone according to their album folders.
Viewing the photo location Enable the location access on your ASUS Phone, and get the location details on your photos. Your photos’ location details include the area where the photos are taken, as well a map of the location via Google Map or Baidu (in China only). To view the details of a photo: 1. Turn on the location access from > Settings > Location. 2. Ensure that you have shared your location to Google Map or Baidu. 3. Launch the Gallery app, and select the photo whose photo details you want to view.
Sharing files from the Gallery 1. From the Gallery screen, tap the folder where the files you want to share are located. 2. After opening the folder, tap to activate file selection. 3. Tap the files you want to share. A check mark appears on top of the image you select. 4. Tap then select from the list where you want to share the images. Deleting files from the Gallery 1. From the Gallery screen, tap the folder where the files you want to delete are located. 2.
Using MiniMovie Turn photos into a theme-designed movie or general slideshow video using the MiniMovie app. To create a MiniMovie: 1. From your Home screen, tap > MiniMovie to launch the MiniMovie app. 2. Tap Allow to allow MiniMovie to access the photos in your phone. 3. Tap Deny or Allow to deny or allow MiniMovie to access your contacts list. 4. Tap Movie or Slideshow to create a theme-designed movie or general slideshow.
5. Select the folder containing the photos for the movie or slideshow that you want to create. Tap to select photos from the cloud services Tap to select a photo folder Tap to select a photo and tap again to deselect it Tap to deselect the selected photos 6. When done, tap Next. 7. Set the theme, music, subtitle, or text for your movie or slideshow.
PhotoCollage Use the PhotoCollage app to create a collage from your collection of photos. To launch the PhotoCollage app, tap from your Home screen then tap PhotoCollage.
7 Staying connected 7 Staying connected Mobile network When there’s no available Wi-Fi network that you can connect to, you can enable your mobile network’s data access for Internet connection. Enabling the mobile network 1. Do any of the following to launch the Settings screen: •• Launch Quick settings then tap •• Tap . > Settings. 2. Tap More > Cellular networks. 3. Slide Data enabled to ON, and configure the other mobile network settings, if necessary.
Connecting to a Wi-Fi network 1. On the Settings screen, tap Wi-Fi to display all detected Wi-Fi networks. 2. Tap a network name to connect to it. For a secured network, you may be prompted to key in a password or other security credentials. NOTES: • Your ASUS Phone automatically reconnects to the network that you connected with previously. • Turn off the Wi-Fi feature when you're not using it to help save battery power. Disabling Wi-Fi To disable Wi-Fi: 1.
Pairing your ASUS Phone to a Bluetooth® device Before using the Bluetooth feature of your ASUS Phone in full scale, you have to pair it first with the Bluetooth device. The ASUS Phone automatically stores the pairing connection of the Bluetooth device. 1. On the Settings screen, tap Bluetooth to display all available devices. IMPORTANT! • If the device that you want to pair is not in the list, ensure to enable its Bluetooth feature and is discoverable.
Tethering When Wi-Fi service is not available, you can use your ASUS Phone as a modem or turn it into a Wi-Fi hotspot to get Internet access on your laptop, tablet, and other mobile devices. IMPORTANT! Most mobile service providers may require a data plan for you to be able to use the tethering function. Contact your mobile service provider about availing of this data plan. NOTES: • Internet access via tethering may be slower than the standard Wi-Fi or mobile connection.
4. From the Tethering screen, slide Portable Wi-Fi hotspot to ON. 5. Connect other devices to your ASUS Phone’s hotspot connection the same way you connect to a Wi-Fi network. Bluetooth Tethering Enable Bluetooth on your ASUS Phone and use it as a modem for Internet access on your Bluetooth-enabled mobile devices such as a laptop or a tablet. 1. Enable Bluetooth on your ASUS Phone and the other device. 2. Pair both devices. NOTE: For details, see Pairing your ASUS Phone to a Bluetooth® device. 3.
8 Travel and Maps Travel and Maps 8 Weather Get real-time weather updates straight from your ASUS Phone using the weather app. Using Weather, you can also check other weather details from around the world. Launching the Weather app From your Home screen, launch the Weather app using either of the following options: •• Tap > Weather. •• From your ASUS Phone’s home screen, tap the weather icon.
Weather home screen Set up and get your current location’s weather updates as well as other parts of the world. You can display the weather updates or daily weather forecast on the What’s Next widget or app, and on the Calendar app.
Clock Customize the time zone settings of your ASUS Phone, set alarms, and use your ASUS Phone as a stop watch using the Clock app. Launching Clock Launch the Clock app using either of the following options: •• Tap > Clock. •• From your ASUS Phone’s home screen, tap the digital clock display. World Clock Tap to access the world clock settings of your ASUS Phone. Tap to get your location update. Tap this to set your clock on night mode. Tap this to edit the cities marked on your world clock.
Alarm clock Tap to access the alarm clock settings of your ASUS Phone. Tap this to access the settings of the alarm clock feature. Tap this to delete any of the previously set alarms. Tap this to set a new alarm time. Stopwatch Tap to use your ASUS Phone as a stopwatch. Tap this button to start running the stopwatch feature.
Timer You may set multiple timer options for your ASUS Phone. To do this, follow the steps below: Setting the timer 1. Tap to access the timer feature of your ASUS Phone. Tap this to access the settings of the timer feature. Tap to set the ringtone for the timer. Tap this to delete the preset timer. Tap this to edit the preset timer. Tap this button to start running the timer. Tap this to set a new timer 2. Tap 97 and use the numeric keypad to input your target time then tap start to start the timer.
9 ZenLink ZenLink 9 Knowing ZenLink Stay connected with the ASUS-exclusive ZenLink for maximum productivity. With these ZenLink apps, you can connect with other devices to share and receive files. Your ZenLink comprises of the following apps: Share Link and Remote Link. NOTE: Some of these ZenLink apps may not be available in your ASUS Phone.
3. Tap the files that you want to send then tap Done. 4. After your ASUS Phone detects the other devices, tap the device that you want to share your files with. Receiving files To receive files: 1. From your Home screen, tap then tap Share Link. 2. Tap Receive file to receive the files from the sender.
10 Zen Everywhere 10 Zen Everywhere Special Zen Tools Flashlight You can turn your ASUS Phone to an instant flashlight by launching your Quick settings panel from any screen or any open app. From the Quick settings panel, simply tap on the Flashlight icon to activate its function. Tap this to enable the flashlight.
Flashlight menu options Tap this to enable or disable the flashlight mode. Tap this to enable or disable the SOS mode. Tap any of these icons to toggle between the flashlight’s speed while blinking. Tap this to access the Flashlight settings. Tap this to turn on or turn off the light. Tap this to enable LED flashlight. Tap this to enabled screen flashlight.
Calculator One-swipe and a tap is all it takes to launch your Calculator. When you open the Quick settings panel, the Calculator icon is there visibly on top of the list. Tap it to get started with your computations.
Quick memo Quick memo is a note-taking tool that gives you the freedom to either scribble or type down important notes you need to remember. After creating notes, you can share them via Share Link and social media sites or turn them into a task inside Do It Later. Creating a sticky note You can turn Quick memo notes into a sticky note so you can view them wherever, on your ASUS Phone. To create a sticky note, just tap on the pin icon on the upper right corner of Quick memo after creating your note.
Sound Recorder Record audio files using your ASUS Phone by enabling the Sound Recorder app. Launching Sound Recorder To launch Sound Recorder, tap > Sound Recorder.
Pausing a recording During a paused recording, you can choose to resume, delete, or save the recording. Tap to delete the recording Tap to resume the recording Tap to save the recording Recording List From the Recording List, you can play, rename, share, or delete a saved audio recording file. To view your recording list, tap from the Sound Recorder main screen.
Audio Wizard AudioWizard allows you to customize the sound modes of your ASUS Phone for a clearer audio output that fits actual usage scenarios. Using Audio Wizard To use AudioWizard: 1. Tap > Audio Wizard. 2. In the AudioWizard window, tap the sound mode you want to activate then tap Done to save and exit.
Splendid ASUS Splendid allows you to easily adjust the display settings. It enriches the color of your screen with its preset screen color modes. Using Splendid To use Splendid: 1. From your extended Home screen tap Smart Tools > Splendid. 2. Select any of these screen color modes: Balance, Bluelight filter, Vivid, and Customized. Balance mode This mode provides a balanced display of color on your ASUS Phone.
Bluelight Filter mode This mode provides a mild paper-like display that reduces eye strain for a comfortable reading experience on your ASUS Phone. Move to adjust the yellow tint Tap to reset to factory defaults Vivid mode This mode provides a fine-tuned color preset that enriches the screen color of your ASUS Phone.
Customized mode This mode allows you to adjust the screen display based on your preferred color temperature, hue, and saturation. Move to adjust the color temperature Move to adjust hue Tap to reset to factory defaults Move to adjust saturation NOTE: You can also quickly set the Splendid screen mode from the Quick settings panel.
Configuring the ASUS Cover settings To configure the ASUS Cover settings: 1. Tap > Settings > ASUS Cover. 2. Tick the box beside Show Cover View.
11 Maintain your Zen Maintain your Zen 11 Keeping your device up-to-date Keep your ASUS Phone in the loop of Android system updates and upgraded apps and features. Updating your system 1. Tap then tap Settings. 2. On the Settings screen, slide down to display other items then tap About. 3. Tap System update then tap Check Update. NOTE: You can preview the last time your ASUS Phone’s system was updated at the Last update check: of the System update window.
Securing your ASUS Phone Use the security features of your ASUS Phone to prevent unauthorized calls or access of information. Unlocking your screen When the screen is locked, you can open it with the security unlocking options that the ASUS Phone offers you. then tap Settings > Lock screen. 1. Tap 2. Tap Screen lock then select an option to unlock your ASUS Phone. NOTES: • Refer to section Unlock screen options for more information.
PIN Key in at least four numbers to set a PIN. IMPORTANT! Ensure to remember the PIN that you created to unlock your device. Pattern Slide your finger on the dots and create a pattern. IMPORTANT! You can create a pattern with a minimum of four dots. Ensure to remember the pattern that you created to unlock your device.
Password Key in at least four characters to create a password. IMPORTANT! Ensure to remember the password that you created to unlock your device. Configuring the other screen security features Aside from the mode of screen lock, you can also do the following on the Screen security window: • Quick Access: Slide the Quick Access switch to ON to launch apps on the lock screen. • What’s Next widget: Slide the What’s Next Widget switch to ON to show the said widget on the lock screen.
Setting your ASUS Phone identity Know your ASUS Phone’s identity such as serial number, IMEI (International Mobile Equipment Identity) number, or model number. This is important, as when you may lose your ASUS Phone, you can contact your mobile carrier and provide the information to blacklist the unauthorized use of your ASUS Phone. To display your ASUS Phone’s identity: 1. Tap All Apps then tap Settings. 2. On the Settings screen, slide down to display other items then tap About.
Appendix Appendix Notices EC Declaration of Conformity This product is compliant with the regulations of the R&TTE Directive 1999/5/EC. The Declaration of Conformity can be downloaded from http://www.asus.com/support CE Mark Warning CE marking for devices with wireless LAN/ Bluetooth This equipment complies with the requirements of Directive 1999/5/EC of the European Parliament and Commission from 9 March, 1999 governing Radio and Telecommunications Equipment and mutual recognition of conformity.
Coating notice IMPORTANT! To provide electrical insulation and maintain electrical safety, a coating is applied to insulate the device except on the areas where the I/O ports are located. Green ASUS notice ASUS is devoted to creating environment-friendly products and packaging to safeguard consumers’ health while minimizing the impact on the environment. The reduction of the number of the manual pages complies with the reduction of carbon emission.
Index Index A Advanced camera features 77 All Smiles 81 - see also Advanced camera features 77 App shortcuts 25 - adding 25 - removing 26 ASUS Phone 8 - chargiing 13 - microSD card - installing 11 - removing 12 - micro-SIM card - installing 9 - removing 10 - Parts and features 8 - turning on/off 15 Audio Wizard 106 B Backup and reset 111 Beautification 77 - see also Advanced camera features 77 Block list - blocking 63 - unblocking 64 Bluetooth 89 - enabling 89 - pairing 90 - see al
- setting up 30 Depth of field 78 Do It Later 42 - adding to-do tasks 42 - calling back now - see also Callbacks 52 - catching up on my online reading now - see also Reading the pages later 37 - deleting to-do tasks 43 Dual SIM feature - see Micro SIM cards 46 E Easy Mode 28 - adding shortcuts 29 - enabling 28 - removing shortcuts 29 Extension number 48 - auto dialing 49 - dialing 48 F Favorites - calling 51 - marking up 62 - see also Contacts 59 File Manager - accessing the cloud stora
PhotoCollage 87 W Q Wallpapers 27 - animated wallpaper 27, 28 - wallpaper and background tint 27 Weather 93 - launching 93 - Weather home screen 94 WebStorage 44 What’s Next - getting the weather updates - see also Weather 93 Widgets 25 Wi-Fi 88 - connecting 89 - disabling 89 - enabling 88 - see also Wi-Fi Hotspot tethering 91 Quick Memo 103 Quick settings 23 - adding or removing buttons 24 R Ringtone - setting up 30 S Security 112 Selfie - see also Advanced camera features 77 Sha