ZE552KL Benutzerhandbuch
G11530 Juli 2016 Erste Ausgabe Pflege und Sicherheit Richtlinien Sicherheit im Straßenverkehr geht vor. Wir empfehlen dringend, das Gerät nicht während der Fahrt oder beim Betrieb jeder Art von Fahrzeug, zu verwenden. Dieses ASUS Tablet darf nur in einer Umgebung mit einer Temperatur zwischen 0°C (32°F) und 35°C (95°F) verwendet werden. Schalten Sie Ihr Gerät in Sicherheitsbereichen aus, in denen die Verwendung von mobilen Geräten verboten ist.
Richtige Entsorgung Falls der Akku durch einen falschen Typ ersetzt wird, besteht Explosionsgefahr. Entsorgen Sie defekte Akkus entsprechend den örtlichen Bestimmungen. Die Batterien NICHT im normalen Hausmüll entsorgen. Das Symbol der durchgestrichenen Mülltonne zeigt an, dass Batterien nicht im normalen Hausmüll entsorgt werden dürfen. Dieses Produkt NICHT im normalen Hausmüll entsorgen. Dieses Produkt wurde entwickelt, um ordnungsgemäß wiederverwertet und entsorgt werden zu können.
Inhaltsverzeichnis 1 Grundlagen Willkommen!............................................................................................................................................ 7 Bereiten Sie Ihr ASUS Phone vor!...................................................................................................... 8 Der erste Systemstart..........................................................................................................................16 Touchscreen verwenden.....................
Die Cloud......................................................................................................................44 ASUS WebStorage................................................................................................................................44 ZenFone Care...............................................................................................................45 4 In Verbindung bleiben Stilvoll telefonieren...............................................................
7 Beste Verbindungen Mobilfunknetz.............................................................................................................88 Mobilfunkdatenverbindung einschalten.....................................................................................88 WLAN............................................................................................................................88 WLAN aktivieren...............................................................................................
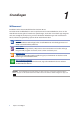
1 Grundlagen Grundlagen 1 Willkommen! Entdecken Sie die intuitive Einfachheit der ASUS Zen UI 3.0! Die ASUS Zen UI 3.0-Oberfläche ist eine ansprechende und intuitive Oberfläche, die es nur bei ASUS Phone-Geräten gibt. Es bietet Ihnen spezielle Apps, die in oder mit anderen Apps integriert sind; dies ermöglicht die Anpassung an Ihre individuellen Anforderungen und vereinfacht Ihr Leben, während Sie gleichzeitig Spaß mit Ihrem ASUS Phone haben.
Bereiten Sie Ihr ASUS Phone vor! Teile und Funktionen Ergreifen Sie Ihr Gerät und bringen Sie es im Handumdrehen zum Laufen.
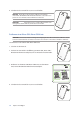
Installieren einer Micro-SIM- / Nano-SIM-Karte Eine Micro-/Nano-SIM (Subscriber Identity Module)-Karte speichert Informationen, wie Ihre Mobiltelefonnummer, Kontakte, Mitteilungen und andere Daten, die Ihnen Zugriff auf ein Mobilfunknetz bieten. Ihr ASUS Phone ist mit einem Micro-SIM-Kartensteckplatz und einem Nano-SIM-Kartensteckplatz ausgestattet, wodurch Sie zwei Mobilfunknetzdienste einrichten und nutzen können, ohne zwei Mobilgeräte bei sich führen zu müssen.
4. Schieben Sie das Kartenfach zu, um es zu schließen. WICHTIG! Beide, Micro-SIM- und Nano-SIM-Kartensteckplätze unterstützen 3G WCDMA / 4G LTE-Netzwerkbänder. Jedoch kann sich jeweils nur eine SIM-Karte mit dem 4G-Dienst verbinden. ACHTUNG: Verwenden Sie keine scharfen Gegenstände oder Lösungsmittel auf Ihrem Gerät, um Kratzer zu vermeiden. Entfernen einer Micro-SIM-/Nano-SIM-Karte ACHTUNG: Seien Sie besonders vorsichtig beim Umgang mit einer Micro-SIM-/Nano-SIM-Karte.
Installieren einer Speicherkarte Ihr ASUS Phone unterstützt eine MicroSD™- und MicroSDHC™-Speicherkarte mit bis zu 2 TB Kapazität. HINWEIS: Einige Speicherkarten sind möglicherweise nicht kompatibel mit dem ASUS Phone. Stellen Sie sicher, dass Sie nur kompatible Speicherkarten verwenden, um Datenverlust, Schäden an Ihrem Gerät oder Speicherkarte oder beiden zu verhindern. ACHTUNG: Seien Sie besonders vorsichtig beim Umgang mit einer Speicherkarte.
Entfernen einer Speicherkarte ACHTUNG! • Seien Sie besonders vorsichtig beim Umgang mit einer Speicherkarte. ASUS ist nicht verantwortlich für den Verlust von Daten oder Schäden an der Speicherkarte. • Werfen Sie die Speicherkarte richtig aus, um sie sicher aus dem Gerät zu entfernen. Um die > Settings (Einstellungen) > Storage&USB Speicherkarte auszuwerfen, tippen Sie auf (Speicher und USB), und klicken Sie dann unter mobiler Speicher auf neben SD card (SD-Karte).
Aufladen Ihres ASUS Phones Ihr ASUS Phone wird teilweise aufgeladen geliefert, aber müssen Sie es vor der ersten Verwendung vollständig laden. Lesen Sie die folgenden wichtigen Hinweise und Vorsichtsmaßnahmen, bevor Sie Ihr Gerät aufladen. WICHTIG! • Benutzen Sie ausschließlich das mitgelieferte Netzteil und das USB-Typ-C-Kabel, um Ihr ASUS Phone aufzuladen. Ein anderes Netzteil und Kabel kann Ihr Tablet beschädigen.
WICHTIG! • Wenn Sie Ihr ASUS Phone im Netzstrombetrieb verwenden, muss sich die geerdete Steckdose in der Nähe befinden und leicht zugänglich sein. • Wenn Sie Ihr ASUS Phone über Ihren Computer aufladen, stellen Sie sicher, dass Sie das USB-Typ-CKabel mit einem USB 2.0- / USB 3.0-Anschluss an Ihrem Computer verbinden. • Vermeiden Sie es, Ihr ASUS Phone in einer Umgebungstemperatur von über 35° C (95° F) aufzuladen. • Laden Sie den Akku vor der ersten Benutzung für 8 Stunden auf.
Ihr ASUS Phone ein- oder ausschalten Ihr Gerät einschalten Um das Gerät einzuschalten, drücken und halten Sie die Power-Taste, bis das Gerät startet. Ihr Gerät ausschalten Ihr ASUS Tablet ausschalten: 1. Wenn Ihr Bildschirm ausgeschaltet ist, drücken Sie die Power-Taste, um ihn einzuschalten. Wenn der Bildschirm gesperrt ist, entsperren Sie den Bildschirm des Geräts. 2. Halten Sie die Power-Taste gedrückt, tippen Sie bei Aufforderung auf Ausschalten und anschließend auf OK.
Der erste Systemstart Wenn Sie Ihr ASUS Phone zum ersten Mal einschalten, führt der Setup-Assistent Sie durch den Setup-Vorgang. Lassen Sie sich von den Hinweisen auf dem Bildschirm durch die Auswahl Ihrer Sprache, der Eingabemethoden, die Einrichtung Ihres Mobilfunknetzes und WLANs, durch die Kontensynchronisierung und die Konfiguration Ihrer lokalen Dienste führen.
Erhaltungstipps für Akkuleistung Die Akkukapazität ist die Lebensader Ihres ASUS Phones. Hier sind ein paar Erhaltungstipps für die Akkuleistung, die helfen die Leistung Ihres Akkus zu bewahren. – Schließen Sie alle laufenden Apps, die nicht benutzt werden. – Drücken Sie bei Nichtgebrauch den Netzschalter, um das Gerät in den Ruhezustand zu schalten. 17 – Aktivieren Sie Smart Saving in der Power Saver App. – Setzen Sie Audio auf Smart-Modus. – Verringern Sie die Bildschirmhelligkeit.
Touchscreen verwenden Nutzen Sie diese Gesten am Touchscreen zum Ausführen von Apps, zum Zugreifen auf einige Einstellungen und zum Navigieren Ihres ASUS Phones. Apps starten und Elemente auswählen Wählen Sie eine der folgenden Optionen: • Wenn Sie eine App starten möchten, tippen Sie einfach darauf. • Zum Auswählen eines Elementes, beispielsweise der Dateimanager-App, tippen Sie einfach auf das Symbol.
Auf Seiten oder in Bildschirmen navigieren Wählen Sie eine der folgenden Optionen: • Wischen Sie mit dem Finger nach links oder rechts, wenn Sie zwischen Bildschirmen wechseln oder eine Galerie mit Bildern durchblättern möchten. • Wischen Sie mit dem Finger nach oben oder unten, wenn Sie auf Internetseiten oder in Listen aufwärts oder abwärts blättern möchten. Vergrößern Ziehen Sie zwei Finger auf dem Touchpanel zum Vergrößern eines Bildes in Gallery (Galerie) oder Maps (Karten) bzw.
Verkleinern Führen Sie zwei Finger auf dem Touchpanel zum Verkleinern eines Bildes in Gallery (Galerie) oder Maps (Karten) bzw. zum Verkleinern einer Webseite zusammen. HINWEIS: Sie sind möglicherweise nicht in der Lage, auf einigen Web-Seiten herein- oder herauszuzoomen, da diese Seiten möglicherweise speziell entworfen wurden, um Ihr Handy-Display genau auszufüllen.
2 Es gibt keinen Platz wie Zuhause Es gibt keinen Platz wie Zuhause 2 Zen Home-Funktionen Home-Bildschirm Erhalten Sie Erinnerungen an wichtige Ereignisse, App und System-Updates, Wettervorhersagen und SMS-Nachrichten von Leuten, die wirklich wichtig für Sie sind, direkt von Ihrem HomeBildschirm.
Die Benachrichtigungssymbole Diese Symbole werden in der Statusleiste angezeigt und informieren Sie über den aktuellen Status Ihres ASUS Phones. Mobilfunknetz Zeigt die Signalstärke Ihres Mobilnetzwerks. 1 2 SIM-Karte 1 Dieses Symbol zeigt an, dass eine microSIM-Karte in den microSIM-Kartenschlitz eingesteckt ist. SIM-Karte 2 Dieses Symbol zeigt an, dass eine Nano-SIM-Karte in den Nano-SIM-Kartenschlitz 2 eingesteckt ist.
Schnelleinstellungen Das Fenster Quick settings (Schnelleinstellungen) bietet mit nur einer Berührung Zugriff auf einige WLAN-Funktionen und Einstellungen Ihres ASUS Phones. Die einzelnen Features werden durch eine Schaltfläche dargestellt. Wischen Sie zum Einblenden des Fensters Quick settings (Schnelleinstellungen) von der oberen rechten Bildschirmecke Ihres ASUS Phones nach unten.
Hinzufügen oder Entfernen von Schaltflächen Hinzufügen oder Entfernen von vorhandenen Schaltflächen aus dem ASUS Schnelleinstellungen Benachrichtigungsfeld: 1. Starten Sie die Schnelleinstellungen, tippen Sie dann auf . 2. Tippen Sie auf das Kontrollkästchen neben der Funktion zum Hinzufügen oder Entfernen aus dem ASUS Schnelleinstellungen Benachrichtigungsfeld.
Startbildschirm individuell anpassen Prägen Sie Ihre eigene Persönlichkeit auf Ihren Home-Bildschirm. Wählen Sie ein attraktives Design als Hintergrund, Fügen Sie Verknüpfungen für den schnellen Zugriff zu Ihrem Lieblingsapps hinzu, und fügen Sie Widgets, für einen kurzen Überblick über wichtige Informationen, hinzu. Sie können auch weitere Seiten hinzufügen, sodass Sie mehr Apps oder Widgets auf dem Home-Bildschirm hinzufügen können und schnelleren Zugriff haben.
App-Verknüpfungen oder Widgets entfernen Tippen und halten Sie eine App oder ein Widget in Ihrem Home-Bildschirm, ziehen Sie es dann auf Entfernen oben auf Ihrem Bildschirm. Vom Startbildschirm entfernte Apps bleiben übrigens im Alle-Apps-Bildschirm erhalten. HINWEIS: Sie können zur Anzeige von All Apps (Alle Apps) und Widgets auch Startbildschirm antippen. in Ihrem App-Verknüpfungen in einem Ordner gruppieren Sie können Ordner zum Organisieren Ihrer App-Verknüpfungen in Ihrem Home-Bildschirm erstellen.
Bildschirmhintergründe Platzieren Sie Ihre Apps, Symbole und andere Zen-Elemente auf einem ansprechend gestalteten Bildschirmhintergrund. Sie können Symbolpakete und Bildschirmhintergründe vom Internet herunterladen. Sie können auch einen animierten Bildschirmhintergrund auswählen, um Ihren Bildschirm lebendig zu machen.
Erweiterter Startbildschirm Startbildschirm erweitern Sie können Ihren Home-Bildschirm um weitere Seiten ergänzen, um zusätzliche AppVerknüpfungen und Widgets darauf abzulegen. 1. Tippen und halten Sie einen leeren Bereich in Ihrem Home-Bildschirm und wählen Home edit (Home bearbeiten) > Edit pages (Seiten bearbeiten). 2. Tippen Sie zum Hinzufügen einer neuen Seite auf .
Verknüpfungen hinzufügen Im Einfachen Modus können Sie bis zu sechsunddreißig (36) App-Verknüpfungen auf dem HomeBildschirm unterbringen. 1. Wischen Sie im Startbildschirm nach rechts, tippen Sie dann auf . 2. Wählen Sie im Alle-Apps-Bildschirm die App aus, die Sie der Liste hinzufügen möchten. Verknüpfungen entfernen Führen Sie folgende Schritte aus: 1. Tippen Sie in der rechten unteren Ecke des Bildschirms auf . 2.
Datum und Uhrzeit einstellen Per Vorgabe werden Datum und Uhrzeit Ihres Gerätes automatisch an Datum und Uhrzeit Ihres Mobilfunkanbieters angepasst. So ändern Sie Datums- und Zeiteinstellungen: 1. Rufen Sie die Einstellungen auf eine der folgenden Weisen auf: •• Starten Sie die Schnelleinstellungen, tippen Sie dann auf •• Tippen Sie auf . > Einstellungen. 2. Blättern Sie in den Einstellungen etwas nach unten, wählen Sie Datum und Uhrzeit. 3.
Sperrbildschirm Standardmäßig erscheint der Sperrbildschirm nach dem Einschalten des Geräts und beim Aufwachen aus dem Ruhemodus. Vom Sperrbildschirm aus können Sie mit dem Android-System Ihres Geräts fortfahren, indem Sie auf Ihrem Touchscreen wischen. Der Sperrbildschirm des Geräts kann auch angepasst werden, um Zugriff auf Ihre mobilen Daten und Apps zu regulieren.
Schnellzugriffschaltflächen anpassen Ab Werk werden Schnellzugriffschaltflächen für folgende Apps im Sperrbildschirm angezeigt: Telefon, Messaging und Kamera. Mit den folgenden Schritten ändern Sie die Standardeinstellungen und legen Schaltflächen zum Starten anderer Apps im Sperrbildschirm an: 1. Starten Sie die Schnelleinstellungen, tippen Sie dann auf . 2. Blättern Sie in den Einstellungen etwas nach unten, wählen Sie dann Sperrbildschirm. 3.
ID-Fingerabdrucksensor Der ID-Fingerabdrucksensor verhindert, dass Dritte Ihr ASUS Phone ohne Ihre Erlaubnis benutzen. Sie können Ihren Fingerabdruck verwenden, um Ihr Gerät zu entsperren oder auf Ihre Telefonanrufe und Daten zuzugreifen. Wenn Sie Ihren ID-Fingerabdruck einrichten, müssen Sie auch Ihre Bildschirmsperre-Methode für den Gerätestart festlegen. Erstmaliges Starten Ihres ASUS Phones So richten Sie Ihren ID-Fingerabdruck ein, wenn Sie Ihr ASUS Phone zum ersten Mal verwenden: 1.
Einrichten des ID-Fingerabdrucks unter Einstellungen So richten Sie Ihren ID-Fingerabdruck unter Einstellungen ein: 1. Stellen Sie sicher, dass der Fingerabdruckscanner und Ihr Finger sauber und trocken sind. 2. Rufen Sie die Einstellungen auf eine der folgenden Weisen auf: •• Starten Sie die Schnelleinstellungen, tippen Sie dann auf •• Tippen Sie auf . > Einstellungen. 3. Scrollen Sie in den Einstellungen etwas nach unten, wählen Sie dann Fingerprint (Fingerabdruck). 4.
5. Tippen Sie auf Manage Fingerprints (Fingerabdrücke verwalten) und wählen Sie die Option der Bildschirmsperre, die Sie verwenden möchten. Befolgen Sie dann die Bildschirmanweisungen zum Einrichten der Bildschirmsperrfunktion. HINWEIS: Mehr dazu erfahren Sie hier: Ihr ASUS Phone absichern. 6. Klicken Sie auf Add a fingerprint (Fingerabdruck hinzufügen). 7. Klick Sie auf NEXT (Weiter) auf der Locate finger print scanner (Fingerabdruckscanner finden)-Seite. 8.
3 Arbeite hart, spiele härter Arbeite hart, spiele härter 3 Chrome Chrome für Android bietet Ihnen das gleiche schnelle, sichere und beständige WebbrowserErlebnis wie Sie es von Chrome auf Desktop-Geräten kennen. Melden Sie sich an Ihrem GoogleKonto an, um Tabs, Lesezeichen und den Browserverlauf mit all Ihren Geräten zu synchronisieren. Falls Sie kein Google-Konto besitzen, erstellen Sie es bitte. HINWEIS: Einzelheiten zum Erstellen eines Google-Kontos finden Sie im Abschnitt Google Mail.
Neues Register hinzufügen Sie können die aktuelle Webseite in den Hintergrund versetzen, ein neues Fenster öffnen und darin zum Beispiel eine andere Webseite aufrufen. 1. Tippen Sie auf der aktuellen Seite auf > Neues Register. 2. Geben Sie die URL-Adresse in das URL-Feld ein und surfen Sie über Ihr ASUS Phone weiter im Internet. 3. Wenn Sie ein weiteres Register hinzufügen möchten, führen Sie Schritt 1 einfach noch einmal aus.
Browserdaten löschen Löschen Sie die Browserdaten, die vorübergehend auf Ihrem ASUS Phone zur Steigerung der Leistung beim Laden von Webseiten in Ihrem Chrome-Browser gespeichert werden. Die Browserdaten beinhalten den Browserverlauf, Cache, Cookies/Seitendaten, gespeicherte Kennwörter und Autofill-Informationen. 1. Starten Sie den Browser. 2. Tippen Sie auf > Settings (Einstellungen) > Privacy (Privatsphäre) > CLEAR BROWSING DATA (BROWSERDATEN LÖSCHEN). 3.
Google Mail Verwenden Sie Gmail, um Ihr Google-Konto einzurichten und so auf Google-relevante Dienste und Apps zuzugreifen sowie Emails direkt über Ihr ASUS Phone zu empfangen, versenden und durchsuchen. Sie können auch andere Email-Konten, wie von Yahoo oder Ihr geschäftliches EmailKonto über Gmail einrichten. WICHTIG! Ihr ASUS Phone muss mit einem WLAN- oder Mobilnetzwerk verbunden sein, damit Sie ein eMail-Konto hinzufügen oder eMails von hinzugefügten Konten senden und empfangen können.
Google Calendar Lassen Sie Ihren Terminplaner lebendig werden und behalten Sie die Übersicht über all Ihre wichtigen Ereignisse und Erinnerungen. Von Ihnen erstellte oder bearbeitete Ereignisse werden automatisch mit allen Versionen von Google Calendar synchronisiert, an denen Sie sich angemeldet haben. Ereignisse erstellen So erstellen Sie ein Ereignis: 1. Tippen Sie im Home-Bildschirm auf Google > Calendar. 2. Tippen Sie auf und dann auf Ereignis. 3.
Erstellen von Erinnerungen So erstellen Sie eine Erinnerung: 1. Tippen Sie im Home-Bildschirm auf Google > Calendar. 2. Tippen Sie auf und dann auf Erinnerung. 3. Geben Sie einen Namen für die Erinnerung ein und tippen auf DONE (FERTIG). 4. Legen Sie das Datum und die Uhrzeit für die Erinnerung fest. Sie können die Erinnerung als ganztägige oder wiederkehrende Erinnerung festlegen. • Ganztägige Erinnerung: Schieben Sie den Regler im Feld All day (Ganztägig) nach rechts.
Tu es später Ergreifen Sie auch die trivialen Dinge in Ihrem beschäftigten Leben. Wenn Sie gerade zu beschäftigt sind, können Sie zu einem geeigneten späteren Zeitpunkt Emails beantworten oder andere wichtige Aufgaben erledigen. HINWEISE: • Beliebte Drittanbieter-Anwendungen, die Do It Later (Später erledigen) unterstützen, sind Google Maps, Google Play, YouTube und iMDb. • Nicht alle Apps können Aufgaben teilen und zu Do It Later hinzufügen.
Aufgaben löschen Mit der Später-erledigen-App können Sie alle abgeschlossenen, überfälligen oder einfach unnötig gewordenen Aufgaben wieder löschen. 1. Tippen Sie am Home-Bildschirm auf Asus > Do It Later. 2. Tippen und halten Sie die Aufgabe, die Sie aus der Liste entfernen möchten. 3. Tippen Sie auf und dann auf OK, um die Löschung zu bestätigen. Dateimanager Mit dem Dateimanager können Sie Ihre Daten im Gerät und auf angeschlossenen externen Datenträgern einfach finden und verwalten.
Die Cloud Über ein Cloud-Konto, wie ASUS WebStorage, Drive, OneDrive und Dropbox, können Sie privat und sicher Ihre Daten sichern, Dateien zwischen verschiedenen Geräten synchronisieren und freigeben. ASUS WebStorage Registrieren Sie sich bei ASUS WebStorage bzw. melden sich an, und Sie erhalten kostenlosen Cloud-Speicher. Über Ihr ASUS WebStorage-Konto können Sie automatisch neu aufgenommene Fotos zur sofortigen Freigabe hochladen, Dateien zwischen verschiedenen Geräten synchronisieren und teilen.
ZenFone Service Suchen Sie in den FAQs (Häufig gestellte Fragen) nach Antworten oder interagieren Sie zum gemeinsamen Finden von Lösungen zu ZenUI 3.0-Apps direkt mit anderen ZenUI-Nutzern. So greifen Sie auf ZenFone Service zu: 1. Tippen Sie auf > ZenFone Care (ZenFone Service) 2. Tippen Sie auf ZenUI Häufig gestellte Fragen, wählen Sie dann die App, zu der Sie Antworten finden möchten.
4 In Verbindung bleiben In Verbindung bleiben 4 Stilvoll telefonieren Dual-SIM-Funktion Die Dual-SIM-Funktion Ihres ASUS Phones ermöglicht Ihnen die Verwaltung der Einstellungen installierter Micro-SIM-/Nano-SIM-Karten. Mit dieser Funktion können Sie die Micro-SIM-/NanoSIM-Karten aktivieren/deaktivieren oder eine Karte als bevorzugtes Netz festlegen. Ihre SIM-Karten umbenennen Ändern Sie die Namen Ihrer Micro-SIM-/Nano-SIM-Karten in Ihrem ASUS Phone, damit Sie sie leichter identifizieren können.
Eine bevorzugte SIM-Karte zuweisen Weisen Sie eine SIM-Karte als bevorzugte SIM für Sprachanrufe und Datenservices zu. SIM-Karte für Sprachanrufe Wenn Sie einen Anruf absetzen, nutzt Ihr ASUS Phone automatisch die bevorzugte SIM-Karte zum Telefonieren. Tippen Sie zum Zuweisen einer SIM-Karte für Anrufe auf Voice call (Sprachanruf), tippen Sie dann auf die SIM, die Sie nutzen möchten. WICHTIG! Sie können diese Funktion nur nutzen, wenn Sie einen Anruf über Ihre Kontaktliste absetzen.
Anrufe tätigen Ihr ASUS Phone bietet Ihnen viele Möglichkeiten, einen Anruf abzusetzen. Rufen Sie Ihre Freunde aus der Kontaktliste an, nutzen Sie die intelligentes Wählen für schnelle Anrufe oder legen Sie eine Kurzwahl für besonders häufig angerufene Kontakte an. HINWEIS: Organisieren Sie Ihre Kontakte in der Kontakte-App. Details dazu erfahren Sie unter Kontakte verwalten. Starten der Phone-App So starten Sie die Telefon-App im Startbildschirm: • Klicken Sie auf . • Tippen Sie auf > .
Nebenstellen automatisch anwählen Sie können nach dem Wählen der Hauptnummer eine kurze oder lange Pause einfügen, nach der die Nebenstellennummer automatisch gewählt wird. 1. Geben Sie die Hauptnummer in der Telefon-App ein. 2. Um eine Pause einzufügen, tippen und halten Sie *, bis ein Komma (,) erscheint. 3. Geben Sie die Nebenstellennummer ein. 4. Wählen Sie zum Absetzen des Anrufs zwischen den Anrufschaltflächen SIM1 und SIM2. 5. Tippen Sie zum Beenden des Anrufs auf .
Kurzwahleinträge erstellen Erstellen Sie einfach Kurzwahleinträge für besonders häufig angerufene Kontakte, die Sie den Ziffern 2 bis 9 zuordnen. 1. Führen Sie einen der folgenden Schritte in der Telefon-App aus: •• Halten Sie eine Ziffer zwischen 2 und 9 angetippt, tippen Sie dann im KurzwahlBestätigungsbildschirm auf OK. •• Tippen Sie auf > Kurzwahl zum Aufrufen des Kurzwahl-Bildschirms. 3. Wenn Sie einen Kontakt aus Ihrer Kontaktliste. Der ausgewählte Eintrag wird im KurzwahlBildschirm gespeichert.
Zuhause anrufen Wenn Sie sich gerade im Ausland aufhalten, gibt es eine praktische Möglichkeit, schnell und einfach zuhause anzurufen. HINWEIS: Beachten Sie unbedingt eventuell anfallenden Roaming-Kosten, wenn Sie keine lokale SIM-Karte (fast immer eine gute, da sehr kostensparende Idee) nutzen. Lassen Sie sich von Ihrem Netzanbieter über Roaming-Kosten informieren, bevor Sie Roaming-Dienste nutzen, damit es kein böses Erwachen beim Eintreffen der nächsten Mobilfunkrechnung gibt. 1.
Anrufe annehmen Der Touchscreen Ihres ASUS Phones leuchtet auf, wenn ein Anruf eingeht. Die Anzeige des eingehenden Anrufs variiert ebenfalls je nach Status Ihres ASUS Phones. Anrufe annehmen Es gibt je nach Status Ihres ASUS Phones zwei Möglichkeiten zum Annehmen eines Anrufs: • Wenn Sie Ihr Gerät gerade aktiv nutzen (das Display also eingeschaltet ist), tippen Sie zum Annehmen eines Anrufes auf Answer (Annehmen), zum Abweisen auf Dismiss (Abweisen).
Anrufe blockieren Sie können Rufnummern aus dem Anrufprotokoll in Ihre Blockierliste übernehmen. 1. Zum Abrufen Ihrer Anrufprotokolle tippen Sie in der Telefon-App auf . 2. Wählen Sie die Nummer, diese blockieren möchten, tippen Sie dann auf > Zur Blockierliste hinzufügen, tippen Sie zum Abschluss auf OK. Anrufe als Kontakte speichern Sie können eine(n) Anruf/Telefonnummer aus Ihren Anrufprotokollen zu Ihrer Kontaktliste hinzufügen. 1.
Weitere Anrufoptionen Im laufenden Gespräch können Sie durch Antippen von während des Anrufes zur Verfügung stehen. weitere Optionen aufrufen, die Ihnen Mikrofon Schaltet das Mikrofon beim aktiven Anruf ein und aus. Wenn das Mikrofon abgeschaltet ist, hören Sie den Anrufer nach wie vor, werden jedoch nicht selbst gehört. Freisprechen Schaltet den Telefonlautsprecher ein und aus. Anruf halten Hält den aktiven Anruf.
Mehrere Anrufe gleichzeitig führen Ihr ASUS Phone bietet den Komfort, zwei Anrufe gleichzeitig abzusetzen oder anzunehmen. Zusätzlich können Sie Telefonkonferenzen nutzen – sehr praktisch für geschäftliche Besprechungen, zum Plaudern mit Freunden und für etliche weitere Zwecke. Zusätzlichen Anruf annehmen Wenn Sie während des Telefonierens mit Ihrem ASUS Phone einen Signalton hören, zeigt dies einen weiteren eingehenden Anruf an. Tippen Sie auf Annehmen, wenn Sie den neuen Anruf annehmen möchten.
Telefonkonferenz starten Mit Ihrem ASUS Phone ist es möglich, Telefonkonferenzen mit bis zu fünf Teilnehmern zu führen. Im laufenden Anruf können Sie weitere Kontakte hinzufügen, alle Anrufe zu einer Telefonkonferenz zusammenschließen. 1. Rufen Sie einen Kontakt aus der Kontaktliste an oder wählen Sie eine Rufnummer. Warten Sie, bis der andere Teilnehmer Ihren Anruf angenommen hat. , dann tippen Sie einen Kontakt an oder wählen 2.
Telefonkonferenzen verwalten In einer laufenden Telefonkonferenz können Sie sich mit einem Teilnehmer zu einem Privatgespräch „zurückziehen“ oder Teilnehmer aus der laufenden Konferenz entfernen. 1. Tippen Sie im Telefonkonferenz-Bildschirm auf Konferenz verwalten – die Teilnehmer der Telefonkonferenz werden aufgelistet. 2. Wenn Sie einen Teilnehmer aus der Konferenz entfernen möchten, tippen Sie auf das Gespräch mit einem Teilnehmer komplett beenden möchten, tippen Sie auf 3.
Anrufe aufzeichnen Ihr ASUS Phone ermöglicht Ihnen die Aufnahme einer Unterhaltung zur künftigen Bezugnahme oder Informationsverwahrung. 1. Rufen Sie einen Kontakt aus der Kontaktliste an oder wählen Sie eine Rufnummer. 2. Tippen Sie zum Aufzeichnen eines Anrufes auf . WICHTIG! Weisen Sie Ihren Gesprächsteilnehmer vor Beginn der Aufzeichnung auf Ihr Vorhaben hin. 3. Zum Stoppen der Aufzeichnung tippen Sie auf Benachrichtigungsleiste. . Das Symbol erscheint in der 4.
Kontakte verwalten Organisieren Sie Ihre Kontakte, bleiben Sie in Verbindung – per Telefon, SMS, mit E-Mails oder über soziale Netzwerke. Fassen Sie Ihre Kontakte zu Favoriten zusammen, damit Ihre Lieblingskontakte immer schnell zur Hand sind, oder erklären Sie Kontakte zu VIPs, lassen Sie sich auf diese Weise bequem über kommende Ereignisse, verpasste Anrufe oder ungelesene Mitteilungen informieren.
Kontakte hinzufügen Fügen Sie berufliche, Google- oder andere E-Mail-Konten auf Ihrem Gerät hinzu, tragen Sie weitere wichtige Kontaktdaten wie Telefonnummern, E-Mail-Adressen, spezielle VIP-Ereignisse und mehr ein. 1. Starten Sie die Kontakte-App, tippen Sie dann auf . 2. Wählen Sie Gerät. HINWEISE: • Übrigens können Sie Kontakte auf Ihrer SIM-Karte speichern oder mit einem E-Mail-Konto verknüpfen.
Kontaktprofile anpassen Sie können Kontaktdaten bearbeiten, ein Foto hinzufügen, einen bestimmten Klingelton einstellen oder ein beliebiges Bild im Profil eines Kontaktes festlegen. 1. Starten Sie die Kontakte-App, wählen Sie dann den Kontakt, dessen Daten (oder dessen Profil) Sie bearbeiten oder anpassen möchten. 2. Nehmen Sie die gewünschten Änderungen auf der Profilseite des Kontaktes vor.
Favoritenkontakte erstellen Wenn Sie häufig angerufene Kontakte als Favoriten definieren, können Sie diese besonders schnell und einfach über die Telefon-App anrufen. 1. Tippen Sie im Home-Bildschirm auf Asus > Kontakte. 2. Wählen Sie den Kontakt, den Sie zu einem Favoriten machen möchten. 3. Klicken Sie auf . Der Kontakt wird der Favoritenliste der Telefon-App hinzugefügt. HINWEISE: • Zum Aufrufen Ihrer Favoritenliste tippen Sie im Home-Bildschirm auf auf , anschließend tippen Sie .
Kontakte exportieren Exportieren Sie Ihre Kontakte auf eines der Speicherkonten in Ihrem ASUS Phone. 1. Tippen Sie auf ASUS > Kontakte und anschließend auf > Kontakte verwalten. 2. Tippen Sie auf Importieren/exportieren, wählen Sie dann zwischen folgenden Exportoptionen: a. An SIM1/SIM2-Karte exportieren b. An Speicher exportieren 3. Tippen Sie, um die Kontakte von folgenden Konten zu wählen: a. Alle Kontakte b. E-Mail Konto/en c. Gerät d. SIM1/SIM2 4. Wählen Sie die Kontakte, die Sie exportieren möchten.
Blockierte Kontakte oder Rufnummern wieder freigeben Sie können blockierte Kontakte oder Rufnummern wieder aus der Blockierliste nehmen, so natürlich auch wieder Anrufe oder Mitteilungen von solchen Kontakten oder Rufnummern erhalten. 1. Tippen Sie auf ASUS > Kontakte, dann auf > Kontakte verwalten > Blockierliste. 2. Tippen und halten Sie den Kontakt oder die Nummer gedrückt, dessen/deren Blockierung Sie aufheben möchten; tippen Sie dann auf Remove from block list (Aus Sperrliste entfernen).
Kontaktdaten verknüpfen Wenn Sie Sozialnetzwerk- oder E-Mail-Konten hinzufügen, werden diese Konten automatisch mit der Kontakte-App synchronisiert. Es kann vorkommen, dass manche Kontaktdaten an unterschiedlichen Stellen, mit verschiedenen Namensvariationen oder Spitznamen in der Kontakte-App erscheinen. Solche Angaben können Sie manuell verknüpfen und an einer Stelle oder in einem Profil zusammenfassen. 1. Tippen Sie in der Kontakte-App auf den Kontakt, dessen Daten Sie verknüpfen möchten. 2.
Anrufeinstellungen Hier konfigurieren Sie Einstellungen für abgehende Anrufe, Anrufsperren, Anrufe zuhause und mehr. 1. Führen Sie zum Aufrufen des Einstellungsbildschirms eine der folgenden Aktionen aus: •• Starten Sie die Schnelleinstellungen, tippen Sie dann auf •• Tippen Sie auf . > Einstellungen. 2. Tippen Sie auf Anrufeinstellungen, wählen Sie dann unter den Einstellungen, die Sie konfigurieren möchten.
Weitere Einstellungen Kein Hintergrund während des Anrufs TelefonKontoeinstellungen Wenn aktiviert, wird ein schwarzer Hintergrund während eines Anrufs angezeigt. Konfigurieren Sie das SIP-Konto und andere Telefoneinstellungen. Mitteilungen und mehr senden Google Messenger Mit der intuitiven und reizvollen Google Messenger App können Sie SMS/MMS-Nachrichten senden und empfangen sowie Gruppentexte, Fotos oder Audiomitteilungen versenden.
5 Spaß und Unterhaltung Spaß und Unterhaltung 5 Headsets verwenden Erleben Sie die Freiheit, unter Einsatz eines Headsets andere Dinge zu erledigen, während Sie telefonieren oder Ihre Lieblingsmusik hören. Kopfhöreranschluss verbinden Stecken Sie den 3,5-mm-Headset-Anschluss in den Audioport Ihres Gerätes. Warnung! • Stecken Sie keine anderen Gegenstände in den Audioport. • Stecken Sie kein Kabel, das Strom ausgibt, in den Audioport. • Längeres Hören bei hoher Lautstärke kann Ihr Gehör schädigen.
Google Play Music Mit Google Play Music können Sie Ihre Lieblingsmusik streamen, Wiedergabelisten erstellen oder Radio hören. Sie können außerdem kostenlos bis zu 50.000 Musikdateien in der Cloud speichern. Weiterhin können Sie sich bei Google Play Music anmelden, um einen unbegrenzten und werbefreien Zugang zu Millionen Musikdateien zu erhalten, die Sie zu Ihrer eigenen Musikbibliothek hinzufügen können.
UKW-Radio Hören Sie Ihre lokalen Lieblingsradiosender über Ihr ASUS Phone. 1. Schließen Sie das mitgelieferte Headset an Ihrem ASUS Phone an. 2. Tippen Sie auf > FM Radio (UKW-Radio).
Nach lokalen Sendern suchen Zur Suche nach Sendern in Ihrer Region tippen Sie auf , um automatisch nach Ihren lokalen Radiosendern zu suchen. Die verfügbaren lokalen Radiosender werden im FM Radio-Bildschirm angezeigt. Eine andere Frequenz einstellen Gehen Sie wie folgt vor, falls Sie sich einen spezifischen Radiosender anhören möchten: 1. Tippen Sie in der App FM Radio (UKW-Radio) auf den aktuellen Radiosender. 2.
6 Kostbare Momente festhalten Kostbare Momente festhalten 6 Momente erfassen Starten der Kamera-App Nehmen Sie Bilder und Videos mit der Kamera-App Ihres ASUS Phones auf. Beziehen Sie sich auf die unten genannten Schritte, um die Kamera-App zu öffnen. Vom Sperrbildschirm Ziehen Sie nach unten, bis die App Kamera ausgeführt wird.
Verwenden der Kamera zum ersten Mal Nach dem Starten der Kamera zum ersten Mal, werden zwei aufeinander folgende Features angezeigt, um Ihnen beim Einstieg zu helfen: Tutorial und Bild-Standorte. Anleitung Wenn Sie die Kamera des ASUS Phones zum ersten Mal verwenden, erscheint beim Starten der Kamera-App der folgende Einführungsbildschirm. Beziehen Sie sich auf die folgenden Schritte, um von hier aus fortzufahren. 1.
Kamera Startbildschirm Die Kamera Ihres ASUS Phones ist mit automatischer Szenenerkennung und automatischer Bildstabilisierung ausgestattet. Zusätzlich gibt es eine Videostabilisierung, die starkes Wackeln bei der Videoaufnahme verhindert. Tippen Sie zum Einsatz der Kamera auf die Symbole, entdecken Sie so die Foto- und Videofunktionen Ihres ASUS Phones.
Bildeinstellungen Passen Sie das Aussehen Ihrer aufgezeichneten Bilder an, indem Sie Ihre Kamera-Einstellungen anhand der folgenden Schritte konfigurieren. WICHTIG! Übernehmen Sie die Einstellungen zunächst, bevor Sie Bilder aufnehmen. 1. Tippen Sie am Kamera-Startbildschirm auf > . 2. Scrollen Sie nach unten, und konfigurieren Sie die verfügbaren Optionen. Image (Bild) Konfigurieren Sie die Bildqualität mit diesen Optionen.
Videoeinstellungen Passen Sie das Aussehen Ihrer aufgezeichneten Videos an, indem Sie die Kamera-Einstellungen mithilfe der folgenden Schritte konfigurieren. WICHTIG! Übernehmen Sie die Einstellungen zunächst, bevor Sie Bilder aufnehmen. 1. Tippen Sie am Kamera-Startbildschirm auf > . 2. Scrollen Sie nach unten, und konfigurieren Sie die verfügbaren Optionen. Image (Bild) Konfigurieren Sie die Videoqualität mit diesen Optionen.
Erweiterte Kamerafunktionen Entdecken Sie neue Möglichkeiten für das Aufnehmen von Bildern oder Videos und lassen Sie Ihre Aufnahmen mit den weiterentwickelten Kamerafunktionen Ihres ASUS Phones zu ganz besonderen Momenten werden. WICHTIG! Übernehmen Sie die Einstellungen zunächst, bevor Sie Bilder aufnehmen. Verfügbare Funktionen variieren je nach Modell. HDR-Pro Die High-Dynamic-Range (HDR) Funktion erlaubt Ihnen detailliertere Bilder, für wenig Licht und sehr kontrastreichen Szenen, aufzunehmen.
Low light (Schwaches Licht) Mit PixelMaster wird die Lichtempfindlichkeit Ihrer Kamera um bis zu 400% erhöht, um die Störungsreduktion zu verbessern und den Farbkontrast um bis zu 200% zu steigern. Nutzen Sie diesen Modus zum Transformieren eines beliebigen Objekts in ein großartiges Foto oder Video; mit oder ohne ausreichende natürliche Beleuchtung. Fotos mit der Funktion Low light (Schwaches Licht) aufnehmen 1. Tippen Sie auf dem Startbildschirm der Kamera-App auf 2.
Erfassen von Selfie Fotos 1. Auf dem Kamera-App Bildschirm, tippen Sie auf . > Selbstaufnahmen. 2. Tippen Sie auf 3. Klicken Sie auf , um zu wählen, wie viele Menschen in dem Foto aufgenommen werden sollen. 4. Verwenden Sie die hintere Kamera, um Gesichter zu erkennen, und warten Sie auf das Piepen Ihres ASUS Phones und den Countdown, bis es das Foto macht. 5. Tippen Sie zum Speichern des Fotos auf .
Miniatur Simulieren Sie den Tilt-Shift-Effekt der DSLR Objektive über die Miniatur-Funktion. Mit dieser Funktion können Sie bestimmte Bereiche des Motivs fokussieren, einen Bokeh-Effekt hinzufügen, der auf Fotos und auf Videos mit dem ASUS Phone verwendet werden kann. Erfassen von Miniatur Fotos 1. Tippen Sie am Bildschirm der Camera (Kamera)-App auf > Miniature (Miniatur). oder 2. Tippen Sie zur Auswahl des Fokusbereiches auf Fokusbereiches anschließend mit zwei Fingern an.
Smart entfernen Beseitigen Sie unerwünschte Details sofort nach der Aufnahme mit der Funktion "Smart entfernen". Aufnahme von Smart-entfernen-Fotos 1. Auf dem Kamera-App Bildschirm, tippen Sie auf > > IntellEntfernen. 2. Tippen Sie zur Aufnahme von Fotos, die mittels Smart remove (Intelligentes Entfernen) bearbeitet werden können, auf . 3. Tippen Sie im aufgenommenen Foto zum Löschen auf den Umriss des erkannten beweglichen Objekts. 4. Tippen Sie zum Speichern des Fotos auf .
Die Galerie benutzen Über die Galerie-App können Sie auf Ihrem ASUS Phone Bilder betrachten und Videos abspielen. Diese App ermöglicht Ihnen außerdem das Bearbeiten, Teilen und Löschen der auf Ihrem ASUS Phone gespeicherten Bild- und Videodateien. Über Galerie können Sie Bilder als Diaschau wiedergeben oder die ausgewählte Bild- bzw. Videodatei durch Antippen betrachten. Tippen Sie zum Starten der Galerie auf ASUS > Gallery (Galerie).
Aufnahmeort anzeigen Aktivieren Sie den Standortzugriff auf Ihr ASUS Phone, und beziehen Sie die Details der Standorte zu Ihren Fotos. Zum Aufnahmeort zählen die Gegend, in der Fotos aufgenommen wurden, sowie eine Karte des Aufnahmeortes, die Sie über Google Maps oder Baidu (nur in China) anzeigen können. So rufen Sie Details zu einem Foto ab: 1. Schalten Sie den Standortzugriff über > Einstellungen > Standort ein. 2. Achten Sie darauf, dass Ihr Standort mit Google Maps oder Baidu geteilt wird. 3.
Dateien aus der Galerie teilen 1. Im Galerie-Bildschirm, tippen Sie auf den Ordner in dem sich die Dateien befinden. 2. Tippen Sie nach Öffnen des Ordners zum Aktivieren der Dateiauswahl auf . 3. Tippen Sie auf die Dateien, die Sie teilen möchten. Oben auf dem Bild, das Sie auswählen, wird ein Häkchen angezeigt. 4. Tippen Sie auf und wählen Sie aus der Liste, wo Sie die Bilder teilen möchten. Dateien aus der Galerie löschen 1.
MiniMovie verwenden Mit der MiniMovie-App verwandeln Sie Fotos in einen thematisch gestalteten Film oder in ein normales Diaschau-Video. So erstellen Sie einen MiniMovie: 1. Tippen Sie im Home-Bildschirm auf > MiniMovie, um die MiniMovie-App zu starten. 2. Tippen Sie auf Allow (Zulassen), um MiniMovie den Zugriff auf die Fotos auf Ihrem Telefon zu gestatten. 3. Tippen Sie auf Deny (Verweigern) oder Allow (Zulassen), um MiniMovie den Zugriff auf Ihre Kontaktlisten zu verweigern oder zu gestatten. 4.
5. Wählen Sie den Ordner mit den Fotos für den Film oder die Diaschau aus, die Sie erstellen möchten. Tippen Sie, um Fotos aus den Cloud-Diensten auszuwählen Tippen Sie, um einen Fotoordner auszuwählen Tippen Sie, um ein Foto auszuwählen und tippen Sie erneut, um es wieder abzuwählen Tippen Sie, um die ausgewählten Fotos abzuwählen 6. Wenn fertig, klicken Sie auf Weiter. 7. Legen Sie Design, Musik, Untertitel oder Text für Ihren Film oder Ihre Diaschau fest.
PhotoCollage Verwenden Sie die PhotoCollage-App, um eine Collage aus Ihrer Fotosammlung zu erstellen. Um die PhotoCollage-App zu starten, tippen Sie im Home-Bildschirm auf PhotoCollage. , tippen Sie dann auf Tippen Sie, um Collagen im Magazin-Stil zu erstellen Tippen Sie, um weitere Fotoeffekte zu verwenden Tippen Sie zum Erstellen von Collagen mit verschiedenen Rastern.
7 Beste Verbindungen 7 Beste Verbindungen Mobilfunknetz Wenn gerade kein Wi-Fi-Netzwerk zum Internetzugriff zur Verfügung steht, können Sie die Mobilfunkdatenverbindung Ihres Gerätes zur Verbindung mit dem Internet einsetzen. Mobilfunkdatenverbindung einschalten 1. Führen Sie zum Aufrufen des Einstellungsbildschirms eine der folgenden Aktionen aus: •• Starten Sie die Schnelleinstellungen, tippen Sie dann auf •• Tippen Sie auf . > Einstellungen. 2.
Mit einem Wi-Fi-Netzwerk verbinden 1. Tippen Sie am Settings (Einstellungen)-Bildschirm zur Anzeige aller erkannten Wi-Fi-Netzwerke auf Wi-Fi. 2. Tippen Sie zum Verbinden auf einen Netzwerknamen. Bei einem gesicherten Netzwerk müssen Sie möglicherweise ein Kennwort oder andere Sicherheitsdaten eingeben. HINWEISE: • Ihr ASUS Phone stellt automatisch eine Verbindung zu dem Netzwerk her, mit dem es zuvor verbunden war.
ASUS Phone mit einem Bluetooth-Gerät koppeln Bevor Sie sämtliche Bluetooth-Funktionen Ihres ASUS Phones nutzen können, müssen Sie es zunächst mit dem Bluetooth-Gerät koppeln. Das ASUS Phone speichert automatisch, mit welchem Bluetooth-Gerät es schon einmal verbunden wurde. 1. Tippen Sie am Settings (Einstellungen)-Bildschirm zur Anzeige aller verfügbaren Geräte auf Bluetooth.
Tethering Wenn der WLAN-Dienst nicht verfügbar ist, können Sie Ihr ASUS Phone als Modem verwenden oder in einen WLAN-Hotspot verwandeln, damit Sie Internetzugang auf Ihrem Laptop, Tablet und anderen Mobilgeräten erhalten. WICHTIG! Viele Mobilfunkanbieter geben Bedingungen, zum Beispiel einen bestimmten Datentarif, zum Einsatz der Tethering-Funktion vor. Erkundigen Sie sich bei Ihrem Mobilfunkanbieter nach entsprechenden Datentarifen.
4. Schieben Sie im Tethering-Bildschirm Portable Wi-Fi hotspot (Mobiler WLAN-Hotspot) auf Ein. 5. Andere Geräte verbinden Sie mit dem ASUS Phone-Hotspot genau so, wie Sie auch eine Verbindung mit einem regulären WLAN herstellen würden. Bluetooth-Tethering Aktivieren Sie Bluetooth auf Ihrem ASUS Phone und nutzen Sie es als Modem für Internetzugang auf Ihren Bluetooth-fähigen Mobilgeräten wie Laptops oder Tablets. 1. Aktivieren Sie Bluetooth an Ihrem ASUS Phone und dem anderen Gerät. 2.
8 Reisen und Karten Reisen und Karten 8 Wetter Bekommen Sie Echtzeit Wetter-Updates von dem ASUS Phone unter Verwendung der Wetter-App. Mit Wetter können Sie auch andere Wetter Details aus der ganzen Welt überprüfen. Wetter-App starten Im Startbildschirm öffnen Sie die Wetter-App auf eine der folgenden Weisen: •• Tippen Sie auf > Wetter. •• Tippen Sie am Startbildschirm Ihres ASUS Phones auf das Wettersymbol.
Wetter Startbildschirm Einfach einrichten – und immer über die aktuelle Wetterlage an Ihrem Aufenthaltsort und überall sonst in der Welt auf dem Laufenden bleiben. Aktuelle Wetterdaten und Wettervorhersagen können Sie auch über das Demnächst-Widget oder die Demnächst-App sowie über die KalenderApp abrufen.
Tracking Passen Sie die Zeitzoneneinstellungen Ihres ASUS Phones an, stellen Sie den Alarm ein und verwenden Sie Ihr ASUS Phone mithilfe der Uhr-App als Stoppuhr. Uhr starten Starten Sie die Uhr-App mit einer der folgenden Optionen: > Clock (Uhr). •• Tippen Sie auf •• Tippen Sie auf die digitale Uhrzeitanzeige auf dem Startbildschirm des ASUS Phones. Weltzeituhr Tippen Sie zum Zugriff auf die Weltuhr-Einstellungen Ihres ASUS Phones auf . Tippen Sie, um die Aktualisierung Ihres Standorts zu erhalten.
Wecker Tippen Sie auf zuzugreifen. , um auf die Einstellungen für die Wecker-Funktion Ihres ASUS Phones Tippen Sie hier, um auf die Einstellungen für die Wecker-Funktion zuzugreifen. Tippen Sie hier, um die zuvor eingestellten Alarme zu löschen. Tippen Sie hier, um eine neue Weckzeit einzustellen. Stoppuhr Tippen Sie zur Verwendung Ihres ASUS Phones als Stoppuhr auf . Tippen Sie auf diese Schaltfläche, um die Stoppuhr-Funktion zu starten.
Timer Sie können mehrere Timer-Optionen für Ihr ASUS Phone einstellen. Führen Sie hierzu die folgenden Schritte aus: Den Timer einstellen 1. Tippen Sie zum Zugriff auf die Timer-Funktion Ihres ASUS Phones auf . Tippen Sie hier, um auf die Einstellungen für die Timer-Funktion zuzugreifen. Tippen Sie, um den Klingelton für den Timer festzulegen. Tippen Sie hier, um den voreingestellten Timer zu löschen. Tippen Sie hier, um den voreingestellten Timer zu bearbeiten.
9 ZenLink ZenLink 9 ZenLink kennenlernen ZenLink ist eine äußerst praktische Konnektivitätslösung, die es nur bei ASUS-Geräten gibt. Mit den ZenLink-Apps können Sie sich im Handumdrehen mit anderen Geräten verbinden, Dateien teilen und übertragen. Ihr ZenLink besteht aus folgenden Apps: Share Link und Remote Link. HINWEIS: Einige dieser ZenLink-Apps sind auf Ihrem ASUS Phone möglicherweise nicht verfügbar.
3. Tippen Sie auf die Dateien, die Sie senden möchten; tippen Sie dann auf Done (Fertig). 4. Nachdem Ihr ASUS Phone die anderen Geräte erkannt hat, tippen Sie auf das Gerät, mit dem Sie Ihre Dateien teilen möchten. Dateien empfangen So empfangen Sie Dateien: 1. Tippen Sie am Home-Bildschirm auf , tippen Sie dann auf Share Link (Freigabelink). 2. Tippen Sie zum Empfangen von Dateien vom Absender auf Receive file (Datei empfangen).
10 Zen Allüberall 10 Zen Allüberall Spezielle Zen-Werkzeuge Taschenlampe Über die Schnelleinstellungen-Maske, die Sie aus jedem Bildschirm und aus jeder geöffneten App heraus aufrufen können, verwandeln Sie Ihr ASUS Phone im Nu in eine Taschenlampe. Dazu tippen Sie einfach auf das Taschenlampensymbol in den Schnelleinstellungen. Zum Einschalten der Taschenlampenfunktionen antippen.
Taschenlampe-Menüoptionen Zum Ein- und Ausschalten der Taschenlampe antippen. Tippen Sie hier zum Aktivieren oder Deaktivieren des SOS-Modus. Mit diesen Symbolen wählen Sie die gewünschte Blinkgeschwindigkeit aus. Tippen Sie hier, um die Einstellungen der Taschenlampe aufzurufen. Zum Ein- und Ausschalten der Taschenlampe antippen. Tippen Sie hier, um die LED-Taschenlampe zu aktivieren. Tippen Sie hier, um die Bildschirmtaschenlampe zu aktivieren.
Rechner Einmal wischen, einmal tippen – schon haben Sie einen vollwertigen Taschenrechner in der Hand. Wenn Sie die Schnelleinstellungen öffnen, finden Sie das Taschenrechnersymbol ganz oben in der Liste. Einfach antippen, schon verliert die Mathematik ihre Schrecken.
Quick Memo Das Schnellmemo ist ein praktisches Notizwerkzeug, mit dem Sie wichtige Notizen entweder mit dem Finger oder über die Bildschirmtastatur festhalten können. Erstellte Notizen können Sie über Share Link oder über soziale Netzwerke teilen, bei Bedarf auch mit der Später-erledigen-App in eine Aufgabe verwandeln. Haftnotizen erstellen Sie können Quick Memo (Schnellnotiz)-Notizen in eine Haftnotiz verwandeln und so jederzeit auf Ihrem ASUS Phone sehen.
Diktiergerät Durch Aktivierung der App Sound Recorder (Diktiergerät) können Sie mit Ihrem ASUS Phone Audiodateien aufnehmen. Sound Recorder (Diktiergerät) ausführen Tippen Sie zum Starten von Sound Recorder (Diktiergerät) auf (Diktiergerät).
Aufnahme anhalten Wenn die Aufnahme angehalten wurde, können Sie diese fortsetzen, speichern oder löschen. Zum Löschen antippen Zum Fortsetzen der Aufnahme antippen Zum Speichern antippen Aufnahmeliste In der Aufnahmeliste können Sie eine gespeicherte Audioaufnahme abspielen, umbenennen, teilen und löschen.
Audio Wizard Mit dem Audioassistenten können Sie die Klangwiedergabe Ihres ASUS Phones verbessern und unterschiedlichen Einsatzszenarien anpassen. Audioassistent nutzen So nutzen Sie AudioWizard: 1. Tippen Sie auf > Audio Wizard (Audioassistent). 2. Tippen Sie im Audioassistent-Fenster auf den Tonmodus, den Sie aktivieren möchten; tippen Sie dann zum Speichern und Verlassen auf Fertig.
Splendid Mit ASUS Splendid können Sie auf einfache Weise die Bildschirmeinstellungen anpassen. Es verstärkt die Farben Ihres Bildschirms mit seinen voreingestellten Bildschirmfarbmodi. Splendid nutzen So benutzen Sie Splendid: 1. Tippen Sie im erweiterten Home-Bildschirm auf Smart-Werkzeuge > Splendid. 2. Wählen Sie einen dieser Bildschirmfarbmodi: Balance, Bluelight Filter (Blaulichtfilter), Vivid (Lebendig) und Customized (Angepasst).
Bluelight Filter(Blaulichtfilter)-Modus Dieser Modus bietet eine weiche, papierartige Anzeige, die Augenbeanspruchung reduziert und für ein komfortables Leseerlebnis auf Ihrem ASUS Phone sorgt. Zum Anpassen der gelben Tönung bewegen Zum Rücksetzen auf die Werkseinstellungen antippen Vivid mode (Lebendig-Modus) Dieser Modus bietet eine fein abgestimmte Farbvoreinstellung, welche die Bildschirmfarbanzeige Ihres ASUS Phones bereichert.
Customized mode (Angepasster Modus) Diese Modus ermöglicht Ihnen die Anpassung der Bildschirmanzeige basierend auf Ihren bevorzugten Farbtemperatur-, Farbton- und Sättigungswerten. Bewegen Sie es, um die Farbtemperatur anzupassen Zum Anpassen des Farbtons bewegen Zum Rücksetzen auf die Werkseinstellungen antippen Zum Anpassen der Sättigung bewegen HINWEIS: Über das Fenster Quick settings (Schnelleinstellungen) können Sie auch schnell den Modus Splendid screen (Splendid-Bildschirm) einstellen.
Konfigurieren der Einstellungen des ASUS Covers So konfigurieren Sie die Einstellungen des ASUS Covers: 1. Tippen Sie auf > Settings (Einstellungen) > ASUS Cover. 2. Haken Sie das Kästchen neben Show Cover View (Cover-Ansicht anzeigen) an.
11 Ihr Zen pflegen Ihr Zen pflegen 11 Ihr Gerät auf dem neuesten Stand halten Halten Sie Ihr ASUS Phone mit Android-Systemaktualisierungen und aktualisierten Apps und Funktionen auf dem neuesten Stand. Ihr System aktualisieren 1. Tippen Sie auf und dann auf Settings (Einstellungen). 2. Wischen Sie zur Anzeige weiterer Elemente am Settings (Einstellungen)-Bildschirm nach unten, tippen Sie dann auf About (Info). 3.
Ihr ASUS Phone absichern Mit den Sicherheitsfunktionen Ihres ASUS Phones können Sie unerwünschte Anrufe und Zugriff auf Ihre Daten wirksam unterbinden. Ihren Bildschirm freigeben Wenn der Bildschirm gesperrt ist, können Sie ihn mit den Sicherheitsfreigabeoptionen des ASUS Phones öffnen. 1. Tippen Sie auf und dann auf Settings (Einstellungen) > Lock Screen (Sperrbildschirm). 2. Tippen Sie auf Screen lock (Sperrbildschirm), wählen Sie dann eine Option zur Freigabe Ihres ASUS Phones.
PIN Geben Sie eine mindestens vierstellige PIN ein. WICHTIG! Achten Sie darauf, sich die von Ihnen erstellte PIN zur Freigabe Ihres Gerätes einzuprägen. Pattern (Muster): Wischen Sie mit Ihrem Finger von einem Punkt zum nächsten und erzeugen Sie so ein Muster. WICHTIG! Zur Erstellung eines Musters müssen Sie mindestens vier Punkte verbinden. Achten Sie darauf, sich das von Ihnen erstellte Muster zur Freigabe Ihres Gerätes einzuprägen.
Kennwort Geben Sie ein mindestens vierstelliges Kennwort ein. WICHTIG! Achten Sie darauf, sich das von Ihnen erstellte Kennwort zur Freigabe Ihres Gerätes einzuprägen. Weitere Bildschirmsicherheitsfunktionen konfigurieren Neben der Auswahl des Bildschirmsperrmodus können Sie Folgendes im Screen security (Bildschirmsicherheit)-Fenster durchführen: • Quick Access (Schnellzugriff): Stellen Sie den Quick Access(Schnellzugriff )-Schalter zum Starten von Apps am Sperrbildschirm durch Wischen auf ON (Ein) ein.
Ihr ASUS Phone-Identität einrichten Erfahren Sie mehr über die Identität Ihres ASUS Phones – zum Beispiel Seriennummer, IMEI (International Mobile Equipment Identity – internationale Mobilgeräteidentität) oder Modellnummer. Diese Angaben sind wichtig: Falls Ihr ASUS Phone einmal abhanden kommen sollte, können Sie sich an Ihren Mobilfunkanbieter wenden und diese Informationen zum Sperren Ihres ASUS Phones verwenden. So zeigen Sie Daten zur Identität Ihres ASUS Phones an: 1.
Anhang Anhang Hinweise EC-Konformitätserklärung Dieses Produkt befolgt die Konformitätserklärung für die R&TTE Directive 1999/5/EC. Diese Konformitätserklärung kann von der Website http://www.asus.com/support geladen werden CE-Kennzeichen-Warnung CE-Zeichen für Geräte mit Wireless LAN/Bluetooth Dieses Gerät stimmt mit den Anforderungen der Richtlinie 1999/5/EU des Europaparlaments und der Europäischen Kommission vom 9.
ASUS Recycling/Rücknahmeservices Das ASUS-Wiederverwertungs- und Rücknahmeprogramm basiert auf den Bestrebungen, die höchsten Standards zum Schutz der Umwelt anzuwenden. Wir glauben, dass die Bereitstellung einer Lösung für unsere Kunden die Möglichkeit schafft, unsere Produkte, Batterien, andere Komponenten und ebenfalls das Verpackungsmaterial verantwortungsbewußt der Wiederverwertung zuzuführen. Besuchen Sie bitte die Webseite http://csr.asus.com/english/ Takeback.